Geflackt
New member
- Mar 21, 2019
- 8
- 0
Single Stage Black Paint on Vintage Race Car.
As a new poster here, I'd first like to thank everyone for all of the tips and tricks, and AGO for supplying great products. They've been very helpful on CC paints (modern British, German, and Italian sports cars) and now on single stage.
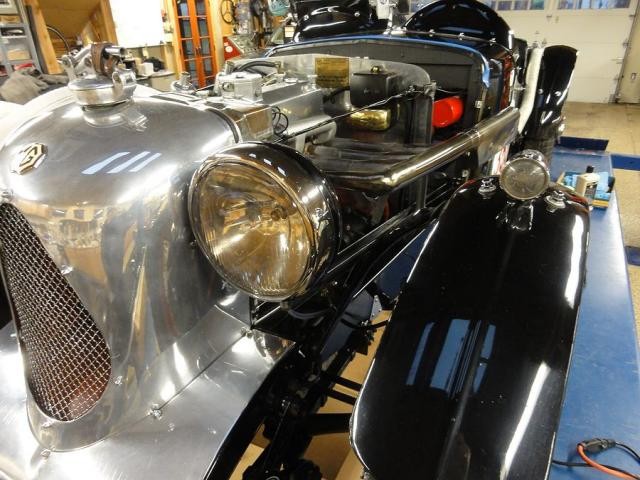
I'm currently in the process of polishing, then protecting, the older single stage paint on my 1935 MG race special. It's going to Simeone's museum for a short weekend display in April, so I'm taking the time to really clean up the paint along with everywhere else on the car. It has several racing seasons on this round of detailing, but I try to keep it as clean as possible.
Here it is in current form, with engine panels and interior removed for detailing and other work:
View attachment 66177
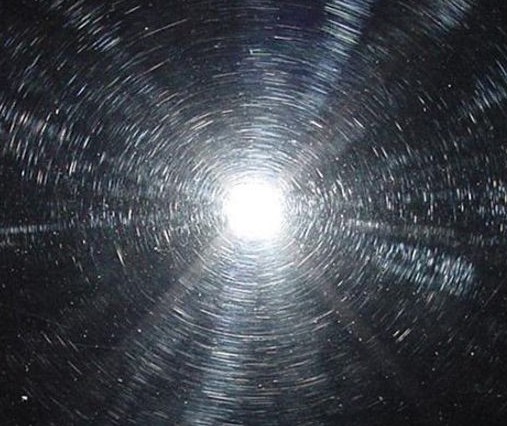
The paint is a single stage black from the mid-to-late 1970's, covering over aluminum panels. I'm not sure of the thickness, but the paint seems very hard. There are plenty of marks and cracks throughout, but this is patina I'd like to keep. What I want to correct and polish are scratches that have occurred through the years. Besides general scratching, I'm also seeing what could be shrinkage - it's like I can see the sanding marks under the paint if I have just the right light.
Sanding and blemishes visible at edge of light and lower:
View attachment 66181
Although there was no oxidation, I did go the #7 route as outlined by Mike Phillips. This did bring up some of the shine, mostly to the level I've had the last few years (usually before I put it in a local show). But I still wanted to attack the many fine scratches. The #7 did help some areas around the cockpit that had gotten dull.
Scratches that were on most of the car, seen here on a side panel:
View attachment 66178
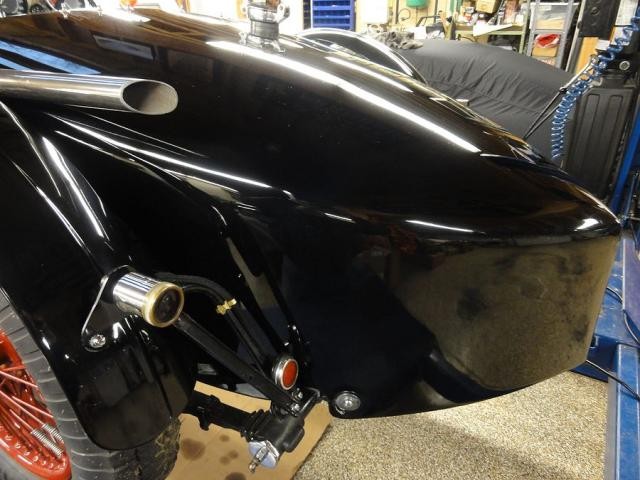
Next step was to try some M100. I initially tried this using a yellow pad, but it really wasn't doing anything. Forgot I had a Griots fast finishing microfiber pad, so I tried that with M100. I'm using both 3" and 6" Griots polishers. Now it started making a difference! I did several passes in areas that really needed attention. There is still a way to go, especially on the panels containing louvers over the engine area, but the main area along the rear of the car looks so much better already. This car just has an infinite amount of sections to detail, aside from the black paint, there are details from a polished aluminum front end, to exposed brake and suspension areas.
Left side after a round of #7 and a few rounds of M100:
View attachment 66179
After a round of #7 and a few rounds of M100:
View attachment 66180
The other end of the side panel shown above, this time after a few rounds of M100:
View attachment 66182
Stone chips in leading edge of rear fender. Leave alone and just polish?
View attachment 66183
But I'm not quite sure where to stop with the M100 or the next few steps. I need to finish out the M100 step in the next few days. But after that, I was looking to use some of the products I already have - M205 and Menzerna SF3800 for polishing, then Souveran wax as a final. I've had decent success using the M205 and SF3800 on a red single stage paint, but the MG black paint I'd like to look as "liquid" as possible.
1) M205, SF3800, then wax? Pad type?
2) M205, #7, then wax? Pad type?
3) Other? I'm also open to trying products I don't have although I'm running out of weekends/nights.
I'll be racing again starting in June and I realize I'll pick up chips, but would at least like to have the car looking good at the start of the event, plus have some protection for the paint.
")
As a new poster here, I'd first like to thank everyone for all of the tips and tricks, and AGO for supplying great products. They've been very helpful on CC paints (modern British, German, and Italian sports cars) and now on single stage.
I'm currently in the process of polishing, then protecting, the older single stage paint on my 1935 MG race special. It's going to Simeone's museum for a short weekend display in April, so I'm taking the time to really clean up the paint along with everywhere else on the car. It has several racing seasons on this round of detailing, but I try to keep it as clean as possible.
Here it is in current form, with engine panels and interior removed for detailing and other work:
View attachment 66177
The paint is a single stage black from the mid-to-late 1970's, covering over aluminum panels. I'm not sure of the thickness, but the paint seems very hard. There are plenty of marks and cracks throughout, but this is patina I'd like to keep. What I want to correct and polish are scratches that have occurred through the years. Besides general scratching, I'm also seeing what could be shrinkage - it's like I can see the sanding marks under the paint if I have just the right light.
Sanding and blemishes visible at edge of light and lower:
View attachment 66181
Although there was no oxidation, I did go the #7 route as outlined by Mike Phillips. This did bring up some of the shine, mostly to the level I've had the last few years (usually before I put it in a local show). But I still wanted to attack the many fine scratches. The #7 did help some areas around the cockpit that had gotten dull.
Scratches that were on most of the car, seen here on a side panel:
View attachment 66178
Next step was to try some M100. I initially tried this using a yellow pad, but it really wasn't doing anything. Forgot I had a Griots fast finishing microfiber pad, so I tried that with M100. I'm using both 3" and 6" Griots polishers. Now it started making a difference! I did several passes in areas that really needed attention. There is still a way to go, especially on the panels containing louvers over the engine area, but the main area along the rear of the car looks so much better already. This car just has an infinite amount of sections to detail, aside from the black paint, there are details from a polished aluminum front end, to exposed brake and suspension areas.
Left side after a round of #7 and a few rounds of M100:
View attachment 66179
After a round of #7 and a few rounds of M100:
View attachment 66180
The other end of the side panel shown above, this time after a few rounds of M100:
View attachment 66182
Stone chips in leading edge of rear fender. Leave alone and just polish?
View attachment 66183
But I'm not quite sure where to stop with the M100 or the next few steps. I need to finish out the M100 step in the next few days. But after that, I was looking to use some of the products I already have - M205 and Menzerna SF3800 for polishing, then Souveran wax as a final. I've had decent success using the M205 and SF3800 on a red single stage paint, but the MG black paint I'd like to look as "liquid" as possible.
1) M205, SF3800, then wax? Pad type?
2) M205, #7, then wax? Pad type?
3) Other? I'm also open to trying products I don't have although I'm running out of weekends/nights.
I'll be racing again starting in June and I realize I'll pick up chips, but would at least like to have the car looking good at the start of the event, plus have some protection for the paint.


 rops:
rops: