Im going to be working on a 08 black nissan titan and a 05 white scion.
The scion has never been waxed, and the titan has had a few hand waxes done.
It's always hard to write out step-by-step instructions for two different vehicles on one thread, it's alway better to post dedicated threads for dedicated projects. This isn't really targeted at you but to everyone that will read this into the future to learn by.
As LincolnZephyr2006 pointed out,
"Use the least aggressive product to get the job done"
This means you have to start by testing the least aggressive product and see if the results make you happy, if not then you can test again and use a different pad/product combination.
This is called, doing a TEST SPOT. It's something you want to do anytime you work on paint that you've never worked on before and also anytime you work with pads, products and tools you've never worked with before.
You want to make sure your choice of pad, products, process and very important, your skill level and technique can make one small area look good before tackling the entire car.
This takes only a few minutes and can save you hours by finding out real fast if you're successsfull... or not... and it's the "or not" part where you save time, energy and money and come back to this forum and tell us what you're seeing in your test spot and everyone here will do their best to see you through to success.
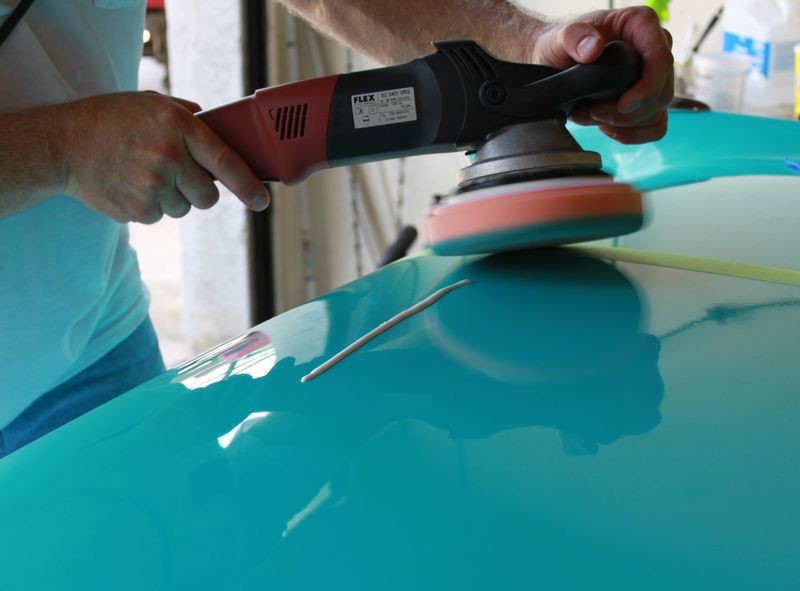
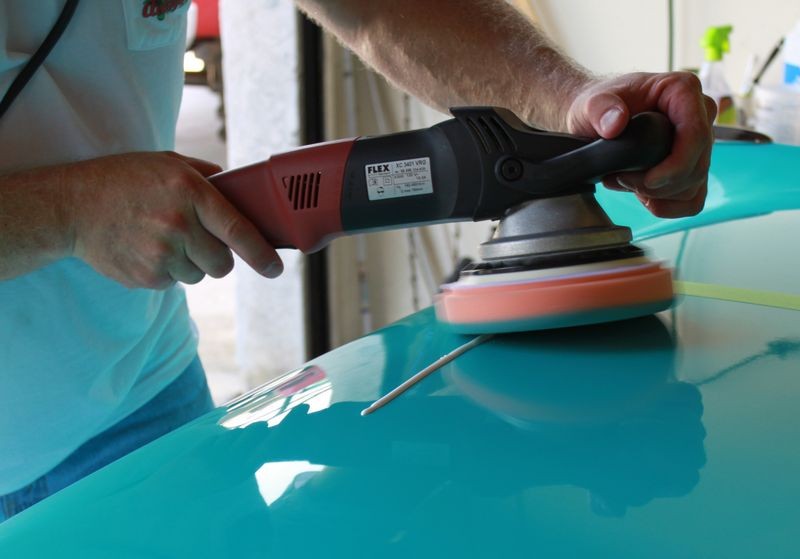
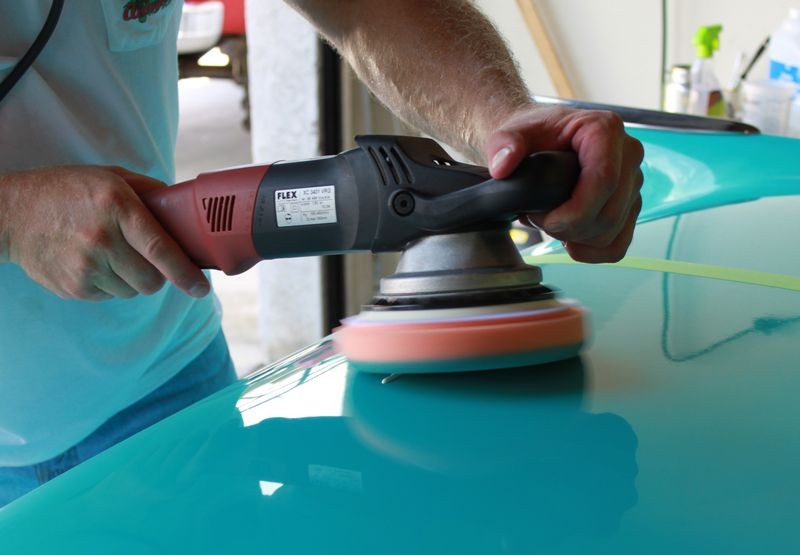
Here's a test spot using a Flex 3401 but the principals all apply no matter how you're doing your work or what you're using.
The below is taken from this thread,
1957 Chevrolet Belair Extreme Makeover - Flex 3401 & Wolfgang Smackdown!
~~~~~~~~~~~~~~
Begin copy and paste
~~~~~~~~~~~~~~~
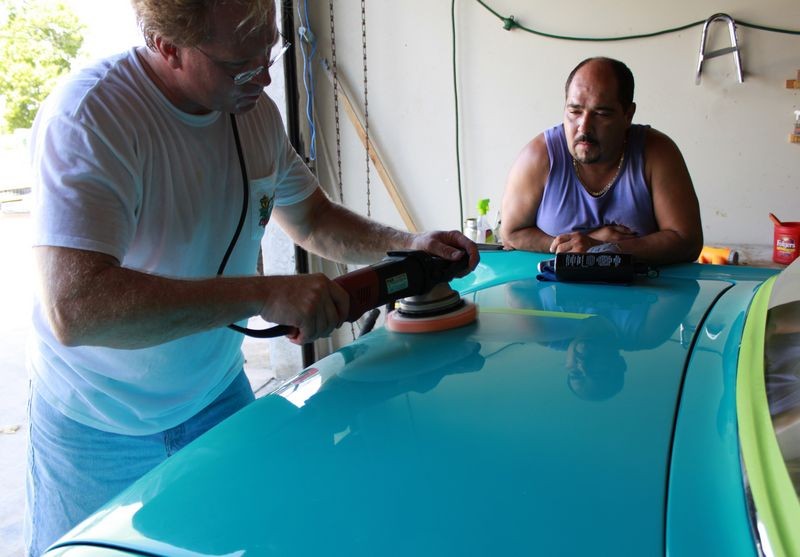
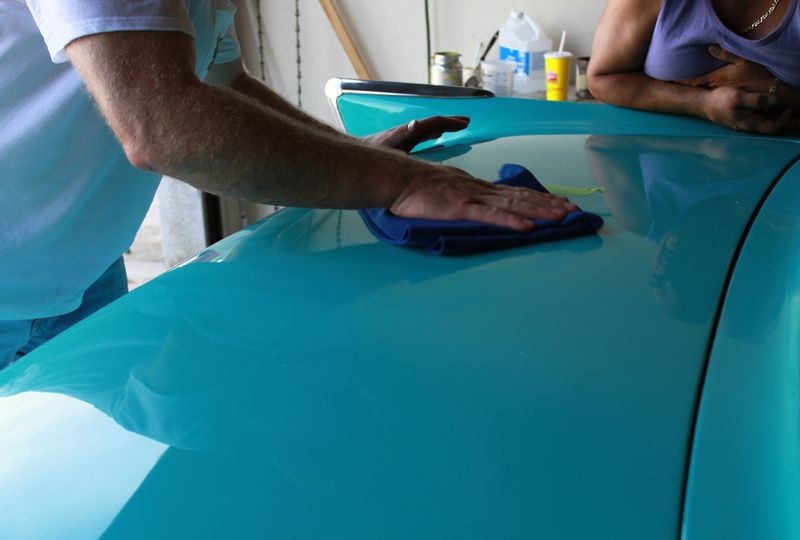
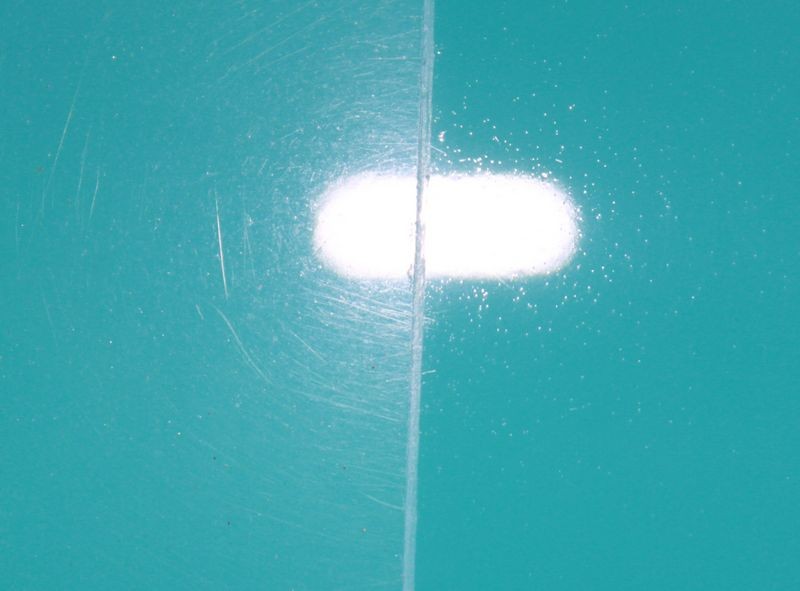
Horizontal surfaces like the hood or the trunk lid always work best for the Test Spot. Here we're using the trunk lid and we've applied a piece of painter's tape to separate between the before and after sides for easier and more accurate evaluation.
Always shake your products well before using them... I like to twist them back in forth at my side...
Lay down a thin strip of product about 6" to 8" long. You'll tend to use less product as you move around the car and your pad becomes more wet with product so it's less likely to absorb product into itself.
Unlike a true Rotary Buffer which the pad would rotate clockwise as you look down on it from behind the buffer, the Flex 3401 rotates counterclockwise and as such we're going to pick up our strip of product running the pad across the panel from left to right and running the strip into the pad at the 4 O'Clock position.
(See the YouTube Video below).
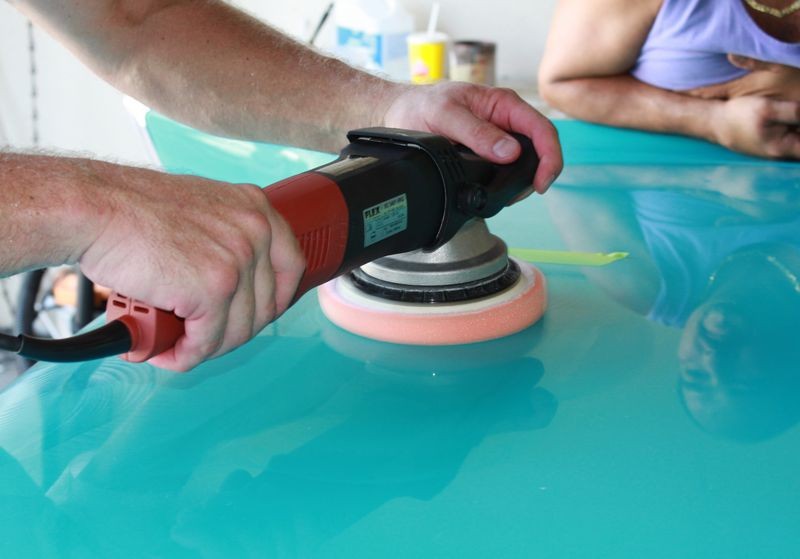
After picking up our bead, we lay the pad flat against the paint and begin making slow, overlapping passes over our test section.
Try to always have a wet film of product at the end of the buffing cycle as buffing to a complete dry buff might lead to hazing if you lose all lubricity on the surface.
YouTube Video Performing A Test Spot using the Flex VRG 3401
[video=youtube_share;3CtUaI_8HhE] - Performing a "Test Spot" to...[/video]
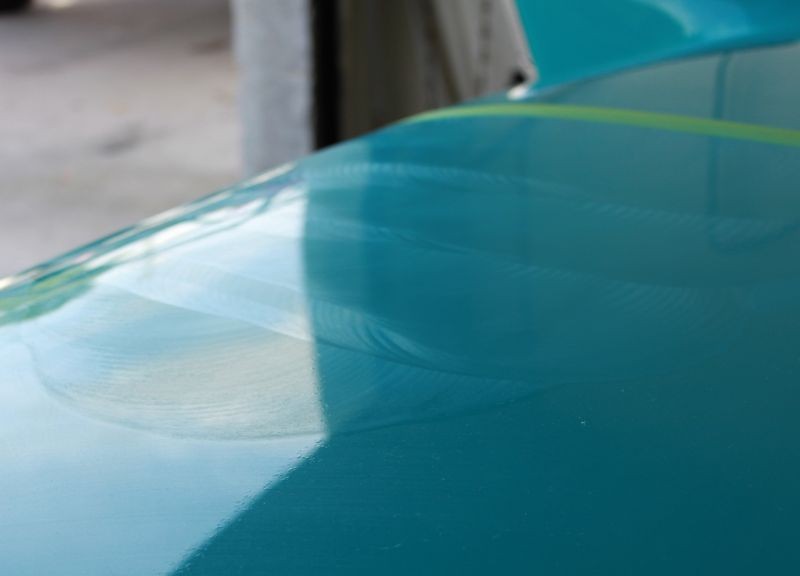
Turning the pad over reveals we're working on a single stage paint job, not a basecoat/clear coat finish. Single stage paints are generally softer and easier to work on than clear coat finishes with the exception of white single stage paints as the pigment type for white paint is
Titanium Dioxide Powder and the pigment alone will make the paint, (resin), very
unworkable or hard-to-polish.
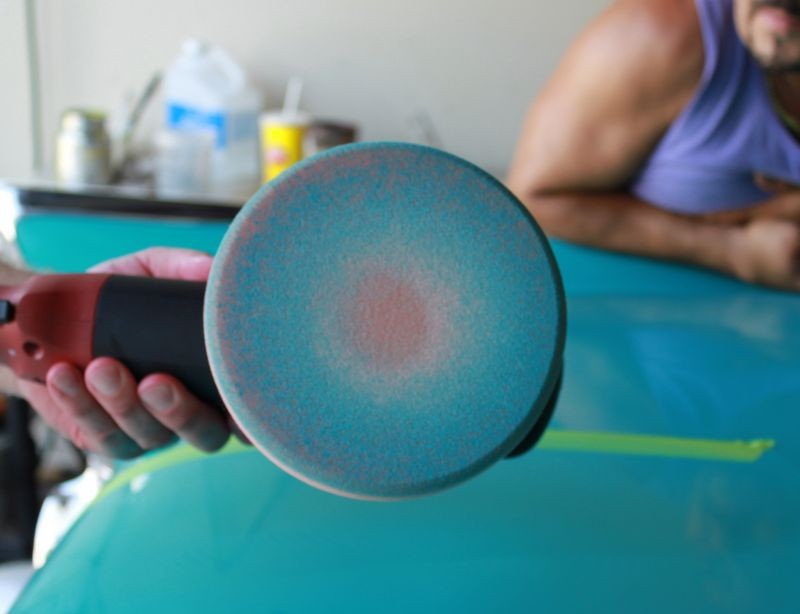
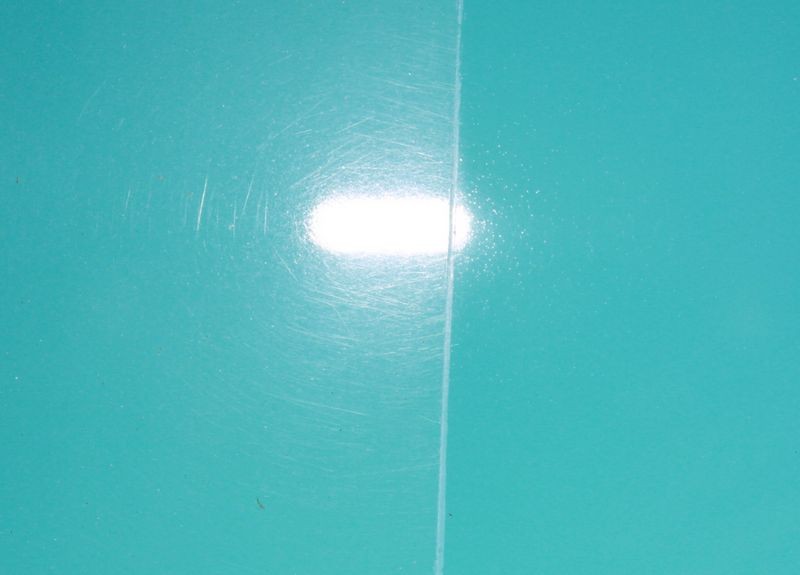
Next we'll wipe the residue off using a
Cobra Indigo Microfiber Polishing Cloth and inspect the results both in the shop and outside in full sun.
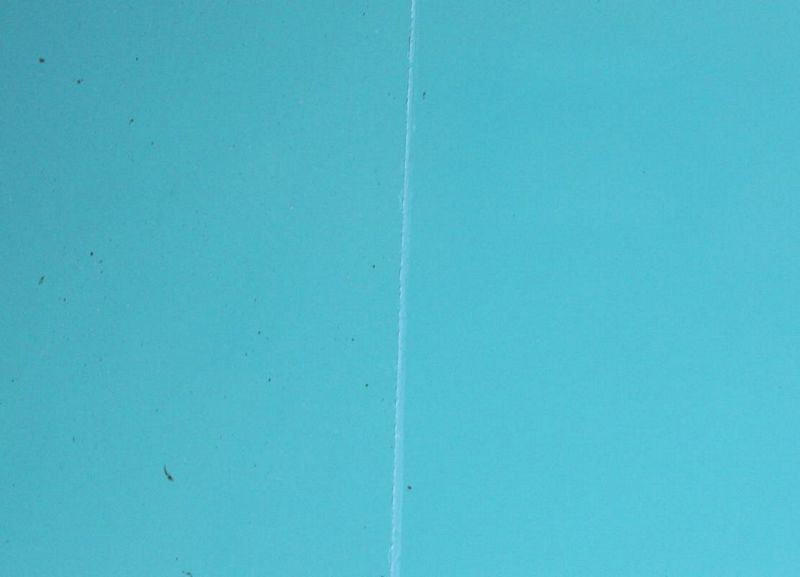
This is with the before side being lit up using the flash of the Rebel T1i
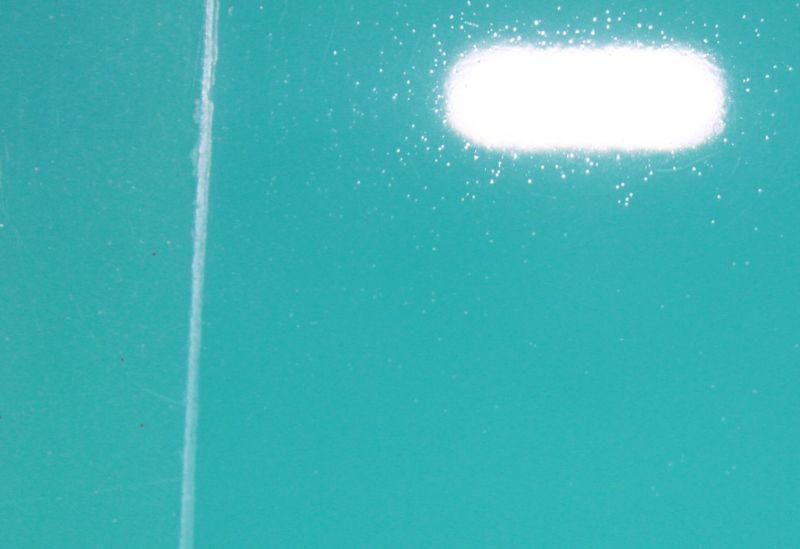
This is the after side. The tiny craters or
pin holes you see are more than likely what' called
Solvent Popping, which occurred when the paint was sprayed. These pin holes are actually present on the before side except because there are so many swirls in the before side, the swirls hide the solvent popping pin holes.
No amount of buffing will remove solvent popping because the holes are throughout the layer of paint, not just on the surface. Compounding and polishing more and more will just remove more paint and reveal a greater depth of the pin holes, it won't make the problem go away.
Keep in mind this is a very high resolution camera and it's being held very close to the paint. After polishing and waxing and then looking at the paint from a normal distance you don't really see them. The only fix is to repaint the entire car or the affected panels.
And a shot right on the tape-line...
__________________
~~~~~~~~~~~~~~
End of copy and paste
~~~~~~~~~~~~~~~
Im going to be working on a 08 black nissan titan and a 05 white scion.
ssr2.5, ssr1, nattys blue, spray& gloss, spray & wipe
lc foam pads orange, white and black
xmt gel shampoo
Wash and dry both cars after they are dry feel the paint to see if it needs to be clayed. That's the first thing to do and if you discover above surface bonded contaminants, then use some detailing clay to clay the paint and get the surface smooth and clean.
Now inspect the finish for swirls and scratches, you usually want to do this with bright sunlight or a Swirl Finder Light like this,
The Brinkman Swirl Finder Light aka The Cruel Master!
If you discover swirls and scratches, start by doing a test sot using the polishing pad and the SSR1, this is a very light SMR but you don't know what you can do until you try. If it's not removing the defects quickly enough or effectively enough then test out the SSR 2.5 with the cutting pad.
Most important, use good technique, see this article as it's pretty in-depth on how to use a DA style polisher.
Tips and Techniques for using the PC 7424XP Dual Action Polisher to remove Below Surface Defects
Sorry dont have any pics as of yet. I know it would be helpful.
Check this out...
How-to work with pictures on discussion forums
It's so easy for people to capture great photos with their digital cameras and even cell phones but if you don't know how to
resize,
upload and
insert the image into a message you never get the fun of sharing them with your friends.
My question is what will I need to do after the ssr2.5 is done on both cars?
Do a test spot with the least aggressive approach, maybe you'll be able to get away with the SSR1 on at least one of the cars?
" You never know what you can to until you try"
Do I need to get a sealant and a polish then use the nattys wax last??? What would be my best choices on pads for the sealant, polish and wax? Sorry about all the question.. Thank you...
With the product you have,
Test first and if you have to use the SSR2.5 then here's your recipe,
SSR2.5 with orange foam cutting pad on speed setting 5.0 to 6.0 speed setting
SSR2 with white foam polishing pad on speed setting 5.0 to 6.0 speed setting
Insure the finish looks great after this
Natty's blue by hand or with the black foam finishing pad on the 4.0 speed setting
Maintain with the Spray & Wipe and the Spray & Gloss in-between regular washings.
:xyxthumbs:
 rops:
rops: