Rupes Detailing Classes at Autogeek!

  • Thread starter Thread starter Mike Phillips
  • Start date Start date
M

Mike Phillips

Guest
Rupes Detailing Classes at Autogeek!


Rupes_Detailing_Classes_by_Mike_Phillips_01.jpg


Rupes Detailing Classes
[video=youtube_share;sndP0ijmvQU"]Video documenting the true before condition[/video]


Rupes Polishers & Rupes Detailing Classes at Autogeek
Autogeek.net carries the complete line of Rupes polishers, pads and products at our warehouse in Stuart, Florida. We've also added dedicated car detailing classes for both the Rupes Bigfoot 15 and the 21 Polishers at our Detailing Boot Camp Classes.

We hold these classes three times a year here at our Corporate Office in Stuart, Florida.

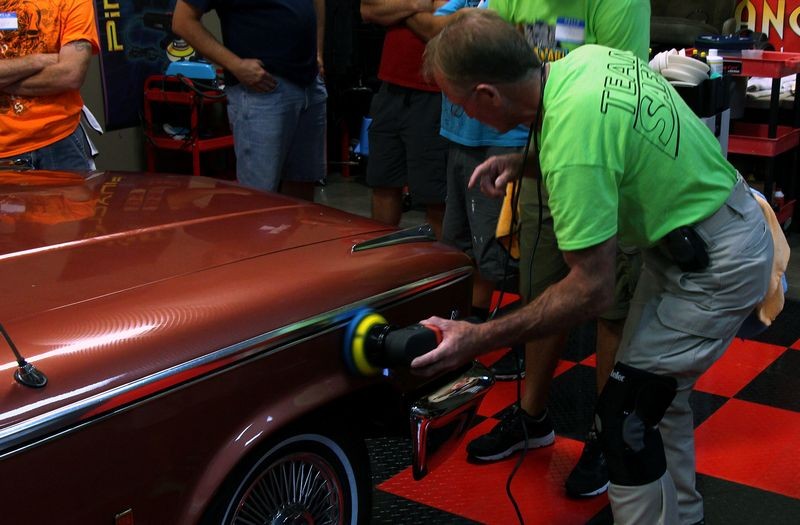
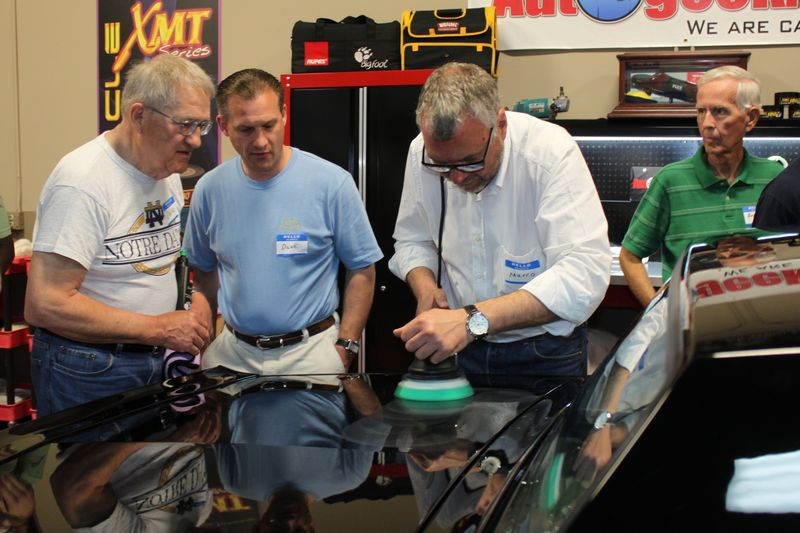
For these classes, I get my students the real deal, that is I get scratched, swirled-out and oxidized street rods, muscle cars and/or classic cars, for my students to get plenty of hands-on training time behind the Rupes polishers. For a lot of people, the chance to work on the type of cool cars I use in my classes not only makes the learning process a lot more fun and memorable but it might be the only opportunity you get to work on cars like these.

For this class we're using a hotrod 1963 Ford Galaxie!

Autogeek's fully equipped training garage
Rupes_Detailing_Classes_001.jpg


Waterless Wash for Classics, Muscle Cars and Streetrods...
I teach my class to never introduce running water to classic cars as a professional courtesy to the owner of these types of cars and as a professional best practice. This helps to reduce the potential for water to get into places that you cannot see or reach and thus creating a rust issue for cars already considered survivors.

Rupes_Detailing_Classes_002.jpg


Rupes_Detailing_Classes_003.jpg


Rupes_Detailing_Classes_004.jpg


Rupes_Detailing_Classes_005.jpg


Mechanically decontaminate the paint
The paint on this 1963 Ford Galaxie had some type of above surface bonded contaminants on the paint. To remove these contaminants before machine polishing we used the Nanoskin Autoscrub Towels.

Rupes_Detailing_Classes_006.jpg


Rupes_Detailing_Classes_007.jpg


Swirls and scratches
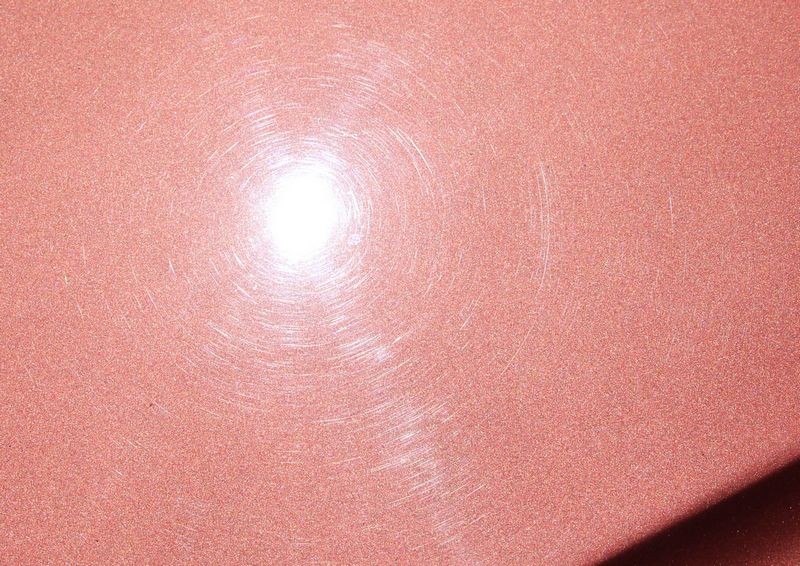
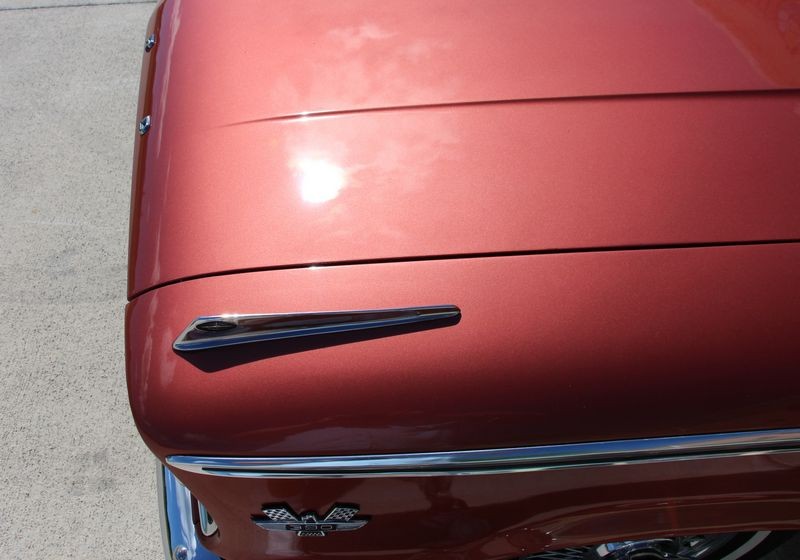
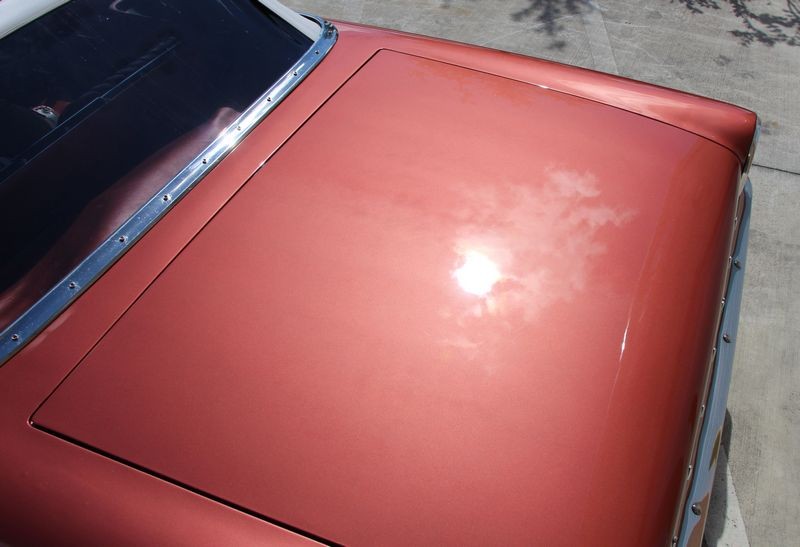
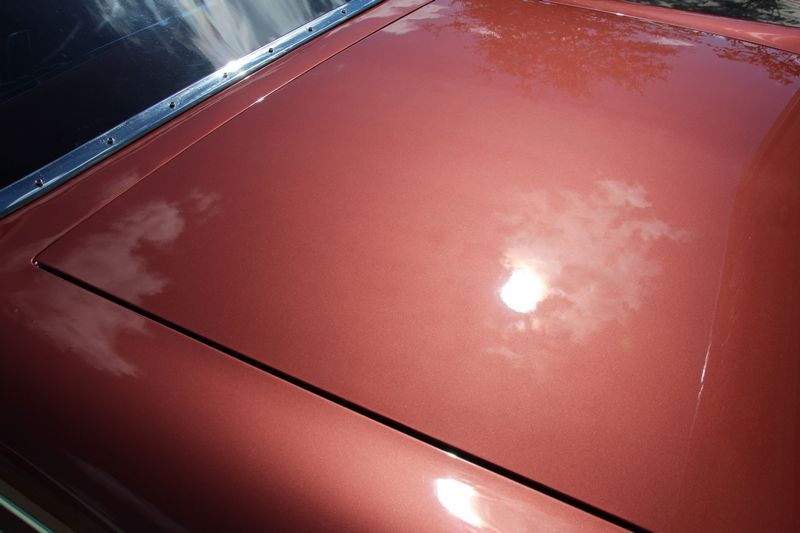
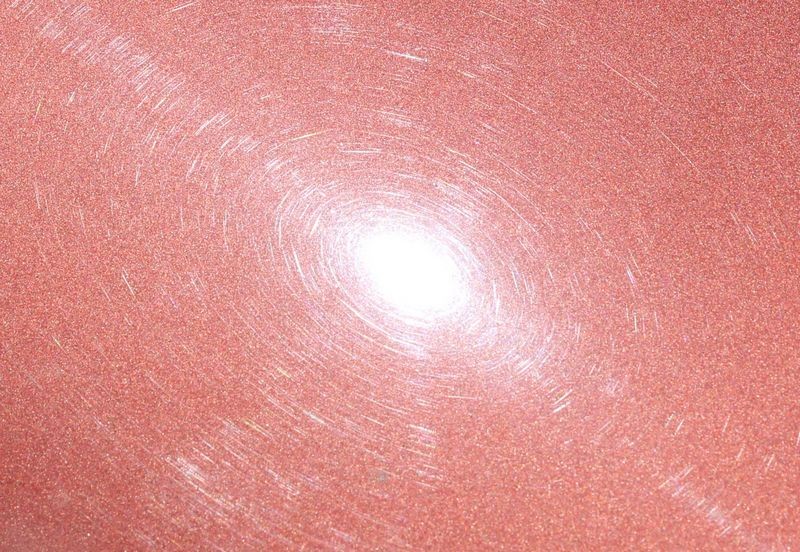
The paint on this car was filled with swirls and scratches, there were holograms in the finish which are the sign it was improperly machine buffed using a rotary buffer.

This 1963 Ford Galaxie has a modern basecoat/clearcoat paint job just like the car sitting in your driveway. When the clear layer has millions of swirls and scratches this makes the clear paint hazy and cloudy so your eyes cannot see through it to the beautiful colored basecoat below it. In this case the paint is Chestnut Metallic.

Rupes_Detailing_Classes_008.jpg


Always use the least aggressive product to get the job done

I teach the sage wisdom of always using the least aggressive product (and pad), to get the job done because this practice will remove the defects while leaving the most paint on the car to last over the service life of the car.


Test Spot Number 1
For our first Test Spot we're using the Rupes Bigfoot 21 Orbital Polisher with a Rupes Yellow foam pad and the Rupes Keramik Gloss Fine Cut Polish.

I show my class how to pick up a thin, bead of product using a modified version of the 10 @ 10 Technique which pulls the bead or strip of product under the pad trapping it between the pad and the paint instead of splattering it.


For our first
Rupes_Detailing_Classes_009.jpg


Rupes_Detailing_Classes_010.jpg


Rupes_Detailing_Classes_011.jpg


Test Spot Number #2
The first combination of pad and product removed the shallow swirls but it wasn't aggressive enough or fast enough to meet our requirements and expectations for the finish quality on this car's paint.

Next we tried the Rupes Green foam pad and the Rupes Quarz Gloss Medium Cut Polish. Note we're doing this Test Spot in a new section of paint as re-doing the test spot to an area we already polished would skew the results.

Rupes_Detailing_Classes_012.jpg


Rupes_Detailing_Classes_013.jpg


Rupes_Detailing_Classes_014.jpg


Rupes_Detailing_Classes_015.jpg


Rupes_Detailing_Classes_016.jpg


Perfect Finish
The more aggressive green pad and polish worked perfect on this paint system to remove the defects and restore a clear, high gloss finish.

Rupes_Detailing_Classes_017.jpg


Tape-off and Cover-up
I teach my class to wait till they've proven a system that will remove the defects and restore a finish that meets their expectations. You never know, something could be out of your control and taping off a car before you dial in your system could end up being a waste of time.

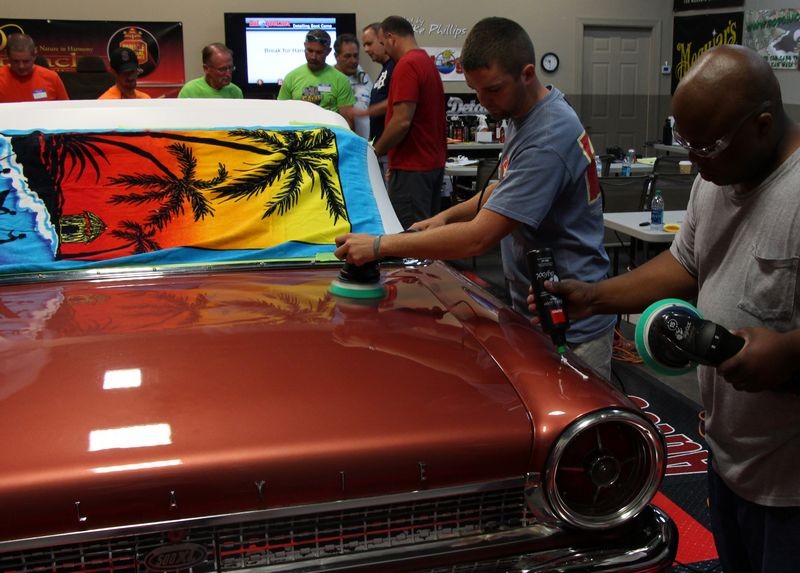
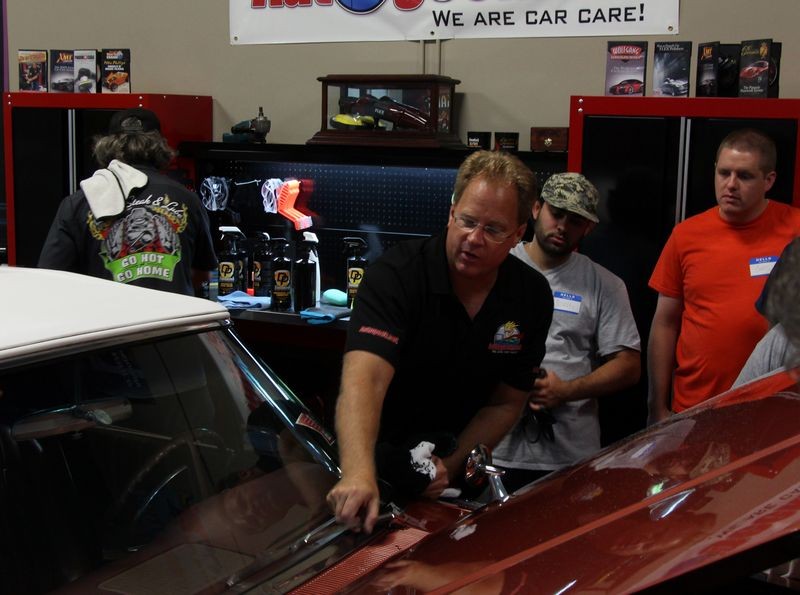
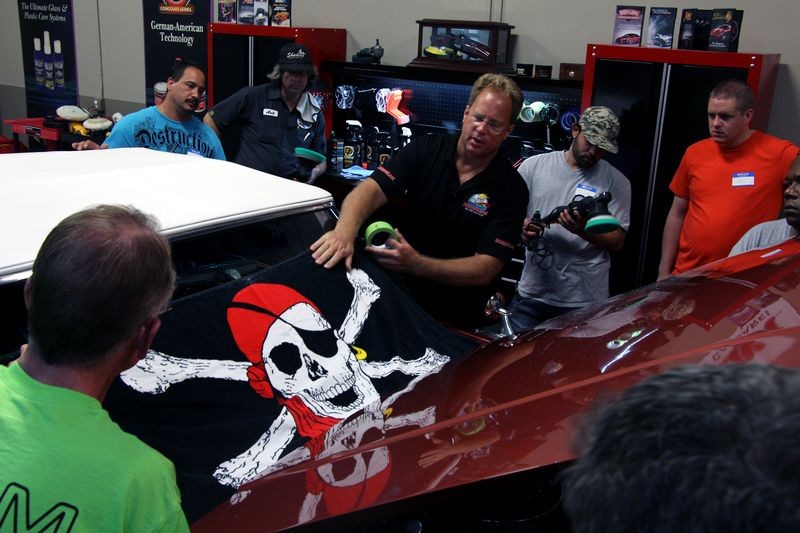
After we proved our system approach we went ahead and used the beach towel technique to cover and protect the fresh air grill, wipers and windshield from any accidental splatter. Remember for most of the people in this class this will be the first time they've either machine buffed and/or used the Rupes system and usually both.


Rupes_Detailing_Classes_018.jpg


Rupes_Detailing_Classes_019.jpg


Hands-on Training
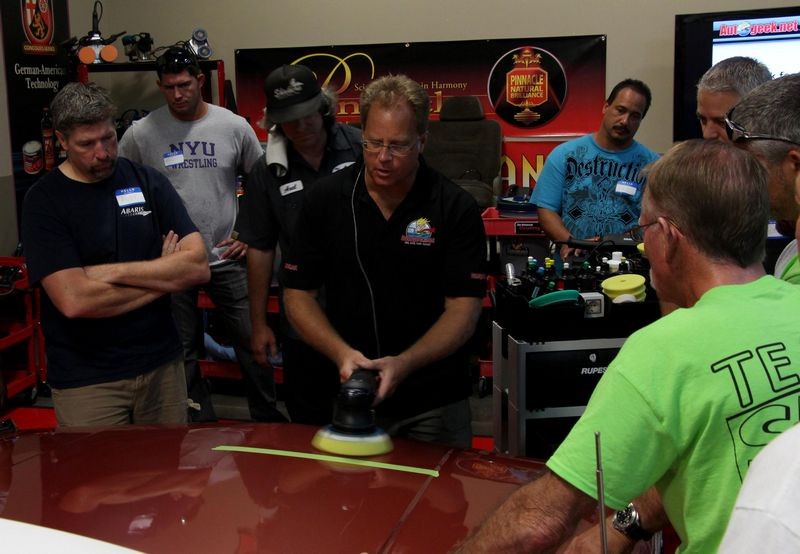
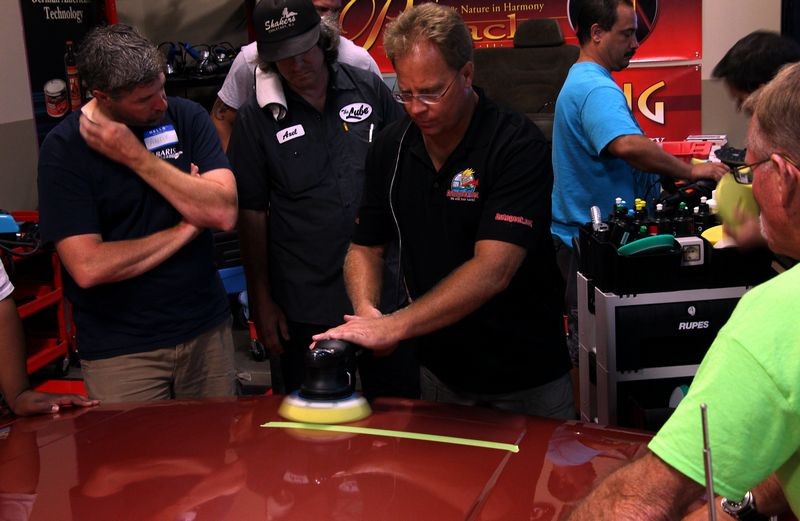
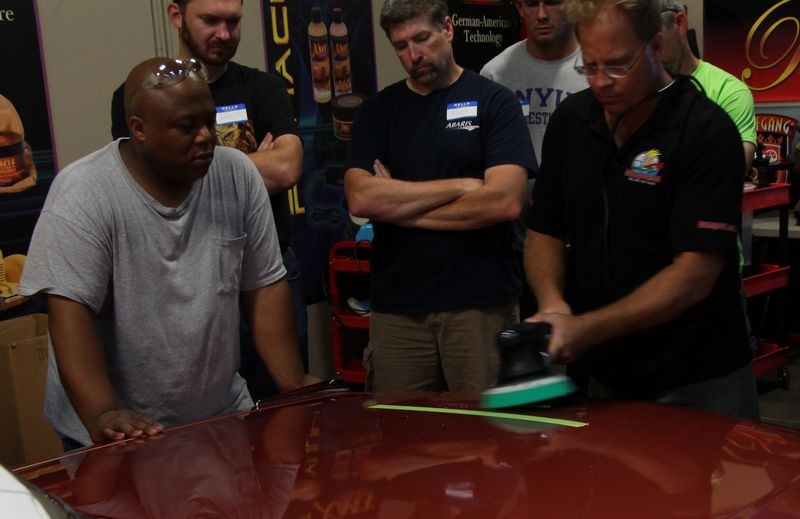
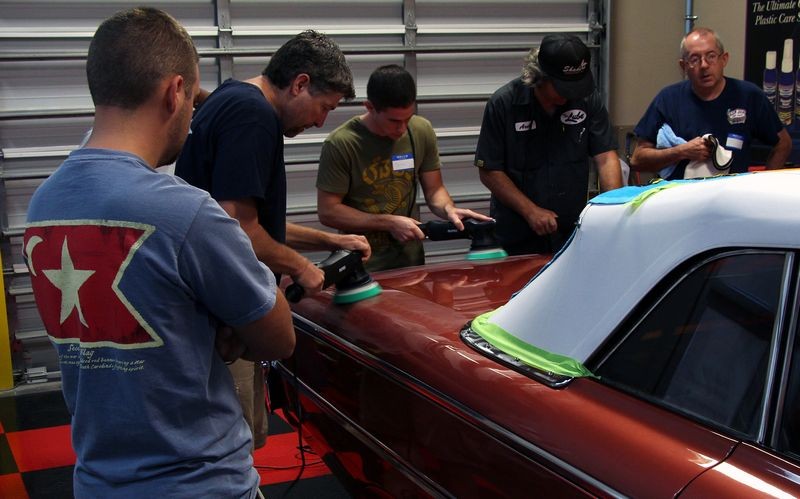
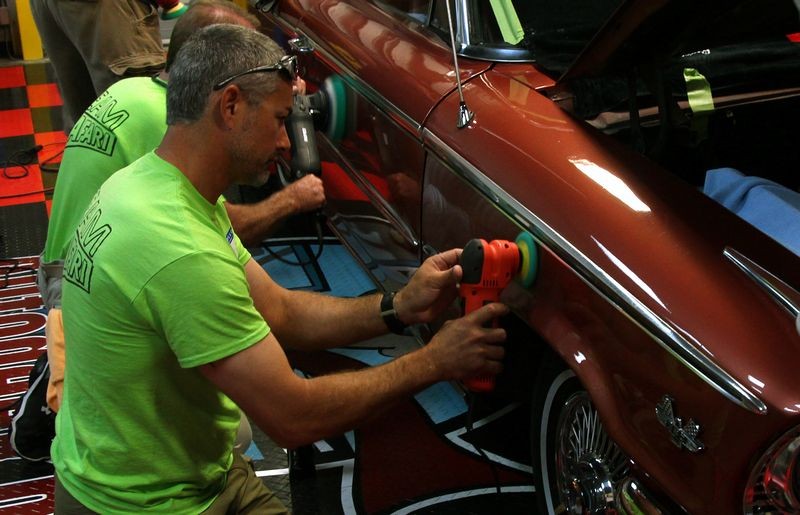
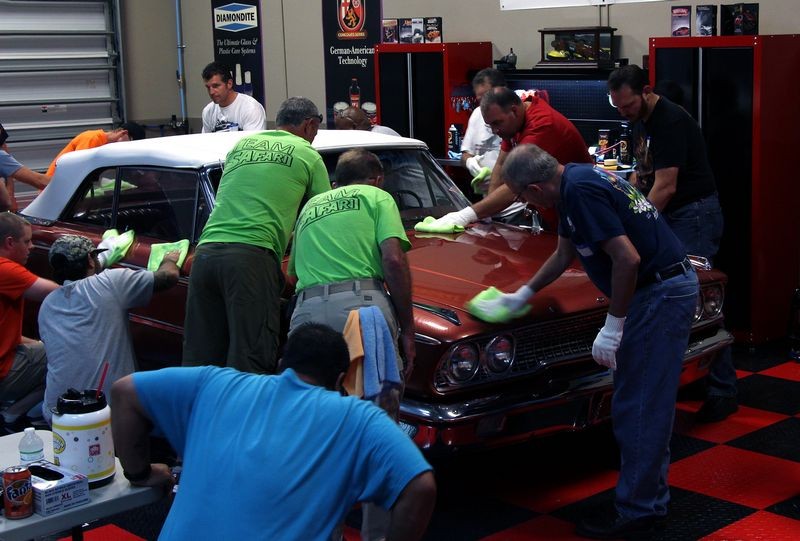
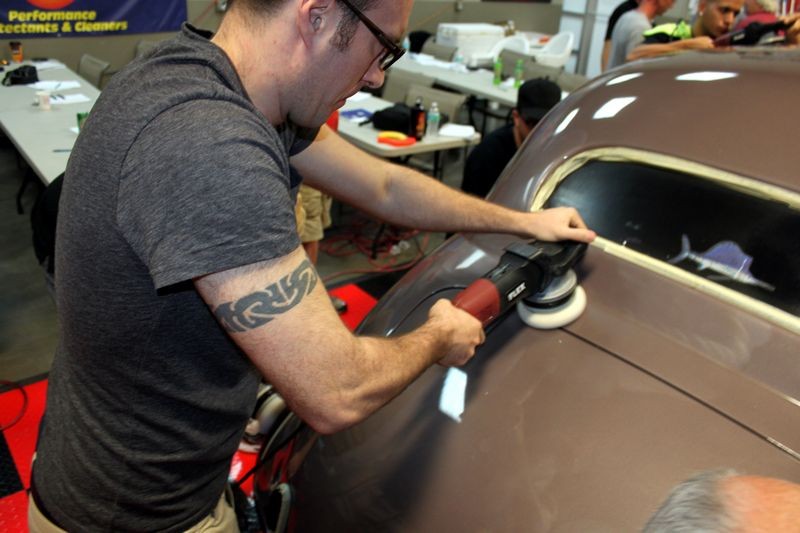
After taping off and covering over things like the convertible top with a tape line surrounding the areas close to body panels the class dives in using the buddy system. Students are paired up with one person buffing and the other person watching their technique as compared to what is taught during the power point presentation and when I demonstrate the tool. The person not buffing is also responsible for making sure the cord is not touching the paint and if it is, gently reminding their buddy to place the cord over their shoulder. They are also responsible to carefully wipe off the product residue. After the first buddy buffs a section of a panel they switch places with the second buddy and repeat the above process. By watching and working together, both people learn from what is done correctly and also by any mistakes that are made. This is a system I've developed on my own and is very effective.

Rupes_Detailing_Classes_020.jpg


:)
 
Continued...

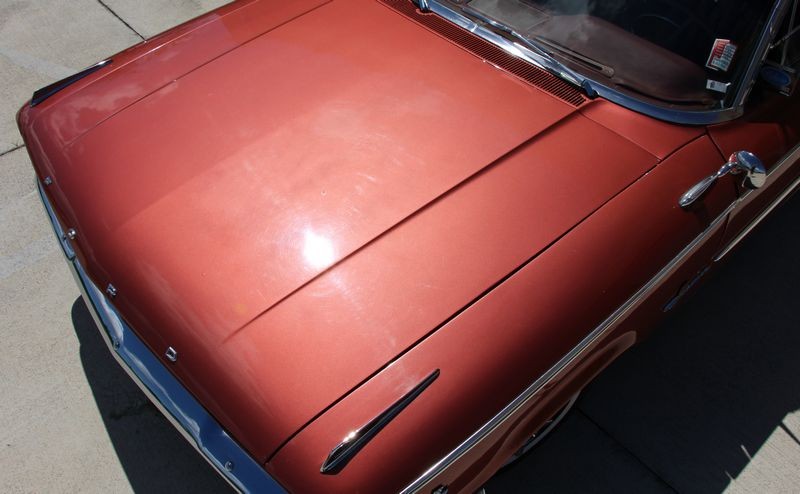
As you look through these pictures, take note of how much room there is for everyone to buff. Classic body designs from Detroit offer plenty of real-estate to learn on and practice your technique.

Rupes_Detailing_Classes_021.jpg


Rupes_Detailing_Classes_022.jpg


Rupes_Detailing_Classes_023.jpg


Rupes_Detailing_Classes_024.jpg


Rupes_Detailing_Classes_025.jpg


Rupes_Detailing_Classes_026.jpg


Rupes_Detailing_Classes_027.jpg


Rupes_Detailing_Classes_028.jpg


Rupes_Detailing_Classes_029.jpg


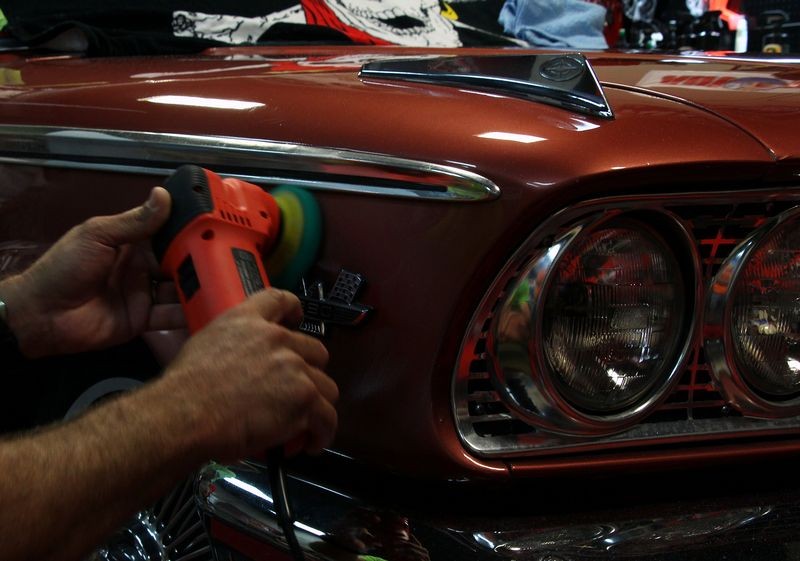
Small, Compact Polisher for Thin Panels or Intricate Areas
For doing small, thin panels we're using the Griot's 3" Mini Polisher with the 4" Rupes Pads. In my opinion, there's not only room in the market place for a REALLY GOOD mini or small orbital polisher but there's a HUGE DEMAND for a tool like this also.
Rupes_Detailing_Classes_030.jpg


Rupes_Detailing_Classes_031.jpg


Rupes_Detailing_Classes_032.jpg


Rupes_Detailing_Classes_033.jpg


Rupes_Detailing_Classes_034.jpg


Rupes_Detailing_Classes_035.jpg


Rupes_Detailing_Classes_036.jpg


Hands-On Training
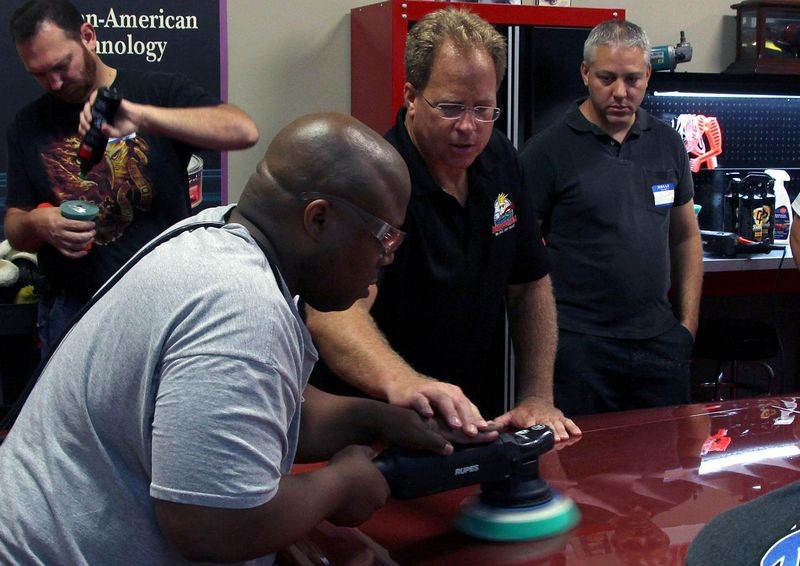
When I say hands-on... I mean hands-on... Sometimes the fastest way to dial-in your technique is to have someone physically place their hands on your hands as you grip the polisher and show you,

  • How much or how little downward pressure to use.
  • Which directions to move the polisher.
  • How fast or slow to move the polisher.
  • The size of an area to tackle at one time.
  • How to divide up larger panels into smaller sections.

Rupes_Detailing_Classes_037.jpg


Rupes_Detailing_Classes_038.jpg


Show Car Techniques - Machine Applying a Show Car Paste Wax
As the saying goes, there's all kinds of ways to skin a cat. At my classes I show multiple ways to "seal" the paint after polishing. For this car I'm going to show my class how to machine apply a true show car paste wax to create a deep, wet shine.

Rupes_Detailing_Classes_039.jpg


Rupes_Detailing_Classes_040.jpg


:)
 
Continued...

Here's my friend Axel, I'm placing some Pinnacle Souveran Paste Wax onto the face of the buffing pad...

Rupes_Detailing_Classes_041.jpg


Machine Waxing = Better, Faster & more Effective
When I was asked to train Wayne Carini's painter and detailer the art of polishing paint I showed them how to machine wax the cool cars they worked on for Wayne. After machine waxing their first car they said they would never wax a car by hand again.

Rupes_Detailing_Classes_042.jpg


Rupes_Detailing_Classes_043.jpg


Rupes_Detailing_Classes_044.jpg


Rupes_Detailing_Classes_045.jpg


Rupes_Detailing_Classes_046.jpg


Rupes_Detailing_Classes_047.jpg


Rupes_Detailing_Classes_048.jpg


Rupes_Detailing_Classes_049.jpg


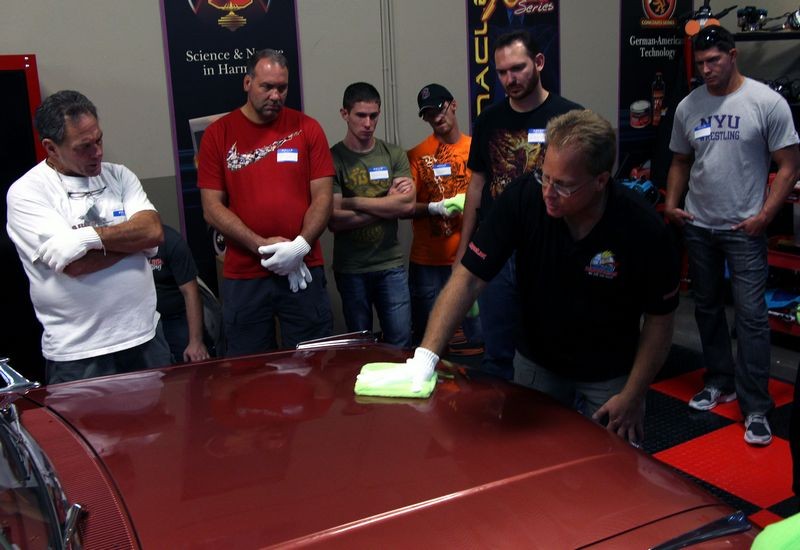
Microfiber Wiping Techniques for Show Car Work
Anyone can wipe wax off a car, you know, the old Karate Kid saying everyone likes to mimic... wipe-on, wipe-off.

In my classes I go over tips and techniques to bring your skills to a higher level in all areas of car detailing including what many would think is a very simple procedure. One thing for sure, after you attend my class you'll know exactly what to do when ti comes to carefully removing any wax, sealant or coating off perfectly polished paint.

Rupes_Detailing_Classes_051.jpg


Rupes_Detailing_Classes_052.jpg


Rupes_Detailing_Classes_053.jpg


Rupes_Detailing_Classes_054.jpg


Rupes_Detailing_Classes_055.jpg


Rupes_Detailing_Classes_056.jpg


Rupes_Detailing_Classes_057.jpg


:)
 
Here's how this car looked when it first arrived...

BEFORE

Before - Swirls & Scratches
[video=youtube_share;yxb-eKk9HeA"]Video documenting the true before condition[/video]


1963_Galaxie_002.jpg


1963_Galaxie_003.jpg


1963_Galaxie_004.jpg


1963_Galaxie_005.jpg


1963_Galaxie_006.jpg


1963_Galaxie_007.jpg


AFTER

Here's how it looked after my class used the Rupes Bigfoot Polishers, Pads and Polishes to decimate the swirls out of the basecoat/clearcoat finish on this 1963 Ford Galaxie and create a show car finish.

1963_Galaxie_0111.jpg


1963_Galaxie_012.jpg


1963_Galaxie_013.jpg


1963_Galaxie_014.jpg


1963_Galaxie_015.jpg


1963_Galaxie_016.jpg


Further Resources
Until you can attend one of my classes, get your hands on my how-to book...

The Complete Guide to a Show Car Finish


And be sure to join the AutogeekOnline Discussion forum as that’s where ALL the action’s at in the online detailing world!

Click here to become a member of AGO!


See you on the forum!


:)
 
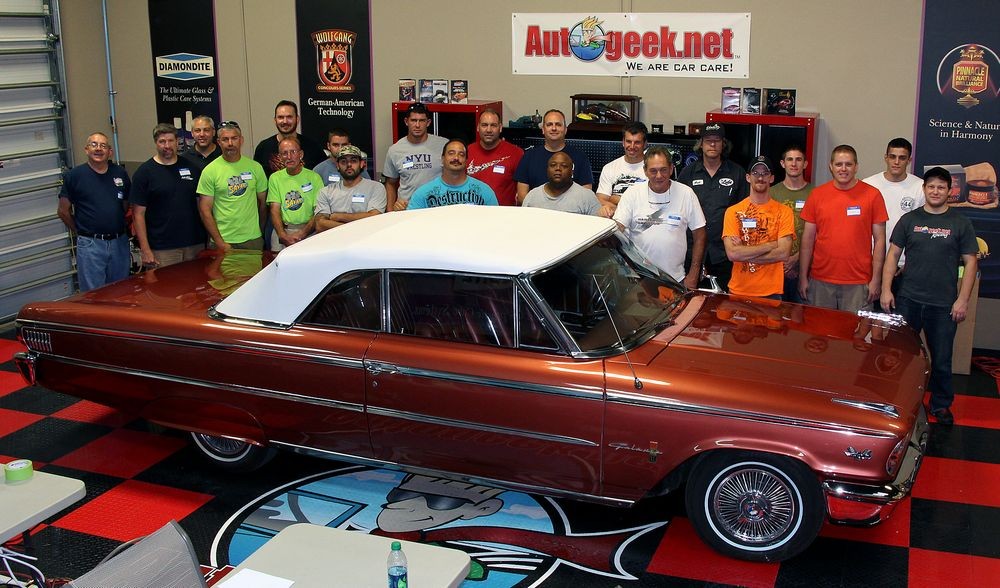
And here's the Class of September 28th & 29th, 2013 that did the transformation...


1000_1963_Galaxie_011.jpg


Now get this...

The majority of these guys had NEVER used a Rupes Bigfoot polisher before this class.


Testimonies about Autogeek's Detailing Boot Camp Classes...

Here's some of the first hand testimonies from the guys in the pictures above...


Hey Mike thanks again,

Really appreciate your hands on approach as well the of passion for detailing that few posses.

Great class, great people, great host Best of luck to all.

:dblthumb2:


thank you!!! for your expert advice. its very rare to have a place to experience all the tools that where there to try and on all the cool cars. i gunna try and get a a few to come on down for the next class..

and thanks to da crew at autogeek wishing you all the best..

Axel :)


Really enjoyed the class thanks for all the knowledge and hands on


Awesome Weekend!

I had high expectations before the class, but it was better than I could have ever imagined. Mike has a great approach to teaching by offering hands on training which makes everything even more interesting.

It was great to try out all of the tools and different chemicals. If anyone is thinking about going to the next class I highly recommend it!

Thanks Mike, Nick and everyone at Autogeek!

Chris :xyxthumbs:


The class was fantastic! I learned a lot of great things I can apply to my business and met a lot of really cool people.

Mike was great, as expected. And Nick really helped walk me through a lot of decisions on products and equipment. He's practically a walking catalog!

I hope to come down for a Thursday sometime, but the eight hour drive may delay that for a while. (Let me know when you do something in Georgia!)

I need to get back to my shopping now (thanks, Nick! :xyxthumbs:).

I'll start posting some of my projects soon!

Thanks again!


I had a great time at boot camp! It met and exceeded all of my expectations. The hands-on training was great; we got to try out so many products and different pieces of equipment.

Many thanks to Mike, Nick, Brian, and Andre for putting on such a great event. I highly encourage anyone who is thinking about going to get signed up.

I am usually not up early on the weekends, but I was so excited to get to class Saturday and Sunday that I was up and out of bed as soon as the alarm went off.

Today was a different story, knowing that I just had to head to the airport to fly back home.

What else can I say other than Mike :urtheman:


T

he class was great. It introduced all the fundamentals to the novice and taught new technologies and techniques that any seasoned veteran could use to improve their craft.

Mike was the best instructor/teacher I have every had, he was knowledgeable, enthusiastic, concerned, and encouraging.


The perfect class if you want to make your cars look shiny the best and most efficient way. A must for guys getting into the detailing business and great for guys that love working on their own cars and boats...like me.

Thanks for a great class Mike!


This class exceeded my expectations. I am now prepared to detail my own vehicles, but I think I will start with a neighbor's car first, LOL.

Looking forward to putting to use the techniques and products.


Mike,

This class was awesome! It completely exceeded all of my expectations.

From the threads that I read before going to the class, I knew we would be working on some great cars and dealing with a lot of different tools and products, but I'm still amazed at how much I learned in just the two days of class.

Now that I have been to the class, I really wish I had decided to go sooner as I am now comfortable with tackling removing the swirls on my black Challenger. Unfortunately, after I showed my wife some of the pictures of the cars that we worked on in class, she wants me to detail her car first.

Also, just want to say that it was great meeting Nick, Bryan, and Andre from Autogeek as well.

Being that I'm just a hobbyist and plan on just detailing my vehicles, everyone went out of their way to make sure I fully understood the products and techniques that were taught in the class.

I guess this little icon says it all for you Mike. :urtheman:


Hey Mike, just got a minute to sit down and reflect on the boot camp I attended. Well I would have too say it was well worth the money. We met a lot of very cool guys . I learned a lot about the product side as well as the hands on. The atmosphere and attitudes were perfect .

Your teaching style is just right making it easy for all to learn from beginner to seasoned vet. just FREAKIN AWESOME man .
Cant wait till DetailFest see u soon thanx.


Let me first start off by giving a big thanks to the Autogeek crew;
Mike, Nick, Andre and Bryan..

:applause: :applause: :goodjob2:

I just made it back up north earlier this morning from spending the weekend at Autogeek's Show Car Garage.
I was thrilled to be able to connect with such a great group of guys and participate in Mike Phillip's Detailing Boot Camp.

Mike, I am really taking over the top with the course outline that you have prepared for the boot camp and the way you navigated the class confidently through it.

When it comes down to finding someone to listen and learn from in this industry, your going to have to do your homework to find a reliable source.

I am honored to conclude that I have found the MOST CREDITABLE PERSON who has years of experience and a unlimited amount of knowledge in the detailing world.

And thats why I continue to come back and visit as much as I can to be in a passionate and positive atmosphere to further advance my set of skills.

:props:


First of all, I would like to thank everyone at Autogeek.net (Meghan, Nick, Andre, Bryan, and of course Mike) for the best time I have ever had in Florida (and I’m a golfer).

The Auto Detailing Boot Camp was even better than I imagined. New Products to try, new procedures to utilize and a hundred helpful tips were just part of the take away, from the weekend.

I have never been exposed to Auto Detailing before Boot Camp, except as a very uneducated consumer. I’m 58 years old and have never had a DA polisher in my hands, let alone safely utilizing this equipment on paint.

Mike and his team had me polishing a 2002 Tahoe (headlights) in the first hour of the class.

Mike stated two things in his opening comments, and I will try to paraphrase;

(1) I cannot make you a detailing expert in two days, but I can give you the confidence to safely detail a car/vehicle paint.

(2) I will give you 100% effort for the next two days.


My comment, to those statements are done and done!

I would recommend this education to anyone that wants to keep their second most important investment in the best shape possible. The best way for me to describe this course is, if Autogeek.net will have me back, I would like to enroll in another Boot Camp Weekend next year!

So, whether you are a novice like me, or have been detailing for profit, you will learn new techniques and test the latest products, during your next Auto Detailing Boot Camp experience.

Fos


Hello Mike,

Took a bit of time to get back to the computer to sign up for the forum, as we hit the ground running, after attending the Detailing Boot Camp last week. So I've decided to take the time for a few thoughts.

Firstly, I would like to extend my gratitude and thanks to you and the rest of the Autogeek crew for an informative, professional, and encompassing program.

When we set out to resurrect our detailing department,which has been in-operational since hurricane Katrina, I knew we needed something that would give us the edge over our competitors.

Simply saying that you can detail a car is just not enough. Our clientèle are high-end production autos, a number of high-dollar SIV's such as Ferrari, Porsche, etc, and a very demanding customer base. We actually have Bentley's come through our tunnel! So there is no room for error.

Our customers maintain high expectations and demand explicit attention to detail. Simply put, we have to be the best! And weeks of research led us to attending your class.

With expectations as high as ours, you would have expected some sort of disappointment. Quite the contrary, our expectations were surpassed!!

You have given us the tools, knowledge, and experience to return home with a program specifically constructed towards our customer base. We have no time wasted in attempting to provide services, or products that we don't need, or our customers don't want.

Probably the most important thing covered in your class, also something i have always preached:

Know your limitations, and match them to your customers expectations.

Instead of 30 or more products in our inventory we will never use, we now have about 6!! Coupled with a standardized procedure for evaluation, communication, and work-process, we are confident that we are launching the very best detailing service department this area has to offer!!

We have minimized risk, cut our process times, and will be able to deliver a product that will simply blow our customers away!!!

Thank you Mike, for sharing your passion and experience with us. It shall be carried on by us, with every car we put our hands on...

Many Thanks, and God Bless....

Tyron Benoit
Safari Car Wash
 
Re: Rupes Bigfoot Polishers 21 & 15 Detailing Classes at AutogeekOnline.net

Question: When do these classes take place?

Answer: These classes are offered three times a year. Because we have people that fly in from all over the United States, Canada, South America and from countries around the world, we hold them at the same time every year.

By holding these classes the same times every year, it makes it easy for you to arrange your schedule, make your travel plans and be part of the next detailing boot camp class...


Here's when the classes are held, these are FULL 2-day classes, starting at 7:30am each day and going all the way to 5:30pm.


Last weekend in January

First weekend in May

Last weekend of September


Meet & Greet on Saturday Night!
There's ALWAYS a Meet & Greet at the Marriot Lounge on Saturday night after the class where we all have a chance talk about cars and our other hobbies and passions out of the shop environment.

Jan_Meet_Greet_1a1.jpg


:xyxthumbs:
 
RUPES Bigfoot Polishing System at Autogeek.net
[ame=http://www.youtube.com/watch?v=IoganIRQcHU&hd=1]RUPES Bigfoot Polishing System at Autogeek.net - YouTube[/video]

[ame=http://www.youtube.com/watch?v=P7q-a9P7xZg&hd=1]RUPES Bigfoot Polishing System at Autogeek.net - YouTube[/video]


:xyxthumbs:
 
What's a Rupes polisher you ask?


Great question!


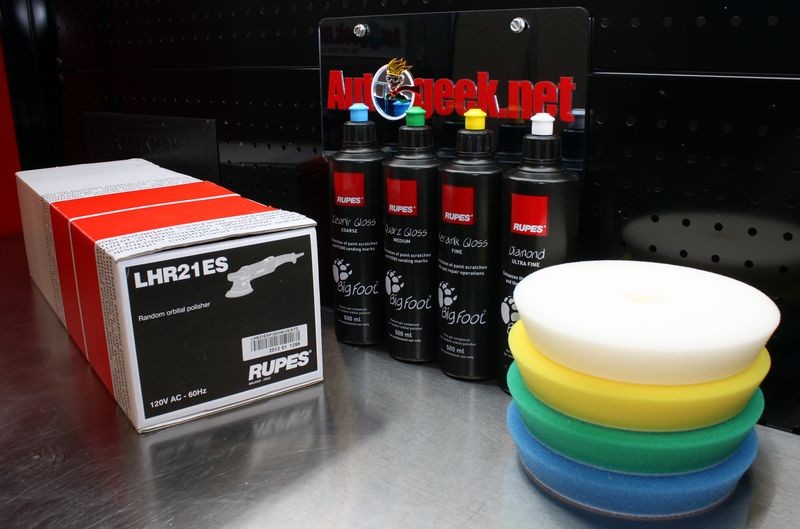
Here's a closer look at the RUPES LHR21ES Random Orbit Polisher and the RUPES Paint Polishing System.

Pictured below

RUPES LHR21ES Random Orbit Polisher
RUPES Compound and Polishes
RUPES Color Matched 7" Foam Buffing Pads

Rupes_21_001.jpg


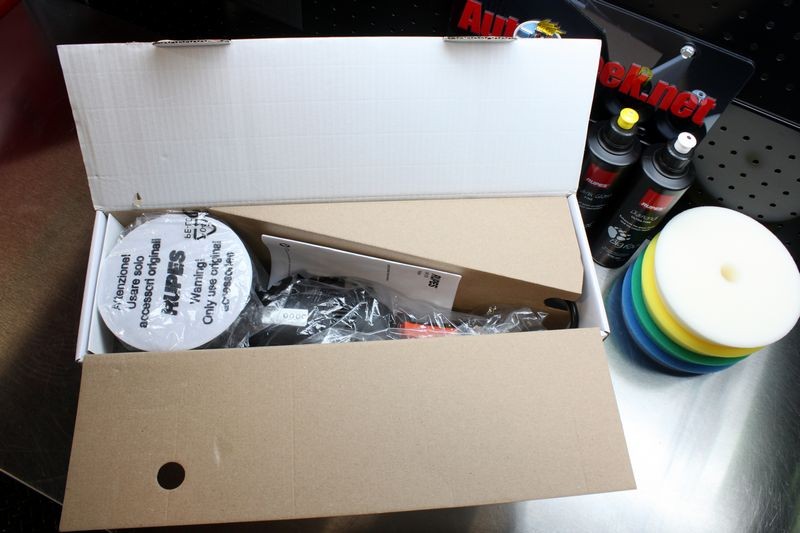
First let's open up the box and take a look inside...

Rupes_21_002.jpg


Inside the box you'll find,

One Polisher
Owner's Manual
Protective cover on the factory installed backing plate

Rupes_21_003.jpg


Remove the protective cover before trying to affix a buffing pad to the backing plate...

Rupes_21_004.jpg


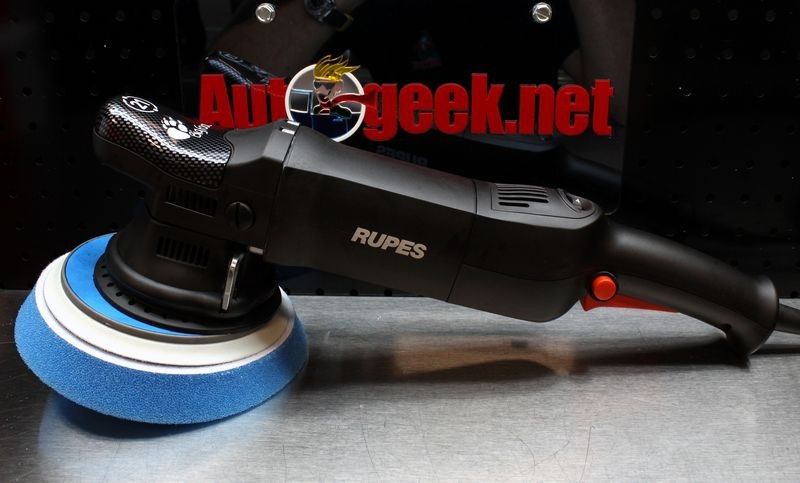
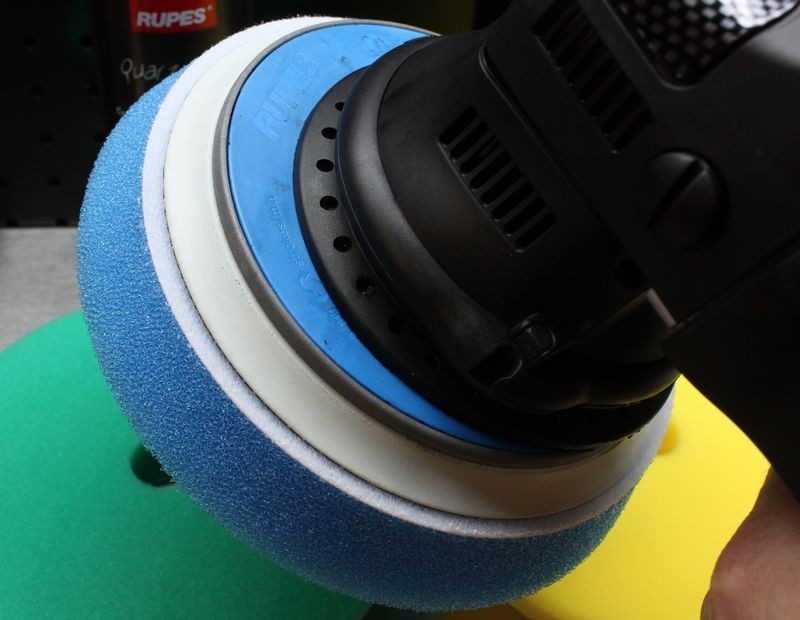
Here's the RUPES LHR21ES Random Orbit Polisher with the Blue Compounding Foam Pad attached to the backing plate.

Rupes_21_005.jpg


Well engineered design
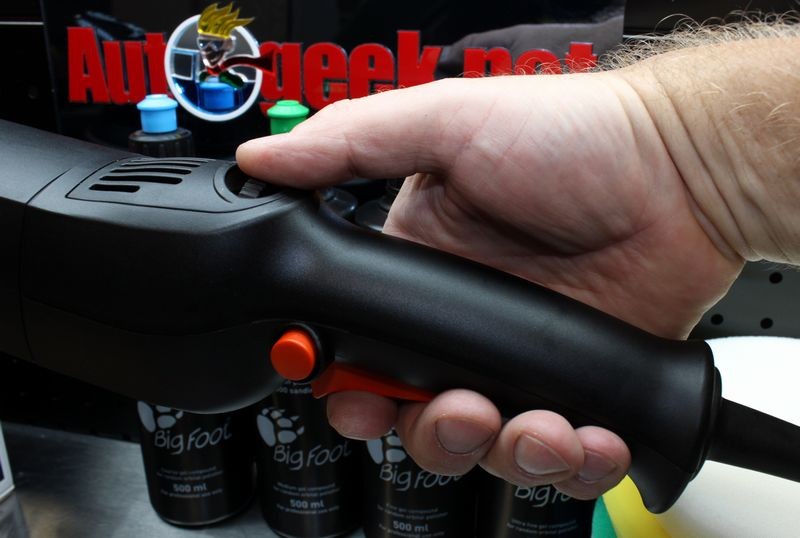
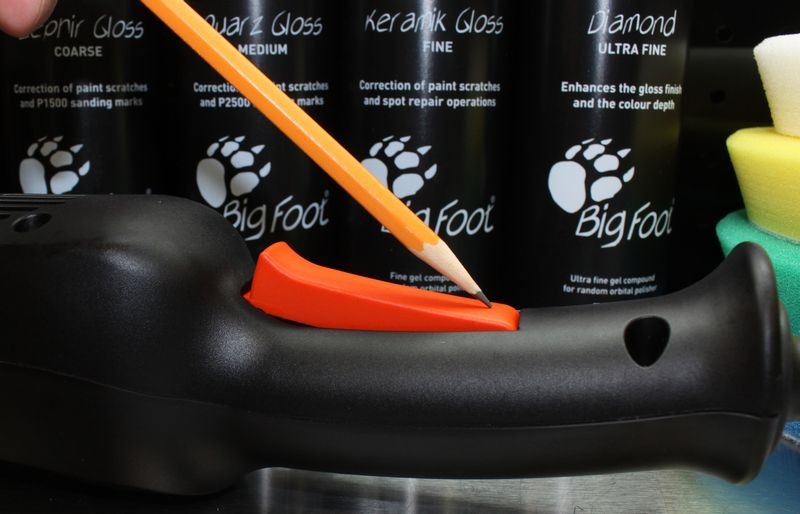
The rear handle is well thought-out with the variable speed dial placed on the top of the body so you can easily adjust the speed on the fly using your thumb. The trigger lever is located on the bottom of the ergo handle and there is a trigger lock button on the left hand side to lock the on/off trigger into place while operating the polisher.

Rupes_21_006.jpg


The pivot point or the trigger lever is reversed as compared to most polishers, instead of hinging or pivoting at the front it pivots at the rear of the lever.
Rupes_21_007.jpg


This design takes advantage of a person's normally strong grip and control of their index and leading fingers.
Rupes_21_008.jpg


The range of the variable speed dial runs from 1 to 6 with the 1 speed setting for low OPM's and the 6 speed setting for high OPM's.

Rupes_21_009.jpg


Rupes_21_010.jpg


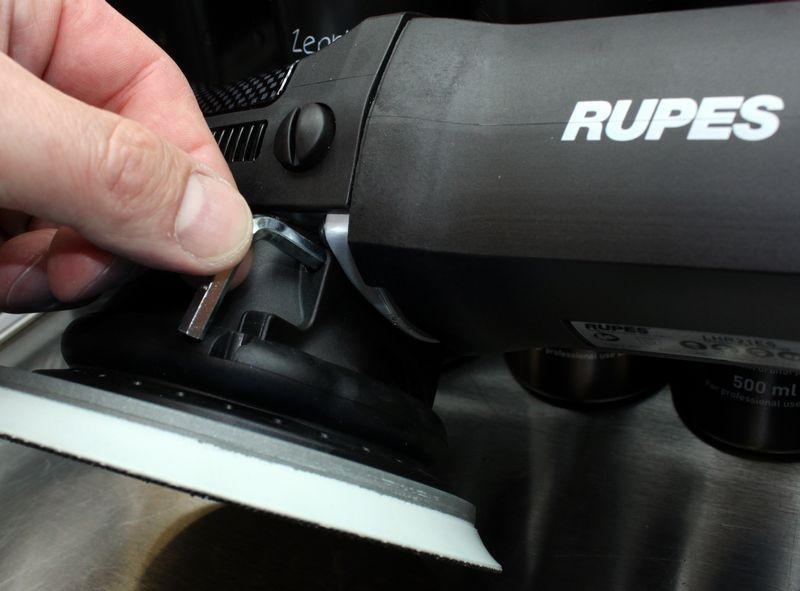
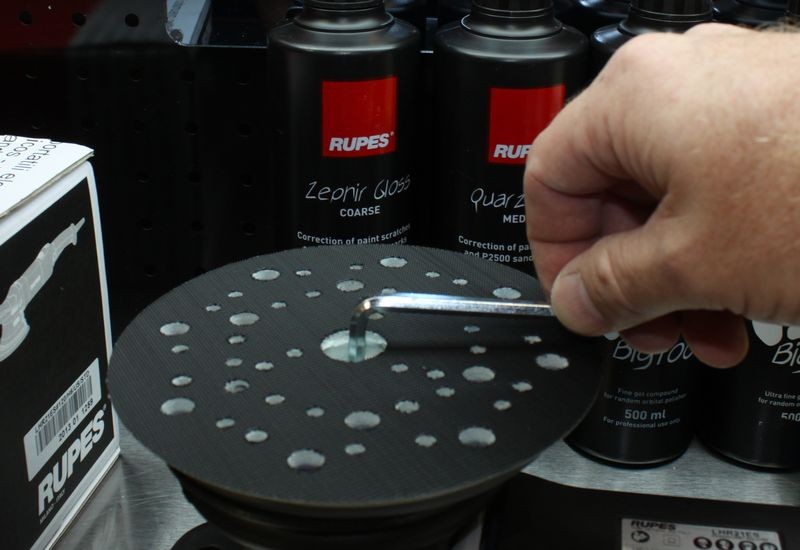
A hex key is included and stored onboard for removing and tightening the backing plate to the spindle.

Rupes_21_011.jpg


Rupes_21_012.jpg


There are 4 fresh air grille vents for air to travel through to control temperatures and keep the tool running cool.

Rupes_21_013.jpg


Rupes_21_014.jpg


Rupes_21_015.jpg


Rupes_21_016.jpg


:)
 
Continued...

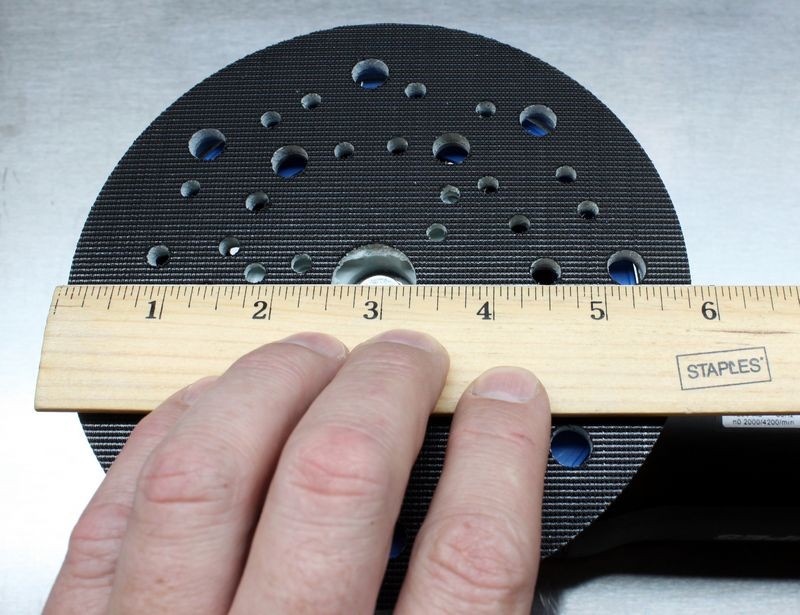
The 6" backing plate actually measure in at approximately 5 13/16" in diameter

Rupes_21_017.jpg


Rupes_21_018.jpg


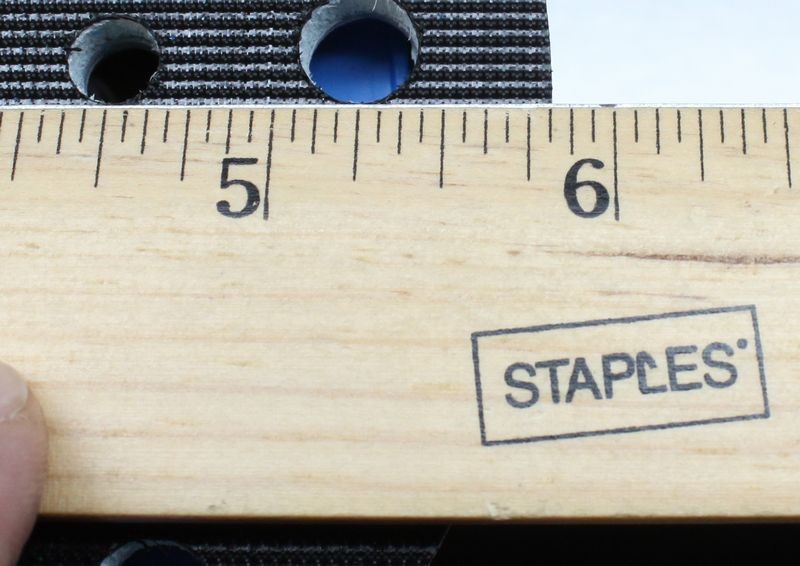
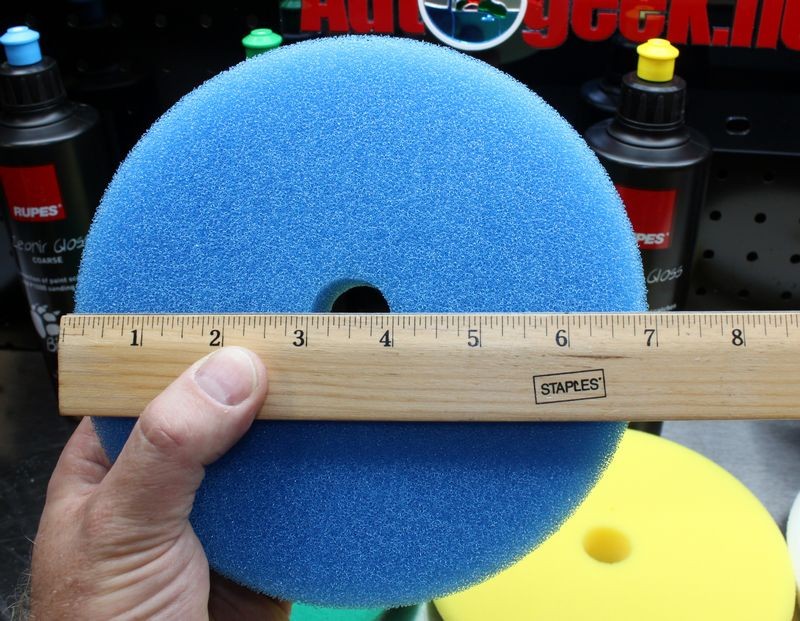
The face of the large foam buffing pads measures in at approximately 7" in diameter.

Rupes_21_021.jpg


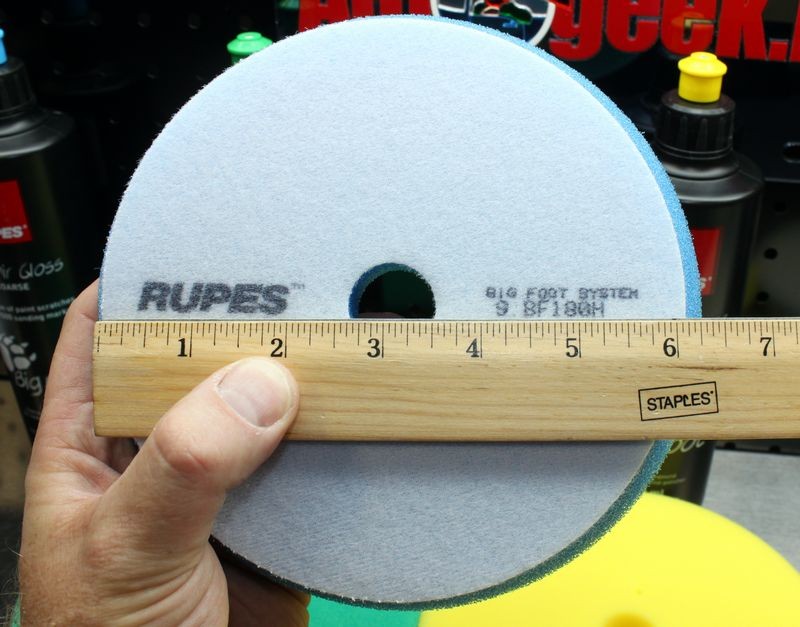
The hook-n-loop backing material on the back of the 7" foam pads measures in at approximately 6 1/4" in diameter.
Rupes_21_019.jpg


Rupes_21_020.jpg


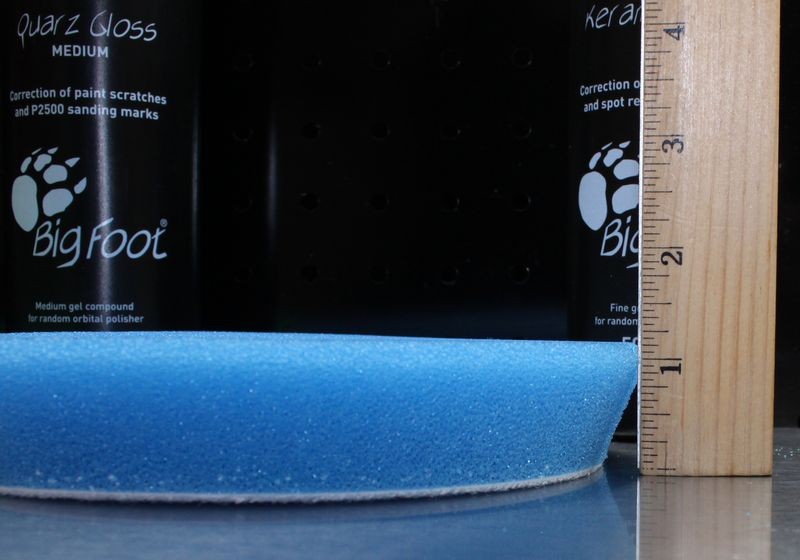
The 7" foam buffing pads are approximately 1 1/8" thick.

Rupes_21_022.jpg


When attaching the 7" foam buffing pads to the 6" backing plates you want to center the pads as best as you can for smooth operation. You should see about an 1/8" of hook-n-loop material surrounding the outer perimeter of the backing plate after attachment.
Rupes_21_023.jpg


Rupes_21_024.jpg


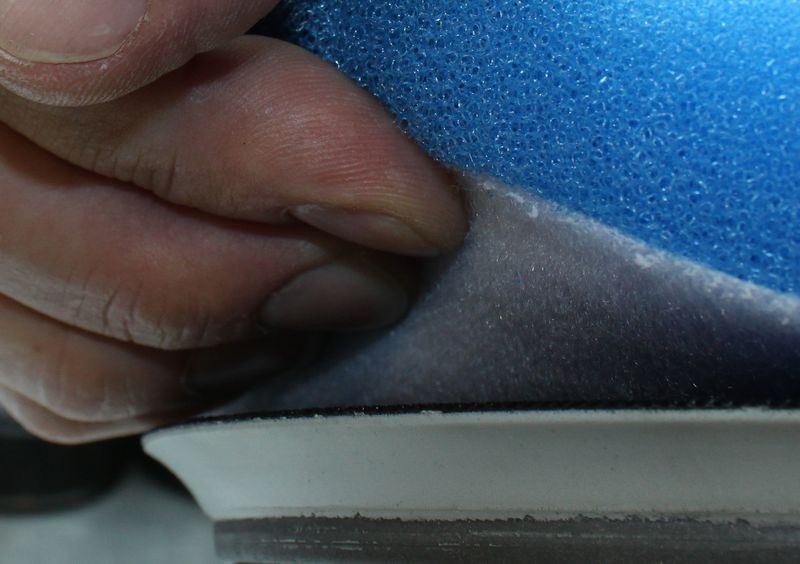
The RUPES hook-n-loop interface offers very strong attachment strength so when removing a pad from the backing plate be sure to work your fingers under the pad and then pull the hook-n-loop material off the backing plate firmly. Don't simply pull on the foam portion when removing pads. Also keep in mind that the hooks used for hook-n-loop interfaces can wear out over time decreasing attachment strength. Keep this in mind and when you notice the attachment strength wearing out, replace the backing plate. Autogeek stocks all replacement sizes for RUPES Polishers.

Rupes_21_025.jpg


Rupes_21_026.jpg


RUPES COMPLETE PAINT POLISHING SYSTEM

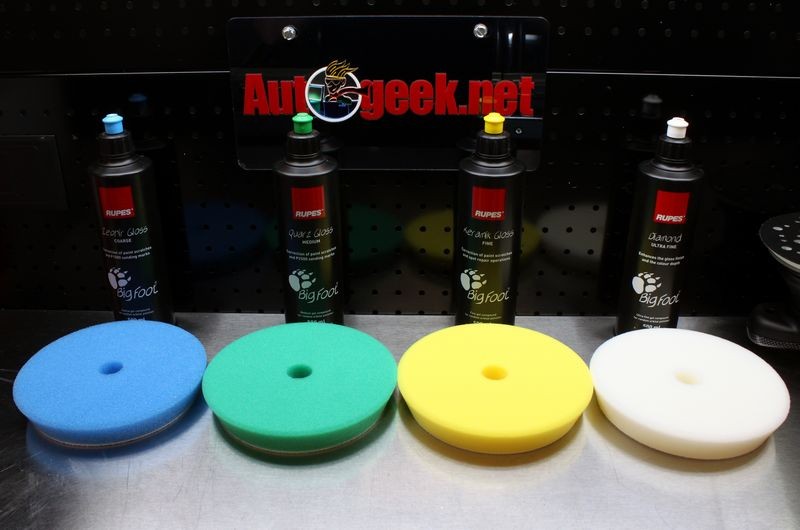
RUPES offers a complete polishing system to go with their polishers including 4 different liquid with color matching caps to go with forum different foam buffing pads offering different levels of aggressiveness or non-aggressiveness.

Rupes_21_027.jpg


Rupes_21_028.jpg


From the most to the least aggressive...

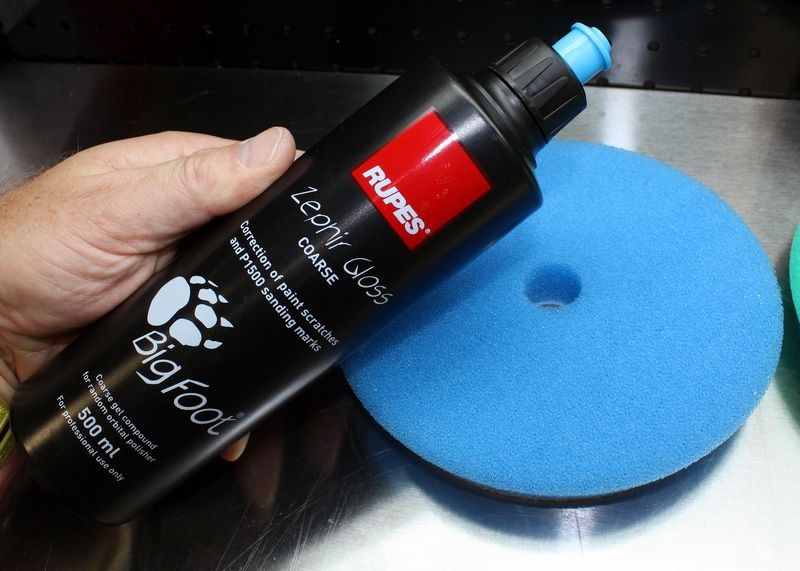
Zephir Gloss - Coarse Compound - Blue Lid & Blue Foam Pad
Zephir Gloss is engineered to be used with the aggressive blue foam cutting pad to remove deeper below surface paint defects while polishing out to a hologram-free finish. Zephir Gloss is aggressive enough to remove down to P1500 sanding marks.

Rupes_21_029.jpg


Quarz Gloss - Medium Cut Polish - Green Lid & Green Foam Pad
Quarz Gloss is engineered to be used with the medium aggressive green foam polishing pad to remove medium depth below surface paint defects while polishing out to a clear, high gloss finish. Quarz Gloss is aggressive enough to remove down to P2500 sanding marks.

Rupes_21_030.jpg


Keramik Gloss - Fine Cut Polish - Yellow Lid & Yellow Foam Pad
Keramik Gloss is engineered to be used with the soft yellow foam finishing pad to remove fine or shallow below surface paint defects while polishing out to an LSP-ready, flawless show room new finish.

Rupes_21_031.jpg


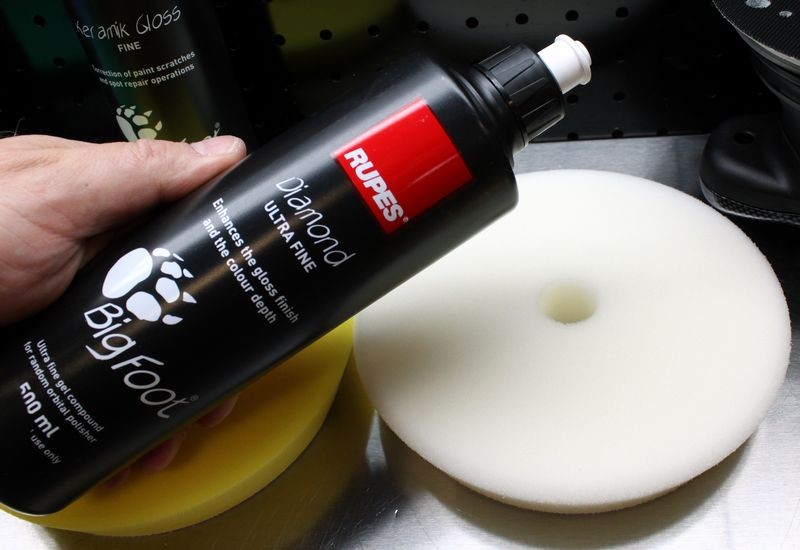
Diamond - Ultra Fine Cut Polish - White Lid & White Foam Pad
Diamond is engineered to be used with the ultra soft foam finishing pad to remove maximize gloss, clarity, depth and shine. Diamond Ultra Fine Cut Polish is an optional step for anyone looking to create a true show car finish.

Rupes_21_032.jpg


On Autogeek.net

Rupes LHR21ES Random Orbit Polisher

Rupes Zephir Gloss Coarse Gel Compound 500 ml.

Rupes Quarz Gloss Medium Gel Compound 500 ml.

Rupes Keramik Gloss Fine Gel Polish 500 ml.

Rupes Diamond Ultra Fine Gel Polish 500 ml.

RUPES Color Matched 7" Foam Buffing Pads

All RUPES Polishers, Pads and Polishes


:)
 
A few thoughts and comments...


What makes the RUPES LHR21ES Random Orbit Polisher different from similar random orbital polishers?

The RUPES LHR21ES Random Orbit Polisher offers a huge 21mm long orbit or stroke. This is huge, or more technically this stroke is dramatically longer than the 8mm orbit offered by tools like the Porter Cable 7424XP, Meguiar's G110v2 and Griot's Garage 6" DA Polishers.

This longer stroke working together with the RUPES engineered system of precisely matched abrasive compounds and polishes to matched foam pads gives you a polisher that has the ability to remove all types of below surface paint defects quickly and easily and do it without creating excessive heat to the surface or instilling holograms at the same time.


Another unique characteristic in the design of the long orbit stroke with the matched compounds, polishes and pads is the ability to remove below surface defects without the need for extreme downward pressure to the head of the polisher during the buffing procedure.

Most other random orbital polishers rely on firm downward pressure to engage the pad and the abrasives against the paint in order to effectively remove small particles of paint and thus remove the defects. Not so with the RUPES design.

With the RUPES Random Orbit Polisher, you truly let the machine do the work while all you have to do is guide it over the paint.


I've been buffing out cars all my life and teaching others how to machine polish paint with every type of polisher common to the body shop and car detailing industry and after using the RUPES polishers one time I was impressed.


Here's a few projects cars I've buffed out using the Rupes Polishers, more write-ups finished and to be posted soon...

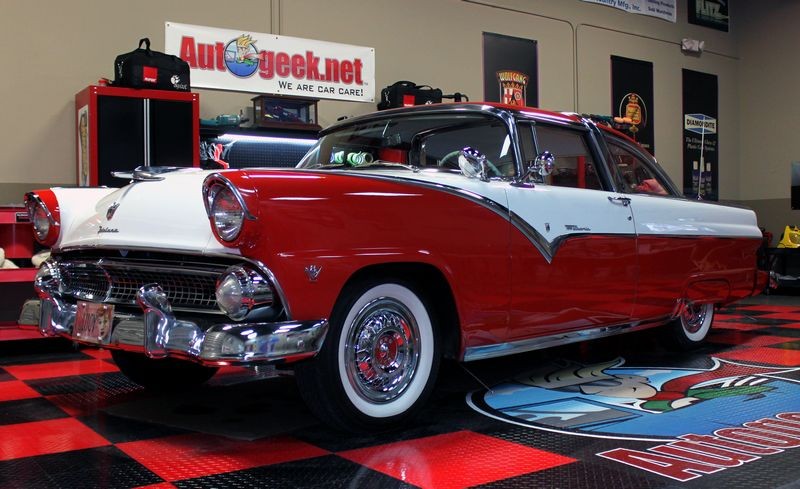
Rupes Polisher Time Lapse Video - 1955 Ford Crown Victoria
1955_Ford_Crown_Victoria_049.jpg


1987 Monte Carlo Extreme Makeover with Rupes and Blackfire BlackICE
1987_Monte_Carlo_053.jpg


1932 Ford Phaeton Roadster - Write-up shortly...

32_Ford_Video_02.jpg


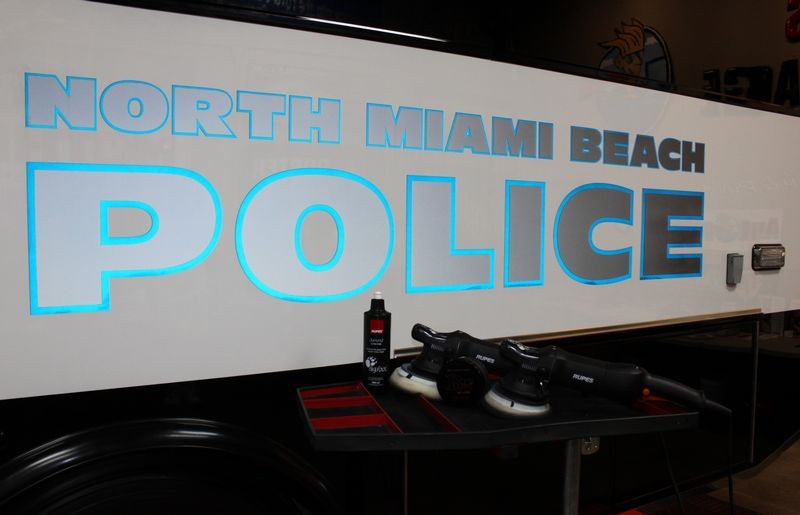
North Miami Beach Police Mobil Command Unit - Show Car Makeover
Police_Command_Van_025.jpg


Mystery Car #1
questionMark-background.jpg


:)
 
Another great class in the books. Well done gentlemen.


Thanks Mike...

I wish I had a count of how many classes I've taught in my life and how many people have taken my classes... sorry to say it's been too many over too many years to even try to count.


The Rupes segment of my class is one of the most popular now as the people that attend these classes tend to have read about these polisher but never held or used one.


Right now I'm working on just the right car for the class coming up in January of next year.


The first class is always a lot of fun as everyone attending will be some of the first people in the U.S. to test out many of the cool new tools, pads and products introduced at SEMA here at our garage.


:xyxthumbs:
 
Wow, outstanding write up as always. I am absolutely going to buy a Rupes polisher this Spring.
 
Another great informative right up Mike. I love my new Rupes polisher. This is my Black 2013 Genesis Coupe polished with Wolf's Medium/Jeweler combo and topped with BF Black Ice (courtesy of Meghan:kiss: )

 
I have promised myself to go this year!
What is the cost Mike?


The price of the classes for next year are $895.00 with a $100.00 store merchandise credit.


The classes just get better and better and the variety of products and tools keeps growing. I'm pretty sure my class in January will be the first detailing class in the U.S. that will be showcasing some of the new stuff coming onto the market.


:xyxthumbs:
 
I see a lot of people step up and plunk down the money for the class and gift card but can someone really learn everything they need in a single session? I'm not doubting the instructor and certainly not the Rupes machine, would never think of doing that but just asking? The reason I ask is because when we had our own little detail day I tried a number of machines and certainly didn't master anything in one day, seems to me this would take a couple weeks and a lot of hands on experience, not just one car one day. It would take time because you'd have to work on old paints, new paints, soft and hard paints, etc and this would take some time IMO, atleast to come out being compitent anyways.

I'm not bashing this class but simply asking a question or two.

Sent from my SPH-M930 using AG Online
 
For everyone reading this into the future...

To sign-up or get more information about the class, if you LOOK at the top of ANY "forum" page you'll see the below graphic,


This is an interactive graphic, by this I mean if you hover your mouse over it and >click< on it, you will be taken to the page where you can sign-up online or simply call

1-800-869-3011


The classes are held the same time every year and that's because we have people that fly in from around the country and from around the world to attend these classes.


Last weekend in January

First weekend in May

Last weekend in September


The first class for next year is already filling up fast, the dates are,

Saturday, January 25th

Saturday, January 26th


We're promoting these classes on My Classic Car next year as well as Velocity TV Channel.

Last year Marco D'Inca and one of his colleagues attended my May class incognito to get a feel for how I teach my classes as I think Marco told me they are going to try to duplicate these and offer some type of Rupes Detailing Classes in Italy.


VIP Guest Marco D'Inca from Rupes at Autogeek's Detailing Boot Camp Class

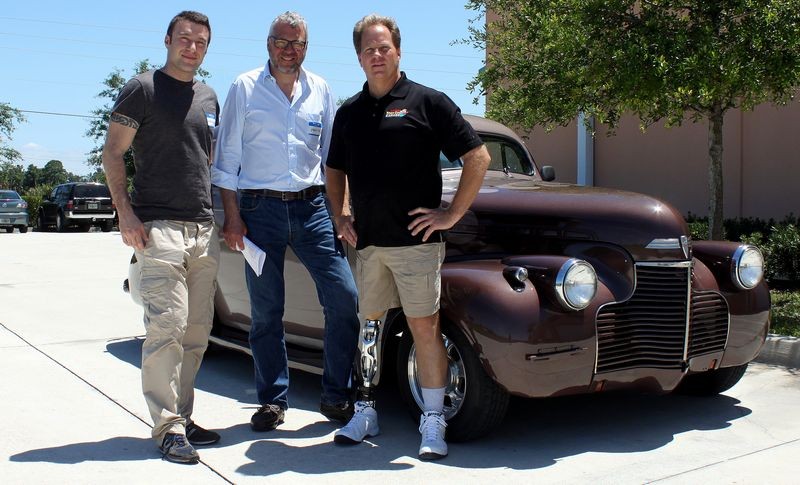
Here' s Marco D'Inca head of engineering for Rupes, he and his colleague Andreas and myself standing in front of the 1940 Chevy Sedan we also buffed out in the class when going over the Flex Power Tools.

Andrea_Marco_Mike_02.jpg


Marco buffing on a 1987 Buick Grand National
Marco is showing my students first hand how to use the Bigfoot 21 to remove swirls out of black paint. This was quite the honor to have this gentleman in my class walking the walk and these guys didn't even know who he was!

There's probably not a lot of 1987 Buick Grand Nationals in Italy to demonstrate the capabilities of the Bigfoot 21 Orbital Polisher.

Andrea_Marco_Mike_07.jpg


Andreas using the Flex with a 4" backing plate and a 5" Hybrid pad on a 1940 Chevy

He probably doesn't get this kind of opportunity in Italy very often. :D

Andrea_Marco_Mike_11.jpg


No other classes like our classes...
I always have incredible cars here to work on including a "normal" daily driver type transportation car as a portion of my class goes over the Meguiar's Microfiber DA Correction System for doing production detailing for guys that either already have a detailing business or are starting a detailing business.


People from all walks of life...
I always have a wide variety of people from all walks of life attend my classes, the three primary groups are,

Enthusiasts - "Car Guys" & "Car Gals" plus Weekend Warriors
These people understand that the paint on their toy is one of the most expensive components of their car. They read our forum and also understand that the clear layer of paint is thinner than a 3M Post-it Note. They don't want to pay someone else to work on their car as they don't want to risk having their car butchered by someone else and most important, they like the satisfaction that comes with knowing how to do it themselves. Believe it or not, this is the larges segment of people that attend my classes and they fly in from all over the country and the world and even from right down the road.


Detailers - Established and Newbies
Ether detailers that have been doing this 5, 10, 15, even 20 years or people that are either brand new to car detailing or toying with the idea of getting into detailing. I think the most common comments I get are from the guys that have been doing this for a long time and the most common comment I hear is,

"I found out today I've been doing it wrong all my life"


Body Shop Guys
These guys want to learn more about wetsanding and the newest sanding tools, newest compounds and newest rotary buffers and other tools for working on fresh paint.


Simply click to post #5 and read the first-hand testimonies from my last class and I can share even more from all my classes dating back to 2004 and if Mercedesshop.com forum had not been taken down I could share testimonies back to 2002.


The classes are not just educational... but a lot of fun...

Hope to see you here...

:xyxthumbs:
 
Build it and they will come...

Sent from my SPH-M930 using AG Online
 
Back
Top