Black Label Coating - Streaking -_-_- Follow with what now??

cardaddy

New member
Joined
Nov 20, 2012
Messages
3,937
Reaction score
0
Hi guys and you too Detail Kitty / Monica. ;)

Developed a problem today and I need a fix for it BEFORE 10:00 tomorrow morning.

We just finished up on coating a Jaguar Vanden Plas for a new client. (Nationwide Body Shop chain, that could end up providing some regular work.)

The car itself is really nothing special. Its been repainted on the left side, has 181,000 miles on it, and the hood and deck lid have also been repainted and or blended during this last visit to the body shop.

The owner evidently was insistent that this car has had (operative phrase) "has had" a coating installed, somewhere back in Missouri. And of course she doesn't know what it is/was and there is absolutely no evidence in the car that would show what product had been used such as certificates or holographic stickers etc. :dunno:


Long story short when they asked if I could apply a coating to this vehicle I said sure, and gave them a price. That was the day it had came out of the paint booth and still needed an extensive amount of work done to it.

I told the body shop manager at the time that the price was dependent upon them doing all of the color sanding, cutting and buffing, and final polishing as if they were going to deliver the vehicle to the customer.

This would assure that everything runs smoother, faster, and save both them (the Body Shop), and the insurance company, a great deal of money.

I mean sure if they wanted to hire us to do all of the work that the body shop can do and pay more for it, that's fine with me.

BUT.... It'll be much quicker for them to do the best possible job they know how, then hand it over to us for completion. After all, this is where we do "What We Do"! :)

Without getting into just how bad of a job they did prepping the vehicle prior to handing it over to us I need first to describe the problem I'm having because I need a solution to this ASAP!!!

We ended up doing a 2 stage compound & polish on the entire right side of the vehicle and roof. Plus a medium cut compound on the hood and trunk.... before any of the above could be polished. (All along however we were only supposed to be doing a light final polishing on the entire vehicle and then going over the entire thing with paint cleansing polish prior to applying the PBL coating.

It was delivered bright n early via a rollback last Saturday morning. After a quick snow foam (or two)and the breaking out of various Nanoskin pads of all shapes and sizes we were on our way.

By the time we went to bed Saturday night the right side was compounded with 101 along with the hood and roughest areas of the roof and the trunk lid.

Sunday afternoon rolls around and from there it was time to FINALLY GET TO POLISHING. :D (Remember, we were not supposed to have to compound anything what so ever!)

Polished the hood, roof along with both front fenders, and started into the doors.
Then before stopping for the evening we applied first round of PBL Paint Cleansing Polish. Typically we'll do the cleansing polish by hand, and remove it by hand.

So before turning in Sunday night we had the hood, both front fenders, the roof, and the trunk all coated! :)

Then of course Monday and Tuesday evenings were spent polishing the rest of the vehicle and applying PBL coating to that as well.

You may have noticed by now that I said "evenings" on more than one occasion. This is because I am currently fighting with an insane amount of pain with ruptured and herniated discs in my lumbar spine, which does not allow me to work AT ALL by myself.

Without my most amazing, beautiful, and hard working wife this job just simply would not have gotten done!!!!!

I'm not sure how much she actually enjoys detailing vehicles with me but I know that she doesn't hate it! :laughing: And I know we have a good time doing it. (As good as we can considering how bad I feel.)

And from where I'm lying down at (notice I did not say from where I'm standing) because as of late it is very VERY HARD for me to stand, and walk, MUCH LESS BENDING (at any degree what so ever) is all but impossible.

Anyhow, we finally get the Jag done and we get the coatng all done on it last night (Tuesday).

I had originally I told body shop that we had to keep it for the coating to cure without any moisture, for a minimum of 24 hours. Therefore they could pick it up either Wednesday afternoon late or early Thursday morning.

Having said everything that I've said thus far I'm finally getting to the point of this freaking thread!!!!!! :rolleyes:

This afternoon I pulled the car outside to give it its final dusting before calling them telling them to send a rollback for it.

I had previously picked up the Pinnacle Black Label booster / detailing / maintenance kit. So why not use either a few a little quick spritzes of the booster or Black Label detailing spray, right?

I mean after all this stuff is purpose made for the Black Label coating, it has a synergy doesn't it? That's what they told us after all, right?

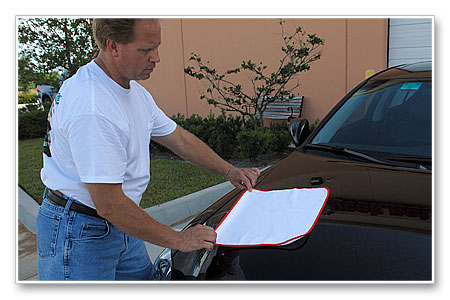
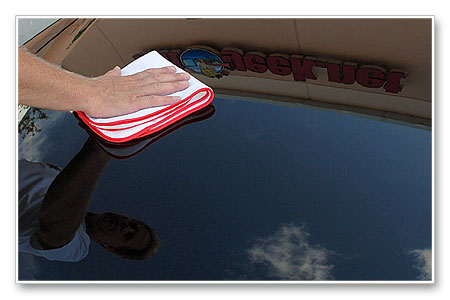
So the question is do you use an ever so slight amount of detailing spray on your favorite 700 GSM microfiber towel?

OR.....

What about a few spritzes of "booster" after all it does say that you can use it to boost your coating and achieve better gloss and shine and protection!

First WHAT I DON'T like!!!

So far with the exception of the shampoo all of the pinnacle black label products spray when you press the button or pull the trigger. There is some sort of atomization of product going on and results in a spray. (That is a GOOD thing, so to speak.)

With the exception of spraying in the wind where you end up losing anywhere from a small amount to most all of what you're trying spray. ;)

The Black Label detailing spray is a very fine mist very very fine spray but it does spray and it is perfect for spraying on your favorite microfiber towel and then apply applying to the surface of your vehicle.

The pinnacle Black Label coating booster however was quite a shock. It does not spray, instead it squirts! It squirts a rather narrow beam like a squirt gun which tends to splatter all over the place when you're trying to say spray the roof and not get it all over the sunroof, or spray the hood and not get it all over the windshield!

OTOH if you are spraying it onto an applicator and then applying it as you would a a coating then you don't have to worry so much about losing product into the four winds. ;)

However I still digress. :)

After we figured out which one squirted and which one misted we decided to use a plush 700 GSM towel and dust the car prior to pulling it out into the sunshine.

Inside our detailing space we have fluorescent lighting, we have high output fluorescent lighting, we have halogen lighting, we have hi output LED lighting, we have incandescent lighting,we have led inspection lights, we have xenon lighting....... basically there is no shortage of lighting!

Once we pulled this beautiful black Jaguar out into the Sun today however we (my son and I) almost became suicidal!

We don't know if it was the booster or if it was the detail spray but something has caused this thing to streak like nobody's business!!!!

I'm not sure that it is the product needing leveling because the 1st of the product was put on Sunday and we never noticed any of these problems.

It seems to be more of an interaction between either the booster or the detailing spray. :dunno:

FWIW I don't use the yellow foam applicator because it seems a bit 'thirsty' ;) so I use the typical suede microfiber method. And this is the first time that I've ever experienced streaking like this with this product.

BTW This Jag isn't solid black, it's a VERY FINE metallic. From arms length you cannot tell that it's metallic. Literally, you have to get right up on it to tell that its not a solid color.

So any ideas as to what is causing this streaking as bad as it is?

I had to pull it back inside to do anything else to it because it is so cold outside that no liquids will dry on the surface.

ONR? (With or without 'wax')?
Megs Ultimate Detailing Spray?
Megs D156?
DG 951?
Yet another shot at Black Label Detailing Spray?
Black Label paint cleansing polish?
Pinnacle paint cleansing lotion ?

This one falls under " #HELP " :laughing:

I have got to deliver this car in the morning before it starts raining! (And or sleeting and snowing AGAIN!!!!!)

(Did speak with Brian this evening and hopefully Nick will have an answer early tomorrow.)

Guess we'll see, huh?!?!?! ;)


Sent from my SAMSUNG-SGH-I337 using AG Online
 
Was this Coating applied to any of the vehicle's re-spray, before it had time to complete it's solvents' "outgassing/curing?

Bob
 
I'm no authority, but let me ask, did you try just another wipe down with just a clean dry MF Towel? Could it be high spots that weren't properly leveled?

I know this is probably a dumb response, and fully reading what you wrote, you state that all looked perfect prior to the booster-detailer being used, and with the ample lighting, one would believe you would've seen such anomalies right away?

I have had the same exact thoughts as FUNX725 also had though, that why would a person coat, or even use any wax, or sealant that soon after paint work being done?

I would think that even after sitting in a booth baking, that time still must be allowed for further paint curing?

Perhaps all that should've been done was the compounding, polishing, and then only a glaze like Megs #7 after?

Wish I could be of more help.
Mark
 
The only other guess was to not use anything so soon after the coating was applied? Again, I'm drawing straws here, and I assume that there's no explicit directions, or cautions about this with the GL Booster, or Detailing product?
 
From reading your post, and my knowledge of streaking, it sounds like its a post-coating problem. Meaning its either the booster or the detailer. You may have used too much of either or both. You mentioned a stream from the booster, this may have led to using too much product. Are you sure you had the trigger turned to the proper spray setting?

Also, did you spray the detailer onto the paint or onto the mf? I'm guessing directly on the paint is the better choice.

My suggestion is try a dry wipedown, if no luck, try another go with the detailer. If still no luck, maybe give a waterless wash a try on the problem areas.

Since you mentioned not seeing it after the coating cured, i don't suspect high spots.

Good luck!
 
Before the 30 day cure time?
YES! (Yet PBL claims to be able to be applied with water born paint systems as they both have some of their own "off gassing" going on. ) Somewhere I read an article to that effect as well. :dunno:

The car is a 2000 model, and the paint job is a mix of new bc/cc and blended cc over old bc. Plus the right side is original. BOY WAS IT ORIGINAL!!!!!!!! :eek:

Given my choice it'd have been a decent buff-n-polish with a sealant (at best).
But the owner has been jumping up and down with the insurance company (the one with a gecco as their mascot) ;) something AWEFUL about how she had a "coating" on her car and if you were a fly on the wall it'd probably sound like; "You be gonna PAY for me to get dat paint pro-texion like what I had!"

So to both call her bluff and placate her they found a price they can live with. I do know had it been 2 other shops in town that what I did for $800 (after discounts) would have easily been twice that.

What threw me is the OLD PAINT side smeared as well.

It just has to be something with the booster and PBL QD. My son was dusting it with the QD AND A 700gsm towel. (By spraying on the towel first. )

Then he picked up the bottle (that he THOUGHT was QD) and sprayed the towel. Except that one was solid, wet, squirts!

Heck, right now I have no freaking idea. Tried ONR, but it was so cold nothing would dry on the surface.

Tried DI water same thing, its so cold that nothing dries, plus DI has zero lubricity in it whatsoever!:eek:

I can tell you this: I would bet my entire free that there never was..... ONE DROP of coating on this car. People that spring for a coating tend to keep their cars up. This puppy has so many markings on my VIF that you can't even read them all. :laughing:

And I didn't even TOUCH the interior! (Falling headliner and all.):rolleyes:

It's a shame that my sons 98 4 runner 2 wheel drive Limited that cost less than 1/3 of what this car did in 2000 is now worth more then this car is! (Considering it has 181,000 miles on it. ) literally spent 10%+ of the value on buffing the paint.

Sent from my SAMSUNG-SGH-I337 using AG Online
 
The pinnacle Black Label coating booster however was quite a shock.

It does not spray, instead it squirts! It squirts a rather narrow beam like a squirt gun which tends to splatter all over the place when you're trying to say spray the roof and not get it all over the sunroof, or spray the hood and not get it all over the windshield!


Really?

I have NEVER had one of these sprayers squirt like a squirt gun, only spray out a fine atomized mist.

After reading your above statement I went out to the warehouse, grabbed a brand new bottle of the detailer and the booster, shook them well, pushed the lever to the >on< position, gave the trigger on both a healthy pull and both products atomized the liquid like normal.

Call Nick this morning and cite this thread, (I'll have already sent him the link to it), and he'll send you either a new sprayer or a replacement bottle of product.


So any ideas as to what is causing this streaking as bad as it is?


Real simple... a streak or a dark patch is nothing more than excess product not removed.

Think about it.... if the paint looks normal in some areas but other areas are darker, what could be the difference between the paint in these two areas? The difference is trace residue not removed.

I would first to simply give the area a slow wipe with a plush soft microfiber towel. Like I describe here,


The Final Wipe – Tips for creating a streak-free, show car finish


Note: The final wiping technique is not for the initial wiping-off of the wax or paint sealant, but instead is for after the majority of product has been already been removed and now all you’re doing is giving the finish a final wipe.


Turning a diamond in the rough into a glistening gemstone
You started early in the morning by washing the car, then you clayed the paint, then removed all the swirls and scratches, then polished the finish to a super high gloss and after that you applied your favorite wax or paint sealant. You’ve taken a diamond in the rough and turned it into a glistening gemstone. After removing the wax or the paint sealant it’s time to give the paint one last final wipe to remove any trace residues and showcase all your hard work.

Here’s a tip to help you insure there are no streaks or smears left on the paint and a technique that on some hard to work on paints that might be just the ticket for creating the perfect finish in any lighting condition.

The Final Wipe
After all the work is done, when it’s time to give the paint the final wipe-down before you stand back and say to yourself it is finished, and then you take your pride and joy for a spin around the block or turn the keys back over to the owner, you usually want and need to give the paint a final wipe-down to insure you didn’t miss any spots and to remove any trace residues off the paint that can stand out like a sore thumb in the right light at the right angle that will so easily distract everyone’s attention from the work of art you’ve created.

This technique can often times help you to remove any stubborn streaks or uneven looking areas on the paint, and it’s exactly opposite of what I’ve often seen enthusiasts and detailers do my entire car detailing life.


The Technique
The technique is to wipe the paint down slowly using your best, premium quality microfiber polishing cloth using gentle, even pressure. Fold your polishing cloth 4-ways to provide plenty of cushion to help spread out the pressure from your hand as best as you can over the face of the folded microfiber.

Fold your microfiber polishing cloth to create plenty of cushion to help spread out the pressure from your hand and to give you 8 dedicated wiping sides.
detail-193.jpg


detail-194.jpg


detail-195.jpg


detail-196.jpg


The secret to this technique is purposefully moving your hand and wiping cloth s-l-o-w-l-y over the paint, not like a spastic crazy guy moving his hand at light-speed over the surface.
detail-197.jpg


How it works
The way this works is really quite simple but let me break it down for you into simple terms so everyone can understand. When making the final wipe, your job is to remove all trace residues from the previously applied wax or paint sealant; that’s your job. While to the human eye the surface of your car’s paint looks smooth and flat, under a microscope it’s actually a landscape of hills and valleys, (which is high spots and low spots), as well as pits and pores and interstices. (Interstices = microscopic gaps and cracks in the paint)

Trace residues remain in the lower imperfections on the surface and when you move a polishing cloth over the surface the fiber’s of the polishing cloth grab onto and removes residues off the high points the easiest. Again, your job is to remove all the trace residues and do it in such a way that you do no harm to the highly polished surface at the same time, thus you need to use a premium quality microfiber, folded 4-ways to help spread out the pressure of your hand.

Now think about it, if you’re moving the microfiber quickly over the surface how much time do the residues on the surface have to transfer to the cloth? Seconds? Milliseconds? That’s not very long.

That’s why wiping like a mad man won’t remove streaks or residues and could possibly inflict swirls and scratches back into the finish.

Slow down to speed up
Instead, how about moving the polishing cloth slowly over the surface and enabling the microscopic sized fibers to get into the low portions where once they make contact with any remaining wax or polymers, the residue will have time to transfer from the paint to the cloth?

This is called the final wiping technique and most people would agree it makes sense. It also works most of the time for stubborn streaks that sometimes show up on dark colored paints but it’s also just a good technique when working on highly polished surfaces where your or your customer’s expectations are high.


If you’ve ever spent upwards of 8 hours and/or longer polishing out the paint to perfection on your car, or a customer’s car then you know how much work goes into,
  • Washing the car.
  • Evaluating the surface.
  • Claying the paint.
  • Taping off trim, body lines, emblems and badges as well as hard, thin edges.
  • Removing swirls, scratches and other paint imperfections.
  • Polishing the paint to a high gloss.
  • Applying the wax or paint sealant.
  • Removing the tape and carefully wiping off any left-over residues around body lines and trim.
  • Removing the first and subsequent coats of wax or paint sealant.
Now it’s time for the final wipe and the last thing you want is to do anything that could potentially instill any new swirls or scratches into the now pristine finish.

That’s why as you progress through the process, after each step you have to be more and more careful when wiping off any compounds or polishes and usually as you progress through the process the quality of your wiping cloth increases along with your carefulness as that’s how show car finishes are achieved. You can’t just wipe with any old towel and do it in any old way. Show car work demands focusing on the task at hand and using your best skills and your best tools to reach the goal of a flawless show car finish.

Rushing at the very end doesn’t make sense and if you instill swirls and scratches because you’re wiping off the car like a lunatic or not using your best quality polishing cloths, then that’s working backwards in the process.

Simply put, sometimes you have to slow down to speed up.

That is, sometimes using a slow wiping motion, or slow rate of travel, will be more effective at removing all trace residues and enable to reach your goal versus moving your hand and polishing cloth quickly over the paint. Sure at the end of the process you’re tired and ready to clean-up and be done with the car but the technique you use for your final wipe-down of the paint needs to be calculated, methodical and precise. And after you make the final pass and you lift your hand and polishing cloth off the paint you can stand back and admire your work and then say, “It is finished”.


*****End of article*****


If the above final wipe moving the towel very slowly over the surface does not remove the excess residues then at least you know the residues have a tight or strong bond to the paint.


Next I would try misting the detailer onto one side of a clean microfiber towel and then repeating the slow wipe.

Let me know if any of the above helps...

I too have seen streaks with the coatings, not the detailer or the booster but I have seen streaks all my life with just about any LSP. It's just a visible sign of un-removed product.

:)
 
Having just played with both the PBL booster and the detailer this week, I have some thoughts.

My booster bottle did squirt over time, but it was because of a white build-up on the nozzle (I'm assuming this is the nano-silica magic that is just too awesome for earth's atmosphere). After wiping off the build-up from the nozzle, it atomized great.

I also found that applying PBL booster by spraying on a panel and wiping with a towel was hit or miss in cold temps with cold panels (like at or below freezing). It was leaving a lot of high spots right where it was sprayed on the panel and where the towel was initially applied to the paint. These high spots took a little passion to remove. Applying directly to a yellow foam applicator and wiping on yielded the best results for me. It sounds like you are not a fan of yellow applicators, but that may be a better option if the towel isn't working for you with PBL booster.

The PBL detailer has given me no streaking in cold temps on cold panels. Areas that were applied heavy buffed off easily if they were addressed immediately.

I'm thinking this is the booster streaking. Maybe Mike/Nick know the best way to remove excess PBL booster (another coat or just hit it with the PBL detailer?)

Are too I think this has more to do list the incompatibility off the booster nozzle and the Earth's atmosphere!

After bringing it in last night and letting it bake for a number of hours underneath a multitude of various lighting paraphernalia it seems to have helped with any high spots that may or may not have been related to lack of product drying correctly.

FWIW We always use the yellow foam applicator that comes with the kits for the glass coating.

Although I still feel that it applies to much product on painted surfaces, ( or at least it certainly absorbs more product then my tried and true suede microfiber applicators. ;)

With rain on the way again this morning we pulled it back outside along with the plethora of lights that seem to follow this car everywhere ( by now our neighbors must think we're nuts)! :laughing:

There we're actually only about 3 high spots remaining. Which were taken care of with a few carefully placed spritzes of PBL QD Spray.

As for the booster spitting and squirting that problem still remains. And when taking into context how bad it looked yesterday afternoon it had to have been the combination of both QD Spray and a MASSIVE overload of product on the towel from the "booster".

Now if I can only get a roll back here in time to get this car delivered back to the body shop before it freaking rains on it! :eek:


Sent from my SAMSUNG-SGH-I337 using AG Online
 
Having just played with both the PBL booster and the detailer this week, I have some thoughts.

My booster bottle did squirt over time, but it was because of a white build-up on the nozzle (I'm assuming this is the nano-silica magic that is just too awesome for earth's atmosphere). After wiping off the build-up from the nozzle, it atomized great.


Thanks for sharing the above. I have not seen any kind of build-up on the outside of the nozzle, at least not as of yet. I do keep all our products in our very nice garage or warehouse where the climate is controlled. I also have a tendency to wipe the bottles down as I take pictures of them in my write-ups, so it could be I'm cleaning them without even looking at them.

I'll try to take note in the future.


I'm thinking this is the booster streaking. Maybe Mike/Nick know the best way to remove excess PBL booster (another coat or just hit it with the PBL detailer?)


Hard to say... one thing, it's kind of a sign of some real "stuff" in the bottle.


As I posted previously, I have seen some streaking and dark patches but nothing a soft wipe has not overcome. Could be our shop environment?

I have a black Tahoe tomorrow and I'm planning on coating it so I'll pay close attention to the surface at the end of the project.


:)
 
Thanks for sharing the above. I have not seen any kind of build-up on the outside of the nozzle, at least not as of yet. I do keep all our products in our very nice garage or warehouse where the climate is controlled. I also have a tendency to wipe the bottles down as I take pictures of them in my write-ups, so it could be I'm cleaning them without even looking at them.

I'll try to take note in the future.


Hard to say... one thing, it's kind of a sign of some real "stuff" in the bottle.


As I posted previously, I have seen some streaking and dark patches but nothing a soft wipe has not overcome. Could be our shop environment?

I have a black Tahoe tomorrow and I'm planning on coating it so I'll pay close attention to the surface at the end of the project.


:)

Both of my issues may have been related to environment. I was pushing this stuff the the environmental limit - near freezing temps and very high humidity in a car wash bay.

Here's a pick of the build-up. It initially started squirting after doing about 1.5 mid-size cars, then I cleaned the nozzle. This amount of build up is from doing 1/2 a car at near freezing temps.

picture.php
 
I really think car care companies should invest more time in there application practicality. Not all detailing companies have the luxury to work in perfect climate controlled environments. I would not mind paying more for a product that can have the same application results weather it is warm,cold, humid, whatever. While some people on this forum have the luxury of living in warm weather climates, I myself live in Ohio where we get just about every type of climate change. I do struggle with products and I have to learn how to deal with it.
 
I really think car care companies should invest more time in there application practicality. Not all detailing companies have the luxury to work in perfect climate controlled environments. I would not mind paying more for a product that can have the same application results weather it is warm,cold, humid, whatever. While some people on this forum have the luxury of living in warm weather climates, I myself live in Ohio where we get just about every type of climate change. I do struggle with products and I have to learn how to deal with it.

Not to pick on your post Wes but the utopia of "fool proof" application does not.... and will never exist. This could potentially be a market killer. They capitalize on our desire to find "the next best thing", and we capitalize (in detailing) at being able to identify those environmental subtleties which may interfere with the expected end result.

It goes without saying that car care companies would leap at R&D if the mass wanted the product (or if they had enough liabilities with their products). I am sad to say it but our desire for perfection (at all costs) puts us in a minority. The mass wants easy and cheap... regardless of the perfection. We want perfection made easy, regardless of the cost. Again something that sets us in a minority.

Isn't that the truth.........
 
From what I seem to understand about either the DP Paint Coating-Pinnacle GL Paint Coating (and probably holds true with every other make of Paint Coating also), is that like WOWA, or WOWO Sealants, there is of course a cure time involved.

Some seem to say a period of between 8-12 hours before a Coating should be subjected to washings, or wet weather.

Now, and in regards of what I briefly touched upon earlier in this thread, wouldn't such might also possibly hold true for topping such Coatings, regardless what they are, or who they are made by, including Pinnacle's own Coating Booster, and Detailer?

Certainly not looking for any proprietary make up of a list of ingredients in either of these products, but might they have water as one ingredient?

I believe I have read that although these Coatings and others have an initial cure time period, I can also seem to remember that these Coatings also have a much longer total-full cure time period.

I myself probably have never seen a need to apply something immediately after these coatings, as I have used the DP Coating, but this isn't to say that I could possibly do such in the future, and the question then is, "is this unwise, and does it go against proper application techniques with these Coatings"?

If so, then perhaps we need some futher education and enlightenment with the proper useage of such products.
Mark
 
Technically all products have a cure time (ie. enough time for the solvents to dissipate and/or for the chemical bonding to occur). Some have more flash time requirements than other, and some requirement longer cure time between layers (due to possibility interaction between the solvents and the LSP), and some have even longer cure times based on the chemical bonding (such as in coatings).

As far as it was explained to me (and through some limited non-scientific testing of my own), coatings require a minimum of 12 hrs away from being exposed to water, should not be washed for 1 week, and should be fully cured by 30 days (obvious environmental factors may lengthen the process). The actual protection does start day 1, however maximum resiliency of the product does require a 30 day wait period (unless you can accelerate the process using IR lamps).

Being a PBL convert, I can say that my experience with their coatings has been great. I did try the detailers (and reviewed it) and am not 100% convinced but will re-evaluate and report later. I cannot wait to try their booster. The coating was applied to my Raptor and was exposed to torrential rain shortly after the 12 hrs cure time and almost 4 weeks later, it performs like a champ.

One more thing to say about PBL coatings is that they are advertised as being able to receive a "topper" so if you desire a different look (for a car show) you have the ability to layer your favorite LSP.
 
Thanks for sharing the above. I have not seen any kind of build-up on the outside of the nozzle, at least not as of yet. I do keep all our products in our very nice garage or warehouse where the climate is controlled. I also have a tendency to wipe the bottles down as I take pictures of them in my write-ups, so it could be I'm cleaning them without even looking at them.

I'll try to take note in the future.


Hard to say... one thing, it's kind of a sign of some real "stuff" in the bottle.


As I posted previously, I have seen some streaking and dark patches but nothing a soft wipe has not overcome. Could be our shop environment?

I have a black Tahoe tomorrow and I'm planning on coating it so I'll pay close attention to the surface at the end of the project.


:)

Mike I made a short (low res) video that I can e-mail you of the booster spitting / shooting a stream. I can email it to you so you can see what was happening.

The streaking/smearing went away after warming up the surface and baking a bit till the wee hours this morning.

We first tried PBL detailing spray, then ONR, (both types) even a small area with Megs QD Spray on a plush towel.

The conclusion that we came to was it seemed to have been a mixture of the PBL detailing spray AND THE. booster on the same 700gsm towel. My son had been dusting it off with the QD then picked up the booster and it put big wet spots on the towel.

It seems that the booster didn't want to flash, especially on the 2 day old coating AND it being in the low 40's (where we rolled it outside for pickup).

After spending the night inside the garage with the heater on, and the lights there was only a very small area on one front fender that we had left this morning to wipe off.

My wife was so worried about it that she called in late for work this morning! She wasn't going anywhere until she knew the car was perfect!

That's my GIRL!!!


Sent from my SAMSUNG-SGH-I337 using AG Online
 
O-Tay then. :rolleyes:

First, I wanted to give a shout out to Nick@Autogeek (of course) ;) for sending me another bottle of booster.

What started as a dust off session turned to mass panic, thankfully the delivery date was based on my flexibility, not the body shops. :xyxthumbs: (Considering they had it for a week after it came out of paint, yet they contacted me to do it the day it WENT INTO paint.)

Obviously the 'flashing' and workability of the PBL coating has been 'dumbed down' to a level that works for a much wider group than say two other well known "pro" products. That alone however doesn't mean that it'll perform flawlessly under what we would consider "extreme" conditions of weather/heat/cold/humidity. After all, there has to be (for lack of a better phrase) "structural integrity" of sufficient strength and durability to make the product both work, but live up to at the very least a minimum standard of durability. And from what I've seen thus far it delivers especially well for the price of admission. Albeit with all the work that goes into prepping a 'less than new' vehicle for a coating I might just as well use the more expensive product.

That aside, there does seem to be a closer relationship with the "booster" and the "coating" in how they lay down. :doh: They do both obviously flash. Enough so that I bet when it's 90° in the shade, and the coating has been there for 48 hours I'm betting a second 'layer' (of sorts) could be made using the booster, INSTEAD of another layer of "coating". :dunno:

I will admit that once I realized my son had picked up the booster and it had saturated the 700 gsm towel he was using, and saw it was a sort of "flashing/streaking" going on that I tried applying it directly to the paint on a panel to see if it'd be 'fixable'.
(It was at that time I also found out it was squirting rather than misting.) :nomore:

We are just lucky that I had a garage to pull it back into and start cleaning it off, heating it up, and working through the "process" for another 18 hours!

I'll see about some photos for another thread. Although this one was really hard because I've been fighting with a herniated/ruptured disc now for several months. It started acting up fairly bad back in the summer at Jean-Claude's place and has been getting progressively worse since. I've been using two crutches and/or a walker to get around for a month now. :cry: Just supervising the Jag was more than I was physically up to, but we do what we have to do. I'd like to say it was the easiest $850 I ever made but considering it wasn't supposed to need ANY compounding, and how bad I was hurting just supervising.... I just dunno' on that one. :dunno:

I have a seated MRI Sunday and a CT myelography Tuesday hoping they'll hurry up and cut me, cut me deep, and cut me with a freaking CHAINSAW if it'll help! Because about now, they don't make enough morphine to help this mess. :eek:

Another story on streaking:

I've seen similar "streaking" when applying a topper to a WOWO type sealant. Especially so when it is during the spring or fall and the temps are below 45°~50°. I had a friend last March where we did his wife's Lexus (dark metallic blue) and he was rushing so I could barely get M21 on the surface before he was wiping it off. I had to go back and put it on again and DARE HIM to remove it. Once it sat for 30 minutes or so he was going NUTS (again in the ever present hurry, but nowhere to go but get more coffee) although by then I agreed to let him wipe it down. I actually have photos of him with a towel in one hand and a coffee cup in the other, for HOURS he was like that!

I had told him the day before that, that if he really wanted it to "pop" that the next day we could put M26 on it. Thing is we didn't get to finishing the car the first day because it turned into a 2-stage correction, AND he kept wanting to quit. Get it clayed, he thought it was time to quit. Get it compounded, he thought it was time to quit. Get it polished, again.... time to quit. :eek:

Fast forward, Sunday morning I finished buffing it and managed to get the M21 on it. No sooner did it get wiped off and he had gone and grabbed the M26 and was spreading it on the other side of the car! I mean GOOD LORD!!!!!! The sealant (at first) had only been on a matter of SECONDS before he was wiping it off. Then it was on about 30 minutes and he started wiping. BUT putting M26 (liquid) on it made it streak to high heaven! Although..... if you know Mike like I know Mike (I've known him since high school) then you know he wasn't looking to begin with. :laughing: I pulled out a 700 gsm towel and gave it a few more wipes and told him to pull it in the garage. His wife was out of town on business and didn't see it for two more days, by which time it was cured and good to go. :props:
 
Back
Top