Above you stated that after using SwirlX once the paint looks the way I want it to that I don't have to use a polishing pad with some polish.
Do a Test Spot using the white polishing pad with the SwirlX, if after you buff for 4-6 section passes to a small area and the wipe off the residue and inspect the paint looks good, that is it meets your expectations, then you can go right to your choice of wax or paint sealant. SwirlX finishes out very nicely on most paints with a polishing pad so there's no further steps you need to do before applying your choice of LSP.
According to that if I use an orange pad I'll then have to follow it up with a white pad.
Key word in what you wrote is
if
If you use the Orange cutting pad with the SwirlX or any chemical then yes, you'll probably have to re-polish each square inch using a polishing pad.
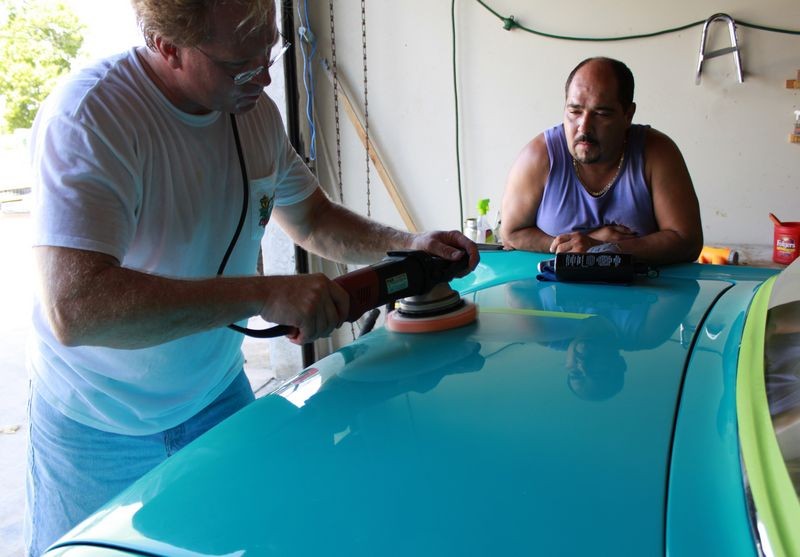
If I'm being a pest and am making more of this than I should then I apologize, but using what I've already got, a 7424XP with white and orange Lake Country pads, what should my protocol be? You said to start with the white pad, then if I'm not satisfied or an not achieving the finish I want to move onto an orange pad.
Yeah I guess I shouldn't have assumed you would know to follow a cutting pad with a polishing pad. Sorry...
What do I do if I decide to go orange? Will that pad leave behind marring if done properly?
Every paint system polishes out differently, for years I've been typing this, it kind of makes sense,
"You don't know what you can do until you try"
or
"You don't know what you can do until you go out into your garage and bring the polisher down onto the paint and buff a small section, (Test Spot), then wipe off the residue and inspect the results"
Point being is believe it or not some paints can and will polish out very nicely with a foam cutting pad and a light cleaner/polish like SwirlX but you won't know until you do dome testing.
The Lake Country Orange cutting pad is pretty aggressive so chances are pretty good you will have to follow any cutting pad step with a polishing pad step.
Polishing paint to create show car results is often times best done using a multiple step approach, if a person, (not you), wanted they could use an AIO or cleaner/wax with a foam cutting pad and get perfectly good Grocery Getter results and be done in one step. Just depends upon your expectations.
Or does using Meguiar's SwirlX prevent that? I'm sorry, now I really don't know what to do.
A quality cleaner/polish or polish or anything slippery can negate the abrading characteristics of something coarse like a cutting pad but to what end you won't know until you do some testing because all paint systems are different not to mention skill level and experience, two very important factors that have a strong effect on results.
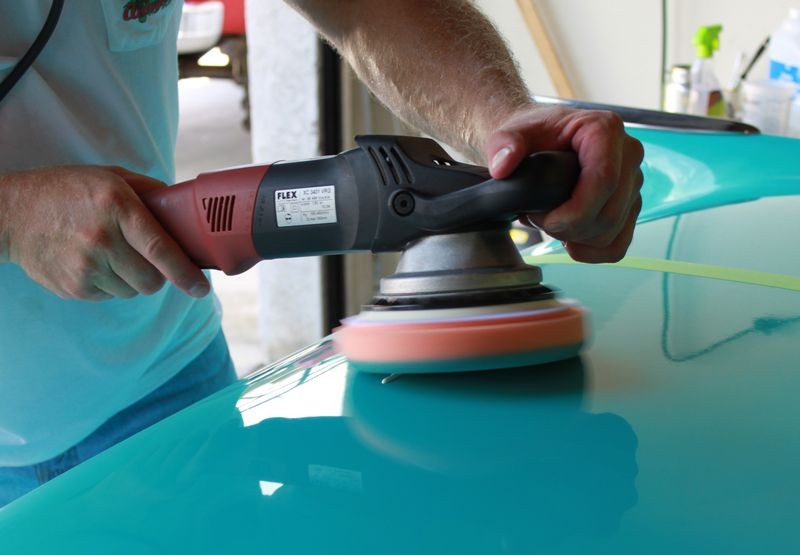
Here you go, after washing and drying the car, or wiping the paint clean, test with a polishing pad and SwirlX to an area about 20" square or so. It helps to lay down a piece of painter's tape and only buff one side of it so you can easily see the before and after results, like shown in the below thread.
Note: This Test Spot was done using a Flex 3401 but the same principals apply for any tool and even working by hand. One thing though, with a PC you don't lay down a strip of product you apply a circle or an x-pattern to the face of the pad.
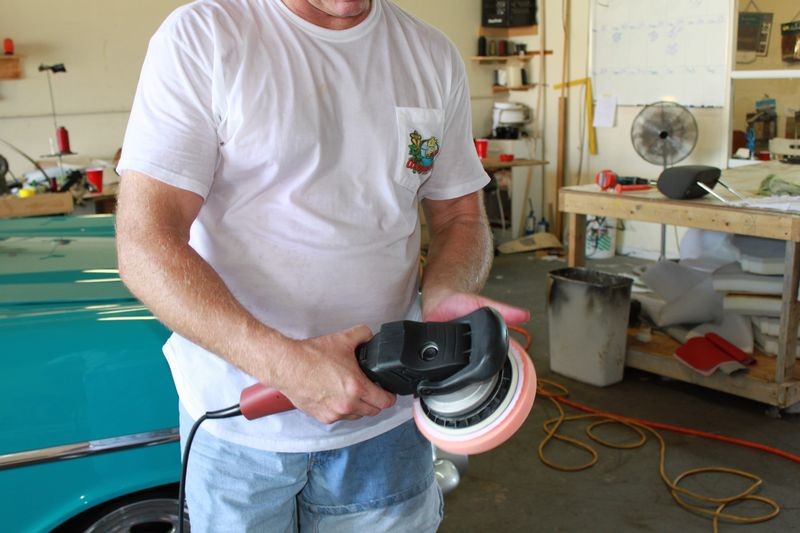
How to do a Test Spot using the Flex 3401
The below is a portion taken from this write-up,
1957 Chevrolet Belair Extreme Makeover - Flex 3401 & Wolfgang Smackdown!
Note: You can swap out different pads and chemicals for your test spot, the important point is to test the products, pads, tools and your technique to one small area first, and then check your results before attempting to buff out the entire car.
It does help to actually lay down a strip of tape of tape and then just work on one side of the tape, this will help you to better see the changes taking place.
Make sure the results from your Test Spot meet your expectations, if they don't then start a thread on this forum and let us know what you're seeing and our online community will do their best to help you tweak your technique and see you through to success!
~~~~~~~~~~~~~
Begin Copy & Paste
~~~~~~~~~~~~~
We're ready to do our test spot and for this we're going to use the
Wolfgang Total Swirl Remover 3.0 with the
LC Hydro-Tech foam polishing pad with the
Flex 3401 If this isn't removing the swirls fast enough or effectively enough then will stick with the same product but try the more aggressive
LC Hydro-Tech Cutting pad.
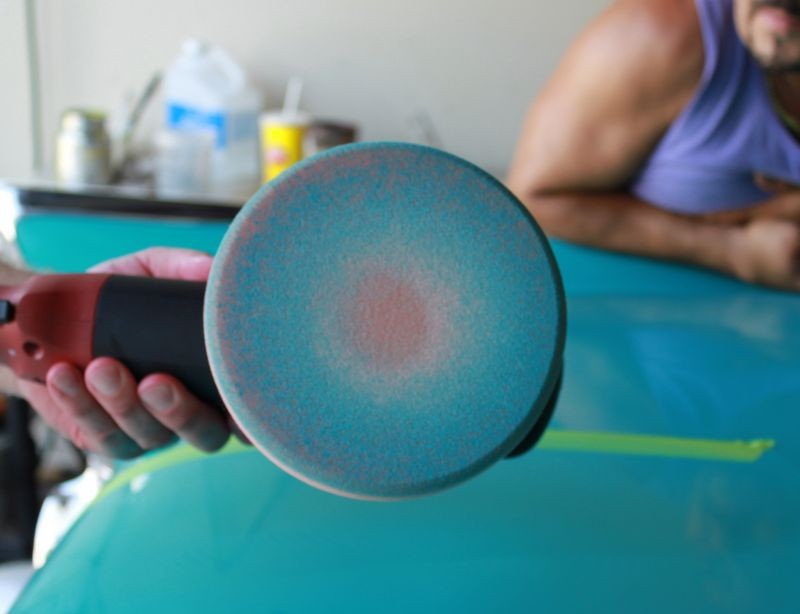
Center the pad onto the backing plate...
And then press the pad firmly against the backing plate to fully engage the Velcro.
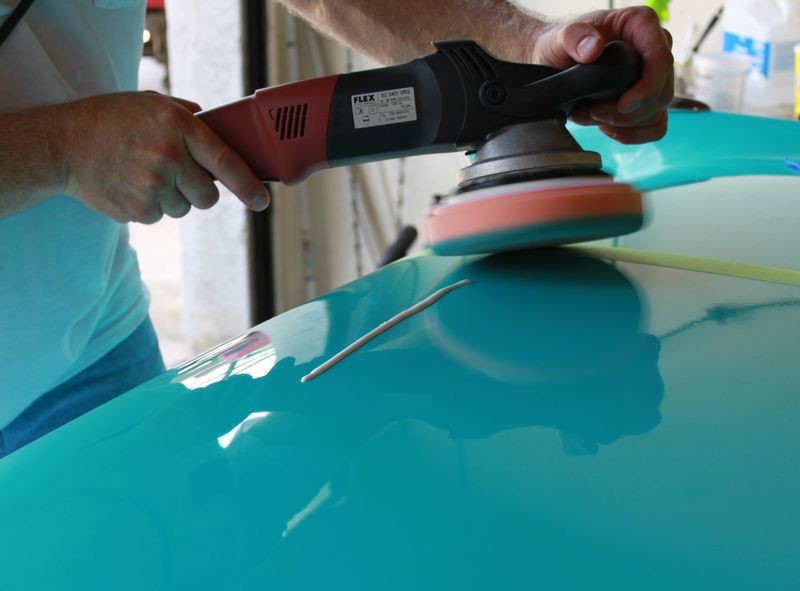
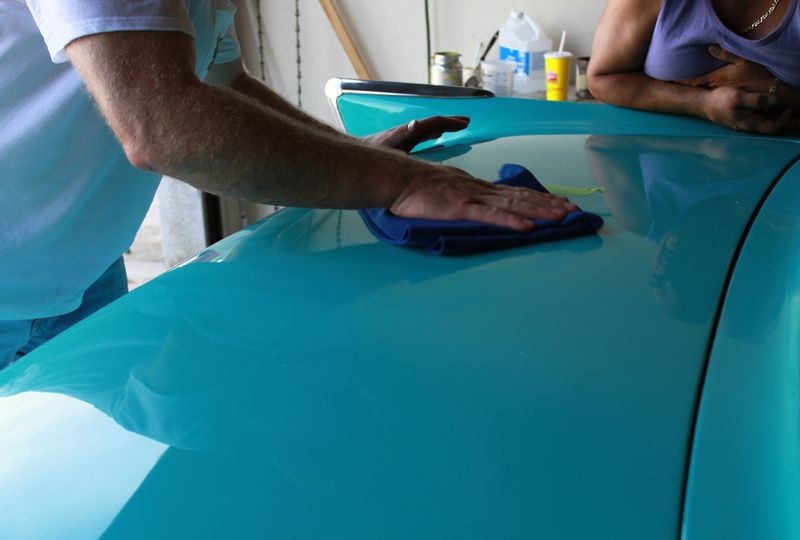
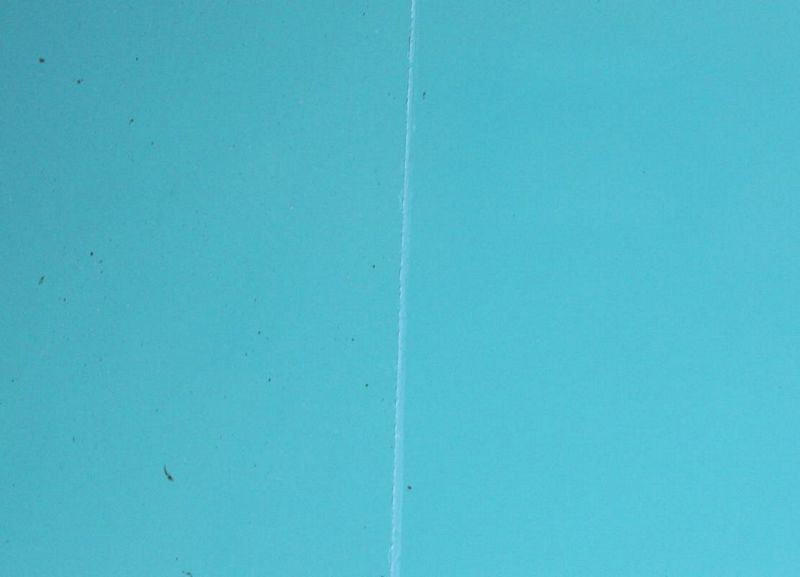
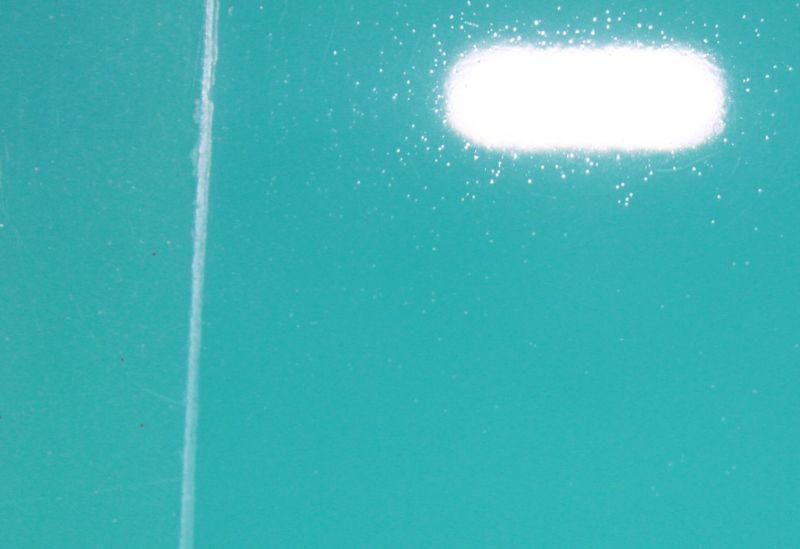
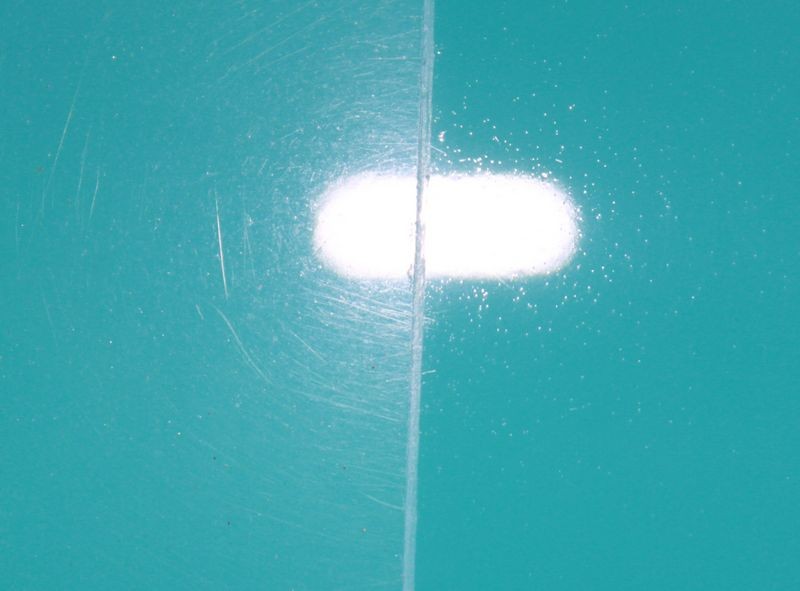
Horizontal surfaces like the hood or the trunk lid always work best for the Test Spot. Here we're using the trunk lid and we've applied a piece of painter's tape to separate between the before and after sides for easier and more accurate evaluation.
Always shake your products well before using them... I like to twist them back in forth at my side...
Lay down a thin strip of product about 6" to 8" long. You'll tend to use less product as you move around the car and your pad becomes more wet with product so it's less likely to absorb product into itself.
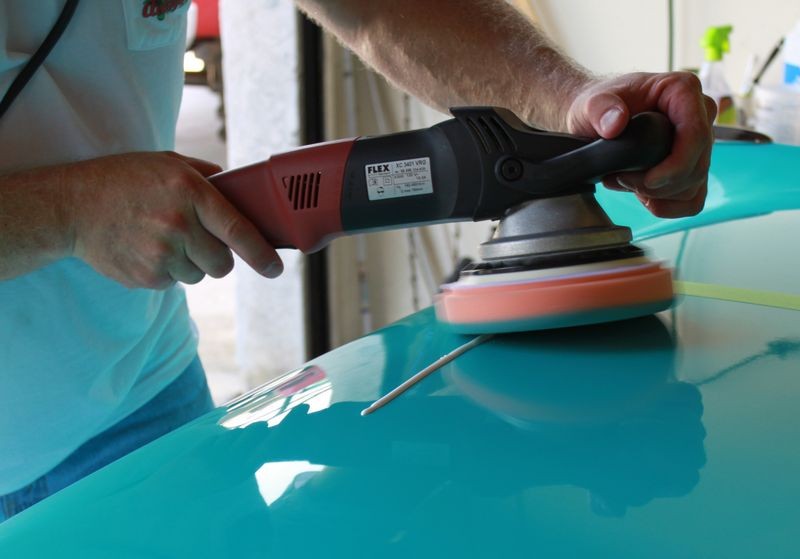
Unlike a true Rotary Buffer which the pad would rotate clockwise as you look down on it from behind the buffer, the Flex 3401 rotates counterclockwise and as such we're going to pick up our strip of product running the pad across the panel from left to right and running the strip into the pad at the 4 O'Clock position.
(See the YouTube Video below).
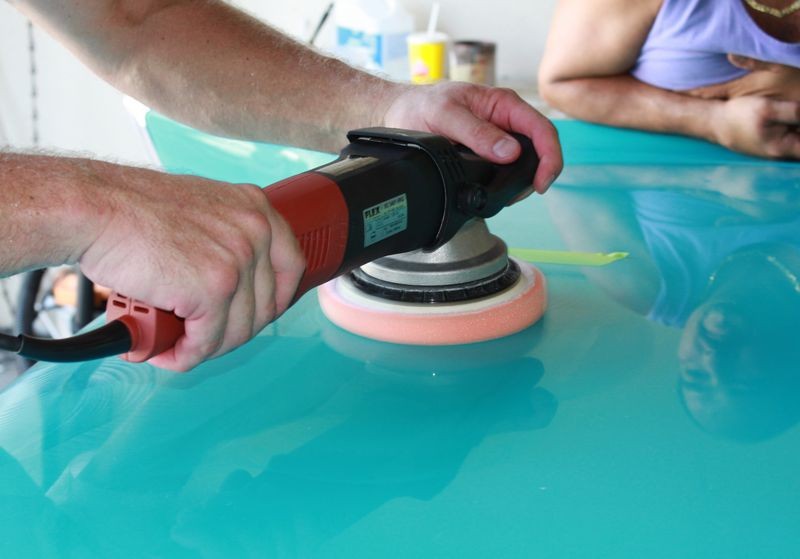
After picking up our bead, we lay the pad flat against the paint and begin making slow, overlapping passes over our test section.
Try to always have a wet film of product at the end of the buffing cycle as buffing to a complete dry buff might lead to hazing if you lose all lubricity on the surface.
YouTube Video Performing A Test Spot using the Flex VRG 3401
[video=youtube_share;3CtUaI_8HhE]- Performing a "Test Spot" to the paint on a 1957 Chevrolet Belair[/video]
Turning the pad over reveals we're working on a single stage paint job, not a basecoat/clear coat finish. Single stage paints are generally softer and easier to work on than clear coat finishes with the exception of white single stage paints as the pigment type for white paint is
Titanium Dioxide Powder and the pigment alone will make the paint, (resin), very
unworkable or hard-to-polish.
Next we'll wipe the residue off using a
Cobra Indigo Microfiber Polishing Cloth and inspect the results both in the shop and outside in full sun.
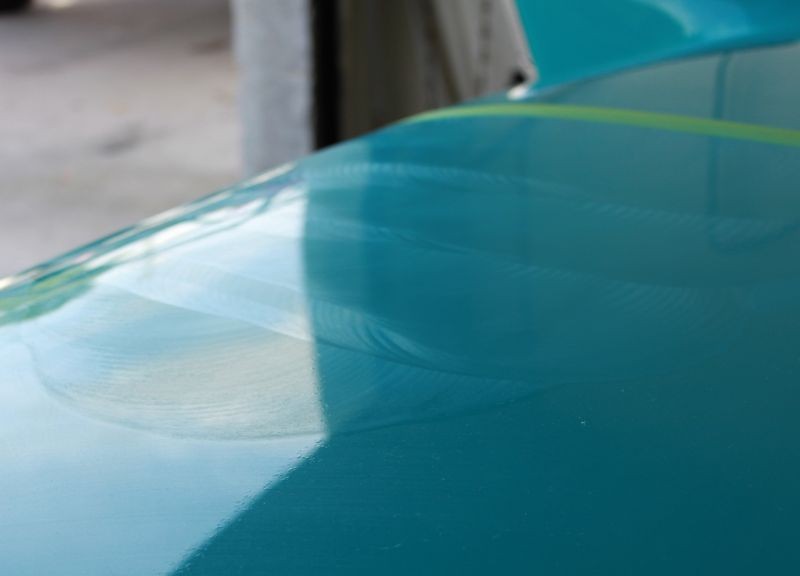
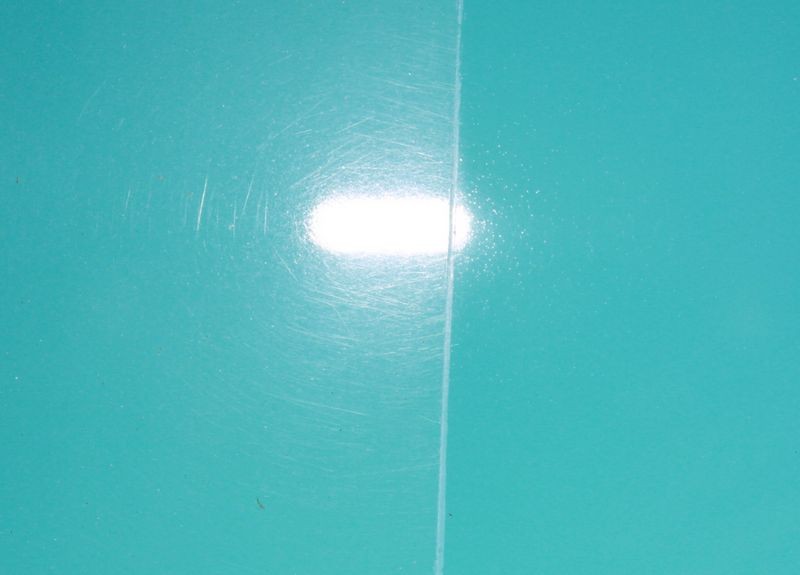
This is with the before side being lit up using the flash of the Rebel T1i
This is the after side. The tiny craters or
pin holes you see are more than likely what' called
Solvent Popping, which occurred when the paint was sprayed. These pin holes are actually present on the before side except because there are so many swirls in the before side, the swirls hide the solvent popping pin holes.
No amount of buffing will remove solvent popping because the holes are throughout the layer of paint, not just on the surface. Compounding and polishing more and more will just remove more paint and reveal a greater depth of the pin holes, it won't make the problem go away.
Keep in mind this is a very high resolution camera and it's being held very close to the paint. After polishing and waxing and then looking at the paint from a normal distance you don't really see them. The only fix is to repaint the entire car or the affected panels.
And a shot right on the tape-line...
")


 I guess whatever it is it's something I shouldn't attempt to use at my level.