First of all Al...
Freaking AMAZING TRUCK!
It looks to be in incredible condition after all these years and low mileage plus still in the family... it can't get any better than that!
:bowdown: :bowdown: :bowdown:
Hopefully I am loading these pictures correctly and they will show up.
I'm impressed. Not sure if you've ever worked with pictures on a forum before but you did it perfectly. I looked at the code and you successfully uploaded your pictures to our gallery and then inserted them into this thread.
And you have less than a dozen posts.
Good job my man and more effort than most. It's SO much nicer to view "inserted" pictures than when someone merely "attaches" their pictures and it's really not that hard to do if a person just takes a few minutes to educate themselves.
:dblthumb2: :dblthumb2: :dblthumb2:
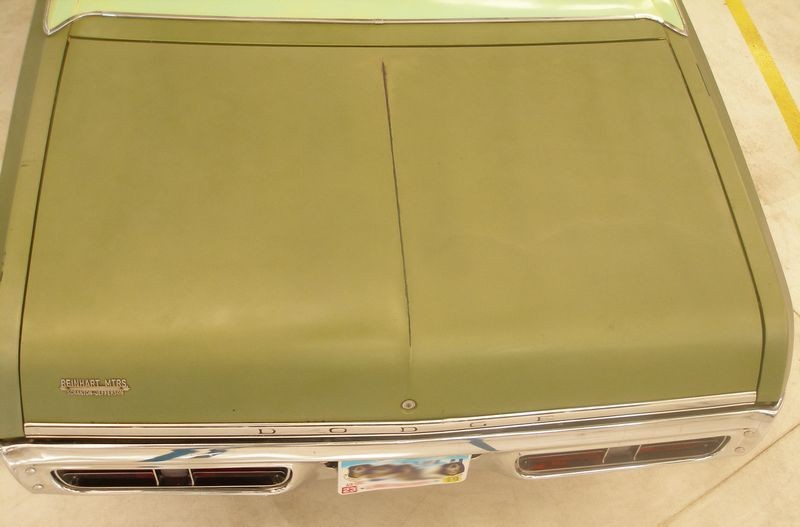
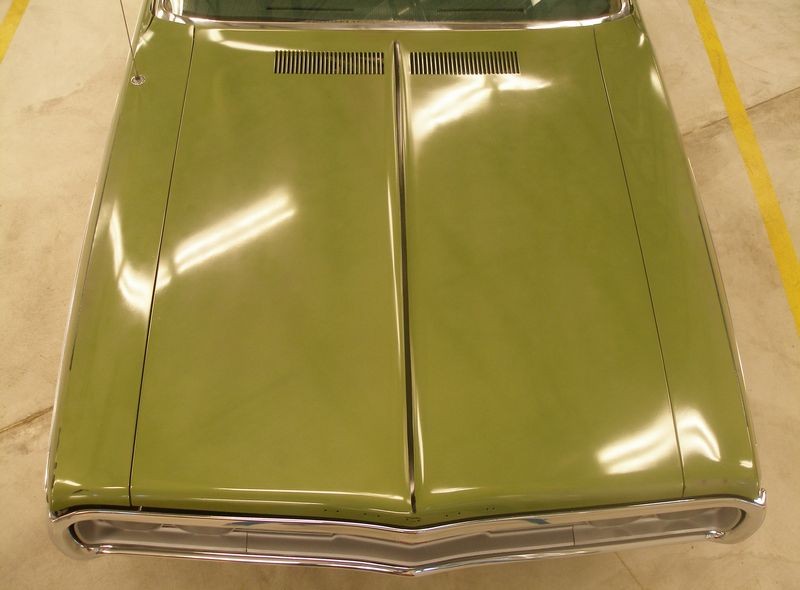
Here is the truck now and some pictures of it back in the 1940's and 1950's. I appreciate everyone's comments and suggestions.
Again... incredible. I'm a classic truck guy so I really appreciate these pictures and your passion to preserve this old truck.
I want to preserve the paint and keep it original. I am not looking for the quick and easy way out!
Now that you've made that clear here's what I would get for the chemicals and apply them in this order. When you're all done the finish will be show car quality,
I guarantee it.
#7 Show Car Glaze
Pinnacle Advanced Swirl Remover
Pinnacle Advanced Finishing Polish
Pinnacle Souveran Paste Wax
You can apply all of the above by hand, even the swirl remover like you see me doing here. In this shot I'm rubbing the paint out using
Pinnacle Advanced Swirl Remover, which is a Medium Cut Polish that can be applied by hand or machine as Wayne watches my technique...
If you don't have a dual action polisher then I would recommend getting one and using this type of tool for this old paint job. The DA Polisher is the safest tool you can use and it will give you better results faster than working by hand while still being perfectly safe and gentle to the old single stage paint.
There are three popular models, the
Porter Cable is the original and we carry both the
Meguiar's and
Griot's versions of it. Everyone has there favorite for all their personal preferences. I tend to grab the Porter Cable whenever I'm doing any DA work but they will all get the job done.
Be sure to get a
5" Lake Country Backing Plate and then get this collection of foam pads.
5.5" Lake Country Orange Light Cutting Pad
5.5" Lake Country White Polishing Pad
5.5" Lake Country Black Finishing Pad
No matter which polisher you buy, you'll still need the 5" backing plate and the above pads as the other polishers come with larger backing plates that only fit larger pads.
I'd also recommend a copy of my how-to book. It's very thorough, kind of like my posts, and it explains everything you'll need to know from start to finish.
Detailing How-To Book and Detailing How-To E-book by Mike Phillips
Then take good before pictures because once you start polishing you'll never be able to go back in time and get the before pictures. I explain that in this article,
The power in the after shots is created in the before shots
And show how to capture swirls and oxidation pictures in this article,
How-To capture swirls, scratches, etchings and other surface defects with your camera
And most of all... keep us updated.... if I lived closer I would love to tag-team this project with you...
")


 rops:
rops:
