Mike Phillips
Active member
- Dec 5, 2022
- 51,004
- 6
1956 Chevrolet Bel Air - Original Paint
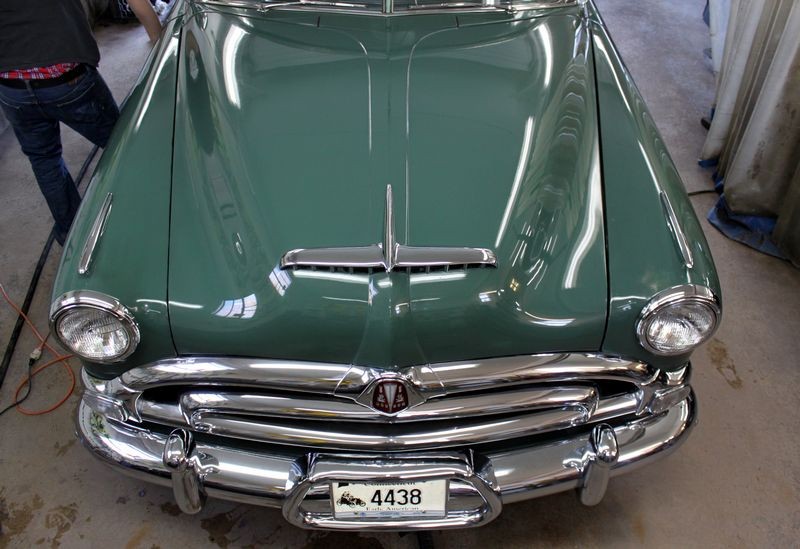
This is Bill's all original 1956 Chevrolet Bel Air that his father purchased new. Most of the paint is still the original single stage lacquer. A few panels have been repainted due to damage over the decades.

Bill was referred to me by my friend Mike Searle. Mike Searle recently brought his 1955 Chevrolet Sedan Delivery to Autogeek's Garage for a show car makeover. You can see the amazing transformation we did to Mike Searle's Chevy here,
1955 Chevy & 1947 Buick Slantback - Show Car Makeover! - Pictures & Videos
Bill brought me his car because he wants to preserve the original paint that is left on this classic antique Bel Air. He does NOT want to repaint this car.
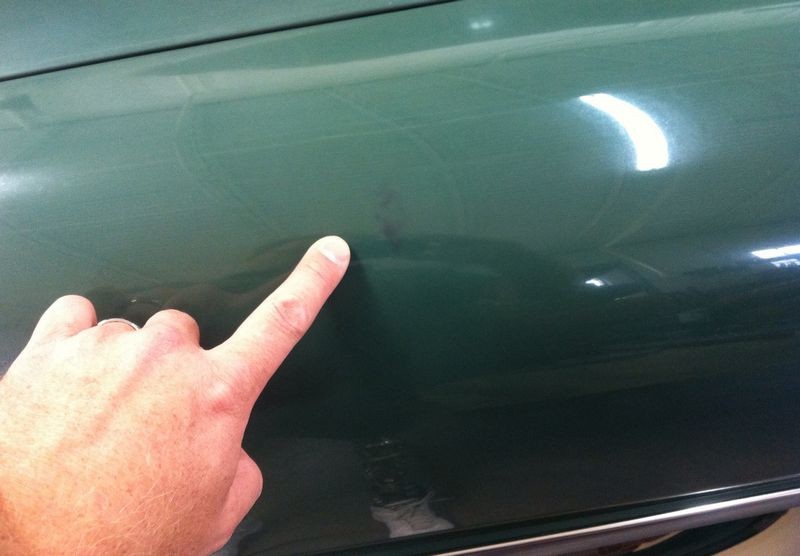
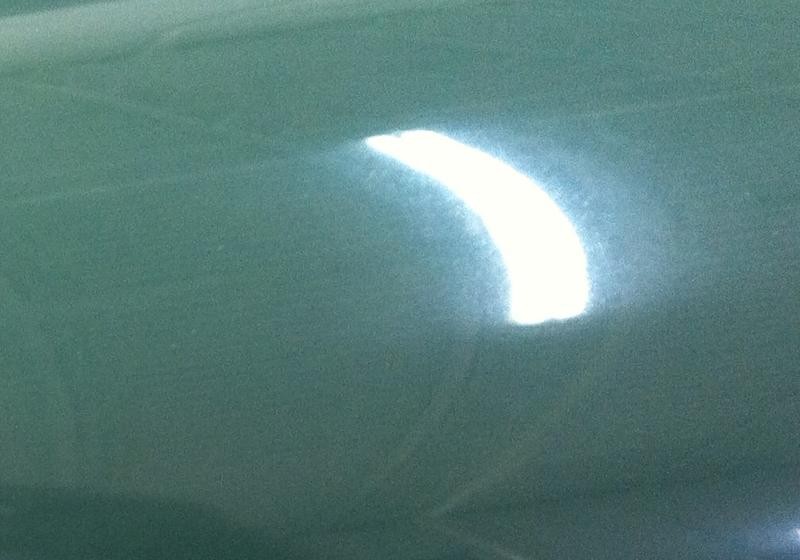
Here's the deal though... the primer is already showing through on the hood. The primer is black and I took a picture of the thin area.

This means we cannot use any time of abrasive polish on the hood and whatever is done it has to be done by hand and carefully, the same way I rubbed out the hood on a car with similarly thin paint for Wayne Carini.

The side panels and the rest of the horizontal panels look to be in better shape, i.e. I didn't see any thin spots with primer showing through but all the rest of these panels must be treated with kids gloves.
The other goal for this project is to restore the color and gloss to the original paint so that it is just as rich in color and vibrant in gloss as the areas with new paint.
By removing the dead, oxidized paint, restoring both the richness of color and gloss to the original paint, this will create a uniform appearance across all panels and this is what Bill wants for his all original 1956 Bel Air.
Bill would like to have this done before October 13th as that's the date he's hoping to display the car at the next car show.
Stay tuned...
:xyxthumbs:
This is Bill's all original 1956 Chevrolet Bel Air that his father purchased new. Most of the paint is still the original single stage lacquer. A few panels have been repainted due to damage over the decades.
Bill was referred to me by my friend Mike Searle. Mike Searle recently brought his 1955 Chevrolet Sedan Delivery to Autogeek's Garage for a show car makeover. You can see the amazing transformation we did to Mike Searle's Chevy here,
1955 Chevy & 1947 Buick Slantback - Show Car Makeover! - Pictures & Videos
Bill brought me his car because he wants to preserve the original paint that is left on this classic antique Bel Air. He does NOT want to repaint this car.
Here's the deal though... the primer is already showing through on the hood. The primer is black and I took a picture of the thin area.
This means we cannot use any time of abrasive polish on the hood and whatever is done it has to be done by hand and carefully, the same way I rubbed out the hood on a car with similarly thin paint for Wayne Carini.
The side panels and the rest of the horizontal panels look to be in better shape, i.e. I didn't see any thin spots with primer showing through but all the rest of these panels must be treated with kids gloves.
The other goal for this project is to restore the color and gloss to the original paint so that it is just as rich in color and vibrant in gloss as the areas with new paint.
By removing the dead, oxidized paint, restoring both the richness of color and gloss to the original paint, this will create a uniform appearance across all panels and this is what Bill wants for his all original 1956 Bel Air.
Bill would like to have this done before October 13th as that's the date he's hoping to display the car at the next car show.
Stay tuned...
:xyxthumbs:


")
