Mike Phillips
Active member
- Dec 5, 2022
- 51,004
- 6
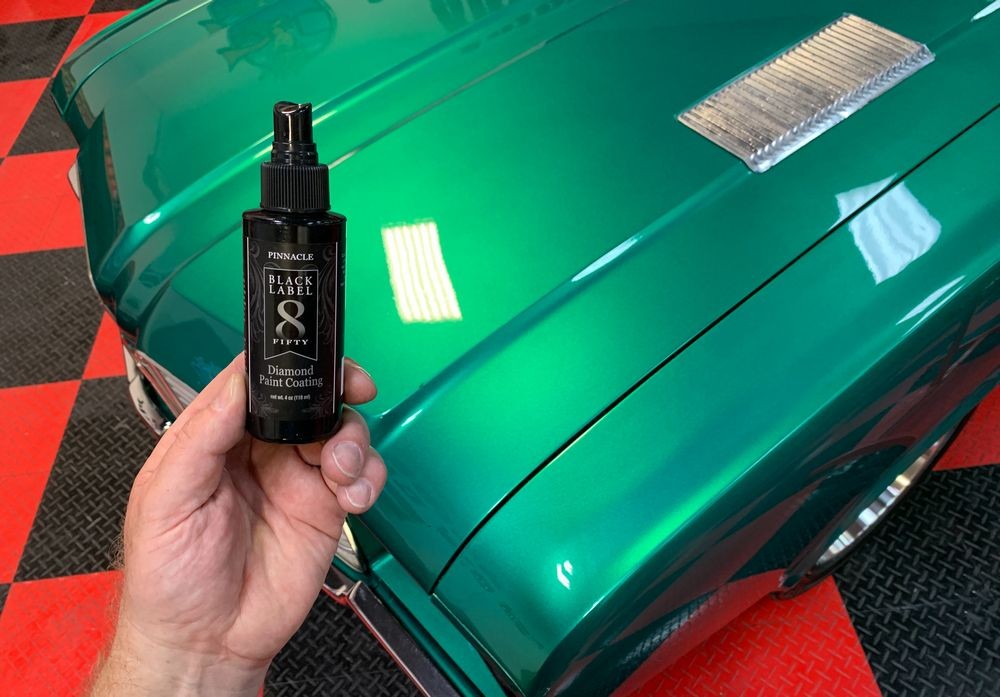
1972 Cutlass - Wet-sanded and Ceramic Coated - PBL Diamond Paint Coating

At my recent 3-day car detailing class we detailed 14 cars in 3 days including wetsanding a 1948 Chevy Suburban Streetrod and a Dodge Ram 3500 Pickup Truck. For these two truck the class learned a technique I call,
Scuff & Buff
Check them out... they look great! And the majority of the people in this class had never wetsanded a car before nor used a rotary polisher with a wool pad to buff out a car.


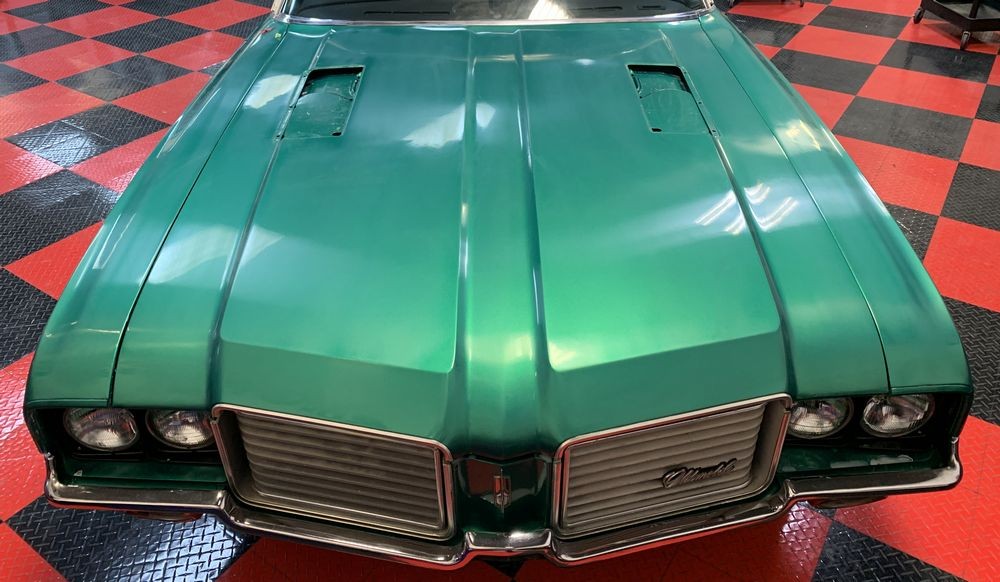
Out of the other 12 cars detailed in this 3-day class, we used one of the student's cars to learn Production Detailing. This is Ryan's 1972 Oldsmobile Cutlass AFTER the class buffed it out.

Looks great huh?
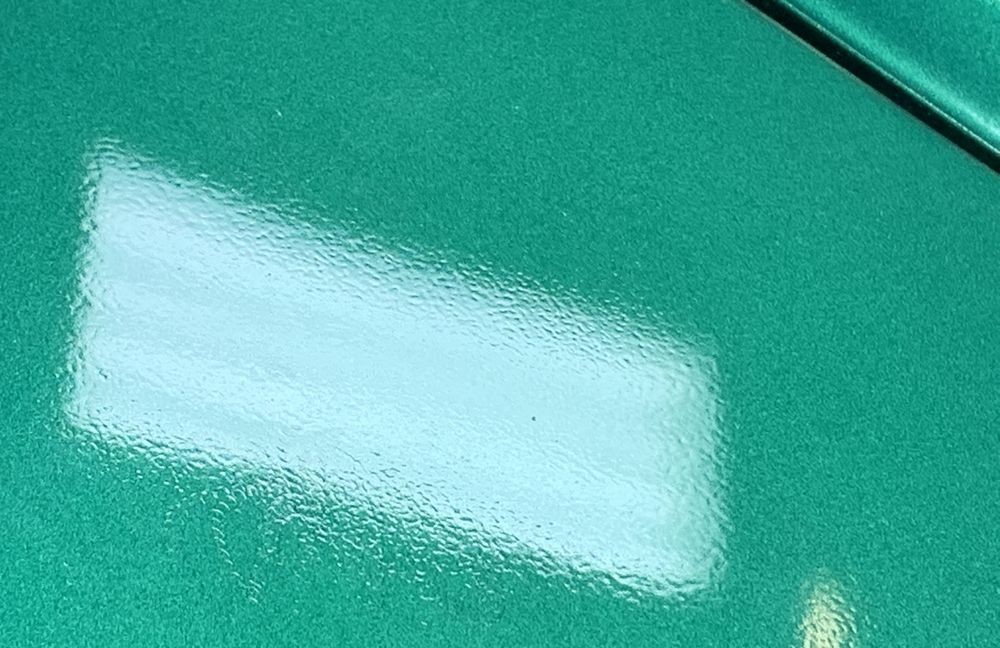
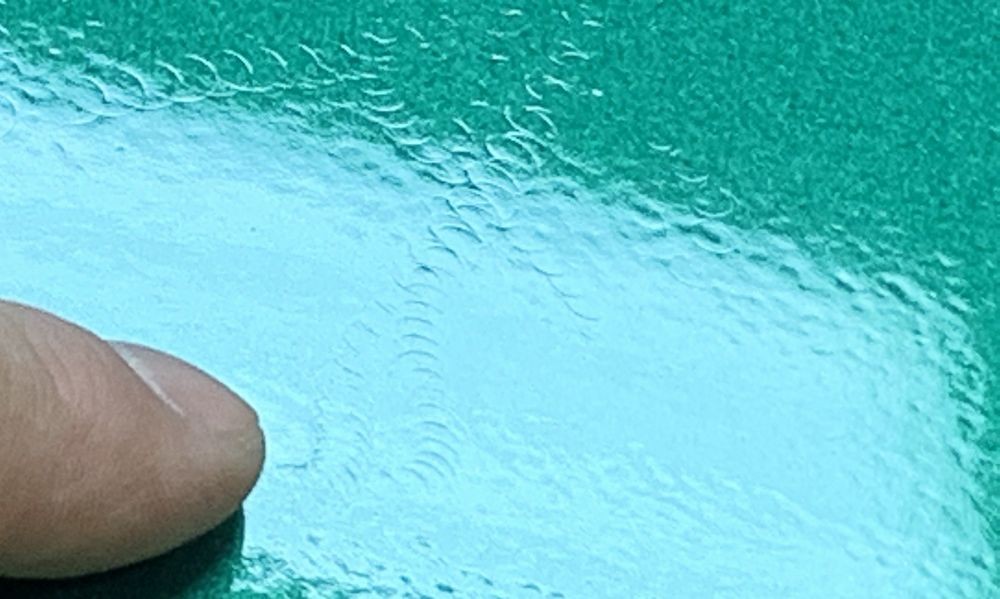
Yes it does. But - this custom paint job had a lot of orange peel, dye-back or shrink back that revealed prep work in the primer as well as other surface texture defects.
Orange Peel

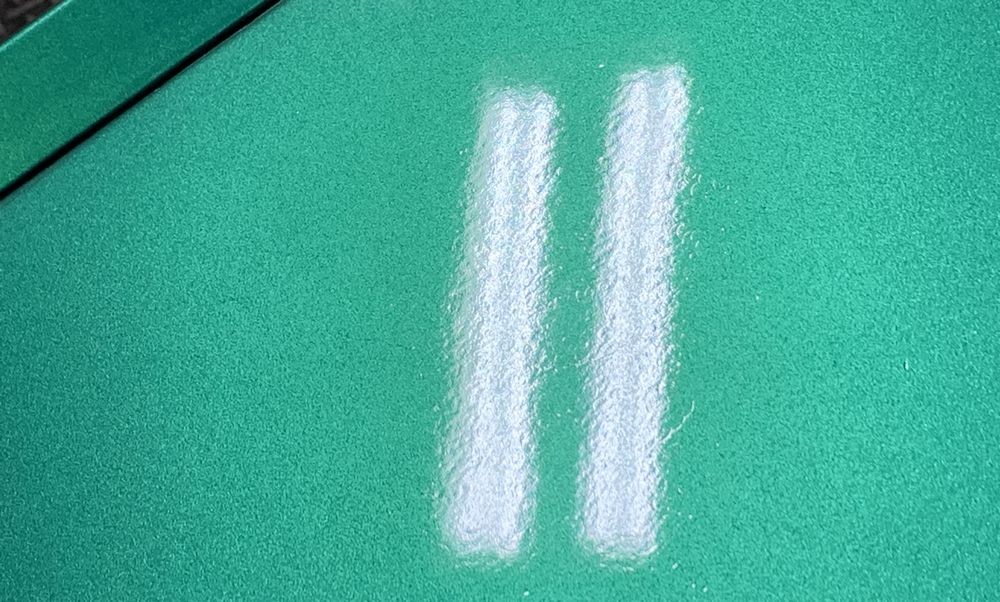

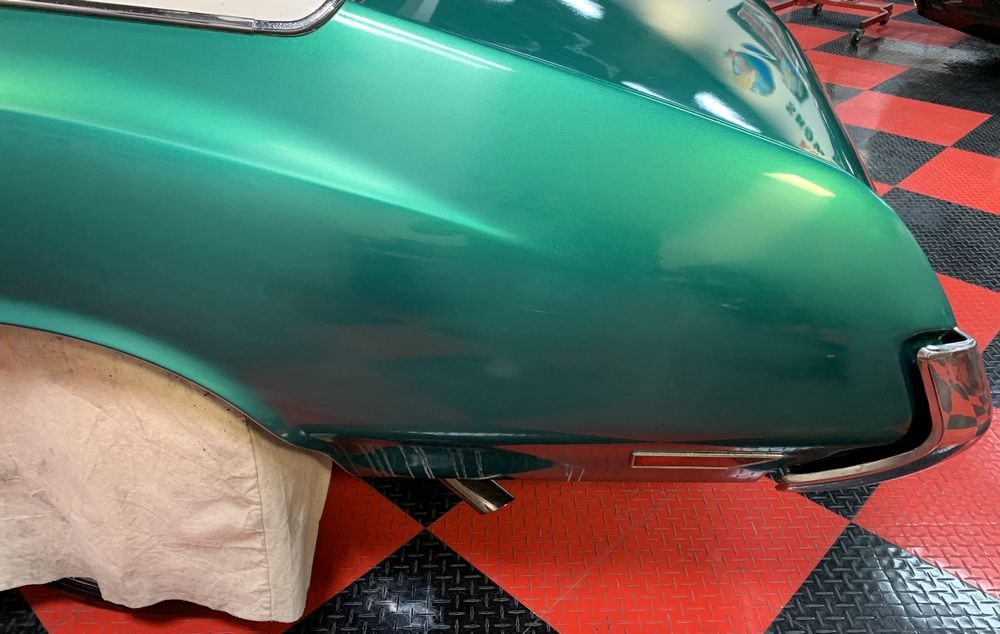
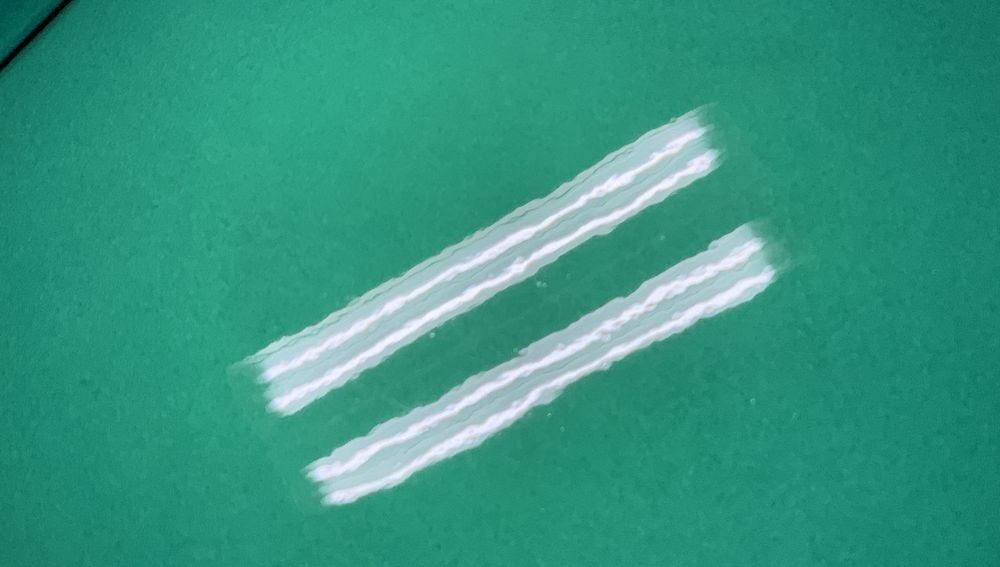
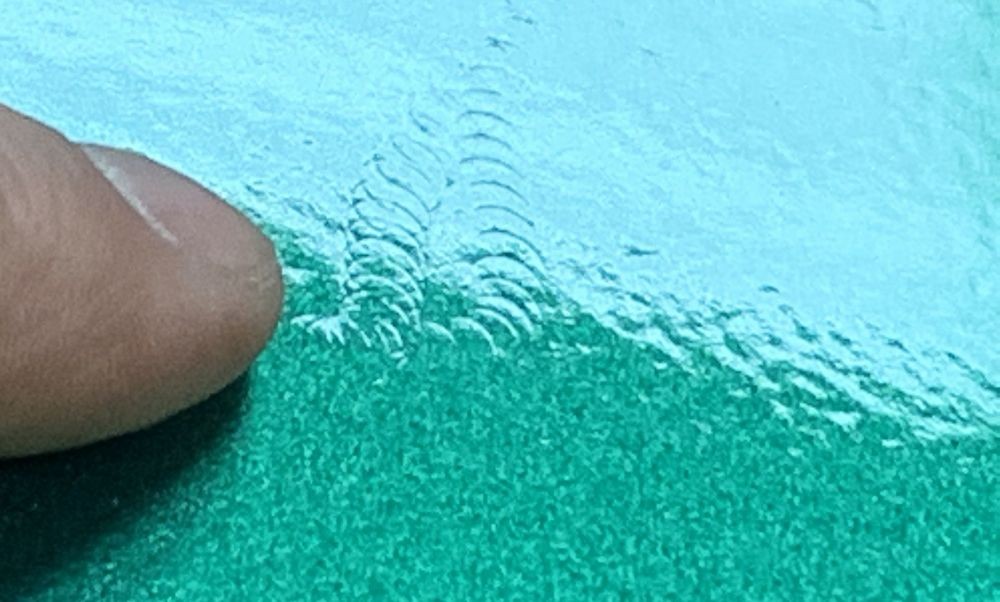
On the other side of the trunk lid you could see D.A. Sanding Marks, called Pig Tails in the underlying coats of paint. The pig tails are actually UNDER the clearcoat and if there's enough clear paint over the basecoat we'll be able to remover or at least improve how they look.

Here's the pig tails...
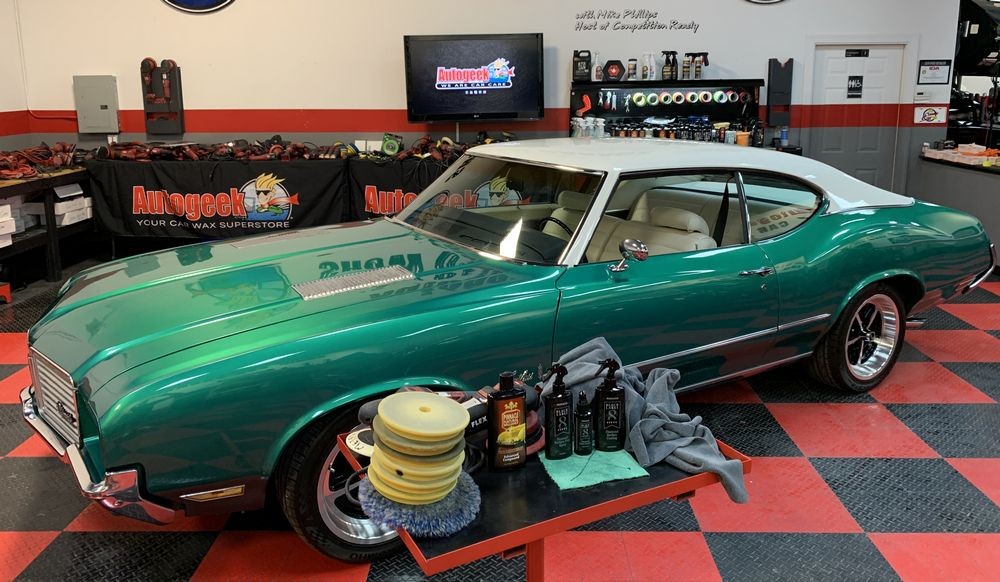
Because I already had 2 vehicles for the wetsanding portion of the 3-day class, I invited Ryan to bring his 1972 Cutlass back to Autogeek where if he let me use the trunk lid for two LIVE Detailing Classes showing how to hand sand and how to machine sand, I would help him to wet sand all the rest of the body panels using the Scuff & Buff Technique to safely level some of the orange peel and other surface imperfections and the ceramic coat the paint.
He said yes.
Next I'll share a few pictures and the LIVE Detailing Class videos we shot that are very educational followed by the final results.
")
At my recent 3-day car detailing class we detailed 14 cars in 3 days including wetsanding a 1948 Chevy Suburban Streetrod and a Dodge Ram 3500 Pickup Truck. For these two truck the class learned a technique I call,
Scuff & Buff
Check them out... they look great! And the majority of the people in this class had never wetsanded a car before nor used a rotary polisher with a wool pad to buff out a car.
Out of the other 12 cars detailed in this 3-day class, we used one of the student's cars to learn Production Detailing. This is Ryan's 1972 Oldsmobile Cutlass AFTER the class buffed it out.

Looks great huh?
Yes it does. But - this custom paint job had a lot of orange peel, dye-back or shrink back that revealed prep work in the primer as well as other surface texture defects.
Orange Peel
On the other side of the trunk lid you could see D.A. Sanding Marks, called Pig Tails in the underlying coats of paint. The pig tails are actually UNDER the clearcoat and if there's enough clear paint over the basecoat we'll be able to remover or at least improve how they look.
Here's the pig tails...
Because I already had 2 vehicles for the wetsanding portion of the 3-day class, I invited Ryan to bring his 1972 Cutlass back to Autogeek where if he let me use the trunk lid for two LIVE Detailing Classes showing how to hand sand and how to machine sand, I would help him to wet sand all the rest of the body panels using the Scuff & Buff Technique to safely level some of the orange peel and other surface imperfections and the ceramic coat the paint.
He said yes.
Next I'll share a few pictures and the LIVE Detailing Class videos we shot that are very educational followed by the final results.