I had a customer contact me today about polishing and replacing some of the trim on this car. He has all the pieces and replacement parts just wants me to out them on when I'm done polishing.
According to him the car is slightly oxidized and as far as he knows the paint is original.
Now I have a few questions...
Since this is a 72 is it safe assume it's single stage? I plan on doing a test spot on it when I see the car but just thought I'd ask. Of course it may have been repainted at some point so I will have to determine what it is upon inspection.
Any tips or advice for the trim?
He says that some of it is off already but some will have to be taken off. Some is staying and I will just be polishing them up.
Looking at pics of this type of car online it looks like a lot of small areas and curves. Plus lots of metal trim that will be coming off or being taped up.
Appreciate any advice!
Hi Jason,
If the paint is original then yes it is single stage. I've buffed out a number of these classic MB's and I've found the paint to be real high quality and easily restored to a high gloss shine.
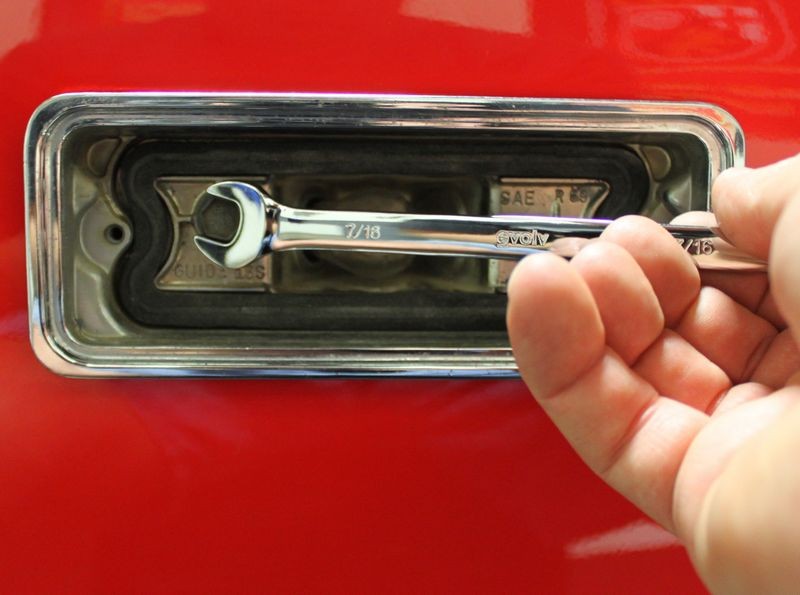
Take a can of WD-40 or your favorite penetrating oil with you and if you can spray any of the fasteners before trying to loosen them then do so as you don't want to break any during the removal process.
Take a nut driver set in metric if you have one, sometimes these come in hand as does a small, 1/4" drive ratchet and some 1/4" drive extensions, even a flexible extension.
Removing trim on old cars is a tick on the risky side so be careful. I don't mind removing trim, emblems and script but I also don't want to be stuck with a bill having to replace these items because the broke while I was trying to remove them.
So if in doubt, leave it on or ask the owner to do the wrenching or prying so if something breaks it happens to them. Lots of trim pieces, emblems and script can be very expensive to purchase and sometime hard to find.
I removed most of the trim on the Elky used in this article and lucky for me it had been recently removed so everything came off with no problems.
Take along some zip-lock style baggies, a permanent marker and some post-it notes to hold and mark where parts go.
Damp-Sanding Tools, Tips and Techniques by Mike Phillips
Re-assembling trim components
Before I started any washing, claying or chemical stripping, the first thing I did was to remove, package and identify as much of the chrome trim as I could do so safely. Don't count on your memory to remember where each and every little nut, bolt or washer goes but instead use Zip-lock bags and Post-It notes to compartmentalize and describe the components and where they came from.
The first application of paint sealant will make the paint slippery so it will resist any accidental scratching or scuffing during assembly of the trim pieces.
All chrome trim components for this 1969 El Camino were packaged to prevent
losing any parts and identified as to where the were removed from.
You can use a little Dielectric grease on the rubber boots to make assembly and any future disassembly easier but don't actually coat the electrical connectors with dielectric grease as it is non-conductive.
Clean and oil all threads before reassembling components, be careful not to over tighten assembly
nuts and bolts on classic to avoid braking or stripping attachment components...
Clean and sanitary re-assembly creates a crisp, factory new look...
A fast, simple way to attach any screws to their rightful home is to place some painter's tape on the threads after inserting them into their proper location. This will save you lots of time hunting down just the right threaded screw to re-attach trim components. Remove the tape, clean the component and it's ready to re-assemble.
Sounds like a fun project, doing extreme makeovers on classics with single stage paint is my favorite type of detailing project.
:xyxthumbs:


")