Mike Phillips
Active member
- Dec 5, 2022
- 51,004
- 7
1987 Corvette Show Car Makeover - SONAX Showcase
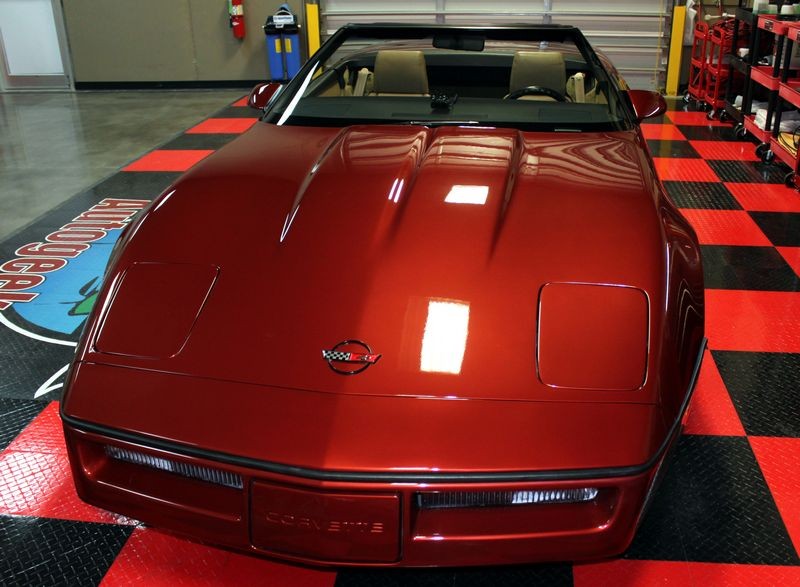
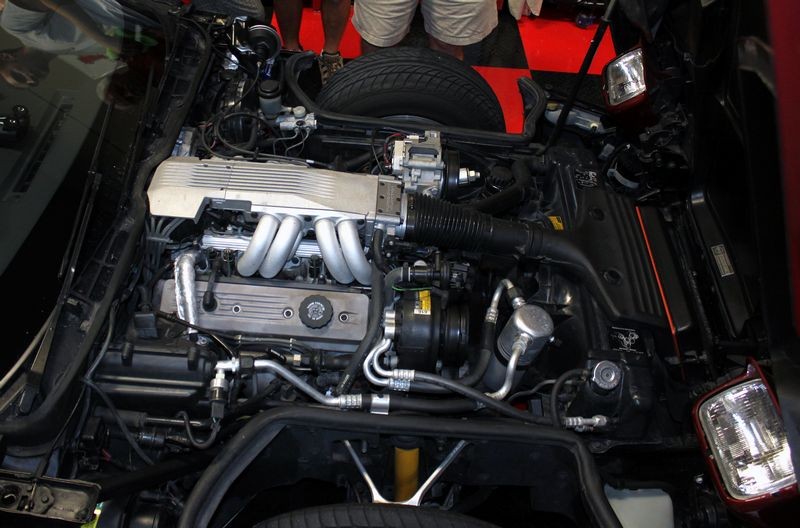
Here's how the Corvette looked when it first arrived, to the untrained eye it looks good because it looks shiny.
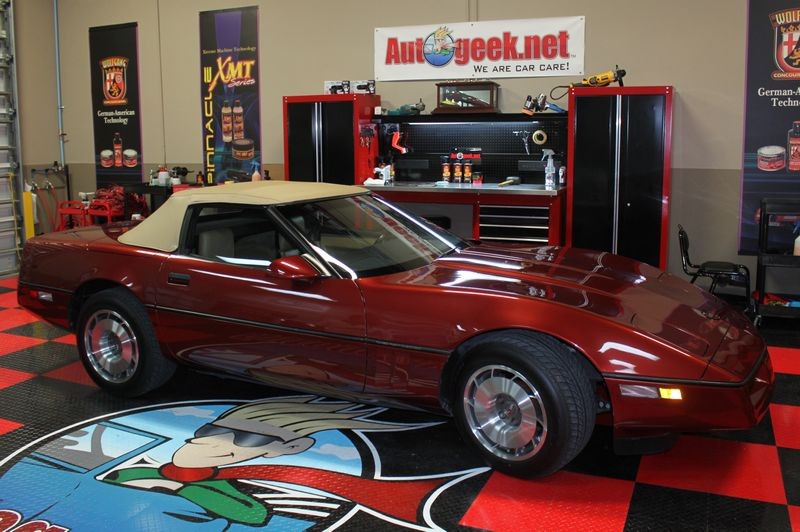

Even though the paint is shiny though it's far from perfect and the finish quality it not acceptable to the owner who has helped us transform and restore show car quality finishes to a number of projects in the past.
Here's how the paint looks to the trained eye... These picture were taking using the flash from my camera on different locations around the car. The car has very low mileage and has probably never been buffed but from wiping and washing the entire finish has swirls.

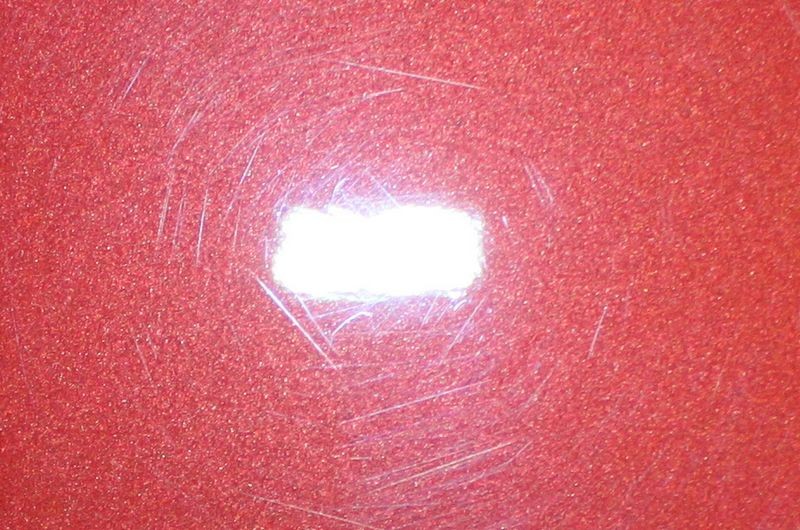
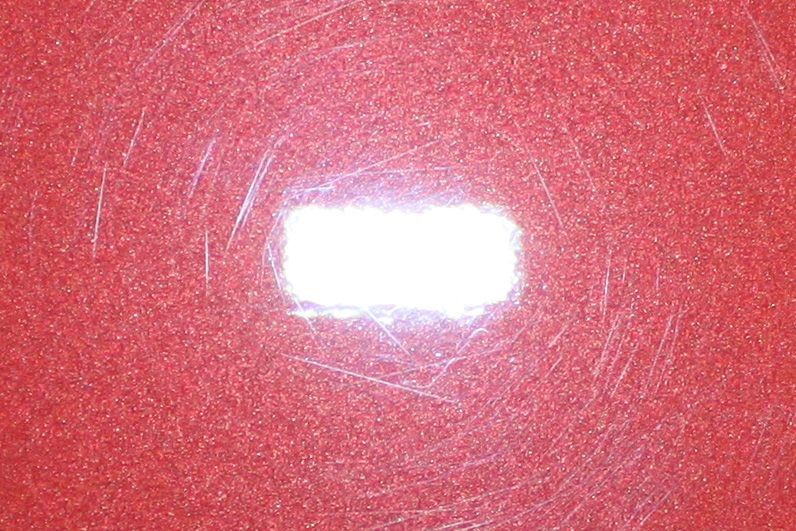
There's a few random isolated deeper scratches here and there too...


These are interesting...


Burned-Through Corvette Emblem Edges
The first thing I do when buffing out a late model Corvette is look to see if the edges of the plastic emblems have been burned off by the other guy
By this I mean often times a detailer will run the edge of their buffing pad into the edges of the emblem and burn the black outer coating off and expose white plastic underneath of it.
Here's a tip... tape-off Corvette emblems before machine buffing, especially with a rotary buffer.
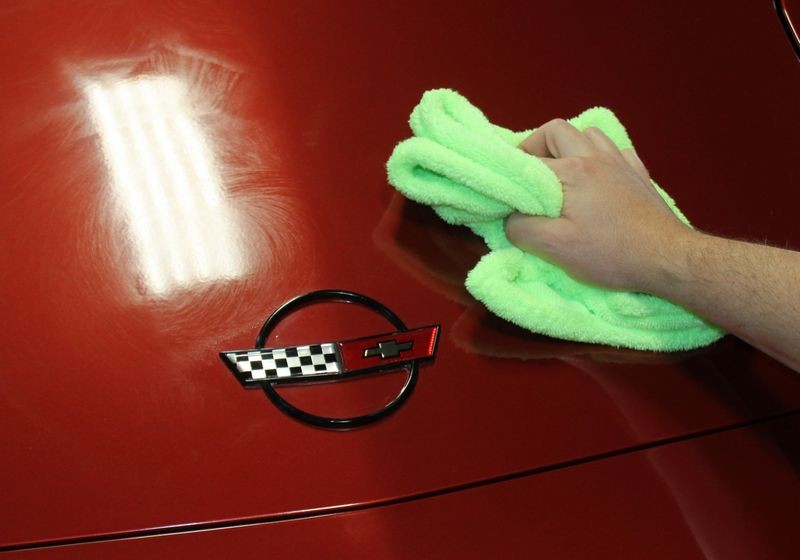
Hood Emblem - Still in great shape!

Rear deck emblem - No problems here!

Tires need some help...

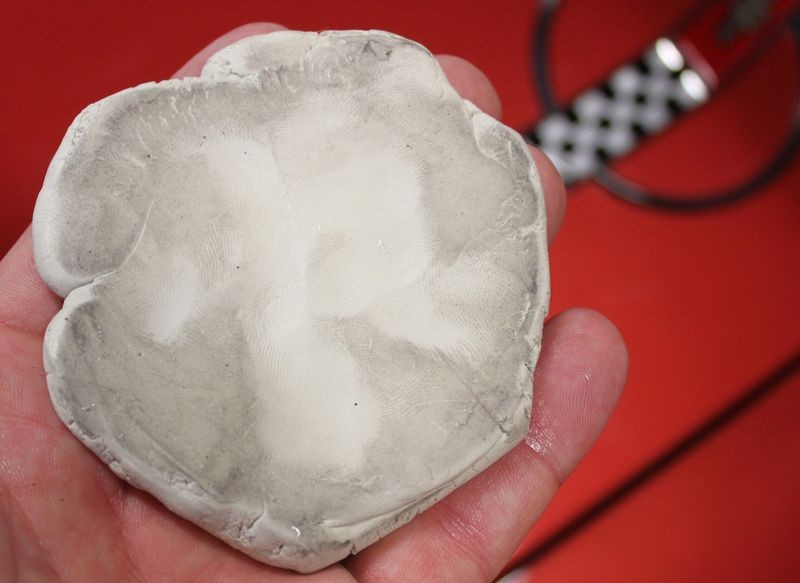
Contaminated Paint
I had the owner Forrest feel the paint for contamination using the Baggie Test and even with low mileage and years of protective garage storage the paint still had above surface bonded contaminants that needed to be removed. For this we used detailing clay.

The picture of this clay was taken after claying only the hood...
Machine Polishing
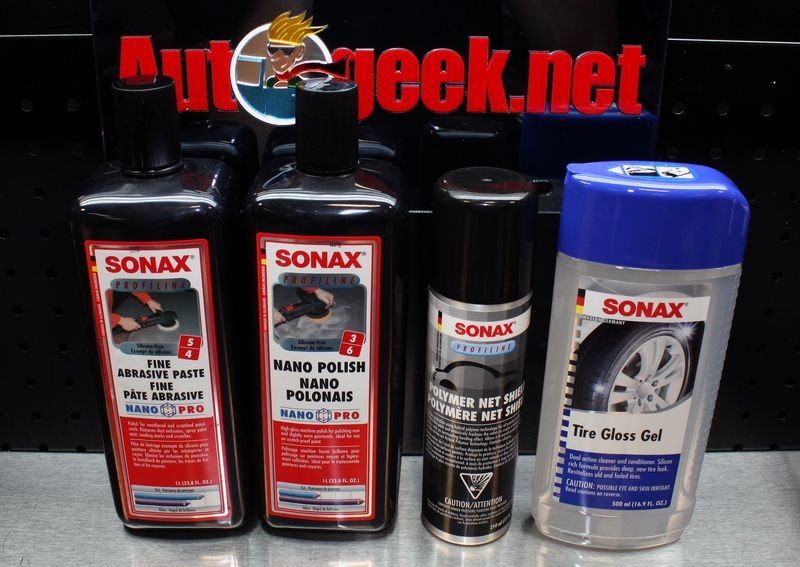
After we clayed the paint and then taped-off all the trim, (look at the Corvette Emblem on the hood), and covered the glass and interior, (the top is down), we then started removing the swirls using rotary buffers, Lake Country Hybrid Polishing pads and the new SONAX Fine Abrasive Paste.
Paul and Forrest tackle the hood...

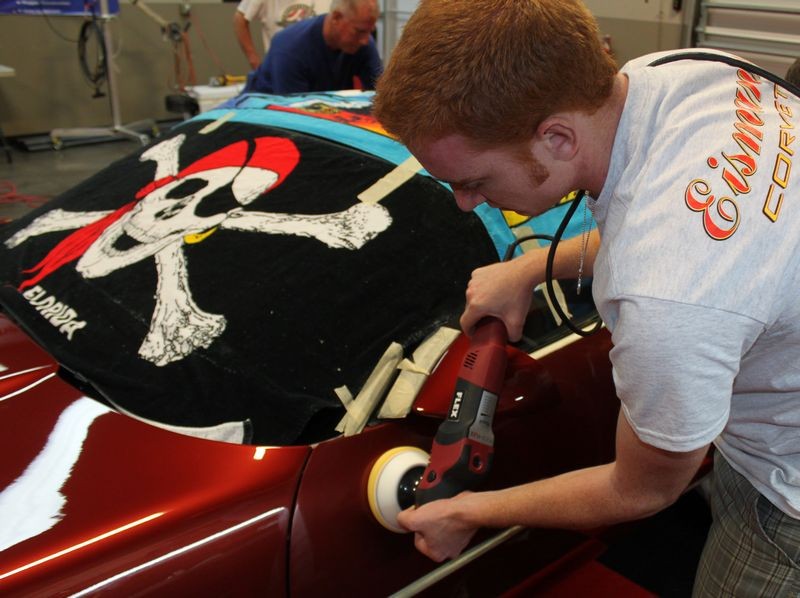
Bumblebee
Paul is using the DeWALT 849X I call the Bumblebee because of the black and yellow coloring. This one has the hoop hand attached but note how Paul chooses to place his hand directly onto the head of the polisher. By the way, Paul buffing out large boats most of the time and is a seasoned pro behind a rotary buffer.

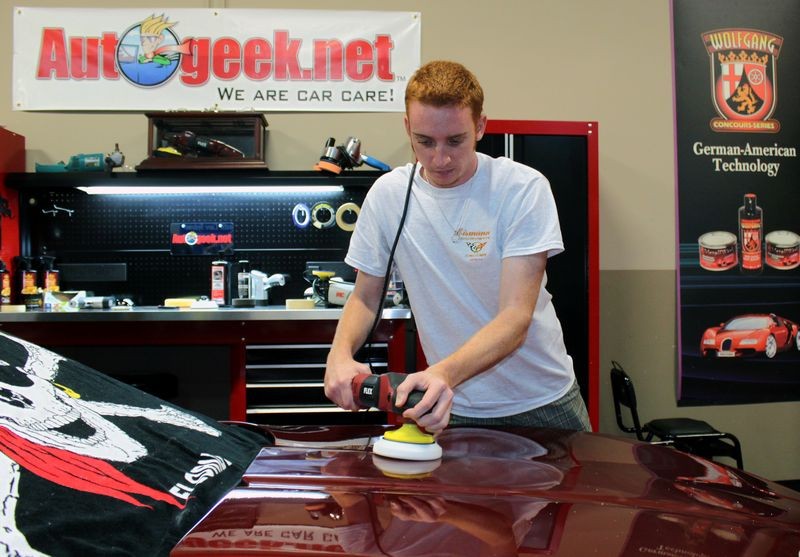
Here's Forrest working with the Flex PE14 sans handle...
Here's Juanito working another 849X only this is one of the DeWALT I have in the studio with neither the stick or the hoop handle attached.


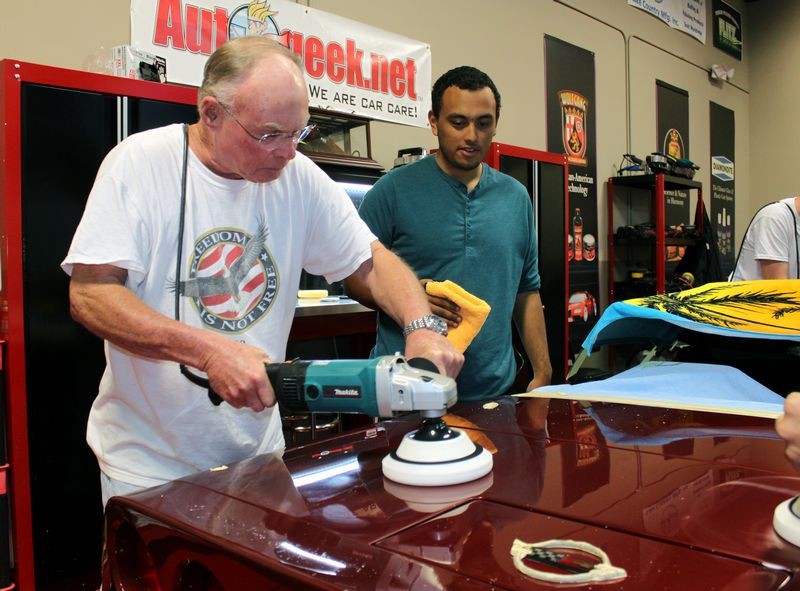
Here's Ken working the Makita 9227C
Here's Tim working the lower portion of the driver's door using a Flex PE14...

Machine Jewelling
Next we switched over to Lake Country Gold Jewelling Pads and machine applied the SONAX Nano Polish, for this everyone stayed around the 600 to 800 RPM Range and re-polished each square inch using only light pressure while cleaning our pads often.

Forrest really liked the results from this step...

")
SONAX Show Car Detail - 1987 All Original Corvette
Here's how the Corvette looked when it first arrived, to the untrained eye it looks good because it looks shiny.
Even though the paint is shiny though it's far from perfect and the finish quality it not acceptable to the owner who has helped us transform and restore show car quality finishes to a number of projects in the past.
Here's how the paint looks to the trained eye... These picture were taking using the flash from my camera on different locations around the car. The car has very low mileage and has probably never been buffed but from wiping and washing the entire finish has swirls.
There's a few random isolated deeper scratches here and there too...
These are interesting...
Burned-Through Corvette Emblem Edges
The first thing I do when buffing out a late model Corvette is look to see if the edges of the plastic emblems have been burned off by the other guy
By this I mean often times a detailer will run the edge of their buffing pad into the edges of the emblem and burn the black outer coating off and expose white plastic underneath of it.
Here's a tip... tape-off Corvette emblems before machine buffing, especially with a rotary buffer.
Hood Emblem - Still in great shape!
Rear deck emblem - No problems here!
Tires need some help...
Contaminated Paint
I had the owner Forrest feel the paint for contamination using the Baggie Test and even with low mileage and years of protective garage storage the paint still had above surface bonded contaminants that needed to be removed. For this we used detailing clay.
The picture of this clay was taken after claying only the hood...
Machine Polishing
After we clayed the paint and then taped-off all the trim, (look at the Corvette Emblem on the hood), and covered the glass and interior, (the top is down), we then started removing the swirls using rotary buffers, Lake Country Hybrid Polishing pads and the new SONAX Fine Abrasive Paste.
Paul and Forrest tackle the hood...
Bumblebee
Paul is using the DeWALT 849X I call the Bumblebee because of the black and yellow coloring. This one has the hoop hand attached but note how Paul chooses to place his hand directly onto the head of the polisher. By the way, Paul buffing out large boats most of the time and is a seasoned pro behind a rotary buffer.
Here's Forrest working with the Flex PE14 sans handle...
Here's Juanito working another 849X only this is one of the DeWALT I have in the studio with neither the stick or the hoop handle attached.
Here's Ken working the Makita 9227C
Here's Tim working the lower portion of the driver's door using a Flex PE14...
Machine Jewelling
Next we switched over to Lake Country Gold Jewelling Pads and machine applied the SONAX Nano Polish, for this everyone stayed around the 600 to 800 RPM Range and re-polished each square inch using only light pressure while cleaning our pads often.
Forrest really liked the results from this step...