Navigation
Install the app
How to install the app on iOS
Follow along with the video below to see how to install our site as a web app on your home screen.
Note: This feature may not be available in some browsers.
More options
Style variation
You are using an out of date browser. It may not display this or other websites correctly.
You should upgrade or use an alternative browser.
You should upgrade or use an alternative browser.
2" pads
- Thread starter parttimer
- Start date
Mike Phillips
Active member
- Dec 5, 2022
- 51,004
- 6
AG now carries 2" foam pads....
Lake Country 2" foam pads
I have some shots of them in action here,
Rupes Polishers - Extreme Makeover - 1965 Chevy Streetrod
2" Foam Pads
Nick gave me some new pads from Lake Country to test out, these are production units, not prototypes.
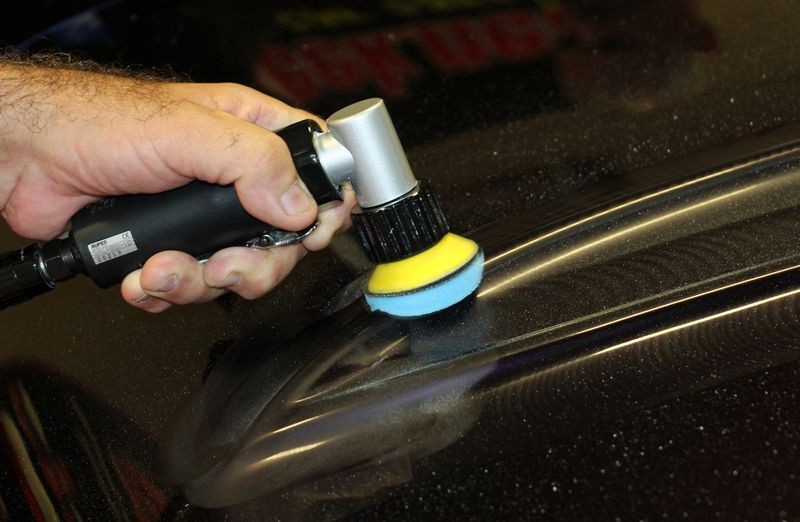
Here's Mr. Robert DiTerrlizzi buffing the swirls and scratches out of the spear on the hood. The small diameter 2" pads were perfect for getting into this tight, thin panel.


Here's Robert CAREFULLY removing the swirls and scratches off of the top of the raised body line. Normally you don't want to buff on a raised body line but the swirls were so obvious on what is actually a large, rounded body line that in order to make the paint match the rest of the hood it had to be machine buffed.
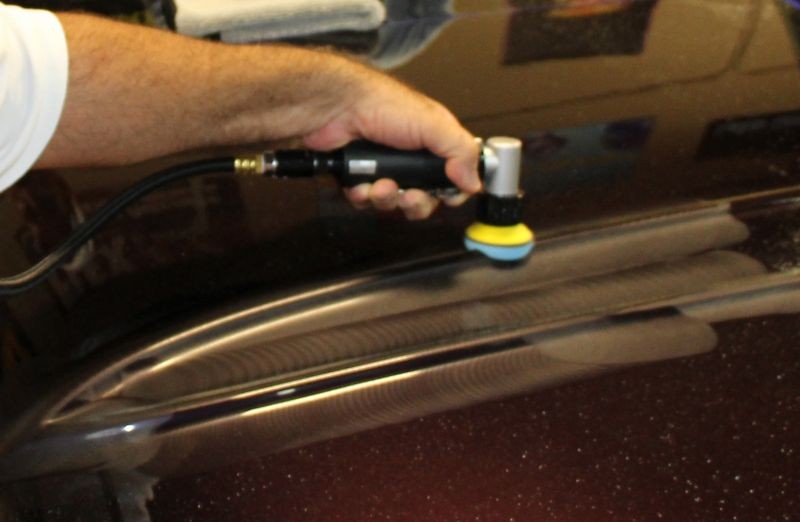
The small footprint and the lightweight, compact size of the Rupes TA50 Sander makes holding the tool with one hand while buffing a cinch.


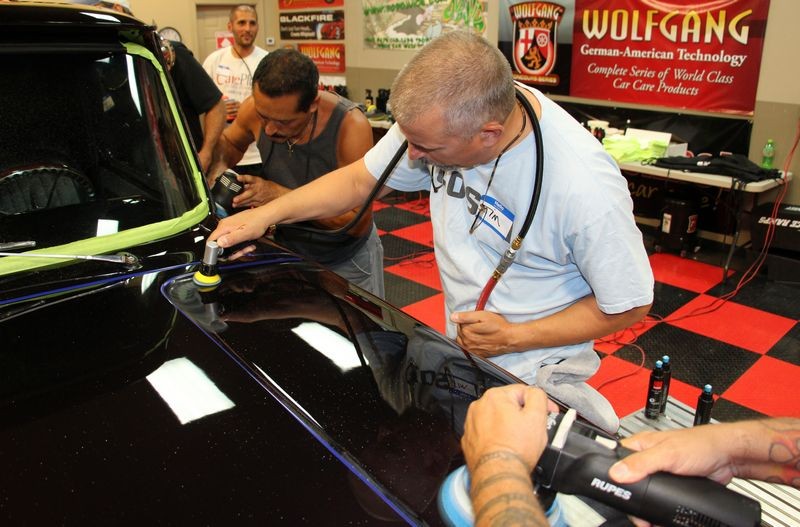
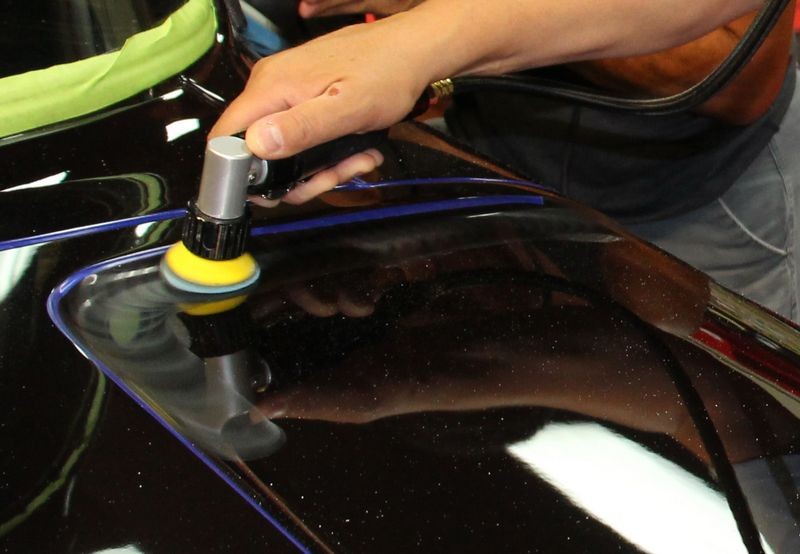
Here's Robert getting the panel just in front of the windshield...

John, from FloridaSportsman.com gave the new pads a test drive....
:xyxthumbs:
Lake Country 2" foam pads
I have some shots of them in action here,
Rupes Polishers - Extreme Makeover - 1965 Chevy Streetrod
2" Foam Pads
Nick gave me some new pads from Lake Country to test out, these are production units, not prototypes.
Here's Mr. Robert DiTerrlizzi buffing the swirls and scratches out of the spear on the hood. The small diameter 2" pads were perfect for getting into this tight, thin panel.
Here's Robert CAREFULLY removing the swirls and scratches off of the top of the raised body line. Normally you don't want to buff on a raised body line but the swirls were so obvious on what is actually a large, rounded body line that in order to make the paint match the rest of the hood it had to be machine buffed.
The small footprint and the lightweight, compact size of the Rupes TA50 Sander makes holding the tool with one hand while buffing a cinch.
Here's Robert getting the panel just in front of the windshield...
John, from FloridaSportsman.com gave the new pads a test drive....
:xyxthumbs:
Mike Phillips
Active member
- Dec 5, 2022
- 51,004
- 6
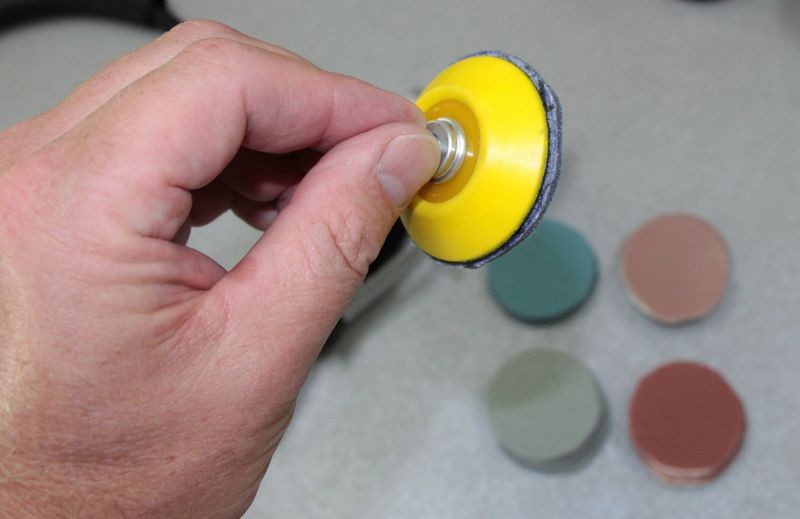
Here's how I made my own sanding and microfiber discs....
Pick your poisen... or in this case, your favorite brand of sanding discs.... 3M Trizact or Meguiar's Unigrit....
Not sure what the future holds for 2" sanding discs but I'm a guy that lives by the philosophy,
"Whatever it takes"
So I just made my own using some scissors and an ink pen. I drew the circles quickly and cut them out just as quickly, I already know some guys will freak out because the perimeter isn't a perfect circle or the edge soft as velvet but when you're sanding in a tight area, up and down an A-pillar or along a raised body line or edge of a panel you're already supposed to be paying attention and being careful.
The big picture to me goes like this,
It already takes a long time to completely wetsand, cut and buff an entire car, why would I want to do anything that would make it take longer?
So of course, be careful, if you like take more time cutting out your own custom discs and maybe even do more steps to refine the edges. While you're doing that I'll be sanding.


:xyxthumbs:
Pick your poisen... or in this case, your favorite brand of sanding discs.... 3M Trizact or Meguiar's Unigrit....
Not sure what the future holds for 2" sanding discs but I'm a guy that lives by the philosophy,
"Whatever it takes"
So I just made my own using some scissors and an ink pen. I drew the circles quickly and cut them out just as quickly, I already know some guys will freak out because the perimeter isn't a perfect circle or the edge soft as velvet but when you're sanding in a tight area, up and down an A-pillar or along a raised body line or edge of a panel you're already supposed to be paying attention and being careful.
The big picture to me goes like this,
It already takes a long time to completely wetsand, cut and buff an entire car, why would I want to do anything that would make it take longer?
So of course, be careful, if you like take more time cutting out your own custom discs and maybe even do more steps to refine the edges. While you're doing that I'll be sanding.
:xyxthumbs:
Mike Phillips
Active member
- Dec 5, 2022
- 51,004
- 6
Rupes TA50 Mini Sander with Meguiar's Xtra Cut MF Discs in action!
We recently wet sanded, cut and buffed a 24' Shearwater Center Console boat. This project included some real challenges including how to remove the oxidation around the rubber-like graphics on the side of the boat.
Here's the boat...
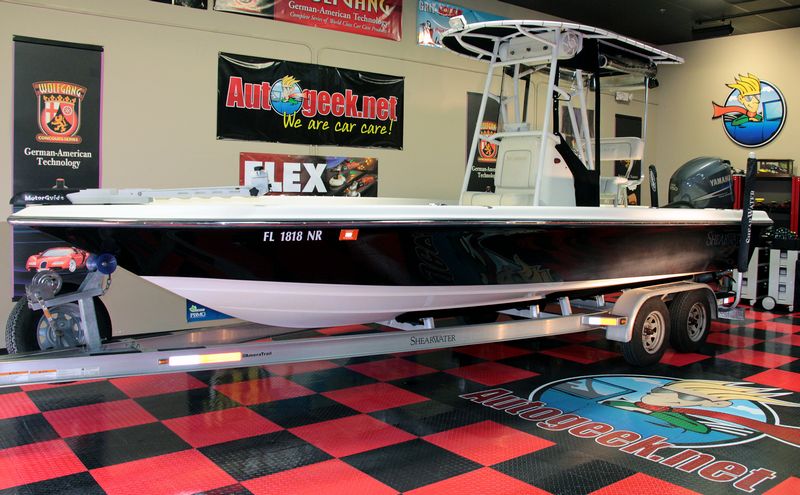
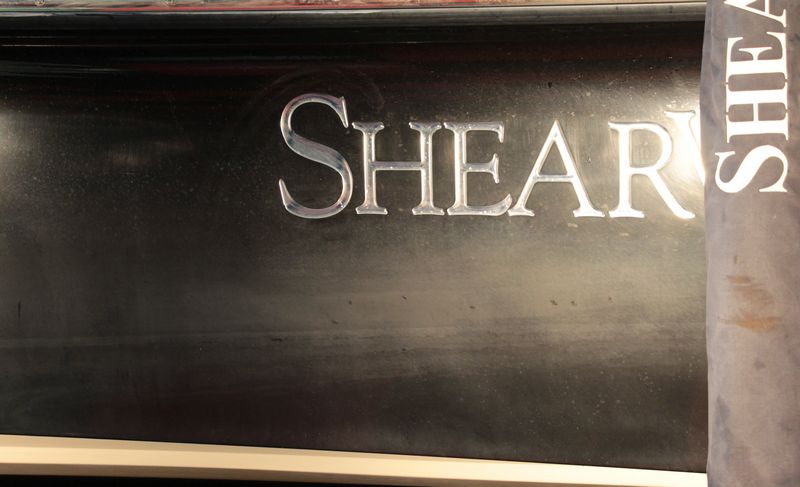
Here's how bad the oxidation was. So bad we opted to machine wet sand it instead of compound it!
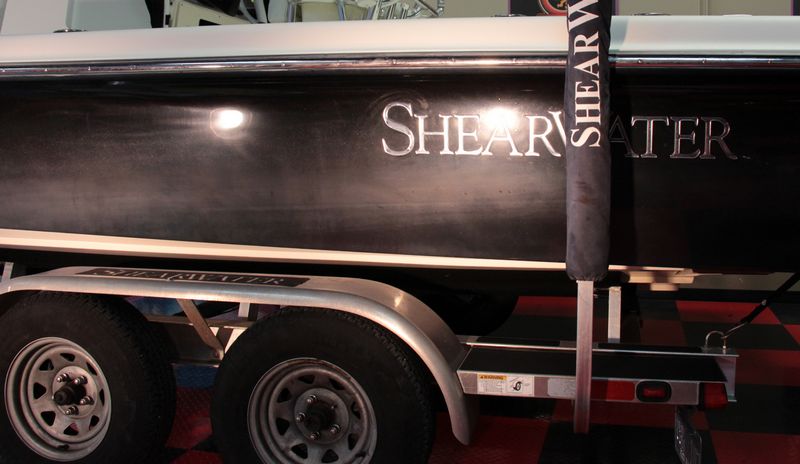
Here's the challenge....
These graphics that spell out Shearwater are a soft form of plastic that feels like rubber.
If you run a FULL SIZE wool cutting pad on a rotary buffer over them you will harm them and even disfigure them.
The Rupes TA50 to the rescue! - I LOVE THIS TOOL!
I've been buffing out cars all my life and I've been waiting for a mini tool like this for doing intricate work and after using one time to remove oxidation I LOVE this tool
This is a must have tool if you buff a lot of cars and have an air compressor... check it out...
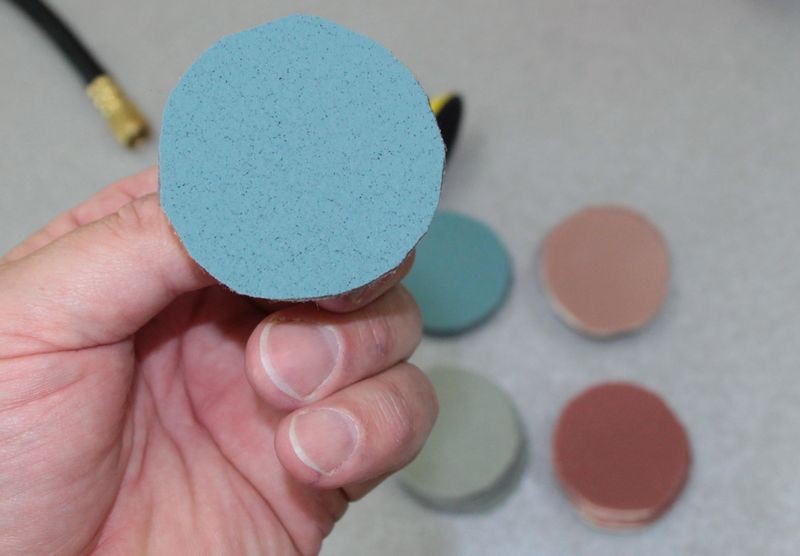
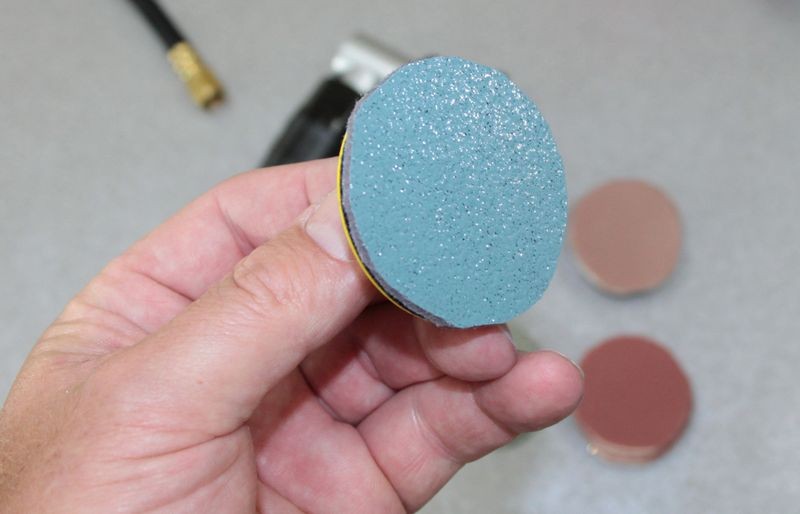
First we took a 6" Meguiar's DMX6 DA Microfiber Xtra Cut Disc and cut 2" discs out of it.
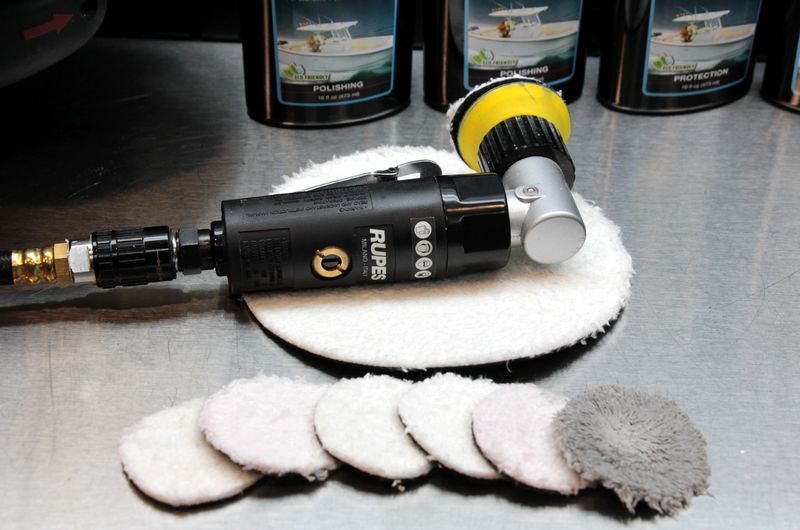

The discs fit onto the velcro hook material on the Rupes 2" backing plate.


Then using Marine 31 Final Step Polish I removed the oxidation around the bottom of the lettering...
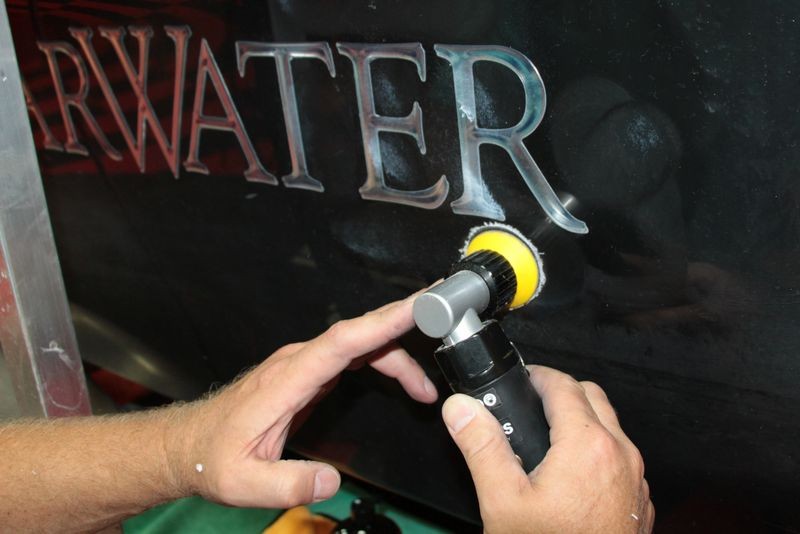

Next by tilting the tool and working on edge I could get inside all the small areas of oxidized gel-coat inside and around the letters.


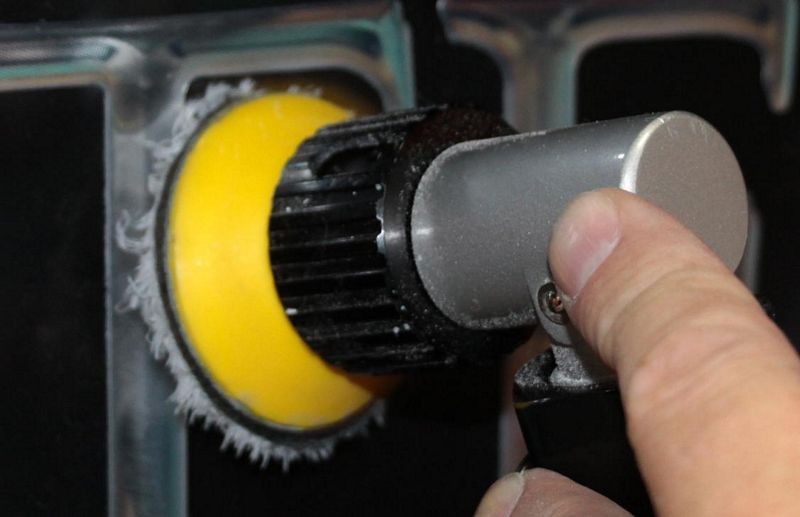
In the shots above the tool is actually running at full speed or wide-open but it looks like the pad is not spinning due the the camera settings and camera flash.
This tool never bogged down. It made quick work of doing some real painstaking polishing.
Get one!
Rupes TA50 Mini Random Orbital Sander
Meguiars DMX6 DA Microfiber Xtra Cut Disc, 6 inches
:dblthumb2:
We recently wet sanded, cut and buffed a 24' Shearwater Center Console boat. This project included some real challenges including how to remove the oxidation around the rubber-like graphics on the side of the boat.
Here's the boat...
Here's how bad the oxidation was. So bad we opted to machine wet sand it instead of compound it!
Here's the challenge....
These graphics that spell out Shearwater are a soft form of plastic that feels like rubber.
If you run a FULL SIZE wool cutting pad on a rotary buffer over them you will harm them and even disfigure them.
The Rupes TA50 to the rescue! - I LOVE THIS TOOL!
I've been buffing out cars all my life and I've been waiting for a mini tool like this for doing intricate work and after using one time to remove oxidation I LOVE this tool
This is a must have tool if you buff a lot of cars and have an air compressor... check it out...
First we took a 6" Meguiar's DMX6 DA Microfiber Xtra Cut Disc and cut 2" discs out of it.
The discs fit onto the velcro hook material on the Rupes 2" backing plate.
Then using Marine 31 Final Step Polish I removed the oxidation around the bottom of the lettering...
Next by tilting the tool and working on edge I could get inside all the small areas of oxidized gel-coat inside and around the letters.
In the shots above the tool is actually running at full speed or wide-open but it looks like the pad is not spinning due the the camera settings and camera flash.
This tool never bogged down. It made quick work of doing some real painstaking polishing.
Get one!
Rupes TA50 Mini Random Orbital Sander
Meguiars DMX6 DA Microfiber Xtra Cut Disc, 6 inches
:dblthumb2:
Mike Phillips
Active member
- Dec 5, 2022
- 51,004
- 6
Just to note...
Cutting up larger pads to make smaller pads is kind of tricky when using just a pair of scissors.
I've done this recently and they never come out very round looking.
Back about 20+ years ago I would make my own small pads using a rotary buffer, a box cutter knife and a screwdriver. This wasn't pretty either but back at the time the smallest foam pad on the market was the W5000 by Meguiar's. Back then this was a 6" pad about 2 inches thick with the backing plate made out of plastic and glued on.
I would put the pad on the rotary, lock the rotary against my leg with the polisher locked onto high speed and then dig the screwdriver into the back of the plastic backing until it carved all the way through it.
Then carefully remove the pad off the rotary and then use the scissors to trim the foam to match the new size of the backing plate. I remember making 3" and 4" pads, mostly for buffing out tight areas and things like the plastic on instrument gauges on muscle cars.
Times have changed....
")
Cutting up larger pads to make smaller pads is kind of tricky when using just a pair of scissors.
I've done this recently and they never come out very round looking.
Back about 20+ years ago I would make my own small pads using a rotary buffer, a box cutter knife and a screwdriver. This wasn't pretty either but back at the time the smallest foam pad on the market was the W5000 by Meguiar's. Back then this was a 6" pad about 2 inches thick with the backing plate made out of plastic and glued on.
I would put the pad on the rotary, lock the rotary against my leg with the polisher locked onto high speed and then dig the screwdriver into the back of the plastic backing until it carved all the way through it.
Then carefully remove the pad off the rotary and then use the scissors to trim the foam to match the new size of the backing plate. I remember making 3" and 4" pads, mostly for buffing out tight areas and things like the plastic on instrument gauges on muscle cars.
Times have changed....
hernandez.art13
New member
- Apr 8, 2013
- 6,958
- 0
Just to note...
Cutting up larger pads to make smaller pads is kind of tricky when using just a pair of scissors.
I've done this recently and they never come out very round looking.
Back about 20+ years ago I would make my own small pads using a rotary buffer, a box cutter knife and a screwdriver. This wasn't pretty either but back at the time the smallest foam pad on the market was the W5000 by Meguiar's. Back then this was a 6" pad about 2 inches thick with the backing plate made out of plastic and glued on.
I would put the pad on the rotary, lock the rotary against my leg with the polisher locked onto high speed and then dig the screwdriver into the back of the plastic backing until it carved all the way through it.
Then carefully remove the pad off the rotary and then use the scissors to trim the foam to match the new size of the backing plate. I remember making 3" and 4" pads, mostly for buffing out tight areas and things like the plastic on instrument gauges on muscle cars.
Times have changed....
I tried doing that when I was making my 2" bp, but didn't keep going after I turned on the machine and put the exacto knife to the spinning bp on a drill. (too scary to proceed, plus didn't have safety goggles on lol)
I do love detailing, but I love my fingers and eyes a lot more :laughing:
You gut some guts Mike
 rops:
rops:oh and if anyone wants to try something similar, get some safety goggles. :coolgleam:
Another trick for 'resizing'...find a piece of pipe with an OD of the correct size. Hold said pipe on the back side of the pad/sanding disks and gently cut around the outside with an Xacto knife, Perfect? No, but seems (to me) better than fighting it with a pair of scissors.
Bill
Bill
hernandez.art13
New member
- Apr 8, 2013
- 6,958
- 0
^ That's actually a great idea.