FrankS
Active member
- Jul 7, 2013
- 1,560
- 0
This is a 2000 Toyota Camry in need of some headlight restoration.
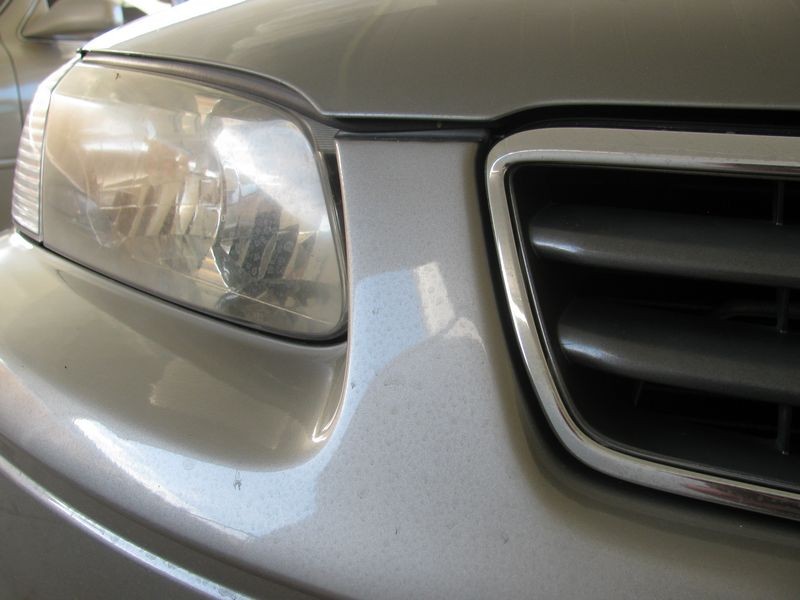
Condition of Headlights
Front shot.

Passenger side - this was the worst side since it gets the afternoon sun as it's parked in the carport.
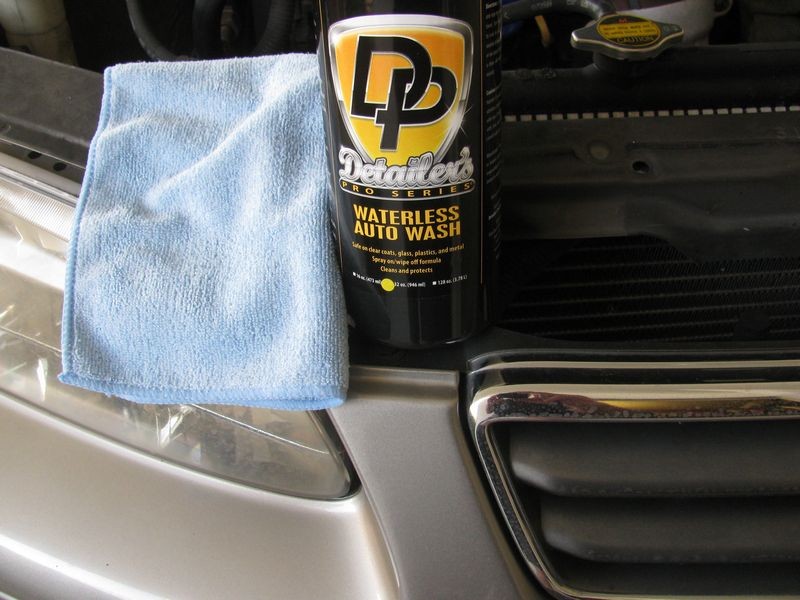
Cleaning the Lenses
Used DP Waterless Auto Wash and MF towel to clean the lenses.
Prep Work
Taped around the lenses. Not a work of art but the idea is to protect the surrounding paint.

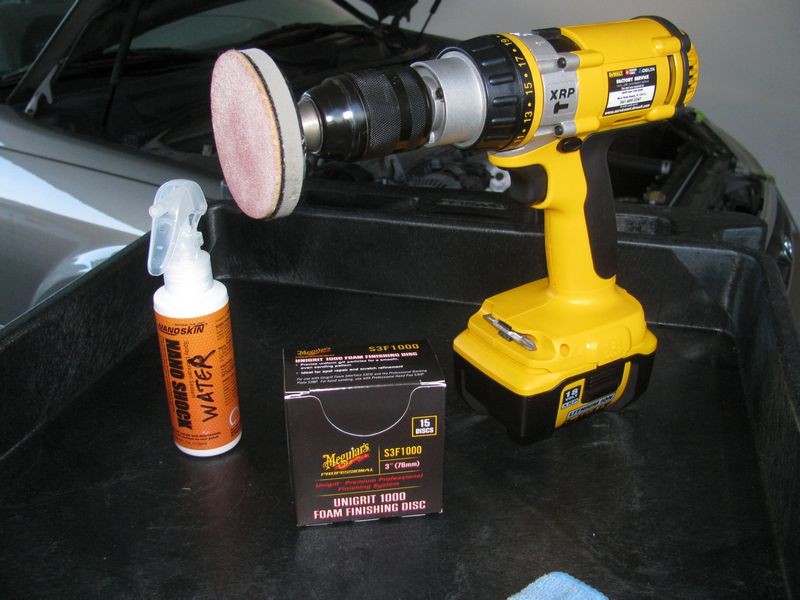
Sanding the Lenses
First up is to wet sand with 1000 grit sandpaper using drill. Used Lake Country 3 Inch Drill Backing Plate attached to drill and Meguiars Unigrit 1000 Foamed Finishing Disc.
Oxidation being removed.

Noticed a clear spot after sanding with 1000 grit, therefore time to hit it again. The entire lens should look hazy.

Second time with 1000 grit - much better.

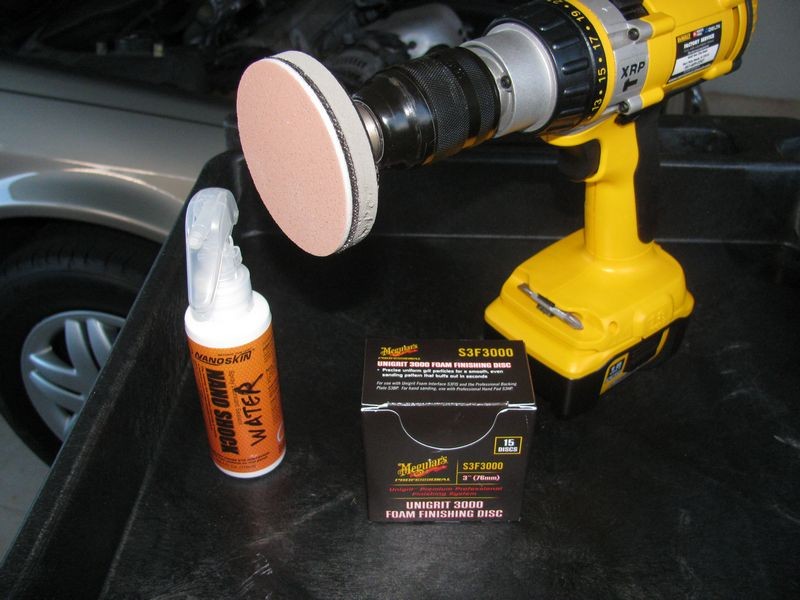
Now it's time to wet sand with 3000 grit to smooth out the scratches caused by the 1000 grit. Used Meg's Unigrit 3000 Foamed Finshing Disc.
Not quite as hazy after using the 3000 grit.

Polishing the Lenses
Time to remove the sanding marks with DP All-In-One Headlight Restoring Polish and a LC 3-1/4" Thin Foamed Wool Pad.
I've had great results using the DP polish and wool pad only without sanding but this time I wanted to do some sanding.

After polishing.

Coating the Lenses
Preparing for the coating - PBL Surface Cleansing Polish to remove any polish residue.
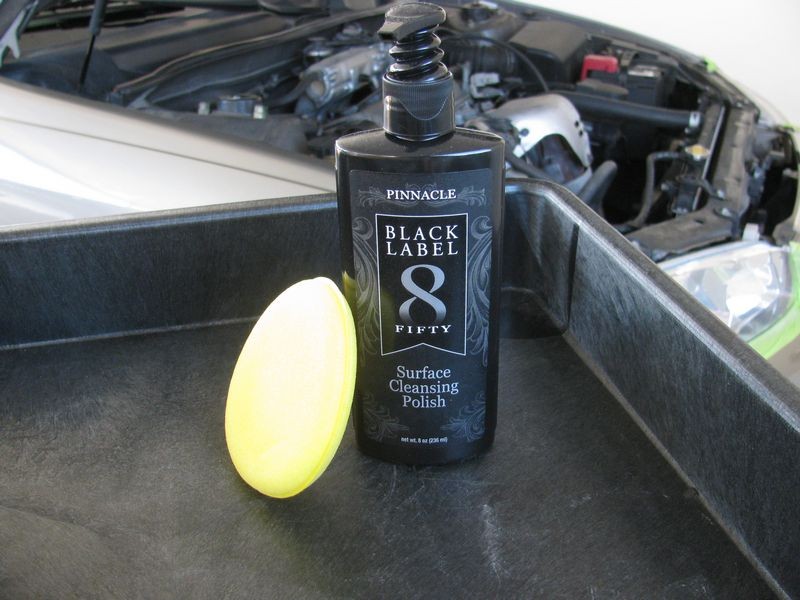
Spreading out the cleansing polish.

Wiping the cleansing polish with clean MF towel.

Time for the coating - PBL Diamond Surface Coating.

Easy application, just spray and spread with small foam pad.

Then wipe with clean MF towel.

Removing Tape
I learned this technique from Mike Phillips. Remove tape at an angle instead of pulling straight up.

Results
Front shot.

Passenger side - was the worst side.
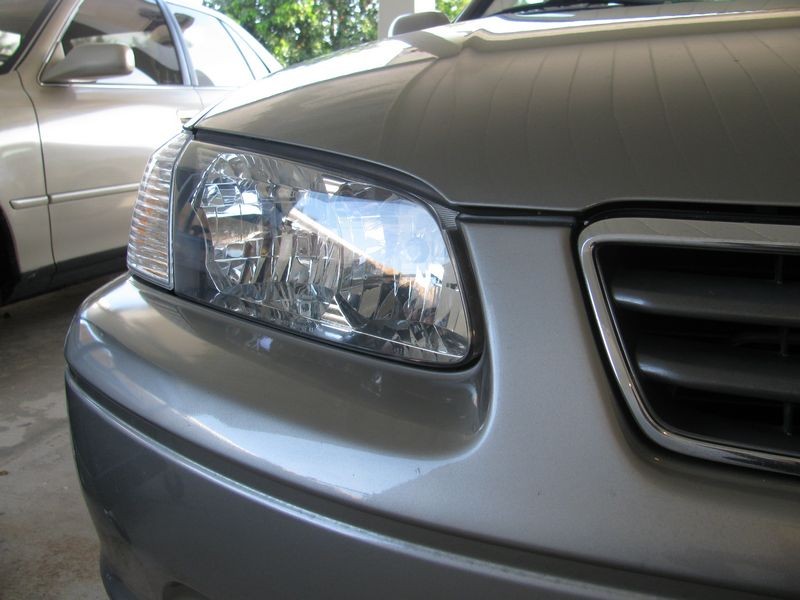
Driver's side.

Job complete and another happy customer!
Condition of Headlights
Front shot.
Passenger side - this was the worst side since it gets the afternoon sun as it's parked in the carport.
Cleaning the Lenses
Used DP Waterless Auto Wash and MF towel to clean the lenses.
Prep Work
Taped around the lenses. Not a work of art but the idea is to protect the surrounding paint.
Sanding the Lenses
First up is to wet sand with 1000 grit sandpaper using drill. Used Lake Country 3 Inch Drill Backing Plate attached to drill and Meguiars Unigrit 1000 Foamed Finishing Disc.
Oxidation being removed.
Noticed a clear spot after sanding with 1000 grit, therefore time to hit it again. The entire lens should look hazy.
Second time with 1000 grit - much better.
Now it's time to wet sand with 3000 grit to smooth out the scratches caused by the 1000 grit. Used Meg's Unigrit 3000 Foamed Finshing Disc.
Not quite as hazy after using the 3000 grit.
Polishing the Lenses
Time to remove the sanding marks with DP All-In-One Headlight Restoring Polish and a LC 3-1/4" Thin Foamed Wool Pad.
I've had great results using the DP polish and wool pad only without sanding but this time I wanted to do some sanding.
After polishing.
Coating the Lenses
Preparing for the coating - PBL Surface Cleansing Polish to remove any polish residue.
Spreading out the cleansing polish.
Wiping the cleansing polish with clean MF towel.
Time for the coating - PBL Diamond Surface Coating.
Easy application, just spray and spread with small foam pad.
Then wipe with clean MF towel.
Removing Tape
I learned this technique from Mike Phillips. Remove tape at an angle instead of pulling straight up.
Results
Front shot.
Passenger side - was the worst side.
Driver's side.
Job complete and another happy customer!