Today I decided to give the 3M Headlight Lens Restoration System a try at clearing up my Passat's cloudy, hazy headlight lenses. It was very obvious the UV coating had failed on the lenses and that wetsanding was my only option to restore them. Take a look at what I was able to achieve in just under 2 hours.
The Problem: Yellowed, cloudy, hazy headlight lenses

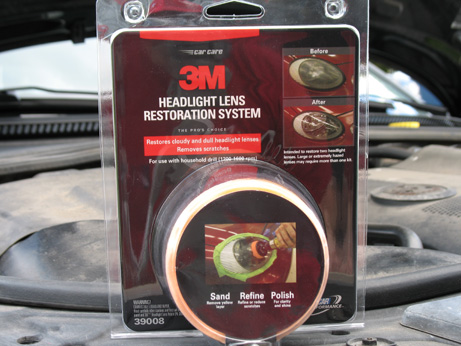
The Solution: 3M Headlight Lens Restoration Sytem
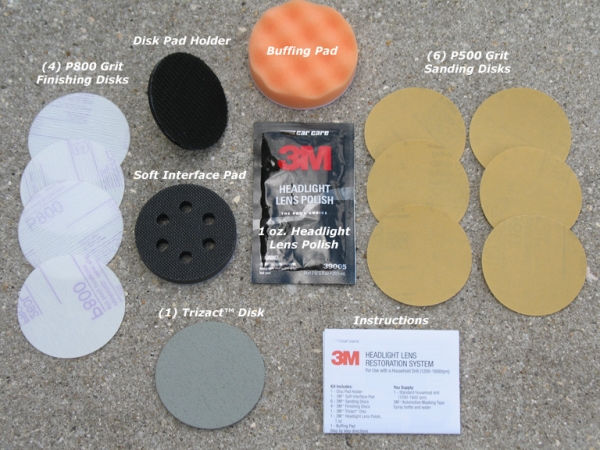
Contents of the kit: The 3M Headlight Lens Restoration System is a great value when you consider all that it comes with.
Before Pictures: As you can see, my headlights were severly clouded and hazy. You can barely see the high beam bulb!


Step 1: Clean the lenses to remove any dirt and tape off the surrounding area. You will be sanding the lens so apply 3-4 layers of tape to prevent accidentally sanding through it and damaging the paint.

Step 2: After you have attached the included disc pad holder to your drill (a corded drill is ideal as a cordless drill may run out of juice before you're finished,) attach the soft interface pad to the pad holder and then place a P500 grit sanding disc onto the interface pad. Using medium to light pressure make slow and steady back and fourth passes on the lens until it appears frosted. I used 2 of the P500 grit sanding pads per lens.
Pass 1


Pass 2 with new P500 disc


Step 3: After you're confident all the yellowing and surface defects have been removed, remove the P500 grit sanding disc and replace it with the P800 grit finishing disc. This step will reduce the 500 grit sanding scratches to a finer 800 grit scratch. Once again, apply medium to light pressure and make slow and steady back and forth passes until you're confident all of the 500 grit scratches have been reduced. I once again used 2 P800 discs per lens.
Pass 1


Pass 2 with a new P800 disc

Step 4: After you're confident all of the 500 grit scratches have been reduced to 800 grit scratches, remove the P800 grit finishing disc and attach the Trizact™ disc. This step will reduce the 800 grit sanding scratches to an even finer 3000 grit scratch which will prepare the surface for polishing. It's important to note that when using the Trizact™ disc you will need to use a spray bottle filled with water to dampen the pad before sanding the lens. I also sprayed the surface of the lens with water to further help the Trizact™ pad work its magic. Again, combine medium to light pressure with a slow and steady back and fourth motion. It will become pretty clear (no pun intended) when this step is complete.

After seeing this, I couldn't stop smiling.

Step 5: After you no longer see any sanding scratches and the lens surface appears slightly hazy it's time to remove the Trizact™ sanding disc and install the orange buffing pad. Apply a dime sized amount of the included 3M Headlight Lens Polish and polish the lens to full clarity.
After Pictures: I am turely amazed at the results and couldn't be happier with this product.


Before & After shot:

The Problem: Yellowed, cloudy, hazy headlight lenses
The Solution: 3M Headlight Lens Restoration Sytem
Contents of the kit: The 3M Headlight Lens Restoration System is a great value when you consider all that it comes with.
Before Pictures: As you can see, my headlights were severly clouded and hazy. You can barely see the high beam bulb!
Step 1: Clean the lenses to remove any dirt and tape off the surrounding area. You will be sanding the lens so apply 3-4 layers of tape to prevent accidentally sanding through it and damaging the paint.
Step 2: After you have attached the included disc pad holder to your drill (a corded drill is ideal as a cordless drill may run out of juice before you're finished,) attach the soft interface pad to the pad holder and then place a P500 grit sanding disc onto the interface pad. Using medium to light pressure make slow and steady back and fourth passes on the lens until it appears frosted. I used 2 of the P500 grit sanding pads per lens.
Pass 1
Pass 2 with new P500 disc
Step 3: After you're confident all the yellowing and surface defects have been removed, remove the P500 grit sanding disc and replace it with the P800 grit finishing disc. This step will reduce the 500 grit sanding scratches to a finer 800 grit scratch. Once again, apply medium to light pressure and make slow and steady back and forth passes until you're confident all of the 500 grit scratches have been reduced. I once again used 2 P800 discs per lens.
Pass 1
Pass 2 with a new P800 disc
Step 4: After you're confident all of the 500 grit scratches have been reduced to 800 grit scratches, remove the P800 grit finishing disc and attach the Trizact™ disc. This step will reduce the 800 grit sanding scratches to an even finer 3000 grit scratch which will prepare the surface for polishing. It's important to note that when using the Trizact™ disc you will need to use a spray bottle filled with water to dampen the pad before sanding the lens. I also sprayed the surface of the lens with water to further help the Trizact™ pad work its magic. Again, combine medium to light pressure with a slow and steady back and fourth motion. It will become pretty clear (no pun intended) when this step is complete.
After seeing this, I couldn't stop smiling.
Step 5: After you no longer see any sanding scratches and the lens surface appears slightly hazy it's time to remove the Trizact™ sanding disc and install the orange buffing pad. Apply a dime sized amount of the included 3M Headlight Lens Polish and polish the lens to full clarity.
After Pictures: I am turely amazed at the results and couldn't be happier with this product.
Before & After shot: