Navigation
Install the app
How to install the app on iOS
Follow along with the video below to see how to install our site as a web app on your home screen.
Note: This feature may not be available in some browsers.
More options
Style variation
You are using an out of date browser. It may not display this or other websites correctly.
You should upgrade or use an alternative browser.
You should upgrade or use an alternative browser.
Applying Multiple Coats
- Thread starter b-rad g
- Start date
pwcheenie
New member
- Oct 24, 2006
- 93
- 0
I read a post last summer on applying multiple coats of wax, one right after another. The secret was to use a chilled spray bottle of water kept in the fridge. Apply one coat of wax, then spray the cool water mist on a pannel before applying next coat of wax. I guess it hardens the previous wax so it is not polished away by the second coat. I have tried it and it seem to work fine.
Has anyone else out there ever heard of this technique? c7424:
Has anyone else out there ever heard of this technique?
c7424:loudog2
New member
- Aug 5, 2008
- 2,880
- 0
Thanks for the small print!! Now my eyes hurt:nomore:I read a post last summer on applying multiple coats of wax, one right after another. The secret was to use a chilled spray bottle of water kept in the fridge. Apply one coat of wax, then spray the cool water mist on a pannel before applying next coat of wax. I guess it hardens the previous wax so it is not polished away by the second coat. I have tried it and it seem to work fine.
Has anyone else out there ever heard of this technique?
jmp09fg2
New member
- Dec 1, 2009
- 164
- 0
I read a post last summer on applying multiple coats of wax, one right after another. The secret was to use a chilled spray bottle of water kept in the fridge. Apply one coat of wax, then spray the cool water mist on a pannel before applying next coat of wax. I guess it hardens the previous wax so it is not polished away by the second coat. I have tried it and it seem to work fine.
Has anyone else out there ever heard of this technique?
Well looky there. I'll try this out tomorrow....
Rsurfer
Active member
- Jan 26, 2007
- 14,156
- 19
It's called spit shinning. Don't know if your old enough, but this system was used to get a glass like look on your boots. It's a lot of work and to me not worth the effort. The cold water will harden the existing wax, but it will also help dissolve the solvents in the wax from removing the previous layer.I read a post last summer on applying multiple coats of wax, one right after another. The secret was to use a chilled spray bottle of water kept in the fridge. Apply one coat of wax, then spray the cool water mist on a pannel before applying next coat of wax. I guess it hardens the previous wax so it is not polished away by the second coat. I have tried it and it seem to work fine.
Has anyone else out there ever heard of this technique?
rohnramirez
New member
- Feb 18, 2010
- 827
- 0
I would just wash it the next day. Not much work there cause, i'm sure not much dirt could to gather in the garage. 10mins to wash, 10minutes to dry. 10minutes to apply another coat. sit in the couch for an hour (yeah,i like to keep it there for a while before i buff it out), then go back for to do a 5minute buff and another 5 minute final wipe.
Mike Phillips
Active member
- Dec 5, 2022
- 51,004
- 6
If your goal is to create the thickest layer of protection possible then a couple of suggestions...
Before applying a second coat you want the first coat to fully set-up, in this case the word set-up means for the protection ingredients to completely do whatever it is they do to be fully locked-on and bonded to the paint. Different waxes and sealants bond to paint differently and there's no real good way to know what this technology is because car wax manufactures don't post this kind of information, at least the "real" part of it for our reading pleasure.
So the next best thing you can do is allow enough time to go by to allow whatever the magical chemistry is to take place and a good rule-of-thumb is a window of time of 24 hours. Maybe the magic is over in 5 minutes, maybe the magic is over in 23 hours and 23 minutes, maybe the magic is over in 5 minutes on the fender but not completely done on the paint by the rear view mirror. Since there's no way of knowing, that's why just a blanket, vague 24 hour window time is a good rule of thumb.
I don't use it personally as I don't have that kind of time in life but the above is just an "answer" and you can take from it what you will.
Next, any subsequent applications of whatever wax or sealant you choose to use must be applied gently and softly and the reason for this is because even if the product you're using is non abrasive, besides the product other factors are involved that could "disrupt" or "break-up" or "loosen" or even "remove" the previously applied coating, things like,
Application material - Soft foam is more gentle than steel wool, so don't use steel wool or anything aggressive to apply a finishing wax or sealant.
Application pressure - Pushing or applying softly is more gentle than scrubbing the next layer on, so be gentle and apply with a soft touch.
Application time - It's possible that just the act of rubbing a liquid over a waxed or sealed surface could act to re-liquefy the previously dried layer, rubbing longer can't possible be a benefit so what's the opposite of rubbing longer?
Don't know if that helps but I've had the good fortune of posting about layering a lot in my life.
Mike Phillips
Active member
- Dec 5, 2022
- 51,004
- 6
If possible, try not to wipe or touch the paint in-between coats, if you have to wipe or wash, then do so in the least evasive manner possible.
If wiping use extra microfibers versus one or two, if washing, remember you don't need to run the wash mitt over the panel but once or twice to loosen the grip any light dirt or dust might have on the paint.
Just the act of rubbing or wiping paint with some kind of cloth is more likely to remove part of the sacrificial wax or sealant coating than to add to it.
Here's wiping to the extreme...
Tips & Techniques for using a Spray Detailer to Remove Light Dust, Fingerprints and Smudges
")
If wiping use extra microfibers versus one or two, if washing, remember you don't need to run the wash mitt over the panel but once or twice to loosen the grip any light dirt or dust might have on the paint.
Just the act of rubbing or wiping paint with some kind of cloth is more likely to remove part of the sacrificial wax or sealant coating than to add to it.
Here's wiping to the extreme...
Tips & Techniques for using a Spray Detailer to Remove Light Dust, Fingerprints and Smudges
- Thread starter
- #11
If your goal is to create the thickest layer of protection possible then a couple of suggestions...
Before applying a second coat you want the first coat to fully set-up, in this case the word set-up means for the protection ingredients to completely do whatever it is they do to be fully locked-on and bonded to the paint. Different waxes and sealants bond to paint differently and there's no real good way to know what this technology is because car wax manufactures don't post this kind of information, at least the "real" part of it for our reading pleasure.
So the next best thing you can do is allow enough time to go by to allow whatever the magical chemistry is to take place and a good rule-of-thumb is a window of time of 24 hours. Maybe the magic is over in 5 minutes, maybe the magic is over in 23 hours and 23 minutes, maybe the magic is over in 5 minutes on the fender but not completely done on the paint by the rear view mirror. Since there's no way of knowing, that's why just a blanket, vague 24 hour window time is a good rule of thumb.
I don't use it personally as I don't have that kind of time in life but the above is just an "answer" and you can take from it what you will.
Next, any subsequent applications of whatever wax or sealant you choose to use must be applied gently and softly and the reason for this is because even if the product you're using is non abrasive, besides the product other factors are involved that could "disrupt" or "break-up" or "loosen" or even "remove" the previously applied coating, things like,
Application material - Soft foam is more gentle than steel wool, so don't use steel wool or anything aggressive to apply a finishing wax or sealant.
Application pressure - Pushing or applying softly is more gentle than scrubbing the next layer on, so be gentle and apply with a soft touch.
Application time - It's possible that just the act of rubbing a liquid over a waxed or sealed surface could act to re-liquefy the previously dried layer, rubbing longer can't possible be a benefit so what's the opposite of rubbing longer?
Don't know if that helps but I've had the good fortune of posting about layering a lot in my life.
Thanks Mike, yes that does help. This is my first time using a "high end" wax, it is the Titanium wax from Zymol and is supposed to be put on with bare hands so it should not be as "rough" as a foam applicator, but being that the wax liquifies when rubbing hands together the previous layer could reliquify when rubbed again with second layer. Well, we shall see what it does. I am planning on letting it sit for atleast 12 hours, more if I can.
Mike Phillips
Active member
- Dec 5, 2022
- 51,004
- 6
Thanks Mike, yes that does help. This is my first time using a "high end" wax, it is the Titanium wax from Zymol and is supposed to be put on with bare hands so it should not be as "rough" as a foam applicator, but being that the wax liquefies when rubbing hands together the previous layer could re-liquefy when rubbed again with second layer. Well, we shall see what it does. I am planning on letting it sit for at least 12 hours, more if I can.
I would apply it with a soft foam applicator pad and not your bare hands...
I've written on this topic numerous time and first and foremost, each person can find a way that works best for them and if you've never applied a wax using your bare hands it's easy enough to at least "try" and then you can have your own opinion based upon real world experience. As for me my personal preference is to apply waxes and paint sealants by machine anytime I can, after that my second choice would be using a clean soft foam applicator pad.
See my comments on bare hand waxing on page 2 of this thread.
Something I just wrote on applying a paste wax by machine in this thread,
The Secret to Removing Oxidation and Restoring a Show Car Finish to Antique Single Stage Paints
How to apply a paste wax by machine
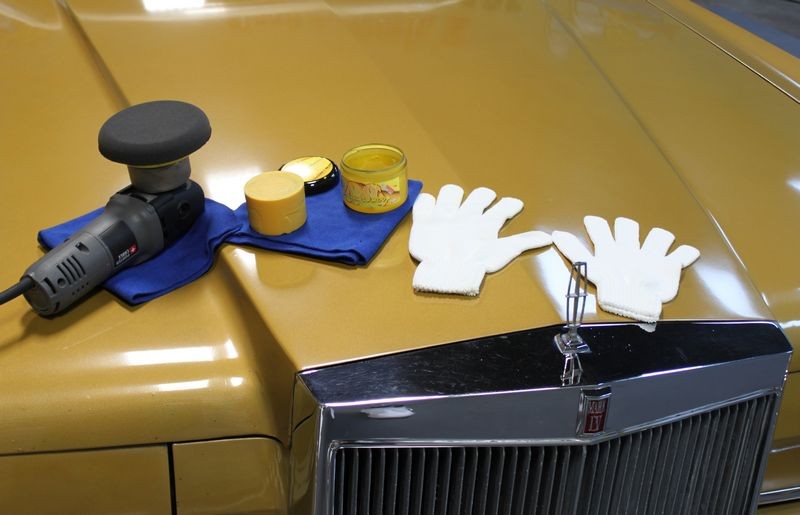
You'll need a DA Polisher like this Porter Cable 7424XP with a 5.5" Flat Gray Finishing Pad, Dodo Juice Banana Armour Hard Wax and some Microfiber Gloves. For this step you could substitute any quality finishing wax or paint sealant. Here's a list of finishing waxes, sealants and hybrids.
How To Choose The Right Wax or Paint Sealant for your Detailing Project
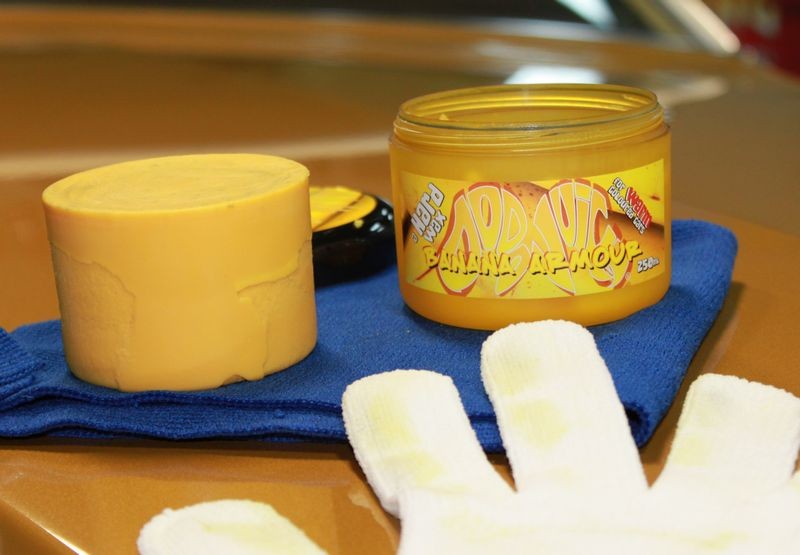
For this procedure I'm going to place a microfiber glove over one hand in order to hold the wax without contaminating it or without it slipping out of my hand.
To get the wax out of the plastic jar you just have to carefully knock it out using inertia by holding the jar upside down and then knocking it against your other hand with a Microfiber Glove on it.
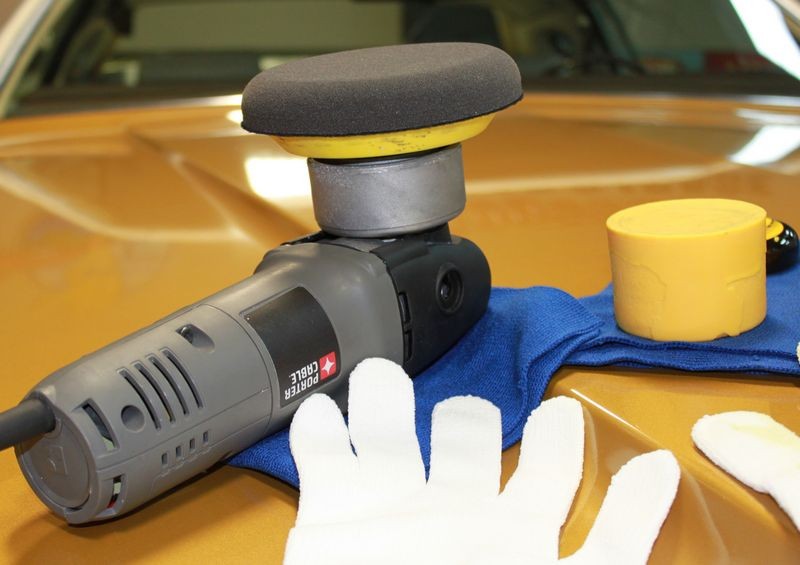
Then hold the polisher in one hand and the wax in your other hand with the glove on it and blip the on/off button of the polisher while holding the wax against the face of the pad and you can quickly transfer wax to the pad.

The Microfiber Gloves keep the wax clean until you place it back into the jar and enable you to grip the wax so it doesn't slip out of your hand and onto the floor...
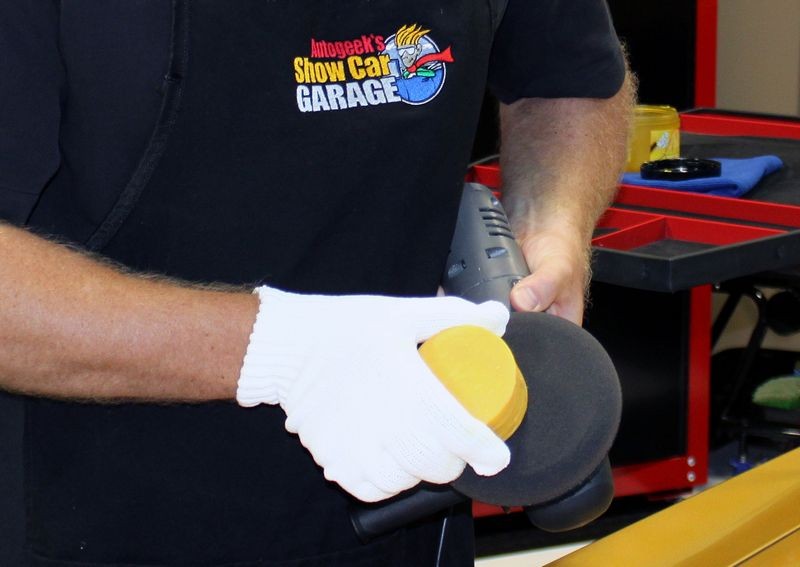
Ready to start laying down some Banana Armour...

It takes a little muscle to do this because in one hand you're holding the wax and the other hand is holding the polisher for the duration of time it takes to run the polisher over every square inch of the car. If you had a helper they could hold the wax with microfiber gloves on and you could use both hands to hold the polisher, then as you needed more wax your helper could apply the wax while you hold the polisher, otherwise hit the gym.
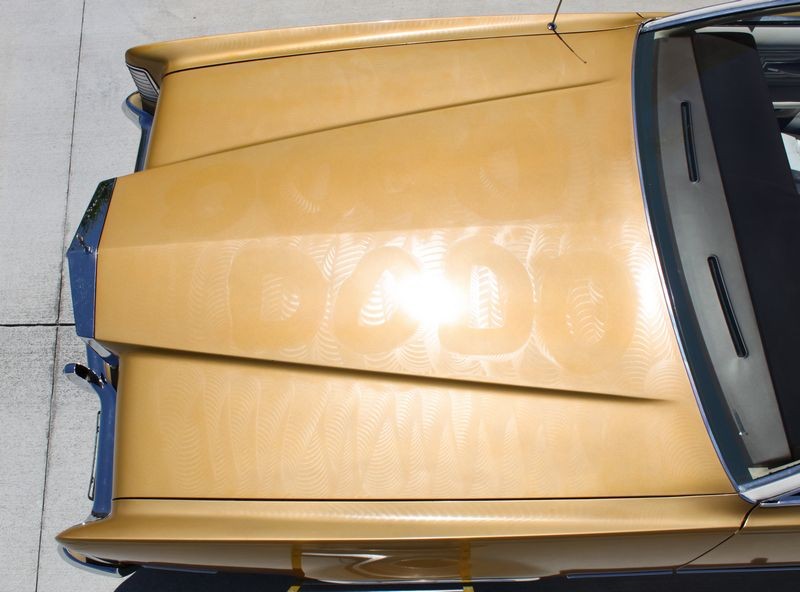
If you look carefully you can see I spelled out Dodo on the hood in my wax pattern...

In the forum world you'll often read people talking about getting the "Sun Shot" , that's where they pull their project car out into the sun to show there are no swirls in the paint.
The below shot is kind of like the "Sun Shot", but I call it the "Fun Shot" because I was just having some fun with the Dodo name in wax.
I used a rubberband to hold a Cobra Indigo Microfiber Bonnet over a 3" Griot's Garage Polishing Pad on a DA Polisher and took the wax off only where the word DODO was spelled out and then pulled the car into the sun for a "Fun Shot".
The Sun Shot Fun Shot
Yep, this is how you get the high overhead shot, you have to get up in the air a little ways...

Removing the wax
After capturing the fun shot I pulled the car back into our studio and let the hood cool down and then removed the wax by hand using Cobra Indigo Microfiber Towels. Always fold your towels 4 ways to give you 8 sides to wipe with and to provide cushion to spread out the pressure of you hand.
Below is a link to a video and at the end of the video I show how to remove Wolfgang Deep Gloss Paint Sealant 3.0 by hand using the Cobra Indigo Microfiber Towels. In this video I share a technique I call "Breaking the Wax Open" and then "Creeping Out". Wolfgang Deep Gloss Paint Sealant 3.0 is a finishing synthetic paint sealant but the technique shared in the video can be used with any finishing wax, sealant or hybrid.
How to Apply a Synthetic Paint Sealant by Hand using the Straightline Technique
After removing the majority of the wax it's time to give the paint a final wipe. Here's an article on the technique for giving paint a final wipe.
The Final Wipe – Tips for creating a streak-free, show car finish
~~~~~~~~~~~
End of copy and paste...
~~~~~~~~~~~
Definitely everyone should try applying a wax using only their bare hand and then decide for themselves if it's a superior technique or call it what you want...
Kurt_s
New member
- Dec 18, 2009
- 1,263
- 0
Since different waxes set up differently, my comment may not be applicable. I've used a traditional carnauba wax that does not contain polymers for about 10 years, although I've recently begun to use sealants and sealant/wax combinations.
Set up time for this particular carnauba wax was about 20-30 minutes with typical SoCal humidity and temperature, when applying with a thin coat and foam applicator. I normally let it sit for an hour in the garage before wiping it down. I always used the swipe test to make sure that it was ready to remove. I also let the car sit overnight before going over the car again to catch any missed wax, sometimes using the manufacturer's spray detailer during the final wipedown.
The manufacturer told me to allow 24-48 hours between wax layers so the wax would properly bond to the paint. As a daily driver, he told me to apply the second coat the following weekend for ease of use. This procedure normally allowed me 3-4 months between clay, glaze and wax jobs with good protection.
He also recommended that the first coat be applied linearly from front to back to minimize swirls during application and removal. The second coat should be applied perpendicular to the first layer to make sure that you have full coverage.
Last year, I bought a PCXP which I use for sealant application. I have not used it for wax application yet, as I have been experimenting with Optimum Spray Wax which is absolutely killer. Good luck!
")