Mike Phillips
Active member
- Dec 5, 2022
- 51,004
- 7
Basic Meguiars G110v2 Assembly
Here's how you assemble your Meguiar's G110v2 after removing it from the box.
First, locate the backing plate and remove the rubber nut that protects the threads. Save the rubber nut in-case you ever choose to use a different backing plate to replace over the threads and protect them while the backing plate is not in use.


Note that the rubber nut also kept the Compression Washer from falling off the threaded shaft of the backing plate.

DO NOT LOSE THE COMPRESSION WASHER.

There is a wrench included with your Meguiar's G110v2, take the wrench and place it on the spindle inside the yellow housing to keep it from rotating when you install and tighten the backing plate.

Hold the backing plate as shown to attach the threaded shaft into the spindle without having the compression washer fall off.


After you get the backing plate threaded into the spindle tighten the backing plate till snug.

Next attach the D-Handle

Use both hand to expand the D-handle so that it will fit over the slotted portion of the head of the polisher.

Next use the included hex head wrench and hex head bolts to affix the handle to the polisher.


Tighten till firm...

Repeat to the other side...

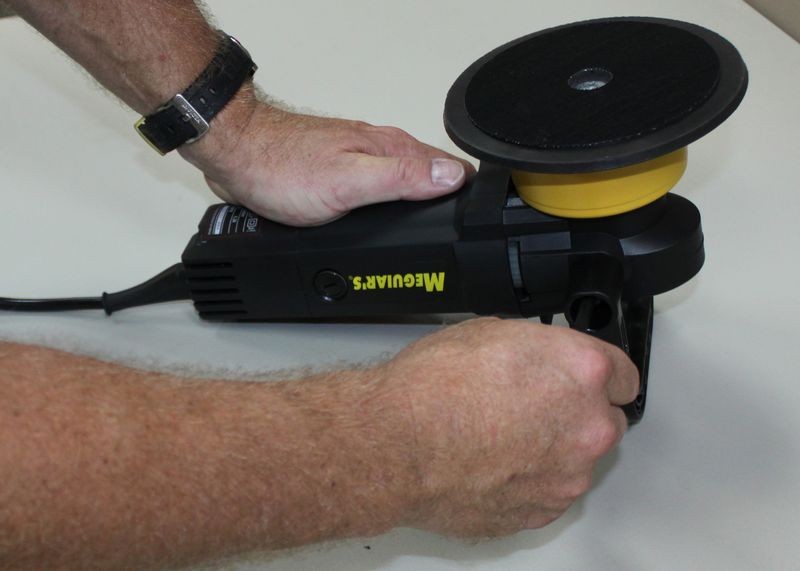


Here is what your assembled G110v2 should look like...

Next attach the Velcro loop side of a Meguiar's foam buffing pad to the face of the backing plate with the attachment hooks...


And now you're ready to start creating flawless, show car results!

:dblthumb2:
Here's how you assemble your Meguiar's G110v2 after removing it from the box.
First, locate the backing plate and remove the rubber nut that protects the threads. Save the rubber nut in-case you ever choose to use a different backing plate to replace over the threads and protect them while the backing plate is not in use.
Note that the rubber nut also kept the Compression Washer from falling off the threaded shaft of the backing plate.
DO NOT LOSE THE COMPRESSION WASHER.
There is a wrench included with your Meguiar's G110v2, take the wrench and place it on the spindle inside the yellow housing to keep it from rotating when you install and tighten the backing plate.
Hold the backing plate as shown to attach the threaded shaft into the spindle without having the compression washer fall off.
After you get the backing plate threaded into the spindle tighten the backing plate till snug.
Next attach the D-Handle
Use both hand to expand the D-handle so that it will fit over the slotted portion of the head of the polisher.
Next use the included hex head wrench and hex head bolts to affix the handle to the polisher.
Tighten till firm...
Repeat to the other side...
Here is what your assembled G110v2 should look like...
Next attach the Velcro loop side of a Meguiar's foam buffing pad to the face of the backing plate with the attachment hooks...
And now you're ready to start creating flawless, show car results!
:dblthumb2: