Best way to remove Vinyl lettering/signs

Big Boi

New member
Joined
Feb 21, 2011
Messages
289
Reaction score
0
I have a huge detail job on a 2004 Ford E150. The owner is a close friend of mine. But insists on paying me top dollar!

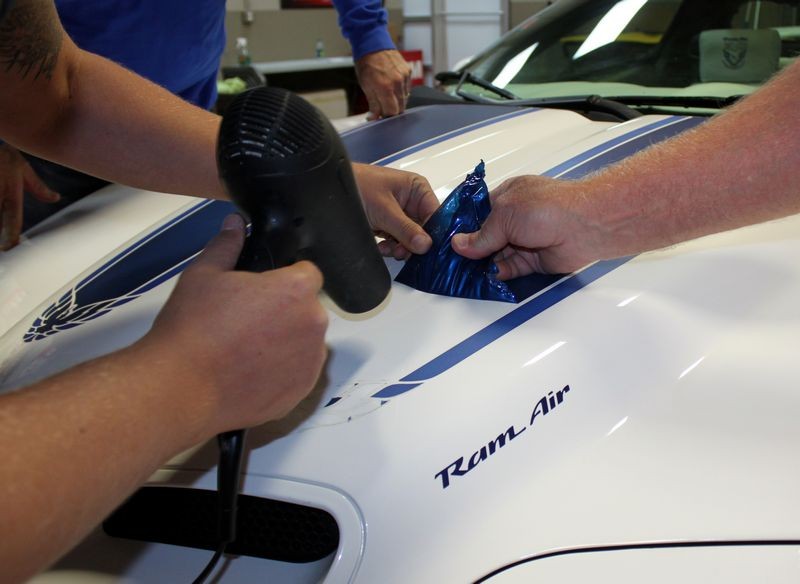
He had some vinyl lettering installed some years ago. And its time for an update with a new logo. Ive started to remove most of the driver side lettering, using a combination of Pro Goof Off, Heat gun, plastic straight edged razor blades, eraser wheel, and a Harbor Freight "Decal Remover." Which is just a cheap soldering iron with a straight edge razor on the end.

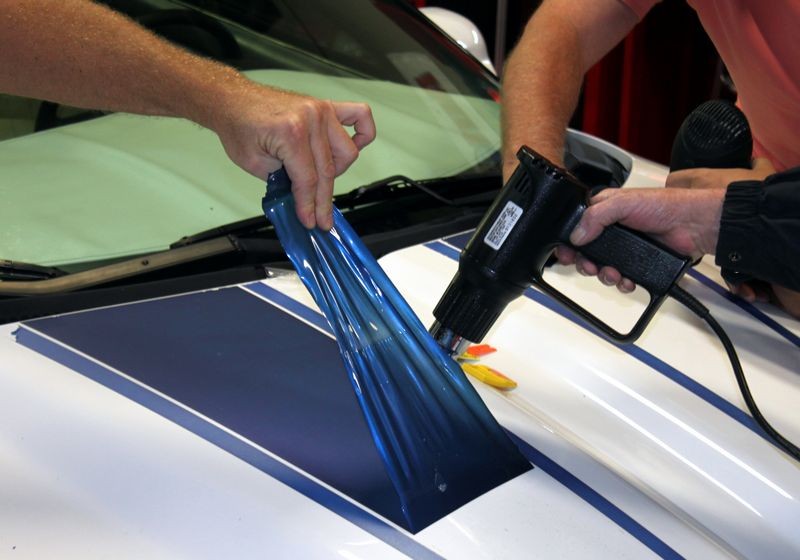
The eraser wheel kicked butt on the top layer of vinyl. But the "Shadow" vinyl isnt budging as easy. Ive done it in direct sunlight/mid day... "No so ez..." :buffing:

Any tip or tricks out there to aid in this job?


Here's my To Do List:
UC, 205, NXT 2.0, M26 or MUW
Clean eninge
Interior detail
Remove front and rear bumpers and repaint (no body work)
Paint wheel hubs
Replace headlamp assemblies
Replace turn signal lens
Oil Change
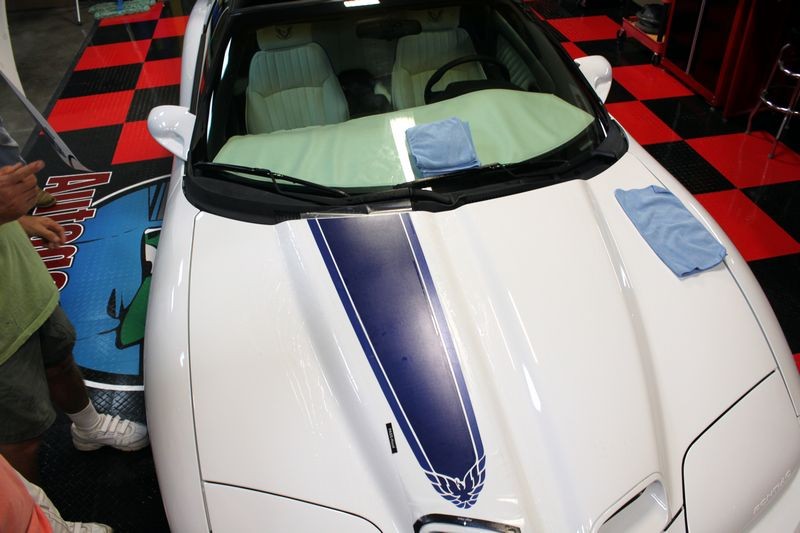
Remove Vinyl lettering from both sides
 
Hard to tell, but is smaller font black vinyl on top of oxidized chrome vinyl.


20130125_192315_HDR.jpg


20130125_192308_HDR.jpg


As it stands
20130126_104638_HDR.jpg
 
I use a heat gun easiest way to take them off. Just be care full not to heat up paint to much.
Todd
 
I removed a very much smaller vinyl dealer sign on a vehicle with TarX. It worked pretty good I thought. It was on the vehicle for 4 years. I suggest some sort of plastic scrapper because I was just using my thumb nail to remove mine. I read that 3M adhesive remover works really well also. TarX doesn't smell that bad either.

Like todd said above, you could use a heat gun if it pulls most of the sticker off but you may still have to follow it up with an adhesive remover to get the leftover residue off.
 
Heat gun to warm the adhesive get a finger nail under the corner and peel up. I also always have a 3m rubber wheel on hand for any glue that might be a pita
 
Removing decals can be a real pain the first half a dozen times you do it until you work out a good technique of removal. Just like polishing paint...each vehicle is different too. With different thicknesses and types of the vinyl itself, different types and amounts of adhesives used and on different substrates which may or may not dissipate heat very well.

I've done a lot of these decal removals at this point and can say that it's all in finding and maintaining the right temperature at where the adhesive is soft enough to allow the decal to peel off in one solid piece. If it's not warm enough the vinyl tears or breaks...If it's too hot then the vinyl stretches and tears as you try to peel it up in one piece. There is a learned technique that when rushed, usually ends up in a lot more work after the vinyl is removed.

The rubber wheel causes burns and or paint blemishes that need to be buffed out, or worse yet requires some wet sanding to get the paint looking like the decals were never there. The plastic razor blades and or scrapers can cause scratches and more buffing work if used too aggressively on over warmed paint.

What I try to do is to warm the entire letter so that it's "not hot, but good and warm" to the back of my hand when placed against the warmed area. Then I work one small area with my fingernail or thumbnail to get a tab large enough to begin pulling the vinyl from. By the time this tab is sufficiently peeled up, the rest of the letter has cooled off too much for a good "in one piece peel". Once I get the pull tab off the paint, I'll reheat the rest of the letter trying to keep the heat concentrated on the stuck on part of the decal as to not melt or over heat the tab that I'll be pulling from so it doesn't tear as I attempt to peel the remainder of the decal up.

After rewarming the decal I begin carefully peeling the decal up trying to keep it in one piece. As the decal begins to cool off, it needs to be rewarmed but the heat should be applied an inch or so forward of the tab that you're peeling from. If the heat hits that tab, the tab will likely stretch and tear as you pull the decal off of the paint. There needs to be a balance of the right amount of heat concentrated in the right place to pull it off in one piece (which is key).

After the decals are all peeled off (if there's a lot of adhesive left behind) I'll take a plastic trigger spray bottle filled with xylene or lacquer thinner and spray two entire letters with it (depending on size) and allow to dwell for about 45 seconds until the adhesive turns to a booger like consistency. Once the adhesive is at this consistency the plastic razor blade will easily remove the majority of the softened up adhesive. I try to keep the softened adhesive wet with the xylene or lacquer thinner as I squeegee it off of the paint. This can make a sticky mess on the garage floor so you might want to lay down a drop cloth of sorts or some cardboard before beginning the adhesive removal stage.

It should go without saying...but I'll say it anyway...keep the xylene and or lacquer thinner off of any rubber or plastic trim. If such trim pieces are present, they should be sufficiently covered with a few layers of tape, or completely removed if possible.

So it's...spray...dwell..spray..squeegee off adhesive with plastic razor blade...wipe blade clean and repeat until all the lettering adhesive is pretty much removed. Whatever adhesive remains afterward easily wipes up with a lacquer thinner dampened towel, turning to a clean towel section as the adhesive begins to clog up the towel's fibers. Once the towel's fibers are clogged up with removed adhesive it stops removing more adhesive until you turn to a clean dampened section and begin to remove the adhesive from the next spot. Repeat this process until all of the adhesive has been removed.

Concerning the decal ghosting...

Depending on how the vehicle was cared for all the while those decals were on there, there may or may not be some severe ghosting left behind. If the vehicle was allowed to get very dirty on a regular basis and then taken through an auto (with brushes) car wash frequently...the abrasion of the dirt, brushes and strong detergents will have likely reduced the paint's film build over the entire van, except where the decals were. So the paint that was under the decals will essentially have a "brand new like" film build thickness, and those areas will stand out like a sore thumb. If you're lucky...there won't be that much, and buffing off the van with a chemical paint cleaner such as Poorboy's World Pro Polish (original, not Pro Polish 2) will whiten the rest of the van as to reduce or totally hide the ghosting.

Sometimes the paint (under the clear coat) becomes sun faded as opposed to where the decals where. In this case, you'll not be buffing off the ghosting and the best thing to do will be to re-letter over those areas in an attempt to hide the ghosting from the previous decals.

Hope this helps some. TD
 
If you'll be doing a lot of decal removals or doing a very large decal removal, you may research and purchase one of these decal removal tools.

zap_elec_miva.gif


The feedback I get from people who own this tool is that it makes decal removal a snap and causes much less marring than the eraser wheels do. It's a must have for the regular decal removal guy who wants to operate at maximum efficiency. I was looking at the Rupes Big Foot polisher...but for the money...one of these decal removal tools has actually just jumped closer to the top of my list of purchases for the shop.

MBX Vinyl Zapper Electric Tool - Vinyl Remover - Sign Supplies and Equipment
 
Removing decals can be a real pain the first half a dozen times you do it until you work out a good technique of removal. Just like polishing paint...each vehicle is different too. With different thicknesses and types of the vinyl itself, different types and amounts of adhesives used and on different substrates which may or may not dissipate heat very well.

I've done a lot of these decal removals at this point and can say that it's all in finding and maintaining the right temperature at where the adhesive is soft enough to allow the decal to peel off in one solid piece. If it's not warm enough the vinyl tears or breaks...If it's too hot then the vinyl stretches and tears as you try to peel it up in one piece. There is a learned technique that when rushed, usually ends up in a lot more work after the vinyl is removed.

The rubber wheel causes burns and or paint blemishes that need to be buffed out, or worse yet requires some wet sanding to get the paint looking like the decals were never there. The plastic razor blades and or scrapers can cause scratches and more buffing work if used too aggressively on over warmed paint.

What I try to do is to warm the entire letter so that it's "not hot, but good and warm" to the back of my hand when placed against the warmed area. Then I work one small area with my fingernail or thumbnail to get a tab large enough to begin pulling the vinyl from. By the time this tab is sufficiently peeled up, the rest of the letter has cooled off too much for a good "in one piece peel". Once I get the pull tab off the paint, I'll reheat the rest of the letter trying to keep the heat concentrated on the stuck on part of the decal as to not melt or over heat the tab that I'll be pulling from so it doesn't tear as I attempt to peel the remainder of the decal up.

After rewarming the decal I begin carefully peeling the decal up trying to keep it in one piece. As the decal begins to cool off, it needs to be rewarmed but the heat should be applied an inch or so forward of the tab that you're peeling from. If the heat hits that tab, the tab will likely stretch and tear as you pull the decal off of the paint. There needs to be a balance of the right amount of heat concentrated in the right place to pull it off in one piece (which is key).

After the decals are all peeled off (if there's a lot of adhesive left behind) I'll take a plastic trigger spray bottle filled with xylene or lacquer thinner and spray two entire letters with it (depending on size) and allow to dwell for about 45 seconds until the adhesive turns to a booger like consistency. Once the adhesive is at this consistency the plastic razor blade will easily remove the majority of the softened up adhesive. I try to keep the softened adhesive wet with the xylene or lacquer thinner as I squeegee it off of the paint. This can make a sticky mess on the garage floor so you might want to lay down a drop cloth of sorts or some cardboard before beginning the adhesive removal stage.

It should go without saying...but I'll say it anyway...keep the xylene and or lacquer thinner off of any rubber or plastic trim. If such trim pieces are present, they should be sufficiently covered with a few layers of tape, or completely removed if possible.

So it's...spray...dwell..spray..squeegee off adhesive with plastic razor blade...wipe blade clean and repeat until all the lettering adhesive is pretty much removed. Whatever adhesive remains afterward easily wipes up with a lacquer thinner dampened towel, turning to a clean towel section as the adhesive begins to clog up the towel's fibers. Once the towel's fibers are clogged up with removed adhesive it stops removing more adhesive until you turn to a clean dampened section and begin to remove the adhesive from the next spot. Repeat this process until all of the adhesive has been removed.

Concerning the decal ghosting...

Depending on how the vehicle was cared for all the while those decals were on there, there may or may not be some severe ghosting left behind. If the vehicle was allowed to get very dirty on a regular basis and then taken through an auto (with brushes) car wash frequently...the abrasion of the dirt, brushes and strong detergents will have likely reduced the paint's film build over the entire van, except where the decals were. So the paint that was under the decals will essentially have a "brand new like" film build thickness, and those areas will stand out like a sore thumb. If you're lucky...there won't be that much, and buffing off the van with a chemical paint cleaner such as Poorboy's World Pro Polish (original, not Pro Polish 2) will whiten the rest of the van as to reduce or totally hide the ghosting.

Sometimes the paint (under the clear coat) becomes sun faded as opposed to where the decals where. In this case, you'll not be buffing off the ghosting and the best thing to do will be to re-letter over those areas in an attempt to hide the ghosting from the previous decals.

Hope this helps some. TD

Awesome Awesome Awesome!!!!! I did exactly what you said with the heat gun and bam! My problem before was overheating the vinyl, like you mentioned.

20130127_133145_HDR.jpg


Thanks a ton, for taking the time to type out all that useful info. Greatly appreciated!!!!!

Sent from my Galaxy Note II using AG Online
You're quite welcome.

We got a few vans in from a limo company down in Baltimore that had a ton of lettering to be removed. I hired a buddy of mine to do the removal, showed him how to find the right amount of heat to get a good peel on the lettering, then told him to have at it. The last comment I made to him was that after he gets finished with these vans, he'd be a pro at de-lettering vans. Half way through the first van he nailed it and the rest of the job was so much easier for him.

I'm glad you got it worked out and got good results, Glad to help out...TD
 
What I try to do is to warm the entire letter so that it's "not hot, but good and warm" to the back of my hand when placed against the warmed area. Then I work one small area with my fingernail or thumbnail to get a tab large enough to begin pulling the vinyl from. By the time this tab is sufficiently peeled up, the rest of the letter has cooled off too much for a good "in one piece peel". Once I get the pull tab off the paint, I'll reheat the rest of the letter trying to keep the heat concentrated on the stuck on part of the decal as to not melt or over heat the tab that I'll be pulling from so it doesn't tear as I attempt to peel the remainder of the decal up.

After rewarming the decal I begin carefully peeling the decal up trying to keep it in one piece. As the decal begins to cool off, it needs to be rewarmed but the heat should be applied an inch or so forward of the tab that you're peeling from. If the heat hits that tab, the tab will likely stretch and tear as you pull the decal off of the paint. There needs to be a balance of the right amount of heat concentrated in the right place to pull it off in one piece (which is key).


Perfect. We have some pictures showing this in a recent Thursday Night project car where we removed the original vinyl graphics off a 1999 Trans Am and then replaced them with reproduction new graphics.

The write-ups in the forum group for our Thursday Night Project cars actually is turning it to a very well rounded library of how-to topics and many of them contain the videos from our live broadcasts.


M101 Foam Cut Compound - 1999 Trans Am Extreme Makeover at Autogeek

For anyone that's never removed old, dried-out, cracked and baked-on vinyl graphics, I have enough pictures to make a pretty good how-to article. For now here's a few pictures to give you an idea. It took about 2 hours to remove all the vinyl graphics and then rub and scrub all the adhesive left behind off the paint AND do it in a way that did not harm the original paint.


Re-applying all of the new vinyl graphics took at around 3 hours...

We didn't just buff this car out, we first removed all the graphics, then buffing it out, polished it and sealed it with a synthetic paint sealant and then applied all of the new graphics... just another furn project on AutogeekOnline.net!


Here's one picture, hang tight for a few more...

Jay heating the vinyl graphics up using a simple Conair Hair Blow Dryer...

1999_Trans_Am_M101_Finished_046.jpg


1999_Trans_Am_M101_Finished_047.jpg


Here's Ken and I using a Heat Gun, when using a Heat Gun instead of a hair dryer you really need to be careful that you don't get the paint itself too hot...

1999_Trans_Am_M101_Finished_048.jpg


New graphics going on... this was hours later after we meticulously buffed the hood to remove most of the Ghosting and all of the adhesive residue...

1999_Trans_Am_M101_Finished_049.jpg


1999_Trans_Am_M101_Finished_050.jpg


1999_Trans_Am_M101_Finished_051.jpg


1999_Trans_Am_M101_Finished_052.jpg


Here you can see that we removed the rear spoiler in order to apply the racing stripes to the deck lid...

1999_Trans_Am_M101_Finished_053.jpg


After putting he racing stripes on the spoiler we're not re-attaching it...

1999_Trans_Am_M101_Finished_054.jpg


1999_Trans_Am_M101_Finished_055.jpg


One thing for sure, everyone has a lot of fun during these types of cool projects, makes new friends and gets the chance to use new tools, pads and yes... products like Meguiar's M101 Foam Cut Compound...

1999_Trans_Am_M101_Finished_056.jpg


Carefull.... easy does it....

1999_Trans_Am_M101_Finished_057.jpg


1999_Trans_Am_M101_Finished_058.jpg


Jay installing all the lettering...

1999_Trans_Am_M101_Finished_059.jpg


Windshield graphics going on....

1999_Trans_Am_M101_Finished_060.jpg


1999_Trans_Am_M101_Finished_061.jpg


1999_Trans_Am_M101_Finished_003.jpg


1999_Trans_Am_M101_Finished_004.jpg


:xyxthumbs:
 
Back
Top