SpeedFreak81
New member
- Jul 14, 2011
- 213
- 0
I've been wanting to try these pads out for quite a while, but was waiting for the right opportunity. Well the time has finally come, as a previous client of mine just purchased a new to him '06 CLK55 AMB Benzo. He brought the car by last week, and upon looking it over could immediately tell that the whole driver's side had been repainted. It was absolutely FULL of orange peel. Rather than spending the time sanding, I decided to give the denim orange peel pads a try! This review is part of full correction for this vehicle, and the rest of the car will follow once the work is complete. I'll start a new thread dedicated to the correction as a whole at that time.
From Car Pro's website: 5 1/4" Denim Orange Peel Removal Pad (V2)
With our CarPro USA Velvet and Denim Orange Peel Removal pads you can now remove or substantially reduce orange peel in the top layer without sanding. While removing orange peel and deep defects you are also polishing the paint rather than leaving sanding marks which reduces the steps needed afterwards.
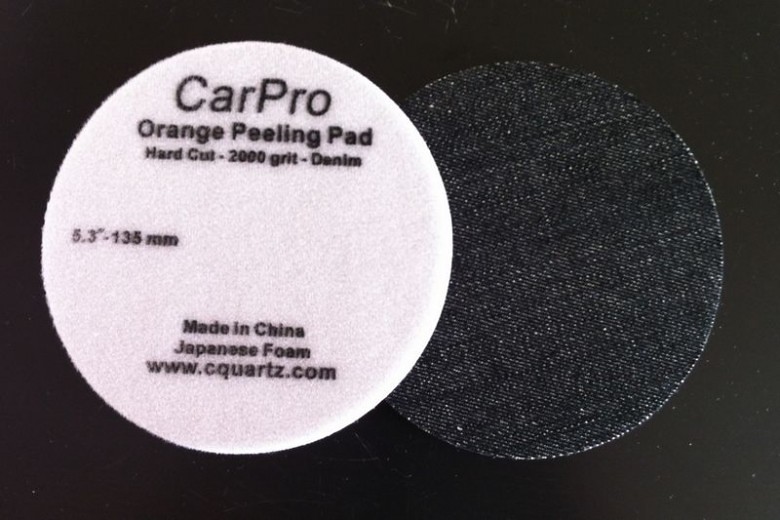
denim_pad_135mm__09983.1355284074.780.780 by SpeedFreak81, on Flickr
New to Version 2:
Well, I'll let the results speak for themselves, but I was STUNNED at what I was able to achieve with these pads!! I used my Rupes Bigfoot 21 on speed 6 with Meguiar's M105 Ultra Cut Compound. Not only did the combo literally destroy the orange peel, it left a nearly flawless finish behind. NOTE: No finishing polish was used for these shots, they were after compound/orange peel pad ONLY. In an industry where time is literally money, this product has impressed me. Compared to sanding by hand or machine, then compounding, finishing; the time savings is huge.
The only con with these pads is they seem to cake up pretty quickly. I was roughing them up with my nylon pad cleaner brush after each pass, but was only able to do about a 4'x4' section before I had to switch to a fresh pad. I would suspect the level of build up would correlate to the amount of orange peel/clear being removed. Either way, a small price to pay IMO.
Without further delay, here are the pics!!
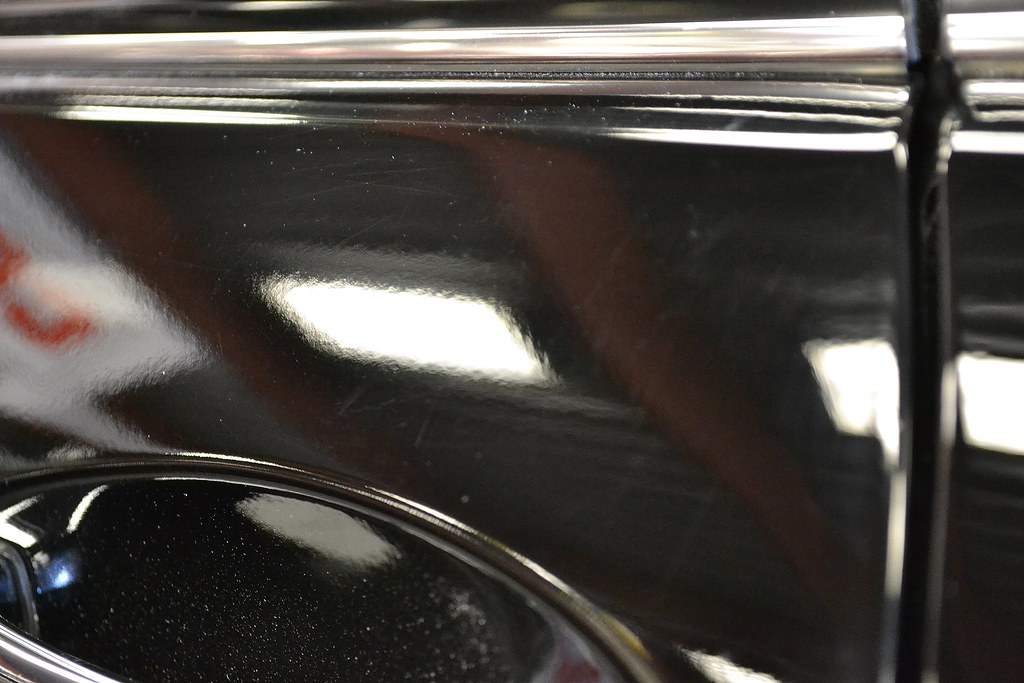
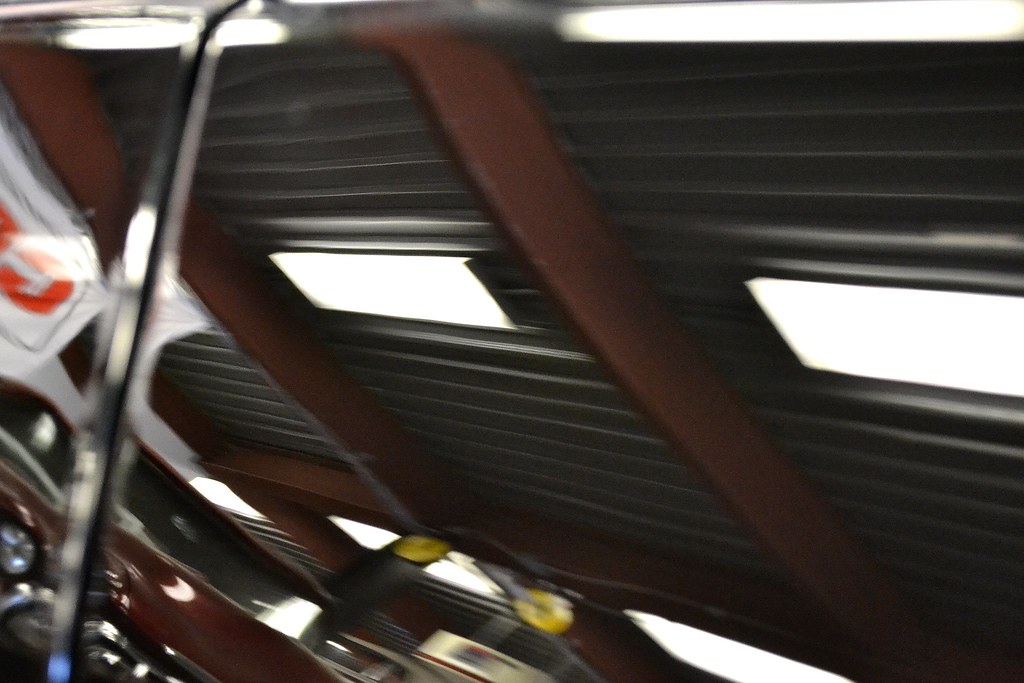
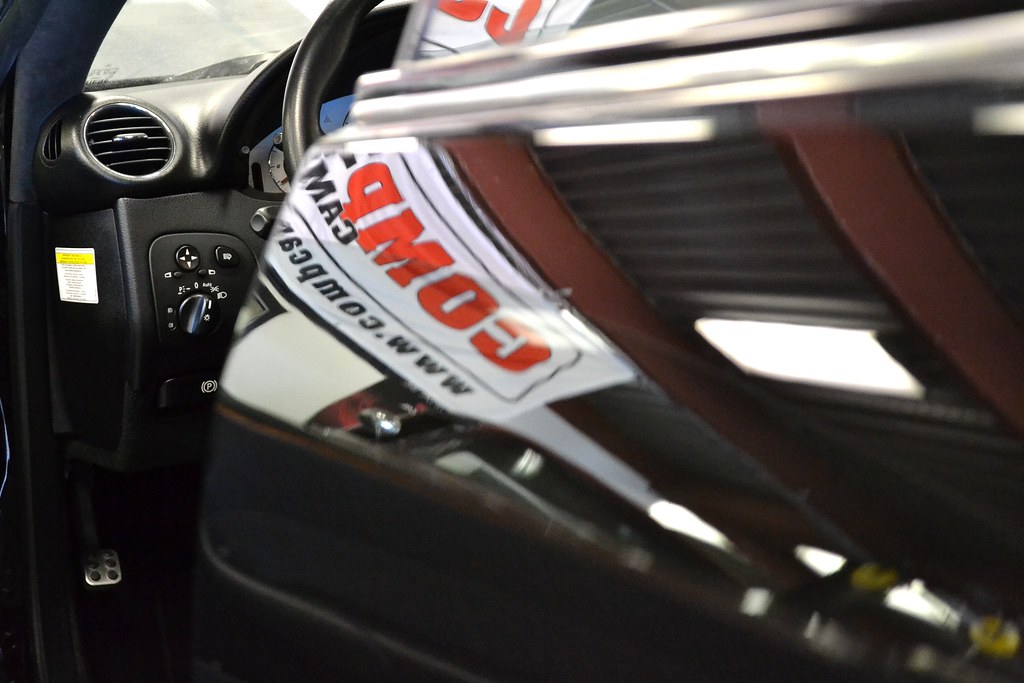
Couple "befores"
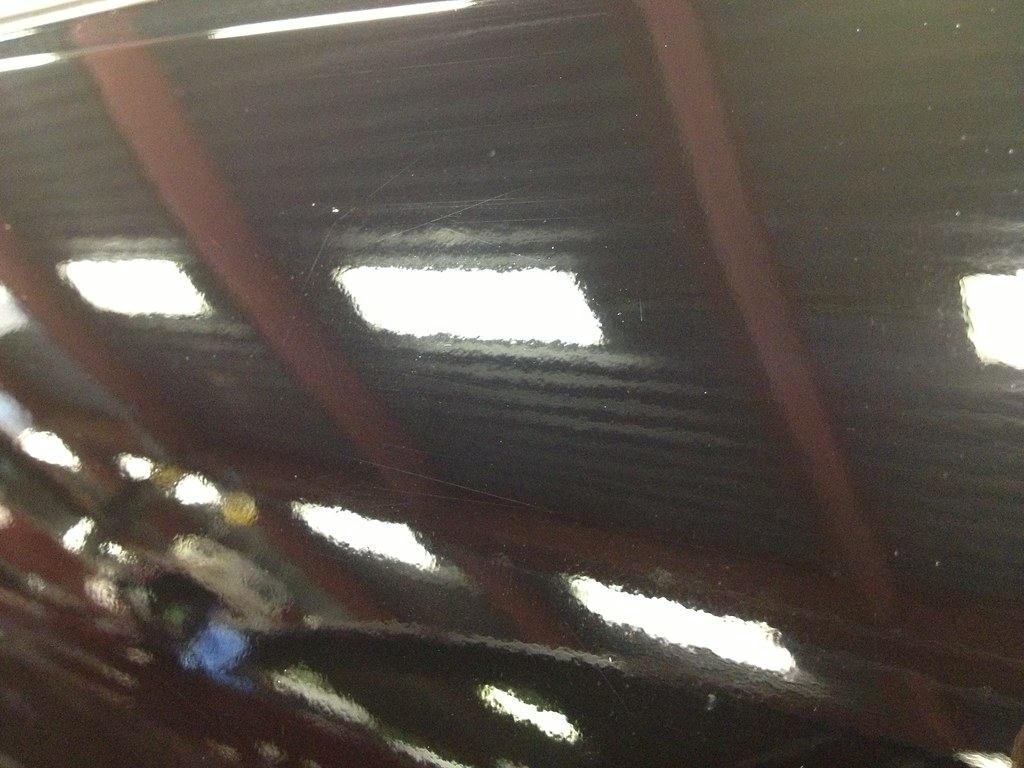
photo1 by SpeedFreak81, on Flickr
DSC_0064 by SpeedFreak81, on Flickr
DSC_0067 by SpeedFreak81, on Flickr
DSC_0071 by SpeedFreak81, on Flickr
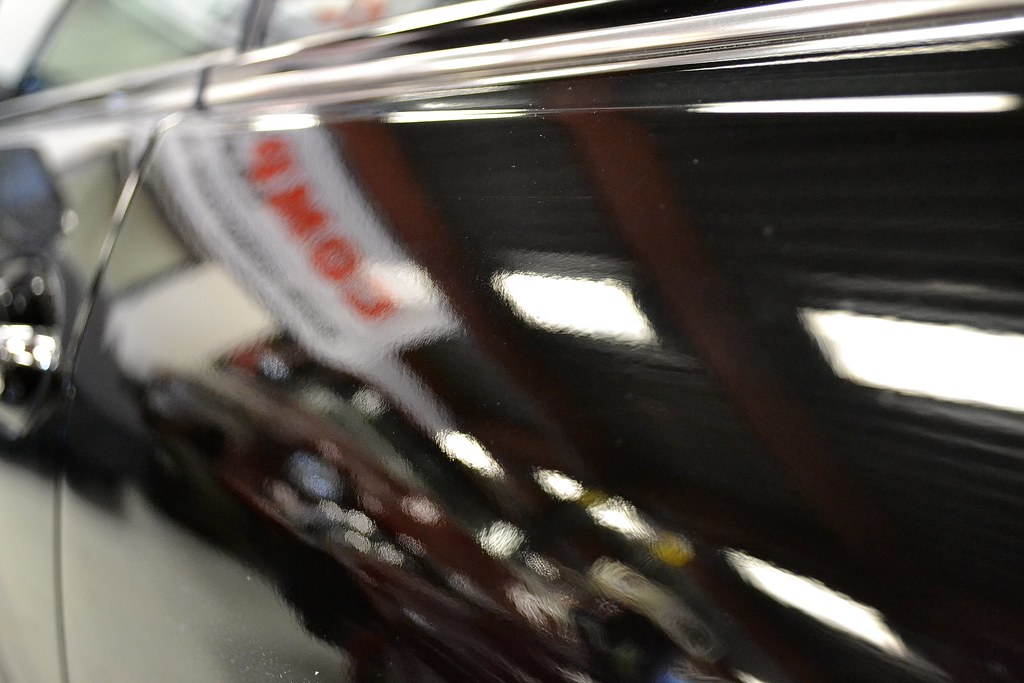
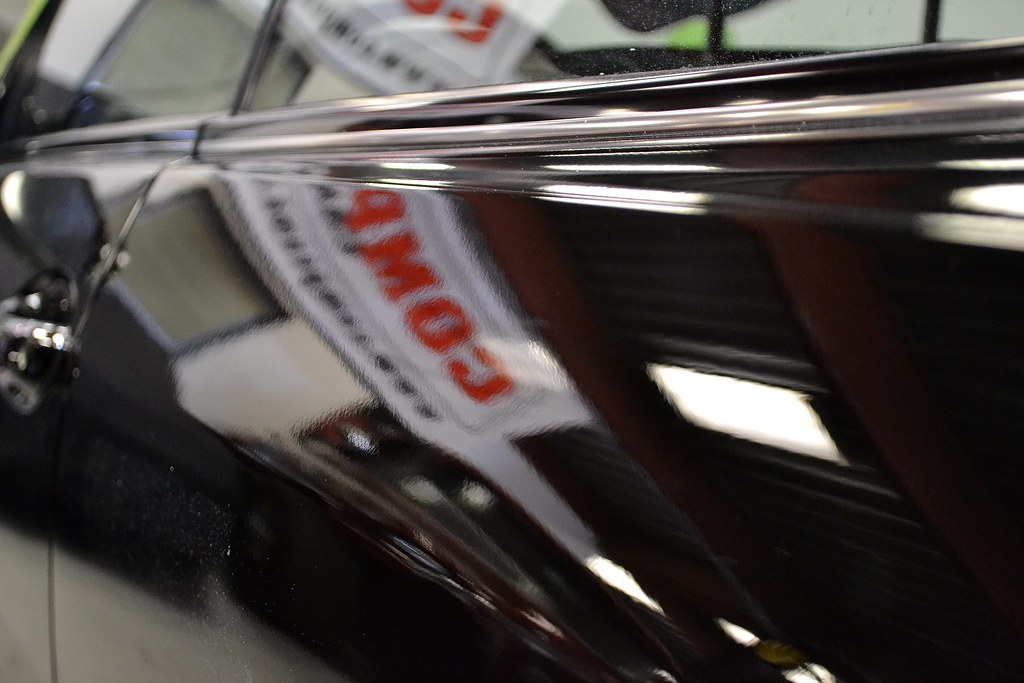
Afters
DSC_0072 by SpeedFreak81, on Flickr
DSC_0068 by SpeedFreak81, on Flickr

DSC_0066 by SpeedFreak81, on Flickr

DSC_0065 by SpeedFreak81, on Flickr
Notice the difference in the distinction of image between the untouched area on the left/door vs the right side which was complete
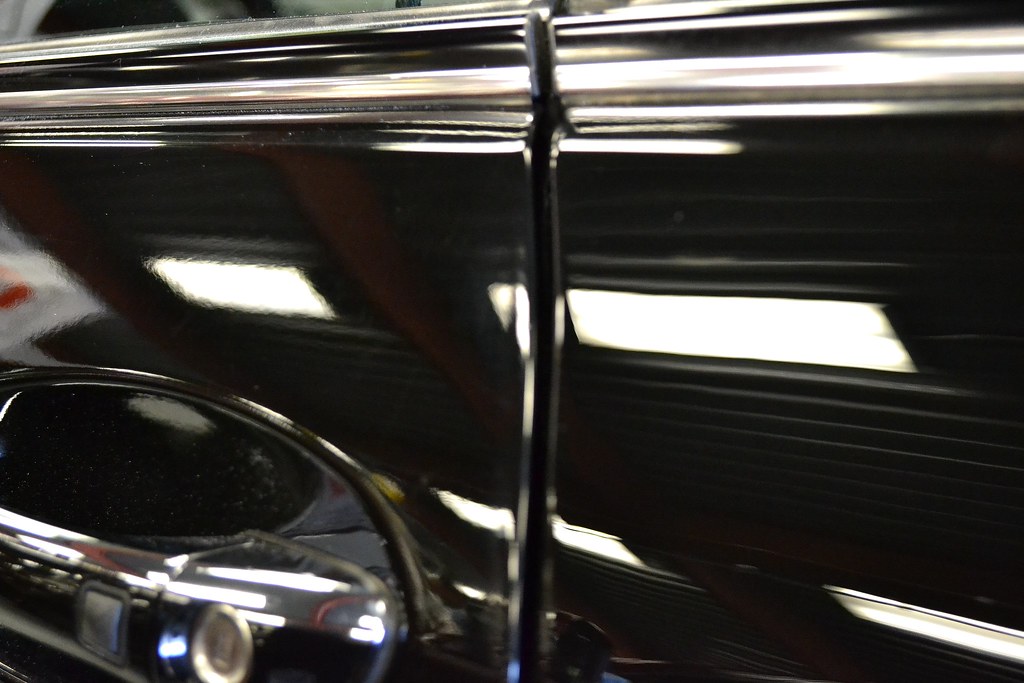
DSC_0070 by SpeedFreak81, on Flickr
Thanks for looking. I'm not the world's greatest photographer, but I think the point is conveyed!
-Brian
From Car Pro's website: 5 1/4" Denim Orange Peel Removal Pad (V2)
With our CarPro USA Velvet and Denim Orange Peel Removal pads you can now remove or substantially reduce orange peel in the top layer without sanding. While removing orange peel and deep defects you are also polishing the paint rather than leaving sanding marks which reduces the steps needed afterwards.
denim_pad_135mm__09983.1355284074.780.780 by SpeedFreak81, on Flickr
New to Version 2:
- Multiple Diameter pads available
- Foam Interlayer changed from 3/8" to 3/16"
- Redesigned foam interlayer for more effective orange peel removal
- Redesigned without holes for longer durability
- Reduce Orange Peel and deep defects while simultaneously polishing paint
- Equivalent to 2000 grit sandpaper with out the dulling of paint and sanding haze
- Reduce Orange Peel without sanding
- Orange peel removal without the haze generated by sanding
- Polish the paint while removing the ridges of orange peel
- Less dust and clean up prior to finishing polish
- Attach to hook & loop backing plate with rotary polisher for best results.
- Apply a few drops to paint or pad according to your skills and preference
- Work a 2' x 2' section or larger to keep heat down as needed but remember the larger the area the more time it will take to level orange peel and defects.
- Begin working polish on low speed for a pass.
- Step up speed to approximately 1100 rpm (adjust as needed)
- With proper lighting observe the level of orange peel removal while you work noting precise surface contact without pressure to level ridges.
- After completing each section wipe off paint with soft microfiber towel
- Brush pad in direction of fibers to remove residue
- Apply a couple more drops of polish for next section
- Switch out pads as needed when cut has been compromised and set aside to clean by hand.
Well, I'll let the results speak for themselves, but I was STUNNED at what I was able to achieve with these pads!! I used my Rupes Bigfoot 21 on speed 6 with Meguiar's M105 Ultra Cut Compound. Not only did the combo literally destroy the orange peel, it left a nearly flawless finish behind. NOTE: No finishing polish was used for these shots, they were after compound/orange peel pad ONLY. In an industry where time is literally money, this product has impressed me. Compared to sanding by hand or machine, then compounding, finishing; the time savings is huge.
The only con with these pads is they seem to cake up pretty quickly. I was roughing them up with my nylon pad cleaner brush after each pass, but was only able to do about a 4'x4' section before I had to switch to a fresh pad. I would suspect the level of build up would correlate to the amount of orange peel/clear being removed. Either way, a small price to pay IMO.
Without further delay, here are the pics!!
Couple "befores"
photo1 by SpeedFreak81, on Flickr
DSC_0064 by SpeedFreak81, on Flickr
DSC_0067 by SpeedFreak81, on Flickr
DSC_0071 by SpeedFreak81, on Flickr
Afters
DSC_0072 by SpeedFreak81, on Flickr
DSC_0068 by SpeedFreak81, on Flickr
DSC_0066 by SpeedFreak81, on Flickr
DSC_0065 by SpeedFreak81, on Flickr
Notice the difference in the distinction of image between the untouched area on the left/door vs the right side which was complete
DSC_0070 by SpeedFreak81, on Flickr
Thanks for looking. I'm not the world's greatest photographer, but I think the point is conveyed!
-Brian
")
 c7424: