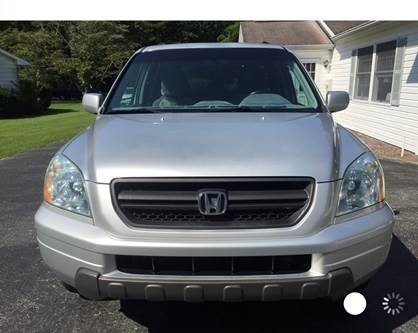
I have a 17 year old Pilot owned since new. I have just finished a paint correction, using 3D One as a compound/polish & 3D Poxy as a LSP, bringing back the paint finish to about 85%. Should I put a coat of Optimum Car Wax over the Poxy or strip the Poxy off and just use the Optimum Car Wax to further protect the clear coat? Would there be more of a benefit one way or another? The car IS NOT GARAGED, if that better explains the condition. Thanks ahead for your time & suggestions. ABSAV
Navigation
Install the app
How to install the app on iOS
Follow along with the video below to see how to install our site as a web app on your home screen.
Note: This feature may not be available in some browsers.
More options
Style variation
You are using an out of date browser. It may not display this or other websites correctly.
You should upgrade or use an alternative browser.
You should upgrade or use an alternative browser.
Clear Coat ALMOST Gone Need Protection
- Thread starter ABSAV
- Start date
PaulMys
Active member
- Jan 14, 2014
- 10,772
- 1
What made you put on the Poxy, if your thinking about removing it? I would just apply OCW over the Poxy.
^^^This^^^
- Thread starter
- #5
I sent Mike P. before and after pics of my project and he noticed that some of the oxidation was still there and the clear coat was almost gone. Although the finished product was pretty good he suggested holding on to the clear coat that is on the car to use Optimum Car Wax and keep up with the paint maintenance. With the videos, I have been viewing, they say no need to add anything else to the Poxy. at this point, I am a bit confused. Should I assume that the Optimum on top of the Poxy would add to the protection?
Rsurfer
Active member
- Jan 26, 2007
- 14,154
- 18
Don't know if it will add to the protection, but removing the Poxy could cause more problems than it's worth.I sent Mike P. before and after pics of my project and he noticed that some of the oxidation was still there and the clear coat was almost gone. Although the finished product was pretty good he suggested holding on to the clear coat that is on the car to use Optimum Car Wax and keep up with the paint maintenance. With the videos, I have been viewing, they say no need to add anything else to the Poxy. at this point, I am a bit confused. Should I assume that the Optimum on top of the Poxy would add to the protection?
Mike Phillips
Active member
- Dec 5, 2022
- 51,004
- 6
Hey thanks for bringing this to the forum. I much prefer to discuss car detailing here versus e-mail. ")
Here's the deal everyone, ABSAV did a GREAT job of bringing paint back from the dead. He e-mailed me pictures. To be honest - I'm not sure I've ever seen clearcoat so far gone restored as good as he was able to do. I hope it holds up.
AT THIS TIME - I didn't know how bad the paint on his Honda Pilot was. Here's the initial e-mail I sent him,
I had to read through out e-mail chain to remember how he got to 3D products and I believe he asked me about them over the phone after seeing a YouTube Influencer talk about them. Me? I'm not a YouTube Influencer but I took his phone call and then typed out the below how-to information including links to,
Here's that e-mail
Hey ABSAV,
Great talking to you today. I know when you’re first getting into detailing it can be confusing simply due to the overwhelming volume of information and products.
Here’s the links we talked about that will get you going.
First – watch the video in this article I wrote. It shows the Porter Cable 7424XP polisher but the tips and technique I share are the exact same techniques you will use with your brand new Griot’s Garage G9 polisher.
How to do a Test Spot and then buff out your car! Video Explanation by Mike Phillips
How to do a Test Spot and then buff out your car! Video Explanation by Mike Phillips
Second - Here’s the link to the Buff & Shine Uro-Tech pads. To keep it simple, the blue heavy polishing foam pad is a great starter pad. You can always get more pads and different pads as you go.
For 5” backing plate
6 Inch Dark Blue Heavy Polishing Foam Pad
For 6” backing plate
7 Inch Dark Blue Heavy Polishing Foam Pad
Lake Country 5” backing plate
lake country 5 inch backing plate, 5 inch backin plate, 5 inch hook and loop backing plate
1-Step approach for your Honda
3D Speed in the quart – you’ll love this stuff. This is a ONE STEP – corrects the paint and leaves the paint sealed in one step.
2-step approach for your Honda
3D One – compound/polish – great stuff but you have to “seal” the paint afterwards as it is a dedicated compound/polish
3D Poxy - Dedicated paint sealant – use after the 3D One
Here’s some how-to articles I’ve written on the 3D products you’re interested in. Because you owned a 1967 Mustang you’ll appreciate this first article. (my reviews tend to be how-to articles)
Review: 3D ONE Hybrid Cutting Compound and Finishing Polish
Review: 3D ONE Hybrid Cutting Compound and Finishing Polish
3D HD Adapt and Poxy Review - 1940 Studebaker Streetrod detailed by Mike Phillips
3D HD Adapt and Poxy Review - 1940 Studebaker Streetrod detailed by Mike Phillips
If you read this review – I’ll explain why I use so many buffing pad when I detail a car.
Review: 3D Paint Coating and 3D One Cutting Compound and Finishing Polish
Review: 3D Paint Coating and 3D One Cutting Compound and Finishing Polish
LIVE Detailing Class
Here’s the link to all of the brand new LIVE Detailing Classes we’ve made to date – the are INFORMATION RICH. And we broadcast these LIVE every Tuesday at 3:00pm Eastern Time
Complete List of Live Broadcast Videos on YouTube - Yancy Martinez & Mike Phillips
Complete List of Live Broadcast Videos on YouTube - Yancy Martinez & Mike Phillips
Hope the above helps Lou and if you need help with your order any of our customer care staff can help you.
1-800-869-3011
Sincerely,
Mike Phillips
[/indent
Of course, the above if FORMATTED for an e-mail. Had I replied to him on the forum I could have used >blue clickable links< and inserted the video as a video not sent as a link. That's the power of a forum over any of these,
So that's the back story as to how he got to 3D products to safe the paint on his Honda.
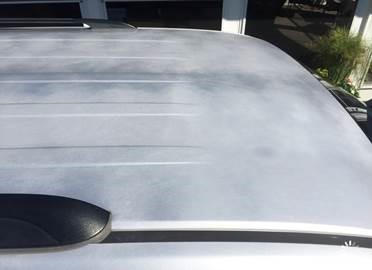
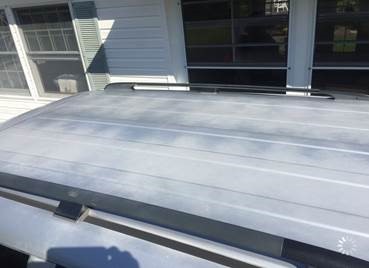
Then he sent me these before and after pictures. So keep in mind - I NEVER knew how bad the paint was before seeing these pictures. If I had to be honest - I would have told him to stick a fork in it and call it DONE.
Here's BEFORE
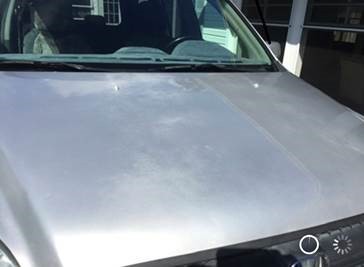
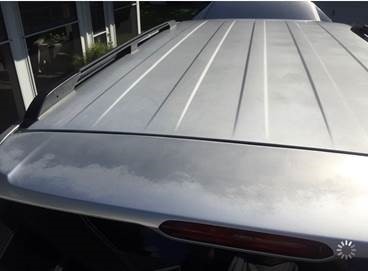

Here's AFTER - Freaking AMAZING save


He did the engine too... nice job.


Now that I've seen how BAD the paint was after making my recommendations I completely impressed with the results considering this is his first machine paint correct.
The pictures show Clearcoat Failure. The paint has NOT started flaking off but that is the next stage in the clearcoat failure process.
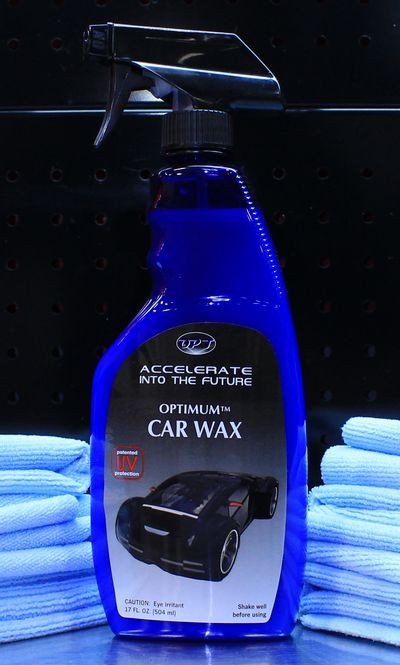
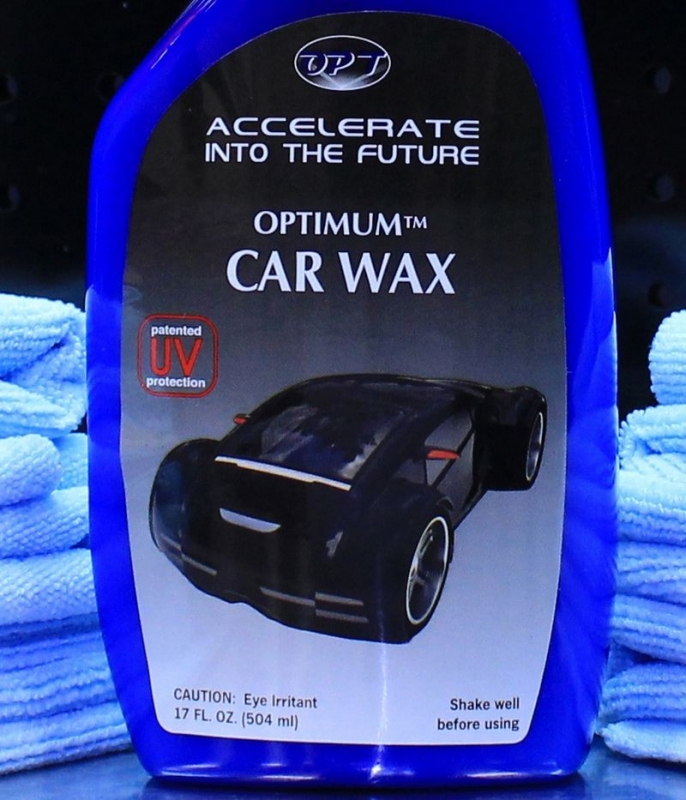
Okay now follow me - after he did all the great work and sent me the before and after pictures you see above - then he asked me how to maintain the paint. After I saw the before and after pictures and NOW KNOWING HOW BAD IT "was" - recommended to start using Optimum Polymer Technologies CAR WAX
BECAUSE - it's the only product I know of that is PATENTED with proven UV protection. Lots of products claim UV protection and my guess is lots of products really do provide UV protection but OPT CAR WAX is the only product I know of where the CHEMIST applied for and obtained a PATENT.
See where I'm going with this?
So then in a reply to another e-mail, after asking me about wetsanding the paint, to which I sent him my infamous article here,
Clearcoats are thin by Mike Phillips
I then sent him the link to this article,
Patented UV Protection - Optimum Car Wax - by Dr. Ghodoussi at Autogeek.com
And that's how come ABSAV is now asking about how to go about applying Optimum Car Wax over 3D Poxy.
Clear as mud?
And this is why any regular reader of mine from the years I ran the MOL forum to the years I've run this forum will often times see me bump or share these articles I've written,
From 2005
Please post your questions to our discussion forum

From 2009
Please post your questions to our discussion forum - Don't send them to me in a PM or E-mail...
I just don't have the typing time to type for one set of eyeballs.
Here's the deal everyone, ABSAV did a GREAT job of bringing paint back from the dead. He e-mailed me pictures. To be honest - I'm not sure I've ever seen clearcoat so far gone restored as good as he was able to do. I hope it holds up.
AT THIS TIME - I didn't know how bad the paint on his Honda Pilot was. Here's the initial e-mail I sent him,
I had to read through out e-mail chain to remember how he got to 3D products and I believe he asked me about them over the phone after seeing a YouTube Influencer talk about them. Me? I'm not a YouTube Influencer but I took his phone call and then typed out the below how-to information including links to,
- Videos
- Products
- Articles
- Pictures
Here's that e-mail
Hey ABSAV,
Great talking to you today. I know when you’re first getting into detailing it can be confusing simply due to the overwhelming volume of information and products.
Here’s the links we talked about that will get you going.
First – watch the video in this article I wrote. It shows the Porter Cable 7424XP polisher but the tips and technique I share are the exact same techniques you will use with your brand new Griot’s Garage G9 polisher.
How to do a Test Spot and then buff out your car! Video Explanation by Mike Phillips
How to do a Test Spot and then buff out your car! Video Explanation by Mike Phillips
Second - Here’s the link to the Buff & Shine Uro-Tech pads. To keep it simple, the blue heavy polishing foam pad is a great starter pad. You can always get more pads and different pads as you go.
For 5” backing plate
6 Inch Dark Blue Heavy Polishing Foam Pad
For 6” backing plate
7 Inch Dark Blue Heavy Polishing Foam Pad
Lake Country 5” backing plate
lake country 5 inch backing plate, 5 inch backin plate, 5 inch hook and loop backing plate
1-Step approach for your Honda
3D Speed in the quart – you’ll love this stuff. This is a ONE STEP – corrects the paint and leaves the paint sealed in one step.
2-step approach for your Honda
3D One – compound/polish – great stuff but you have to “seal” the paint afterwards as it is a dedicated compound/polish
3D Poxy - Dedicated paint sealant – use after the 3D One
Here’s some how-to articles I’ve written on the 3D products you’re interested in. Because you owned a 1967 Mustang you’ll appreciate this first article. (my reviews tend to be how-to articles)
Review: 3D ONE Hybrid Cutting Compound and Finishing Polish
Review: 3D ONE Hybrid Cutting Compound and Finishing Polish
3D HD Adapt and Poxy Review - 1940 Studebaker Streetrod detailed by Mike Phillips
3D HD Adapt and Poxy Review - 1940 Studebaker Streetrod detailed by Mike Phillips
If you read this review – I’ll explain why I use so many buffing pad when I detail a car.
Review: 3D Paint Coating and 3D One Cutting Compound and Finishing Polish
Review: 3D Paint Coating and 3D One Cutting Compound and Finishing Polish
LIVE Detailing Class
Here’s the link to all of the brand new LIVE Detailing Classes we’ve made to date – the are INFORMATION RICH. And we broadcast these LIVE every Tuesday at 3:00pm Eastern Time
Complete List of Live Broadcast Videos on YouTube - Yancy Martinez & Mike Phillips
Complete List of Live Broadcast Videos on YouTube - Yancy Martinez & Mike Phillips
Hope the above helps Lou and if you need help with your order any of our customer care staff can help you.
1-800-869-3011
Sincerely,
Mike Phillips
[/indent
Of course, the above if FORMATTED for an e-mail. Had I replied to him on the forum I could have used >blue clickable links< and inserted the video as a video not sent as a link. That's the power of a forum over any of these,
- Any type of message
- YouTube
- TikTok
- Periscope
- Ad nauseam
So that's the back story as to how he got to 3D products to safe the paint on his Honda.
Then he sent me these before and after pictures. So keep in mind - I NEVER knew how bad the paint was before seeing these pictures. If I had to be honest - I would have told him to stick a fork in it and call it DONE.
Here's BEFORE
Here's AFTER - Freaking AMAZING save
He did the engine too... nice job.
Now that I've seen how BAD the paint was after making my recommendations I completely impressed with the results considering this is his first machine paint correct.
The pictures show Clearcoat Failure. The paint has NOT started flaking off but that is the next stage in the clearcoat failure process.
Okay now follow me - after he did all the great work and sent me the before and after pictures you see above - then he asked me how to maintain the paint. After I saw the before and after pictures and NOW KNOWING HOW BAD IT "was" - recommended to start using Optimum Polymer Technologies CAR WAX
BECAUSE - it's the only product I know of that is PATENTED with proven UV protection. Lots of products claim UV protection and my guess is lots of products really do provide UV protection but OPT CAR WAX is the only product I know of where the CHEMIST applied for and obtained a PATENT.
See where I'm going with this?
So then in a reply to another e-mail, after asking me about wetsanding the paint, to which I sent him my infamous article here,
Clearcoats are thin by Mike Phillips
I then sent him the link to this article,
Patented UV Protection - Optimum Car Wax - by Dr. Ghodoussi at Autogeek.com
And that's how come ABSAV is now asking about how to go about applying Optimum Car Wax over 3D Poxy.
Clear as mud?
And this is why any regular reader of mine from the years I ran the MOL forum to the years I've run this forum will often times see me bump or share these articles I've written,
From 2005
Please post your questions to our discussion forum
From 2009
Please post your questions to our discussion forum - Don't send them to me in a PM or E-mail...
I just don't have the typing time to type for one set of eyeballs.
You can use any spray wax. I think you might need something stronger like a coating to provide some extra protection.
From my experience, my car was pretty good until year 17. That's when the clear started to peel. Eventually it will fail. It's just a question to how much longer you can stretch it out.
From my experience, my car was pretty good until year 17. That's when the clear started to peel. Eventually it will fail. It's just a question to how much longer you can stretch it out.
Mike Phillips
Active member
- Dec 5, 2022
- 51,004
- 6
What made you put on the Poxy, if your thinking about removing it?
What do you mean by clear coat almost gone? Are you having signs of clear coat failure?
If you can WADE through my post above I think I answer all your questions.
Mike Phillips
Active member
- Dec 5, 2022
- 51,004
- 6
And these two answers...
To this question,
Yes.
Just start massaging the Optimum Car Wax over all the horizontal panels.
A: The act of rubbing ANY liquid over any type of car wax will have the act of removing it.
B: As you rub the Optimum Car Wax over the 3D Poxy and remove it you will ALSO be rubbing the Optimum Car Wax INTO the clearcoat thus accomplishing your goal. No harm done.
Here's my article on Optimum Car Wax - NOTE THE PART I TURNED THE TEXT RED
Patented UV Protection - Optimum Car Wax - by Dr. Ghodoussi at Autogeek.com
Optimum Car Wax
A chemist that also worked for car paint companies to create modern clearcoat paints
Dr. David Ghodoussi is a PhD Organic Chemist and his background includes working for many of the major paint companies that make automotive car paints. He was one of the chemists that helped to create modern clearcoat/basecoat paint technology back in the 1980's.

Optimum Car Wax
Dr. Ghodoussi has a product called Optimum Car Wax which uses a patented UV protection ingredient and process that offers the same UV protection as the UV protection ingredients used in the actual clear layer of paint on your car. Dr. Ghodoussi also told me that Ford Motor Company did long term testing of protection products and documented that this product actually lived up to the claim and offered true UV protection for automotive clearcoats.

Plus, while I know most people think a spray on wax is a glorified spray detailer, this particular wax really does leave the UV protection ingredients on the surface and if I remember correctly with repeated use the key ingredients migrate into the paint resin to some level.
I asked Dr. Ghodoussi why he didn't bring this out as a traditional paste or liquid wax and he told me that the best and perhaps the only way to suspend the key ingredients was using a thin liquid formula and that's why this product is a spray-on product.
If your car is a daily driver and especially a daily driver parked outside every day and even more especially if you live in a geographical location that has extended and even extreme exposure to the sun, like for example you live near the equator, then get this product and use it.
My recommendation
Before using this product the paint should be clean and smooth. If your car's paint is not clean and smooth and also defect free then prep the paint first by,
And this is key...
USE IT OFTEN.
At least use it often on the horizontal surface like the roof, hood and trunk lid as these are the surfaces that take a beating every day from the sun. Think about it.... if you walk around any parking lots filled with cars the panels you most often see clearcoat failure are the hood, roof and trunk lids because these are the areas that sunburned everyday.
A quick simple routine is what you need
Washing and waxing your car correctly will take you a couple of hours easy.... but think outside the box. Purchase a quality spray detailer, waterless wash or rinseless wash and wipe down the horizontal surfaces and then apply the spray wax. This will take you around 20 minutes if you do a good job. This small time investment will protect and maintain your car's horizontal surfaces with patented UV protection. Then later on the weekend or when you have time wash and wax the entire car.
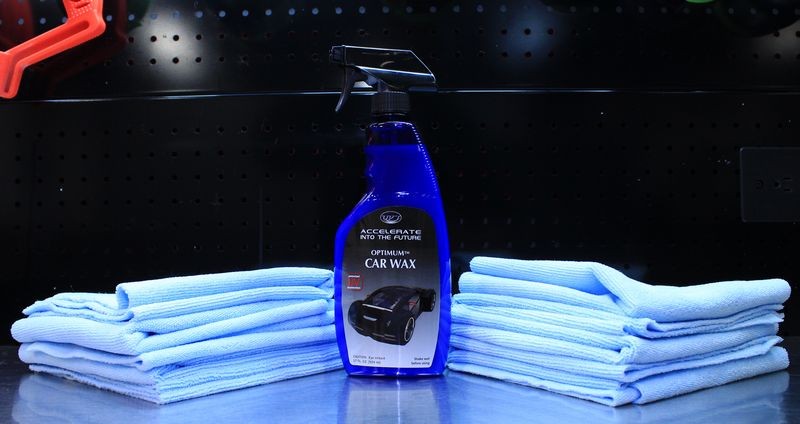
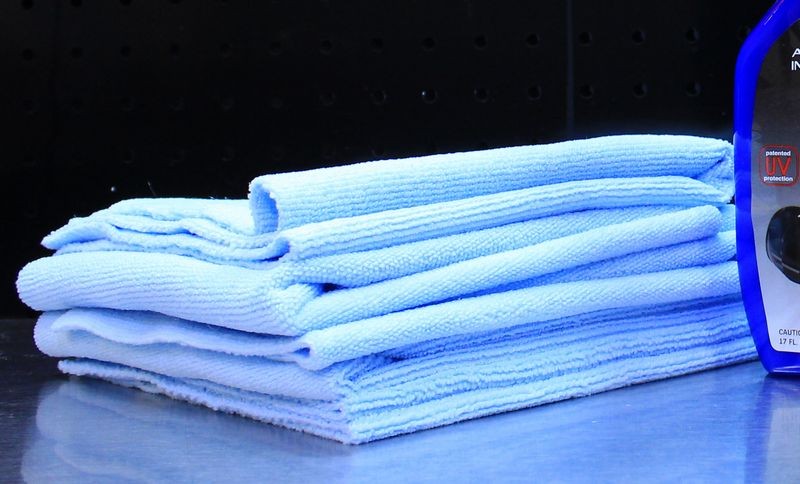
Get and take care of a nice collection of microfiber towels when you order the Optimum Spray Wax
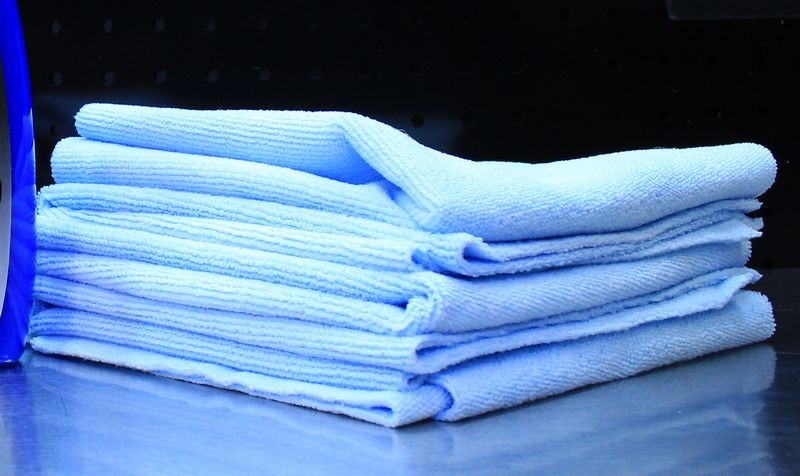
What is touching your car's paint?
It' is the towel that touches the paint. I recommend purchasing a 12 pack of towels and the DEDICATE these towels for NOTHING but for use with this spray wax on your favorite ride. Get a dedicated laundry basket for the garage for ONLY THESE TOWELS. Keep them off the ground. Wash them together. Dry them together. Store them someplace they will NOT get contaminated and then every time you go to apply and wipe off the wax you won't scratch your car's precious thin paint.
Remember - it's what touches the paint that determines swirls and scratches.
12 Pack Sky Blue Edgeless Polishing Cloths
Make sense?
On Autogeek.com
Optimum Spray Wax
12 Pack Sky Blue Edgeless Polishing Cloths
Optimum No Rinse (ONR) Essentials Wash Kit - Everything you need to mix up your own waterless wash
End of article
:dig:
I would just apply OCW over the Poxy.
To answer you're question, you can use optimum car wax on top of poxy at any time. It is up to you whenever you choose to use it.
To this question,
ABSAV said:Should I put a coat of Optimum Car Wax over the Poxy or strip the Poxy off and just use the Optimum Car Wax to further protect the clear coat?
Yes.
Just start massaging the Optimum Car Wax over all the horizontal panels.
A: The act of rubbing ANY liquid over any type of car wax will have the act of removing it.
B: As you rub the Optimum Car Wax over the 3D Poxy and remove it you will ALSO be rubbing the Optimum Car Wax INTO the clearcoat thus accomplishing your goal. No harm done.
Here's my article on Optimum Car Wax - NOTE THE PART I TURNED THE TEXT RED
Patented UV Protection - Optimum Car Wax - by Dr. Ghodoussi at Autogeek.com
Optimum Car Wax
A chemist that also worked for car paint companies to create modern clearcoat paints
Dr. David Ghodoussi is a PhD Organic Chemist and his background includes working for many of the major paint companies that make automotive car paints. He was one of the chemists that helped to create modern clearcoat/basecoat paint technology back in the 1980's.
Optimum Car Wax
Dr. Ghodoussi has a product called Optimum Car Wax which uses a patented UV protection ingredient and process that offers the same UV protection as the UV protection ingredients used in the actual clear layer of paint on your car. Dr. Ghodoussi also told me that Ford Motor Company did long term testing of protection products and documented that this product actually lived up to the claim and offered true UV protection for automotive clearcoats.
Plus, while I know most people think a spray on wax is a glorified spray detailer, this particular wax really does leave the UV protection ingredients on the surface and if I remember correctly with repeated use the key ingredients migrate into the paint resin to some level.
I asked Dr. Ghodoussi why he didn't bring this out as a traditional paste or liquid wax and he told me that the best and perhaps the only way to suspend the key ingredients was using a thin liquid formula and that's why this product is a spray-on product.
If your car is a daily driver and especially a daily driver parked outside every day and even more especially if you live in a geographical location that has extended and even extreme exposure to the sun, like for example you live near the equator, then get this product and use it.
My recommendation
Before using this product the paint should be clean and smooth. If your car's paint is not clean and smooth and also defect free then prep the paint first by,
- Washing
- Claying
- Compounding (if needed to remove deep swirls and scratches)
- Polishing
- Then apply Optimum Spray Wax
And this is key...
USE IT OFTEN.
At least use it often on the horizontal surface like the roof, hood and trunk lid as these are the surfaces that take a beating every day from the sun. Think about it.... if you walk around any parking lots filled with cars the panels you most often see clearcoat failure are the hood, roof and trunk lids because these are the areas that sunburned everyday.
A quick simple routine is what you need
Washing and waxing your car correctly will take you a couple of hours easy.... but think outside the box. Purchase a quality spray detailer, waterless wash or rinseless wash and wipe down the horizontal surfaces and then apply the spray wax. This will take you around 20 minutes if you do a good job. This small time investment will protect and maintain your car's horizontal surfaces with patented UV protection. Then later on the weekend or when you have time wash and wax the entire car.
Get and take care of a nice collection of microfiber towels when you order the Optimum Spray Wax
What is touching your car's paint?
It' is the towel that touches the paint. I recommend purchasing a 12 pack of towels and the DEDICATE these towels for NOTHING but for use with this spray wax on your favorite ride. Get a dedicated laundry basket for the garage for ONLY THESE TOWELS. Keep them off the ground. Wash them together. Dry them together. Store them someplace they will NOT get contaminated and then every time you go to apply and wipe off the wax you won't scratch your car's precious thin paint.
Remember - it's what touches the paint that determines swirls and scratches.
12 Pack Sky Blue Edgeless Polishing Cloths
Make sense?
On Autogeek.com
Optimum Spray Wax
12 Pack Sky Blue Edgeless Polishing Cloths
Optimum No Rinse (ONR) Essentials Wash Kit - Everything you need to mix up your own waterless wash
End of article
:dig:
- Thread starter
- #12
Hey Mike, I see now about posting questions on the forum so everyone gets a chance to chime in with there experience - even you. Many thanks for the compliments. ALSO thanks to the others for their info replies. I tried to use Tapatalk to post pics - no luck. My granddaughter helped with the posting the pics, then you bailed me out by posting my email to show others my problem - many thanks for doing that along with adding more of your personal touch in answering questions. ABSAV
The Guz
Well-known member
- Jun 17, 2013
- 8,768
- 45
Is this something that one could use Optimum Clear Coat Restorer on? Or is it not meant for something like this?
It doesn’t work on clear coat that has already failed. Used it and it didn’t don anything for that. It was also not designed for that.
Me Time
New member
- Apr 11, 2016
- 219
- 0
It doesn’t work on clear coat that has already failed. Used it and it didn’t don anything for that. It was also not designed for that.
Wonder what the main draw of it is then? Haven't seen much on it.
Last edited:
Whitewater25
Member
- Feb 14, 2015
- 618
- 0
Or wait a week or two and the Poxy will be gone, or close to it. looks good when fresh but not very durable.