Compound not delivering expected results - What do I need to change?

Peter182

New member
Joined
Jul 4, 2017
Messages
32
Reaction score
0
Hi! First time poster from Hamilton, Ontario polishing my very first car (my one and only daily driver, a black 2011 Mazda 3 Hatchback 2.0L).

I've watched countless hours at this point of good quality YouTube videos (mostly Larry from AMMO NYC, and most recently binging on the good ole' JUNKMAN) and these exceptionally talented guys n gals have inspired me to start taking care of my car. So I've spent around $350 CAD in the last couple weeks on car care products including MF towels, mitts, sponges, wheels brushes, clay bar system, wax, and OF COURSE - a PC 7424XP DA polisher along with foam pads.

NOW ON TO THE QUESTION:


I have completed my test spot on the hood of my car (Yes I know, pick the most visible place why don't I...), and as expected, I didn't kill my paint.
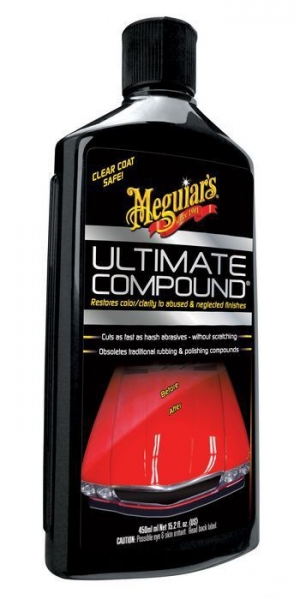
I am, however, not satisfied with the results; nor am I very surprised considering my product of choice was Meguiar's consumer product ULTIMATE COMPOUND.

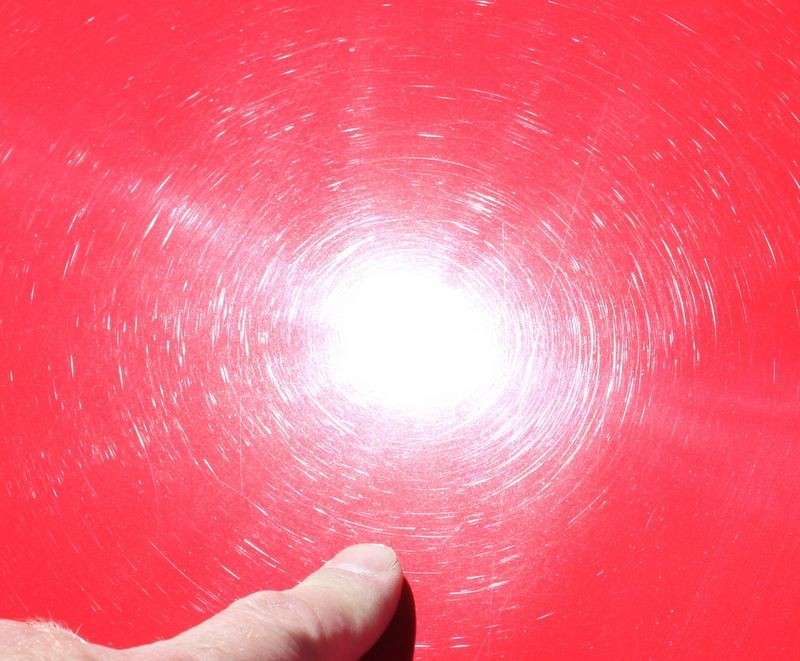
See two pictures attached for the uncorrected and corrected difference (These are not before/after pictures of the same spot) I've also linked a youtube clip going back and forth over the right side (COMPOUNDED) and left side (NO CORRECTION).


Yes, the product removed the majority of the swirls. However, the deeper clearcoat scratches didn't want to go away. The scratches that remain are essentially impossible to notice unless you get right in there with a light source... But I feel like with the reputed soft paint of the Mazdas (in particular the black paint as reported by dozens of Mazda owners on forums) that I shouldn't be having an issue getting rid of these slightly deeper CC scratches.

Here's what I'm using:


PC 7424XP DA Polisher w/ 5" backing plate
LC CCS 5.5" Orange foam pad
Megs Ultimate Compound

The steps that I took for my 2x2 test spot:

1.Wash with dove soap (only used this to prep the spot for clay/polish)
2. Clay bar, using light-pressured strokes (paint was not heavily contaminated, felt fairly smooth before the clay)
3. Dry with MF towel (tags removed)
4. IPA to remove any remaining grease & wax (1 coat of liquid wax was last applied a month ago, definitely was not beading much at this point)
5. COMPOUND
  • I used 4 pea-sized drops on the brand new pad, and used one mist of detailer spray
  • Dabbed product on the 2x2 spot
  • Worked product in on a speed of 1
  • On a speed of 5, I moved very slowly using crosshatch pattern. Two horizontal, and two vertical passes, 50% crossover, applying a small amount of pressure on the machine as I found the pad to be moving waaay too slowly if I applied the "14+ pounds including the weight of the machine" as I've seen recommended.

I ended up going over this same spot on the top end of the hood a total of 4 times (with the same pad), as I would wipe and still see scratches remain with a light source. I stopped after 4 thinking something needed to change...

The question is... What? Yellow for orange pad? MF pad for foam pad? Professional-grade cutting compound for consumer grade w/ fillers? A combination of these???


Thanks for your help and guidance :)
 
Last edited:
You didn't try a fine polish after the compound? That's haze. Try a fine polish
 
I should have mentioned:

Farther down the hood towards the front of the care I did a single pass of UC followed by meg's UP with a LC black 5.5" finishing pad using the same technique as described in the OP. This spot was not nearly as marred/scratched as it was right at the top (closest to windshield). I figured if the polishing step did not correct the marring from the spot below that it wouldn't do so here, and therefore didn't want to waste further product assuming I'd need either a stronger pad or compound.
 
Do you have a microfiber cutting pad?


Sent from my iPhone using AGOnline
 
If it's a daily driver, you might not want to chase those deeper marks on that thin clear.

Misting with detail spray, or water isn't recommended by the manufacturer. This might be causing over lubrication. Of the detail spray contains some type of wax/sealant, it is impeding the abrasives, preventing maximum paint abrasion.

Ultimate Compound is a very good product with actual abrasives. I love the Junkman, but he hasn't done enough research on the product to declare that it's "full of fillers". See my photo album here on my profile of Ultimate Compound vs 1000 grit.

Maybe lighten up the pressure as well, to get more rotation. Unfortunately, I find that the yellow, orange, and white pads need a lot of pressure to be effective. That is why I really like the Lake Country Hydrocephalus line, or the American foam style pads - like the green and blue Buff and Shine, Meguiar's line, and the Pink, and Green Lake Country CCS. They do need some pressure, but nowhere near what I need from the yellow, orange, and white.

Ultimate Compound cuts pretty fast. It could be that you are filling the pad with residue somewhere in the cycle. Cleaning the pad with a pad conditioning brush, after every section cycle is critical to the performance of your combination. As the pad starts to become saturated, a wipe down with a dry microfiber will help pull the liquid, and excess residue out of the pad.

Give it some time, play around with one variable at a time. The last thing I would do is buy more product. Learn to maximize what you have.
 
If it's a daily driver, you might not want to chase those deeper marks on that thin clear.

This was my thought exactly. As a daily driver you're never far from one bug splatter, pebble collision, or rub from a careless person person walking by your car in the parking lot who will mess up the finish. I won't chase the deep random marks on any of my cars.
 
Agree, that is about as far as I would go after deeper scratches with a DD. IF you are showing it and plan to coat it (not compound it all the time and wear away the CC) then go after those with a heavier compound and MF pad.
 
Instead of a black pad try a white pad with your polish
 
Hi! First time poster from Hamilton, Ontario polishing my very first car (my one and only daily driver, a black 2011 Mazda 3 Hatchback 2.0L).

Welcome to AutogeekOnline! :welcome:


I've watched countless hours at this point of good quality YouTube videos (mostly Larry from AMMO NYC, and most recently binging on the good ole' JUNKMAN)

Well I'm not Larry or Junkman but I'll take a stab at reading your story and trying to help out...


Yes, the product removed the majority of the swirls. However, the deeper clearcoat scratches didn't want to go away.

The scratches that remain are essentially impossible to notice unless you get right in there with a light source...

But I feel like with the reputed soft paint of the Mazdas (in particular the black paint as reported by dozens of Mazda owners on forums) that I shouldn't be having an issue getting rid of these slightly deeper CC scratches.

What you are seeing are the RIDS

RIDS = Random Isolated Deeper Scratches


Here's my article on what RIDS are...

RIDS - The Definition of RIDS and the story behind the term...


RIDS = Random Isolated Deeper Scratches

RIDS
Random Isolated Deeper Scratches. These type of scratches come from normal wear & tear and there is no pattern to them. RIDS are like Tracers in that they are deeper scratches that show up after the shallow scratches have first been removed through a machine or hand buffing process, usually with a compound or paint cleaner. After the shallow swirls and scratches have been removed, any deeper scratches that remain will now show up like a Sore-Thumb to your eyes because there are no longer thousands of lighter, more shallow scratches camouflaging them.


I coined this term back in the early 1990's, before discussion forums existed. Note vBulletin wasn't released as a pay-for-script until 1999/2000, see this article here,

Discussion Forums - A relatively "new" invention...


Here's the story behind the story for the term R.I.D.S.

For most people working on a daily driver, the normal process is to,


  • Wash and dry the car
  • Inspect the paint by feeling it with your clean hand to check for above surface bonded contaminants
  • Inspect the paint visually by looking at in in bright light for swirls and scratches
  • Clay the paint if needed
  • Remove the swirls if needed
  • Polish to a high gloss
  • Apply a wax, paint sealant or hybrids


Make your final wipe and then stand back and admire the results...

Like most detailers, I would evaluate the finish on a customer's car, explain to them the process I would use to remove the defects and restore a show car finish from the Test Spot to the First Step Process and all the way up to the LSP or the Last Step Product.

In most cases, after the correction step would be finished, that means after the paint has been compounded and for me that would usually be after buffing the paint using my trusty, dusty Makita 9207SPC rotary buffer and removing as many defects as I felt comfortable with, at that point the RIDS would show up and it would be at this point that I would show the customer the deeper defects and then educate them on paint thickness and why it would be unwise to attempt removing the remaining deeper defects. Sometimes I would re-enforce this education segment with where the deeper defects came from, (them and the way they treat the car or from the person they bought the car from), and to avoid this type of problem to be more careful with the paint in the future because paint is thin and that's the fault of the car manufacture, not the detailer, (me).
biggrin.gif


So that's where I started using the term, educating customers.

60 Eyeballs
The topic also comes up in all the classes I've taught and continue to teach as most of the focus of these classes is showing people how to move from working by hand to working by machine. I know from experience, that if I see the RIDS show up in my customer's cars, then the students are going to see the RIDS show up when they work on their cars, so it's only a win/win situation to educate them on RIDS at the same time you're teaching them how to machine clean and polish paint.

The amazing thing!
There's always someone in every class that after you remove the shallow swirls and scratches will closely look at the finish and because the RIDS will now stand out like a Sore-Thumb, they will point to the RIDS and say something uniformed like,


"Hey look, your polisher put some scratches into the paint!"

laughing.gif


This is so ridiculous, but in front of anywhere from 20 to 50 people with the average being 30 people or 60 eyeballs, you have to use kids gloves to gently explain what just happened, in other words, that right there in front of all their eyeballs you just removed all the zillions of shallow swirls and scratches surrounding the deeper scratches and now that the shallow swirls and scratches are removed the remaining deeper scratches now show up like a Sore-Thumb because there are no longer zillions of shallow swirls and scratches surrounding them acting to camouflage them from their eyes.

Once you explain this, 99.9% of the people in the class, watching the live demonstration, usually on a thrashed black car can understand and internalize the concept and know what to expect when they go home and work on their car in their garage. Connecting the dots for people like this results in the removal of panic, fear and confusion and is a win/win deal for everyone involved.


When do RIDS Show Up?
As mentioned above in my accounting of a story that plays itself out with almost ever customer and most if not all detailing classes, RIDS show up after you perform the first cleaning or compounding step.

In most cases, and especially if the paint has been neglected or abused, the paint will be filled with hundreds of thousands of light or shallow swirls and scratches. At this point, when you look at the paint you don't really see the RIDS because the are masked or camouflaged by the hundreds of thousands of deeper scratches.

AFTER you compound or use some type of paint cleaner or cleaner/polish over the paint, then wipe off the residue... then the RIDS show up.

This isn't always true for all RIDS as deeper RIDS will show up easily to your eyes even when surrounded by hundreds of swirls, like this... note the straight-line scratches in a few random directions included in the mass cobweb swirls throughout the paint.

redelcamino_029.jpg


After you remove the majority of shallow swirls, scratches and other below surface defects out of the paint and then wipe-off the residue and inspect the paint, now that the zillions of shallow defects will have been removed, the only defects left will be the random, isolated deeper scratches and because there's no longer zillions of swirls and scratches surrounding the deeper scratches they stand out like a sore-thumb and are easy to see.


Random
The reason I used the word random is because they are random, and this is an important distinction because sometimes people confuse RIDS with other types of below surface defects, for example, sometimes people will refer to Tracers and RIDS but this isn't accurate.

Tracers are, or at least should be, scratches in the paint that are all in a straight line going in the direction a person was moving their hand when wet-sanding.

RIDS are instilled through normal, wear-n-tear from a car being used as a daily driver and as such, deeper scratches are instilled in hap-hazard, random ways, thus the choice of the word Random.


Isolated
This just means they're usually by themselves, not a part of a group or pattern of scratches or below surface defects


Deeper
This is kind of obvious but RIDS is about the deeper scratches that don't come out during the first and sometimes second or even third compounding or correction step because they're just too deep to be removed safely. At this point you need to learn to live with them or educate your customer that they are too deep to remove safely and they either need to learn to live with them or consider their other options, like having the affected panel or the entire car re-painted.


Scratches
RIDS are mostly about the deeper scratches that remain after the compounding and/or polishing steps but it could also include any deeper defects that are not removed such as Type II Water Spot Etchings, Tracers, Pigtails, etc., basically anything that remains after you've made the decision you've worked a panel as much as you're going to work it and anything that hasn't bee removed is not going to be removed. (At least by you).


Here's your pictures, I placed them into your free photo gallery here on AGO


Before

Mazda_01.jpg


After

Mazda_02.jpg


I'm not sure what kind of advice Larry or Junkman would give you but here's my advice and another article to go with it...


Look at the BIG PICTURE

By this I mean, is this a show car or your daily driver?

A: If it's a show car that you put on display then go for it! Keep compounding till your happy.

B: If it's a daily driver, then stop where your at and stick a fork in it and call it done.​


The Big Picture

If this is a daily driver with the factory clearcoat, then the factory clear layer of paint is THIN. HOw thin? Here's my article on how thin...

Clearcoats are thin by Mike Phillips

Here's a picture from the above article that drives home the point made in the article,

watermark.php


Besides being thin, all of the UV protection is in the clear layer of paint. It has a half life of 5 years. This means after a new car is 5 years old, half of the UV protection is spent or used up, no longer functioning, no longer protecting the basecoat and the entire matrix of paint from sun exposure.

Knowing this, and knowing that compounding will remove more and more of your already precious thin clear layer of paint and knowing this car is a daily driver which means it's going to see more wear-n-tear, then why not look at the big picture.

Remove all the shallow defects and then learn to live with the deeper RIDS that remain and enjoy your clean, shiny car.

Then learn how to wash the car carefully so as not to put MORE deep scratches into the paint or any scratches into the paint. See my article here,


How to wash a coated car - The Gentle Approach for Washing a Car by Mike Phillips


A quality re-paint on a normal passenger car that does NOT need any body work or rust removal will average you $3000.00 and in most cases, for a paint job that's warrantied, that's on the low side.


So compound, polish and wax the paint and then enjoy your clean shiny ride. Put your car on a regular maintenance program and take some advice given to me over 30 years ago that I've been sharing just as long...


"Find something you like and use it often"


In your case, this would mean find a wax, or a sealant or a coating and use it once in a while. If you see swirls and scratches, do a "polishing" step and then re-seal the paint.

KISS or Keep it Simple Simon

If it's simple, you're more likely to do it.

:)
 
Here's what I'm using:[/B]

PC 7424XP DA Polisher w/ 5" backing plate
LC CCS 5.5" Orange foam pad
Megs Ultimate Compound

The car on the label of the compound is a car I used for a TNOG or Thursday Night Open Garage detailing class at Meguiar's corporate office back when I started and taught all the TNOGs in Irvine, California. I actualy started them on Wednesday nights and then moved them to Thursdays. --> Car Detailing History

Here's my article on this story...

Meguiar's Ultimate Compound History

Ultimate_Compound_Mike_Phillips_005.jpg


Ultimate_Compound_Mike_Phillips_006.jpg


Ultimate_Compound_Mike_Phillips_004.jpg


That's a very capable compound.


Ultimate_Compound_Mike_Phillips_001.jpg


The steps that I took for my 2x2 test spot:

Always good to do a Test Spot... I coined the term as it's used in our industry back in 2004, that's 13 years ago. I don't know if Larry or Junkman were even detailing back then?


Test Spot - The story behind the story...


5. COMPOUND
[*]I used 4 pea-sized drops on the brand new pad, and used one mist of detailer spray

Never been a fan or an advocate of PEA sized drops of product. Here's the real deal.... you NEED some amount of abrasives and lubrication on the surface working against the paint minus what soaks into the pad. Check out my article here...

From 2011...

How to prime a foam pad when using a DA Polisher

For some products and paint conditions, you may want more product on the surface working for you. Here's an example of dime size drops of product.

Dime size drops of product
PrimingPad12.jpg


PrimingPad13.jpg


[*]Dabbed product on the 2x2 spot
[*]Worked product in on a speed of 1

That's called Kissing the Finish... here's my article from 2010

Kissing the Finish by Mike Phillips


[*]On a speed of 5, I moved very slowly using crosshatch pattern. Two horizontal, and two vertical passes, 50% crossover, applying a small amount of pressure on the machine as I found the pad to be moving waaay too slowly if I applied the "14+ pounds including the weight of the machine" as I've seen recommended.

And here's the original source for the crosshatch pattern and the amount of pressure to apply dated 2004

How to use the G-100 to remove swirls


I ended up going over this same spot on the top end of the hood a total of 4 times (with the same pad), as I would wipe and still see scratches remain with a light source. I stopped after 4 thinking something needed to change...

That's called 4 SECTION PASSES - here's the article that has the definition for this term now used everywhere in the industry. The original article was written in 2009 but here's the article I created with just the info on the term section pass from the original article here.

The Definition of a Section Pass by Mike Phillips


The question is... What? Yellow for orange pad? MF pad for foam pad? Professional-grade cutting compound for consumer grade w/ fillers? A combination of these???

The compound you have is enough.

Try this,

  1. Speed 6 on our Porter Cable.
  2. Make 6-8 section passes
  3. Work a smaller area - for a PC 2' x 2' is too large
  4. Switch to a clean, dry foam pad OFTEN - dry foam pads cut better than wet soggy foam pads.


For most cars, in a perfect world you want one pad per panel for the compounding step. Let your budget and the value of your time be your guide.


:)
 
A few more tips...


With the PC or Porter Cable you really need to be on the 6.0 speed setting to maintain pad rotation and it's only when the pad is rotation on a free spinning orbital polisher that you're are removing any substantial paint or in other words removing defects although there's a handful of detailing gurus in the world that claim jiggling or vibrating only will remove defects. :laughing:


Read this and watch the short video...

Video: Mark your backing plate to make it easy to see pad rotation


MarkYourBackingPlate01.jpg


Here's a quick video that show how and why to mark your backing plate to see and monitor pad rotation while doing any correction or polishing steps.


Then read this, it will share the most common mistakes people make AND how to remedy them...

DA Polisher Trouble Shooting Guide


Then watch this video, it will show you step-by-step what to do and how to do it...


And for more and more info on how to use a simple or entry level polisher check out these...


There's a LOT of machine polishing articles here,


DA Polisher Articles - Help for Newbies to Machine Polishing


:buffing:
 
Thank you so much for the schooling, Mr. Phillips!

I had a feeling these were deeper scratches that may very well be unsafe (or unwise at the very least) to remove, especially on a 2011 stock mazda 3... ;D

Very much appreciate your help. I will continue with the polishing as I have so far and will definitely toss those results in the appropriate sub thread!
 
Didn't even notice there was a 2nd page! Haha I will have to have a read after work tonight. Then onto the rest of the hood!
 
Can I just say..... DOVE soap? Lol I hope you meant Dawn...

Sent from my SM-G935V using Tapatalk
 
Can I just say..... DOVE soap? Lol I hope you meant Dawn...

Sent from my SM-G935V using Tapatalk

What, you mean their Beauty Bar system doesn't effectively remove contaminates and grime on my car's paint?!
Shoot, I knew I must have misunderstood that tutorial!

:laughing:
 
No I did not really consider purchasing one as black Mazda paint is known to be super soft with the clear coat exceptionally thin. I believe I've heard of readings in the 50s-80s (mm?) whereas average I've read is around 100-120.
 
If it's a daily driver, you might not want to chase those deeper marks on that thin clear.
I am in agreement with you here. Just disappointed I couldn't get rid of some more!


Misting with detail spray, or water isn't recommended by the manufacturer. This might be causing over lubrication. Of the detail spray contains some type of wax/sealant, it is impeding the abrasives, preventing maximum paint abrasion.
Yeah I didn't use DS until the 3rd and 4th go at it (are these called section cycles?), as the pad was starting to dust. I have more pads coming in the mail so I will be switching them out.


Ultimate Compound is a very good product with actual abrasives. I love the Junkman, but he hasn't done enough research on the product to declare that it's "full of fillers". See my photo album here on my profile of Ultimate Compound vs 1000 grit.
I will take a look! I actually meant to do a test - record video of the corrected section, then applying IPA to remove any potential "fillers", recording again to see if there's any noticeable difference. I will *absolutely* do this test on the other half of the hood, as it is swirls galore there and you should be able to notice if anything is being filled.

Maybe lighten up the pressure as well, to get more rotation. Unfortunately, I find that the yellow, orange, and white pads need a lot of pressure to be effective. That is why I really like the Lake Country Hydrocephalus line, or the American foam style pads - like the green and blue Buff and Shine, Meguiar's line, and the Pink, and Green Lake Country CCS. They do need some pressure, but nowhere near what I need from the yellow, orange, and white.
This part of your post confused me a little bit, comparing the Pink/Green LC CCS pads to their yellow/orange/white pads. Are you saying the P&G pads have more effective cutting than the Y/O/W pads due to the fact that they require less

Ultimate Compound cuts pretty fast. It could be that you are filling the pad with residue somewhere in the cycle. Cleaning the pad with a pad conditioning brush, after every section cycle is critical to the performance of your combination. As the pad starts to become saturated, a wipe down with a dry microfiber will help pull the liquid, and excess residue out of the pad.

I've just purchased ten 100% cotton terry cloth towels for $10 for cleaning the pads. I have cheap Costco MF towels as well, which would work better for this purpose??
Also, I purchased a nylon brush meant for cleaning grout. Is this what you mean by a "pad conditioning brush"? I can't see how it would do anything to the foam... In fact, I could see it causing tears.

Give it some time, play around with one variable at a time. The last thing I would do is buy more product. Learn to maximize what you have.
Absolutely. I was almost set on purchasing $60+ worth of polish... I really need to take a step back and learn to use what I have (and most importantly, what I can afford!)
 
No I did not really consider purchasing one as black Mazda paint is known to be super soft with the clear coat exceptionally thin. I believe I've heard of readings in the 50s-80s (mm?) whereas average I've read is around 100-120.

For some reason I cannot edit the posts I made on mobile...

Anyways, my quote above was referring to SabbyNJ's post:
SabbyNJ said:
Do you have a microfiber cutting pad?
 
Back
Top