Marc08EX
New member
- May 10, 2008
- 4,108
- 0
Wheels/Tires:
CG Citrus Wash And Gloss on wheels
Meguiar's APC on tires
Tuff Shine tire brush on tires
Swissvax Wheel brush for wheels, calipers and small crevices
EZ Detail Brush for wheel barrels
DP Wheel Coating on wheels
Sonax Tire Gloss Gel Dressing on tires
Wash:
CG Citrus Wash and Gloss via Foam Gun for pre-soak
Meguiar's Gold Class for 2BM wash
Meguiar's Microfiber Wash Mitt
Meguiar's Water Magnet
Clay:
Nanoskin Autoscrub Sponge
Meguiar's D155 as clay lube
Paint Correction:
Griot's Garage BOSS G21
Rupes 75E Mini
Griot's Garage BOSS Correcting Cream
Griot's Garage BOSS microfiber pads
Rupes 4" green foam pads
Pad Conditioning Brush
LSP:
Wolfgang Perfekt Finish Paint Prep
Wolfgang Uber Ceramic Coating
Interior:
Meguiar's Quik Interior Detailer
Vacuum
Exhaust:
Pinnacle Exhaust Cleaner and Polish
My friend had been itching to have this car detailed. He has slowly been accumulating swirls from improper washing and has been asking me to detail his car. Thankfully, I was able to open up this weekend and he was also free so we decided to detail his absolutely stunning ride!
The car was very clean when it arrived so I don't have a lot of before picture besides the swirls.


Dirty wheel barrels:

Extremely filthy exhaust tips:

I first washed the car but ss usual, I always get started with the wheels. Here are the tools I used for this task:

Cleaning the face of the wheels:

Cleaning the brake calipers using a Swissvax brush:

Cleaning the wheel barrels using the EZ detail brush:

Cleaning the tires using Meguiar's APC and Tuff Shine tire brush


These beautiful wheels are now clean!

After, I foamed up the car to loosen up the dirt and contaminants.

I then proceeded to do a 2 bucket wash using Meguiar's Gold Class shampoo. After, I clayed the entire car using the Nanoskin speedy prep sponge.
Now onto the polishing phase. Both of us agreed that the best course of action is a 1 step polish but I told him that if it needs a 2 step, I'll be doing that for him.
I wanted to use the Griot's Garage BOSS system for this detail. Ever since I did my review on the Griot's Garage BOSS G21 polisher (http://www.autogeekonline.net/forum...ong-throw-polisher-comparison-rupes-21es.html), I've been intrigued by the BOSS compounds and polishes ever since.
Here are the products I planned on using:

As you know, the BOSS system pairs up the correcting cream to the orange foam pad and the fast correcting cream to the white foam pad or the microfiber pad. On my test spot, I first used the correcting cream with the orange foam pad. This left too much swirls for my taste. After, I tried using the fast correcting cream with the microfiber pad. This gave me about 93+% correction while leaving the finish LSP ready! I was blown away! But after, I decided to try the correcting cream with the microfiber pad combo. This gave me the same results as the fast correcting cream with microfiber pad combo. So I decided to use the correcting cream with the microfiber pad on this detail.
All taped up and ready to go!

The following shots were taken during the compounding/polishing phase:
Driver Side Rear Quarter Before:

Driver Side Rear Quarter 50/50:

Driver Side Rear Quarter After:

Driver Side Rear Door Before:

Driver Side Rear Door 50/50:

Driver Side Rear Door After:
Driver Side Rear Door Before:

Driver Side Rear Door After:

Driver Side Front Door Handle Before:

Driver Side Front Door Handle After:

Driver Side Front Fender Before:

Driver Side Front Fender After:

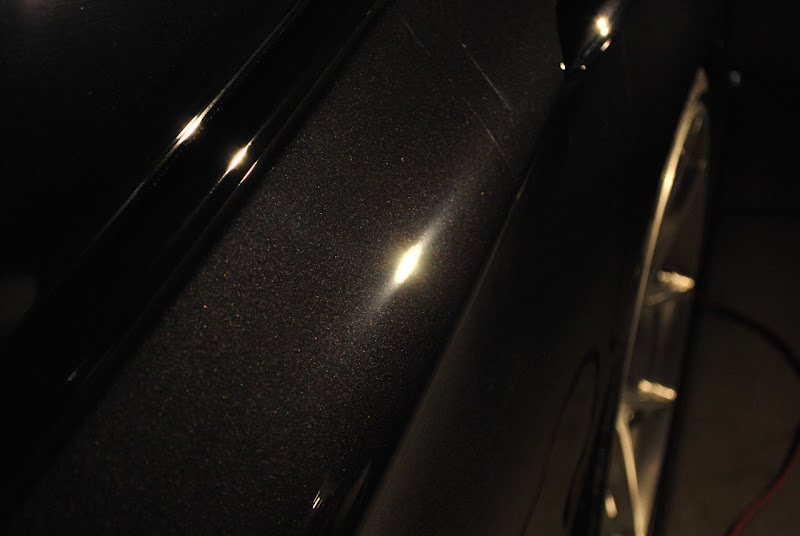
The following shots are from the hood but only with background lighting. It's crazy to see how much scratches and haze are there in the paint even without a strong light.
Hood before:

Hood 50/50: You can clearly see a big difference in color!

Hood 50/50 under LED light:

Trunk Lid 50/50:

Passenger Side Rear Quarter 50/50:

There was a very heavy haze in the rear bumper that was visible from a mile away. Looks like somebody washed that area with scotchbrite or sanded it down... It was nasty! Here's a 50/50 shot of that said area:

Horizontal area of the rear bumper before:
Rupes mini 75E was used on all small panels. I love this thing!!!

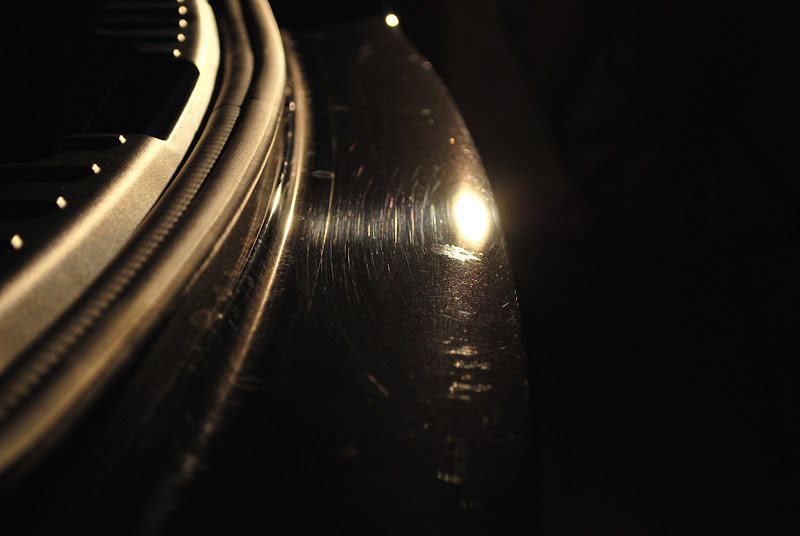
After. Yes there are still some very deep RIDS remaining.

Window sills were also polished:

After all the compounding and polishing was done, it was time to apply the LSP. The owner of the car wanted to use a coating. Since the car was very special, I wanted to apply something special as well so I opted to use the Wolfgang Uber Ceramic Coating.
I first wiped the entire car down with the Wolfgang Perfekt Finish Paint Prep to properly prepare the paint for the bonding process of the coating. After, I applied the Wolfgang coating.

Coating Flashing:

For the wheels, I decided to use DP Wheel Coating:

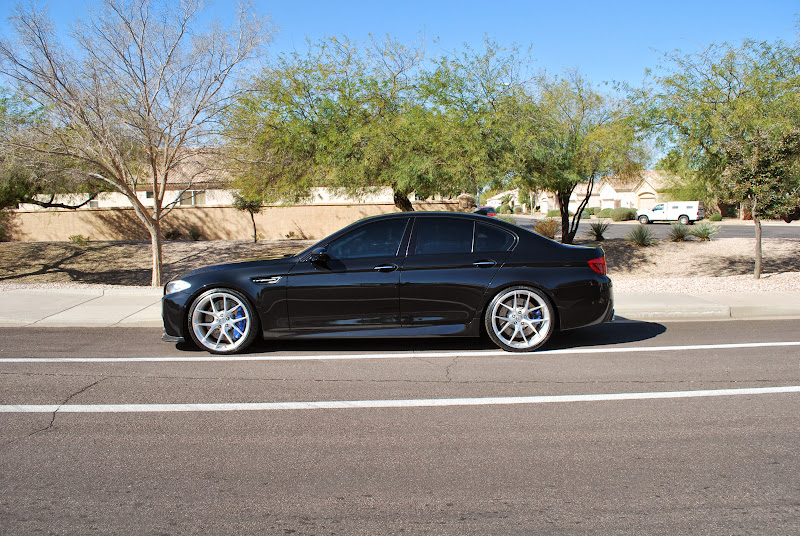
After the coating was applied, I was left with an unbelievable glass and mirror like finish. I was blown away. I hope the owner will be too.


CG Citrus Wash And Gloss on wheels
Meguiar's APC on tires
Tuff Shine tire brush on tires
Swissvax Wheel brush for wheels, calipers and small crevices
EZ Detail Brush for wheel barrels
DP Wheel Coating on wheels
Sonax Tire Gloss Gel Dressing on tires
Wash:
CG Citrus Wash and Gloss via Foam Gun for pre-soak
Meguiar's Gold Class for 2BM wash
Meguiar's Microfiber Wash Mitt
Meguiar's Water Magnet
Clay:
Nanoskin Autoscrub Sponge
Meguiar's D155 as clay lube
Paint Correction:
Griot's Garage BOSS G21
Rupes 75E Mini
Griot's Garage BOSS Correcting Cream
Griot's Garage BOSS microfiber pads
Rupes 4" green foam pads
Pad Conditioning Brush
LSP:
Wolfgang Perfekt Finish Paint Prep
Wolfgang Uber Ceramic Coating
Interior:
Meguiar's Quik Interior Detailer
Vacuum
Exhaust:
Pinnacle Exhaust Cleaner and Polish
My friend had been itching to have this car detailed. He has slowly been accumulating swirls from improper washing and has been asking me to detail his car. Thankfully, I was able to open up this weekend and he was also free so we decided to detail his absolutely stunning ride!
The car was very clean when it arrived so I don't have a lot of before picture besides the swirls.
Dirty wheel barrels:
Extremely filthy exhaust tips:
I first washed the car but ss usual, I always get started with the wheels. Here are the tools I used for this task:
Cleaning the face of the wheels:
Cleaning the brake calipers using a Swissvax brush:
Cleaning the wheel barrels using the EZ detail brush:
Cleaning the tires using Meguiar's APC and Tuff Shine tire brush
These beautiful wheels are now clean!
After, I foamed up the car to loosen up the dirt and contaminants.
I then proceeded to do a 2 bucket wash using Meguiar's Gold Class shampoo. After, I clayed the entire car using the Nanoskin speedy prep sponge.
Now onto the polishing phase. Both of us agreed that the best course of action is a 1 step polish but I told him that if it needs a 2 step, I'll be doing that for him.
I wanted to use the Griot's Garage BOSS system for this detail. Ever since I did my review on the Griot's Garage BOSS G21 polisher (http://www.autogeekonline.net/forum...ong-throw-polisher-comparison-rupes-21es.html), I've been intrigued by the BOSS compounds and polishes ever since.
Here are the products I planned on using:
As you know, the BOSS system pairs up the correcting cream to the orange foam pad and the fast correcting cream to the white foam pad or the microfiber pad. On my test spot, I first used the correcting cream with the orange foam pad. This left too much swirls for my taste. After, I tried using the fast correcting cream with the microfiber pad. This gave me about 93+% correction while leaving the finish LSP ready! I was blown away! But after, I decided to try the correcting cream with the microfiber pad combo. This gave me the same results as the fast correcting cream with microfiber pad combo. So I decided to use the correcting cream with the microfiber pad on this detail.
All taped up and ready to go!
The following shots were taken during the compounding/polishing phase:
Driver Side Rear Quarter Before:
Driver Side Rear Quarter 50/50:
Driver Side Rear Quarter After:
Driver Side Rear Door Before:
Driver Side Rear Door 50/50:
Driver Side Rear Door After:
Driver Side Rear Door Before:
Driver Side Rear Door After:
Driver Side Front Door Handle Before:
Driver Side Front Door Handle After:
Driver Side Front Fender Before:
Driver Side Front Fender After:
The following shots are from the hood but only with background lighting. It's crazy to see how much scratches and haze are there in the paint even without a strong light.
Hood before:
Hood 50/50: You can clearly see a big difference in color!
Hood 50/50 under LED light:
Trunk Lid 50/50:
Passenger Side Rear Quarter 50/50:
There was a very heavy haze in the rear bumper that was visible from a mile away. Looks like somebody washed that area with scotchbrite or sanded it down... It was nasty! Here's a 50/50 shot of that said area:
Horizontal area of the rear bumper before:
Rupes mini 75E was used on all small panels. I love this thing!!!
After. Yes there are still some very deep RIDS remaining.
Window sills were also polished:
After all the compounding and polishing was done, it was time to apply the LSP. The owner of the car wanted to use a coating. Since the car was very special, I wanted to apply something special as well so I opted to use the Wolfgang Uber Ceramic Coating.
I first wiped the entire car down with the Wolfgang Perfekt Finish Paint Prep to properly prepare the paint for the bonding process of the coating. After, I applied the Wolfgang coating.
Coating Flashing:
For the wheels, I decided to use DP Wheel Coating:
After the coating was applied, I was left with an unbelievable glass and mirror like finish. I was blown away. I hope the owner will be too.


")