Mike Phillips
Active member
- Dec 5, 2022
- 51,004
- 6
Doing Edge Work with RUPES Nano in Rotary Mode - Mike Phillips Style

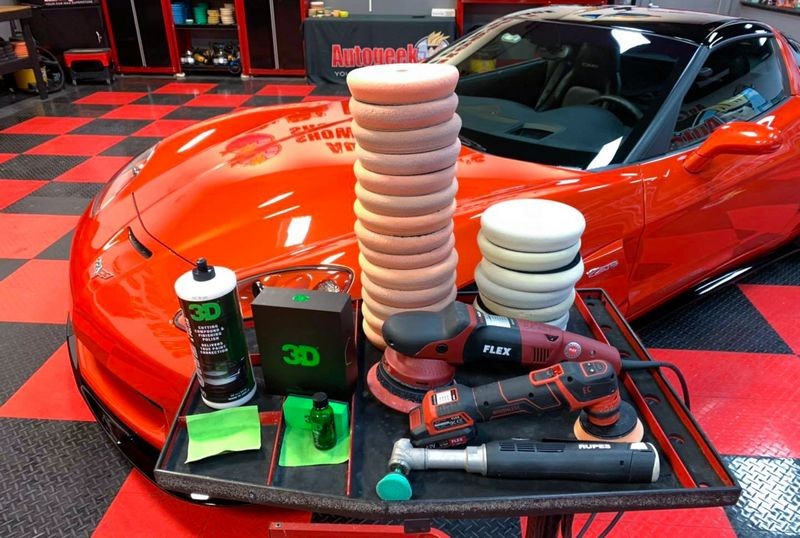
Once you get past the price of the full RUPES Nano in kit form, you're going to LOVE this tool!
When buying your first Nano you need the full kit because you need and want all the drive units, backing plates, brushes, batteries, battery charger, brushes, etc. So once you make up your mind to bite the bullet then go all in and get the full RUPES Nano Kit. Here's the link,
Rupes Bigfoot Nano iBrid Long Neck Kit - $600.00
The Rupes Bigfoot Nano iBrid Short Neck Kit includes:
The kit includes everything you need to go out into your garage and start doing edge work. Once you spend about 10 minutes using this tool you will wonder, like all of us did at one time,
How did I get by without this tool?
Yep... it's that good and yeperdoo, it's that k0oL :buffing:
Then with a little practice, experience and after buffing out a few cars and discovering how often you can make use of this Tooth Polisher, you'll never want to be without it.
Long Neck vs Short Neck?
I know some guys like the short neck as the shortness characteristic makes it easier for them to use with a single hand. Not me. First anytime I'm doing the kind of meticulous surgical work where this type of tool is needed I'm going to hold it with both hands. Typically I hold the body of the tool as it is also the handle and then use a few fingers to grip the head of the tool to guide it where I want it to go with precision.
So for me it's the long neck all the way.
Your Edge Work Style?
All of us detailers will invariable come up with our own style.
Here's the Mike Phillips Style
I look over each car I detail and sum up the areas that SHOULD be knocked-out with the RUPES Nano. For 99.9% of the time I'm using this tool in ROTARY MODE with the RUPES 1" pads. I also do all the edge work FIRST (in rotary mode), and then when I switch over to an full size orbital polisher I can clean-up the holograms and then tackle the rest of the car.
Some of you might want to buff out the car using a full size polisher and then afterwards come back and knock out the tight areas and thin panels that you couldn't get with the full size - that's a legitimate style too and I can make a case for approaching a car in this manner. The BIG PICTURE is to spend some time behind the tool and learn it's capabilities and the exploit them to the max for your benefit and your customer's benefit.
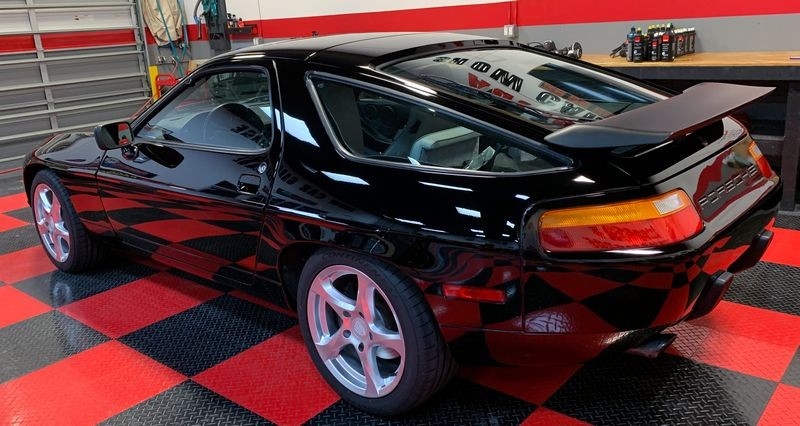
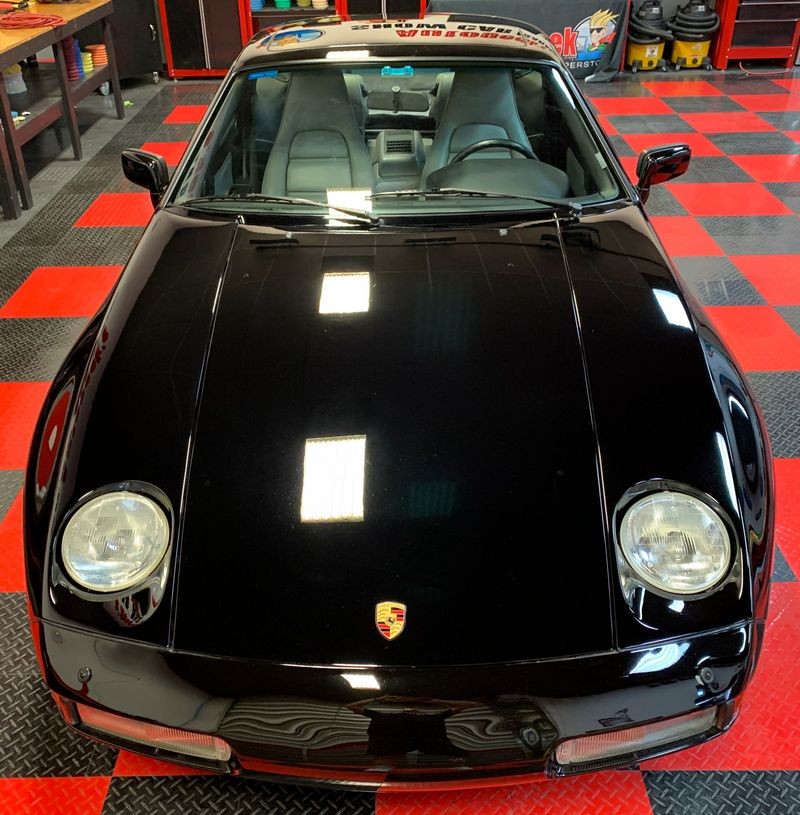
1988 Porsche 928 s4 - Single Stage Paint
Here's a recent classic 1988 Porsche 928 s4 with the original single stage black paint. For those that might not know a lot about older, single stage paints, they tend to be the SOFTEST paints there are to work on. So you have to be very careful when choosing products, pads and even tools. For example, the paint on this car because it's single stage - it has oxidation. In some areas, the oxidation is so bad the paint has literally turned white. White oxidation is a sign of extreme oxidation.
Here's a few pictures showing how I used the RUPES Nano to carefully do my edge work with precision and safety.
First - note the pad I'm using? It's the softest foam pad that RUPES offers for the Nano and it's handling the correction work on this super soft paint with no problems. Think about it.")

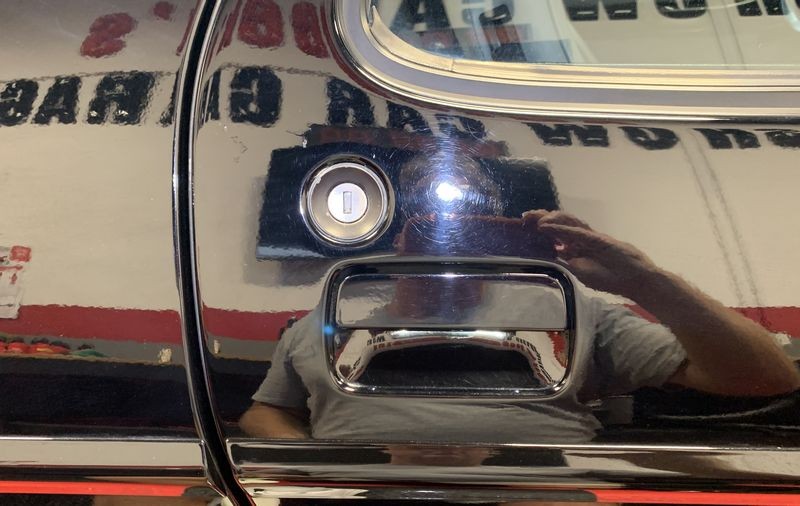
Here's a before pictures showing the swirl-level on the car. There's a some tight areas and thin panels to address on this section of the door.
1" White RUPES Finishing Pad

A dab of BLACKFIRE One Step
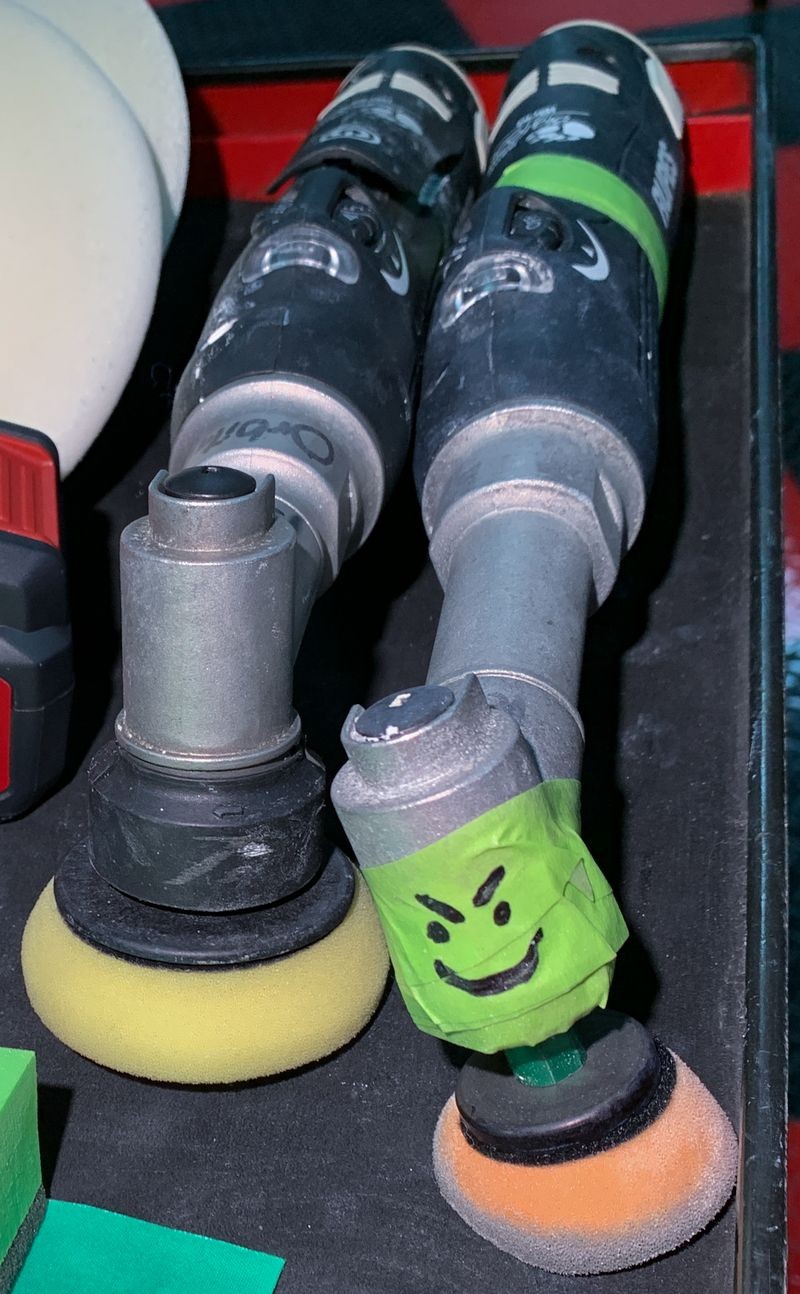
When it comes to using the Nano in rotary mode, a little dab will do ya - remember, this tool is in rotary mode as seen by the GREEN drive unit attached to the spindle. In rotary mode, if you use too much product, it's going to get slung all over the place via centrifugal force.

Buff buff buff...
See the black pigment coming off the door and onto the foam buffing pad?

Swirls are gone and gone fast!
Not only did I correct the paint where you see the camera flash but also the handle itself, and all around the handle and the door lock.

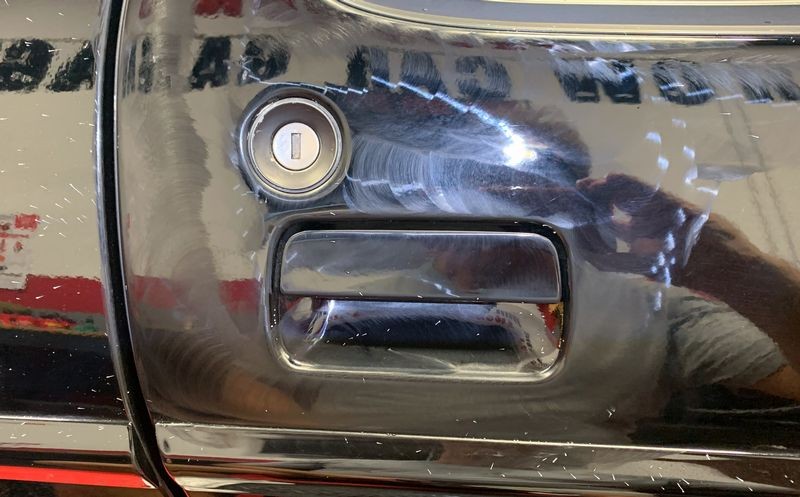
Just a cool shot I thought...
I carefully used the Nano to edge around the edges. Normally I would lay into these areas with a full size tool but due to the softness and age of the paint, I was super careful. As I type in the year 2020 this car from 1988 is 32 years old, thus the paint is 32 years old.
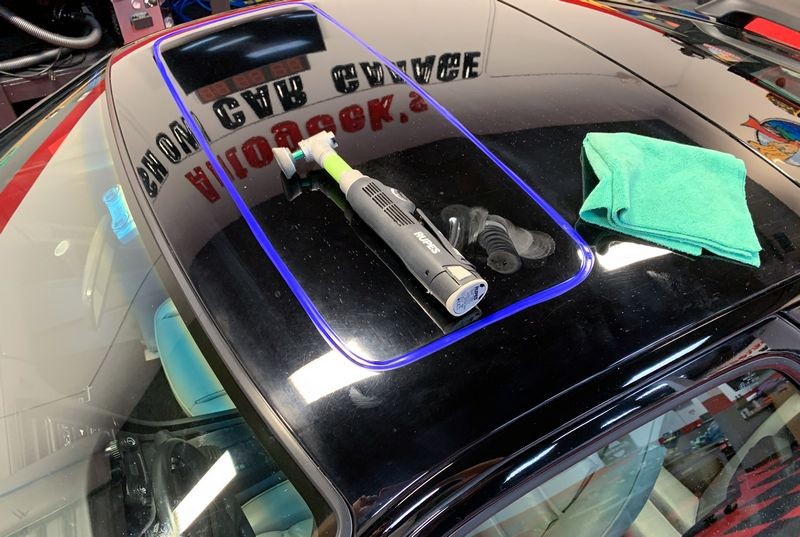
Edge work on the roof panel and sun roof panel
The paint around all the edges had severe oxidation. Again, normally I would knock these out with a full size tool but due to the softness of the paint on this car I chose to tackle the edges using the Nano.
Extreme Oxidation
When black single stage paint turns white - this qualifies for the description of EXTREME OXIDATION.
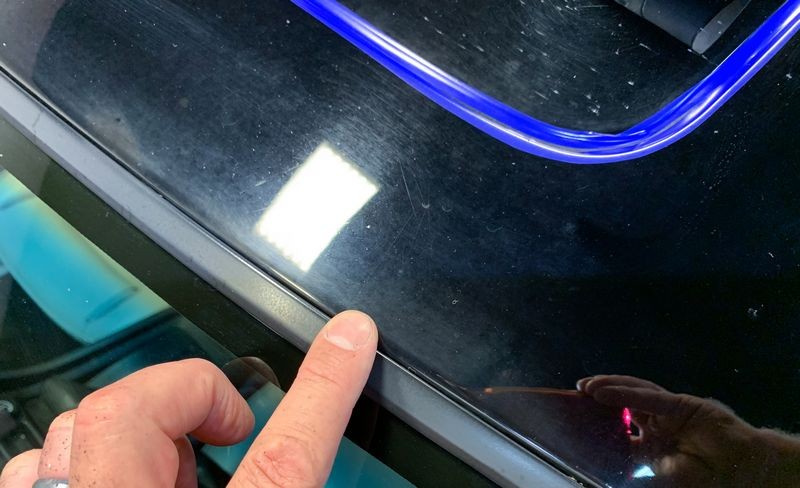
In this close-up not only can you see the oxidation but you can also see scratches...

Buff buff buff....

Wipey wipey,

The left hand side is before and the right hand side is after buffing with the Nano.

And here's a more clear shot of the "after" side. All of the dead, chalky white paint has been removed. (safely)

And then I continued doing my edge work around the car
See all the thin panels and edges in just this one shot of the section of paint past the roof and front door that leads to the hatch and rear side window.

Can't live without out.... or better said, can't detail without it....

Not bad for 32 year old paint....
On Autogeek.com
Rupes Bigfoot Nano iBrid Long Neck Kit - $600.00
Also used to restore the paint on this car,
All correction work was done using,
BLACKFIRE One Step - 32 ounces - best deal besides buying a gallon
The results from the BLACKFIRE One Step were topped with,
Wolfgang Füzion Carnauba Polymer Estate Wax - $195.00
(includes one free refill)
Towels used to wipe the BLACKFIRE One Step
Cobra 12 Pack Forrest Green Edgeless Microfiber Polishing Cloths - $19.99
Towels used to wipe off the Wolfgang Fuzion
Wolfgang Concours-Series Microfiber Towel- 6-pack - $34.99
Once you get past the price of the full RUPES Nano in kit form, you're going to LOVE this tool!
When buying your first Nano you need the full kit because you need and want all the drive units, backing plates, brushes, batteries, battery charger, brushes, etc. So once you make up your mind to bite the bullet then go all in and get the full RUPES Nano Kit. Here's the link,
Rupes Bigfoot Nano iBrid Long Neck Kit - $600.00
The Rupes Bigfoot Nano iBrid Short Neck Kit includes:
- iBrid Nano Long Neck
- Charger
- BIGFOOT Premium Tool Case
- Wrench
- 1-1/4 inch backing plate
- 2 inch backing plate
- Rotary connector
- 3 mm orbit connector
- 12 mm orbit connector
- AC-DC adapter
- 2 Rechargeable power pack
- 6 Buffing foam pads COARSE 1-1/4"
- 6 Buffing foam pads FINE 1-1/4"
- 4 Buffing foam pads COARSE 2"
- 4 Buffing foam pads FINE 2"
- ZEPHIR polishing compound 150 ml COARSE
- KERAMIK polishing compound 150 ml FINE
- Microfiber towel
- Cylinder brush
The kit includes everything you need to go out into your garage and start doing edge work. Once you spend about 10 minutes using this tool you will wonder, like all of us did at one time,
How did I get by without this tool?
Yep... it's that good and yeperdoo, it's that k0oL :buffing:
Then with a little practice, experience and after buffing out a few cars and discovering how often you can make use of this Tooth Polisher, you'll never want to be without it.
Long Neck vs Short Neck?
I know some guys like the short neck as the shortness characteristic makes it easier for them to use with a single hand. Not me. First anytime I'm doing the kind of meticulous surgical work where this type of tool is needed I'm going to hold it with both hands. Typically I hold the body of the tool as it is also the handle and then use a few fingers to grip the head of the tool to guide it where I want it to go with precision.
So for me it's the long neck all the way.
Your Edge Work Style?
All of us detailers will invariable come up with our own style.
Here's the Mike Phillips Style
I look over each car I detail and sum up the areas that SHOULD be knocked-out with the RUPES Nano. For 99.9% of the time I'm using this tool in ROTARY MODE with the RUPES 1" pads. I also do all the edge work FIRST (in rotary mode), and then when I switch over to an full size orbital polisher I can clean-up the holograms and then tackle the rest of the car.
Some of you might want to buff out the car using a full size polisher and then afterwards come back and knock out the tight areas and thin panels that you couldn't get with the full size - that's a legitimate style too and I can make a case for approaching a car in this manner. The BIG PICTURE is to spend some time behind the tool and learn it's capabilities and the exploit them to the max for your benefit and your customer's benefit.
1988 Porsche 928 s4 - Single Stage Paint
Here's a recent classic 1988 Porsche 928 s4 with the original single stage black paint. For those that might not know a lot about older, single stage paints, they tend to be the SOFTEST paints there are to work on. So you have to be very careful when choosing products, pads and even tools. For example, the paint on this car because it's single stage - it has oxidation. In some areas, the oxidation is so bad the paint has literally turned white. White oxidation is a sign of extreme oxidation.
Here's a few pictures showing how I used the RUPES Nano to carefully do my edge work with precision and safety.
First - note the pad I'm using? It's the softest foam pad that RUPES offers for the Nano and it's handling the correction work on this super soft paint with no problems. Think about it.
Here's a before pictures showing the swirl-level on the car. There's a some tight areas and thin panels to address on this section of the door.
1" White RUPES Finishing Pad
A dab of BLACKFIRE One Step
When it comes to using the Nano in rotary mode, a little dab will do ya - remember, this tool is in rotary mode as seen by the GREEN drive unit attached to the spindle. In rotary mode, if you use too much product, it's going to get slung all over the place via centrifugal force.
Buff buff buff...
See the black pigment coming off the door and onto the foam buffing pad?
Swirls are gone and gone fast!
Not only did I correct the paint where you see the camera flash but also the handle itself, and all around the handle and the door lock.
Just a cool shot I thought...
I carefully used the Nano to edge around the edges. Normally I would lay into these areas with a full size tool but due to the softness and age of the paint, I was super careful. As I type in the year 2020 this car from 1988 is 32 years old, thus the paint is 32 years old.
Edge work on the roof panel and sun roof panel
The paint around all the edges had severe oxidation. Again, normally I would knock these out with a full size tool but due to the softness of the paint on this car I chose to tackle the edges using the Nano.
Extreme Oxidation
When black single stage paint turns white - this qualifies for the description of EXTREME OXIDATION.
In this close-up not only can you see the oxidation but you can also see scratches...
Buff buff buff....
Wipey wipey,
The left hand side is before and the right hand side is after buffing with the Nano.
And here's a more clear shot of the "after" side. All of the dead, chalky white paint has been removed. (safely)
And then I continued doing my edge work around the car
See all the thin panels and edges in just this one shot of the section of paint past the roof and front door that leads to the hatch and rear side window.
Can't live without out.... or better said, can't detail without it....
Not bad for 32 year old paint....
On Autogeek.com
Rupes Bigfoot Nano iBrid Long Neck Kit - $600.00
Also used to restore the paint on this car,
All correction work was done using,
BLACKFIRE One Step - 32 ounces - best deal besides buying a gallon
The results from the BLACKFIRE One Step were topped with,
Wolfgang Füzion Carnauba Polymer Estate Wax - $195.00
(includes one free refill)
Towels used to wipe the BLACKFIRE One Step
Cobra 12 Pack Forrest Green Edgeless Microfiber Polishing Cloths - $19.99
Towels used to wipe off the Wolfgang Fuzion
Wolfgang Concours-Series Microfiber Towel- 6-pack - $34.99