Mike Phillips
Active member
- Dec 5, 2022
- 51,004
- 6
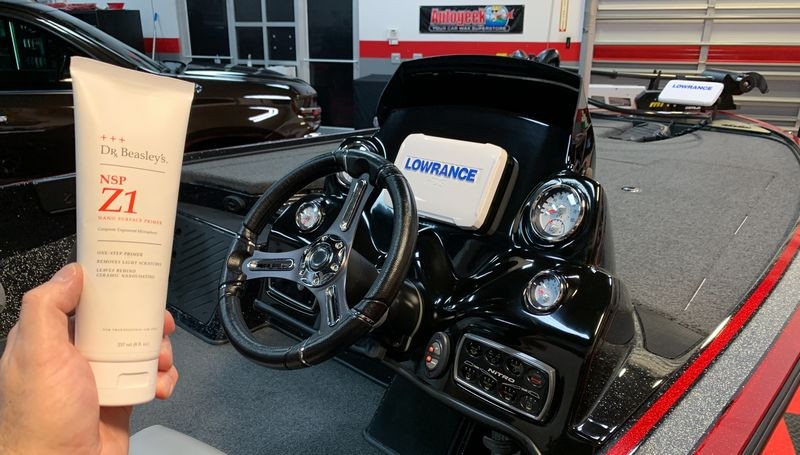
Dr. Beasley's Z1 - Bass Pro Shops Nitro Z19 Bass Boat - Ceramic Coating Gelcoat
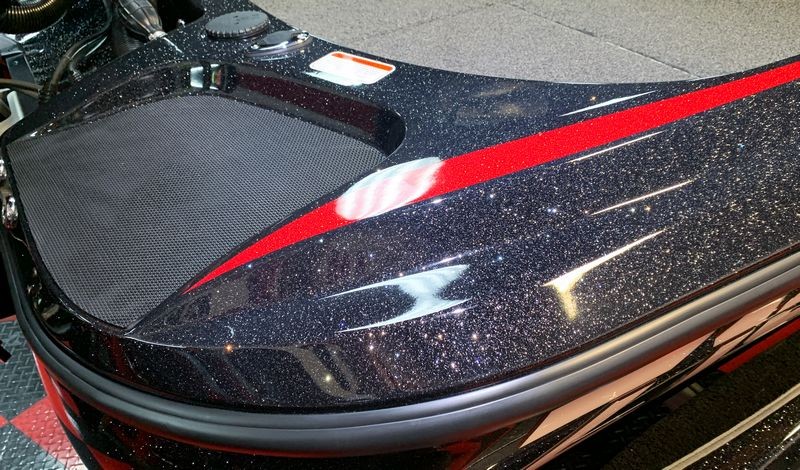
Gelcoat is polyester resin with different types of pigments added to create color. Bass boats have historically been made out of gelcoat with the addition of LOTS of METALLIC FLAKE added to the gelcoat to give them a very flashy and wild look.
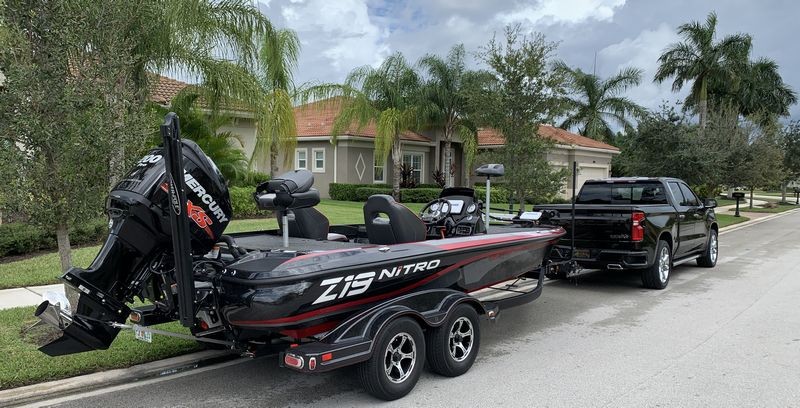
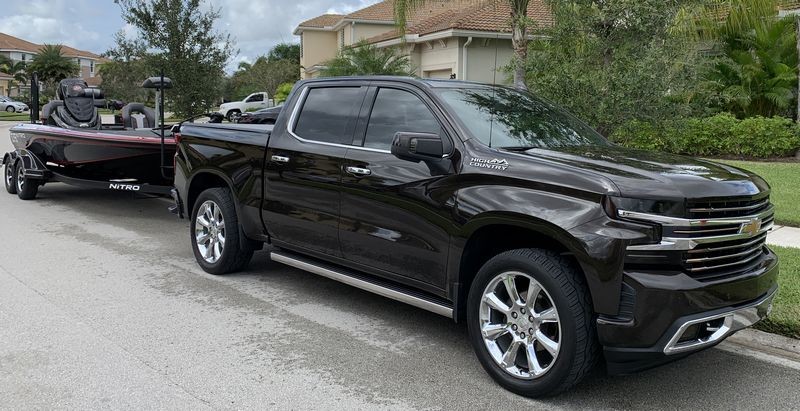
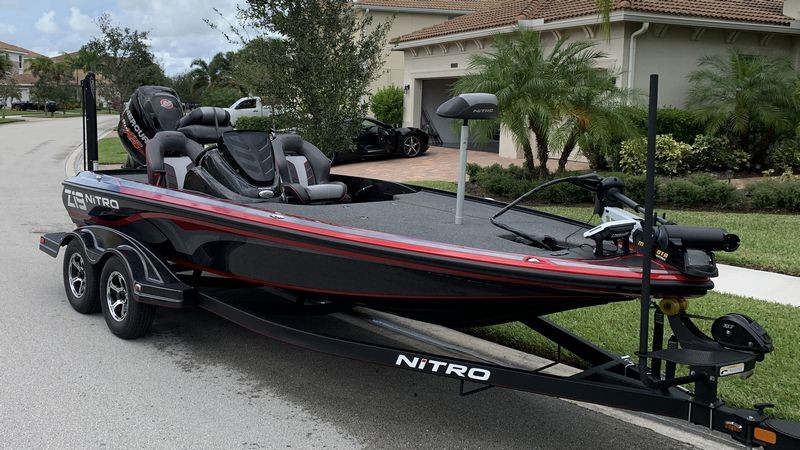
This Nitro Z19 Bass Boat is no exception to the history of this style of building a bass boat. My brother-in-law recently purchased this Nitro Z19 new from a local Bass Pro Shop here in Florida. It's a 2018 model that never sold but over the 3 years has seen enough wear-n-tear on display and also test drives and then fishing trips via PJ, my brother-in-law that it has a swirled-out gelcoat finish.
No Wax Protection
This boat to our collective knowledge has never been waxed or sealed in any way, at least not professionally. My brother-in-law fully understands the benefits of a ceramic coating. He knows besides lasting longer than a wax or sealant, the ceramic coating makes clean-up faster and easier. This is a fresh water boat but the water you might picture when you read the words "fresh water" is not the clear blue bubbling water you imagine in a mountain stream. Far from it. It's a brownish, murky water that is normal to fresh water lakes in Florida. So PJ traded me the use of his boat for a number of projects and in return, I would install a ceramic coating to the boat and the trailer.
Anyway, PJ told me he wanted to get his boat ceramic coated so after a day of fishing, he could simply pull through any Coin-Op Car wash and BLAST the boat and trailer to knock off any Lake Water Scum before storing the boat.
Fast and Easy
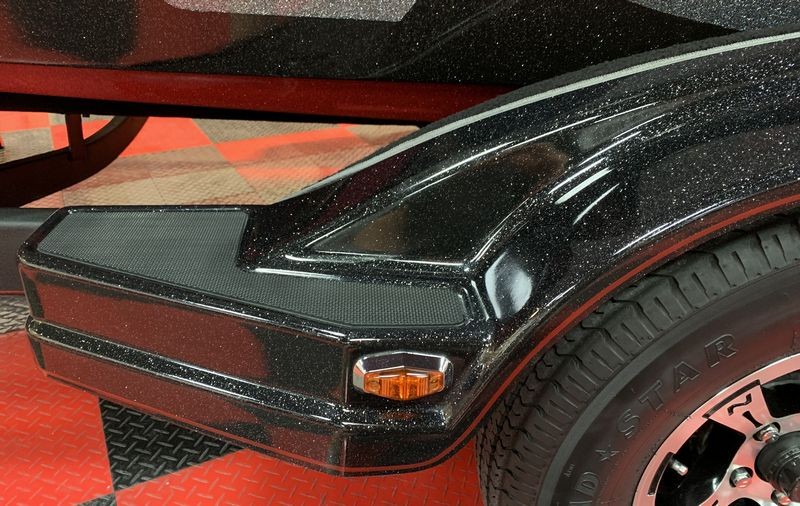
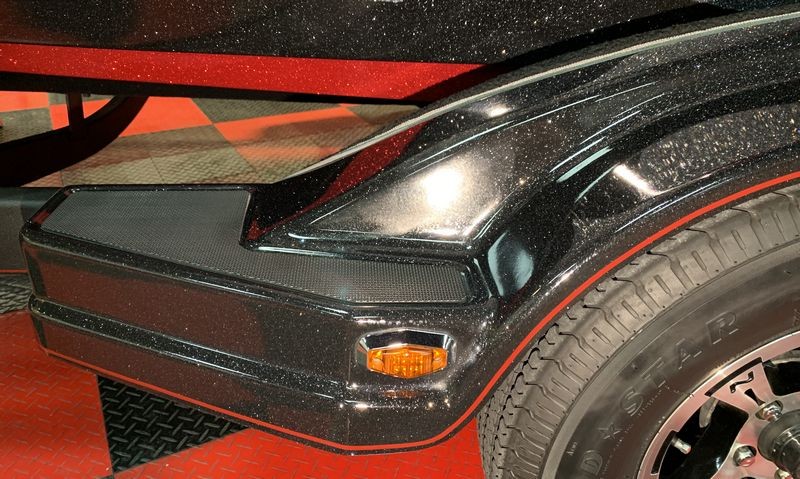
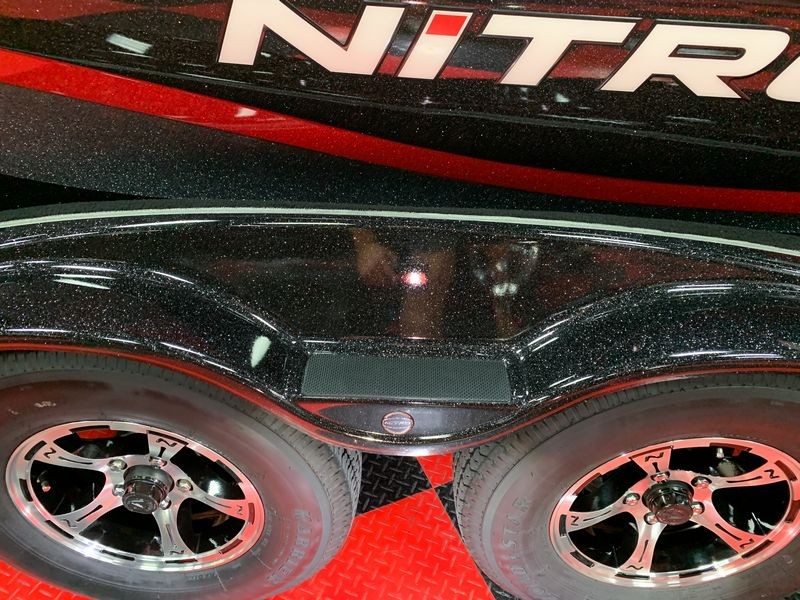
So this last Saturday, I coated the boat. I wanted to do a GREAT job for my brother-in-law because he's such a cool dude and has been such great friend to Autogeek over the years BUT I also wanted to make the job (work), as fast and easy as possible. While there's not a ton of real-estate like you would find with a Center Console boat like this one we coated recently, it is a somewhat complicated design to machine correct. The trailer fenders are also gelcoat and very curvy. Then there's the motor and also the front of the console as well as the driver's side of the console with all of it's gauges, switches and buttons.
8 hours
It took me roughly 8 hours to machine correct and then coat this boat working non-stop. And this was the fast and easy approach.
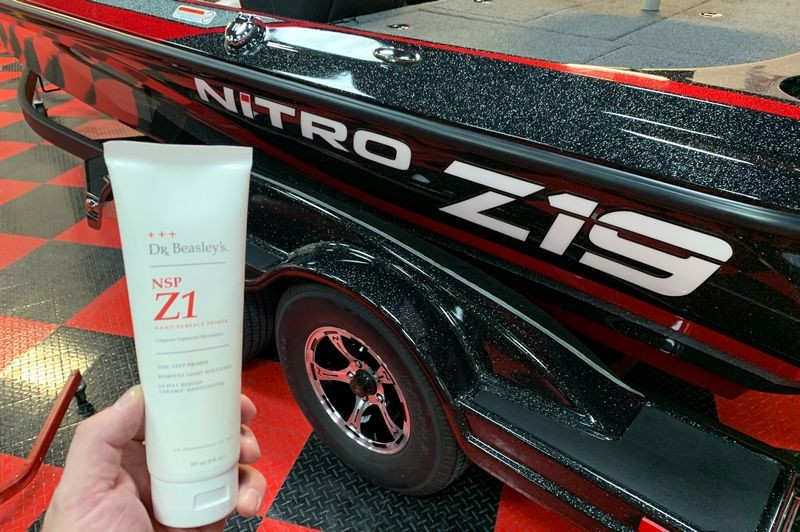
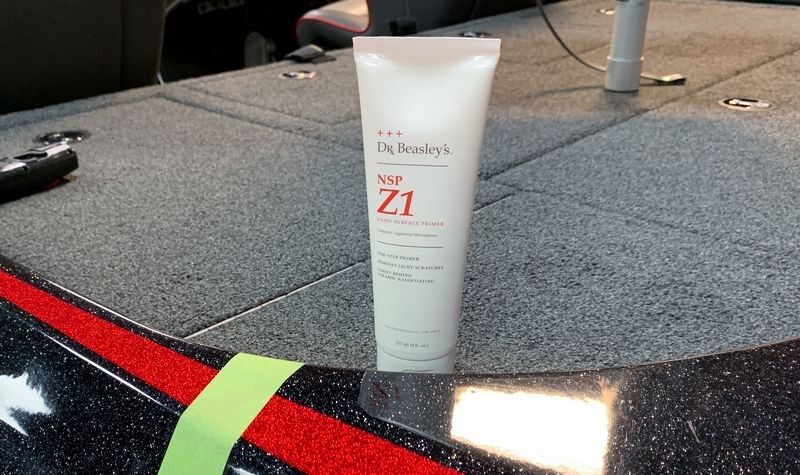
Dr. Beasley's Z1
Recently Jim Lafeber aka Dr. Beasley, released a brand new product he's been working on. I've used it on a few cars with great success. This is basically what I would call a,
Ceramic AIO
That is, it's a one-step cleaner/wax or AIO only instead of using "wax" or some type of "sealant" for the protection aspect of the product it uses a unique nano-structure resin/coating formulated using TiO2, (Titanium Dioxide), and SiO2 (Silicone Dioxide).
Besides using the TiO2 and the SiO2 for protection, Jim also says,
A: You don't need to chemically strip the paint after using the product in you want to apply a dedicated coating over the top of it.
B: You can use your favorite brand of coating over it - you don't have to use a Dr. Beasley's brand of coating over it.
And of course, you don't have to top it at all if you don't want to. The Z1 is a stand-alone product. This means one and done.
I don't think there's anywhere on the label of Z1 or anywhere else where it states the product can be used on gelcoat. There's nothing that says it cannot be used on gelcoat. So throwing caution to the wind, I chose to use Z1 for the correction step, which would also leave everything buffed with it sealed and protected with the TiO2, (Titanium Dioxide), and SiO2 (Silicone Dioxide), nano-structure coating. And because you can apply or top this foundation with any other coating, I also applied a second, dedicated coating after all the gelcoat correction work.
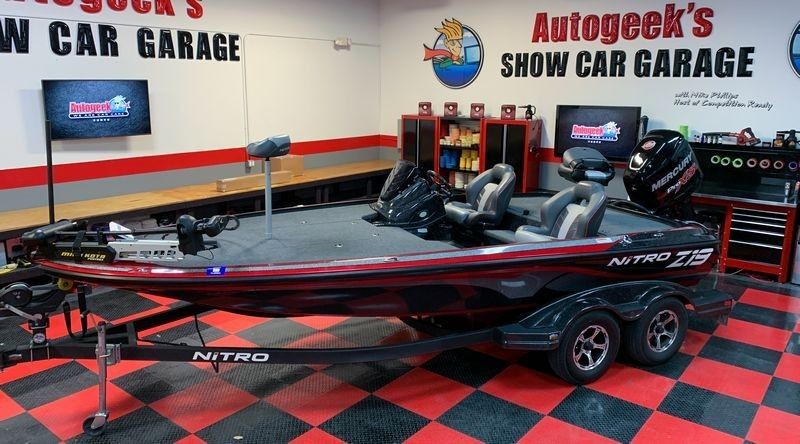
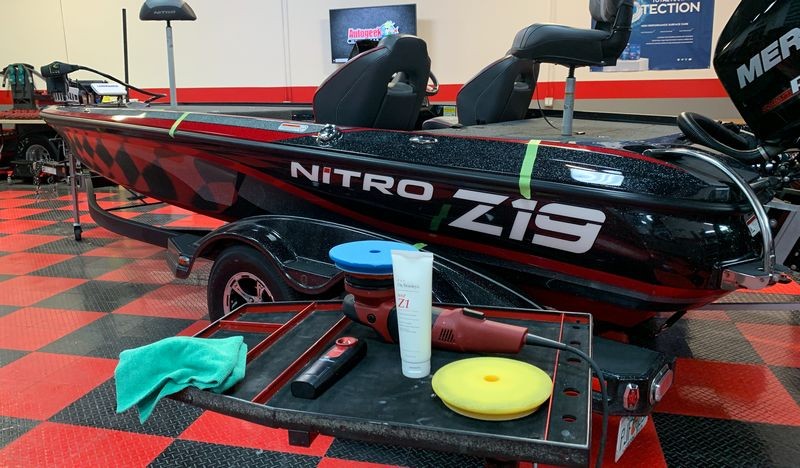
Here's the 2018 Nitro Z19 as it arrived to Autogeek's Show Car Garage.
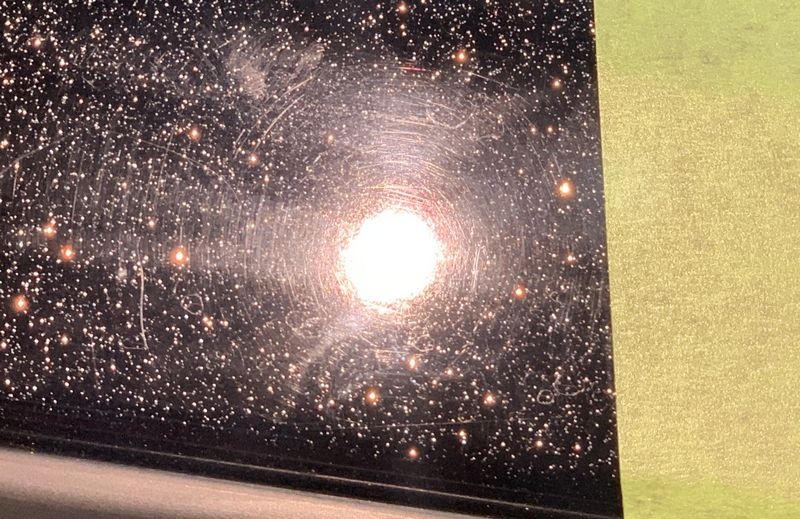
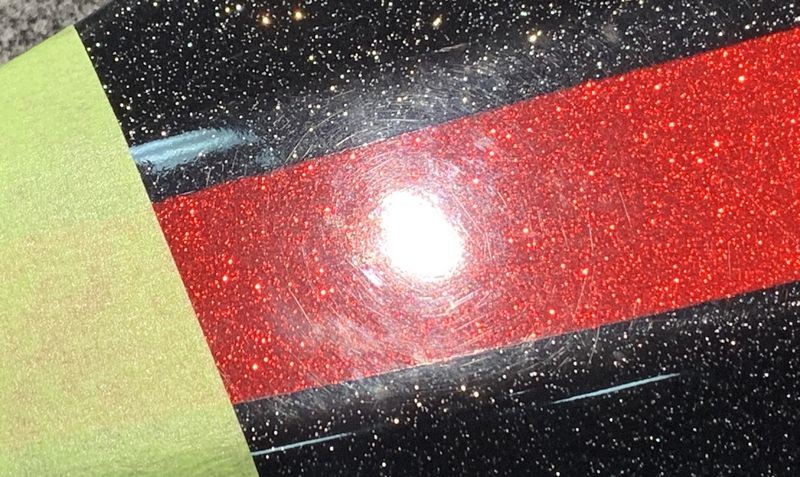
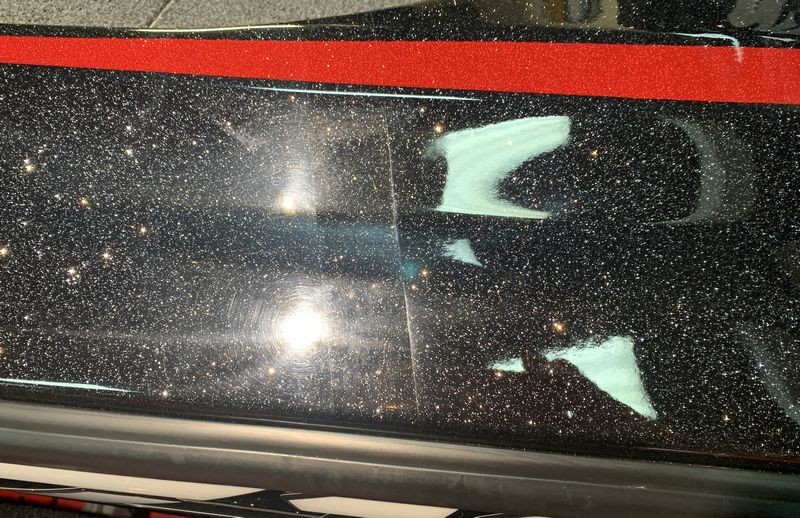
Metallic finishes hard to photograph
Metallic paint is more difficult to photograph than non-metallic paint. LARGE metallic flake gelcoat is also more difficult to photograph than non-metallic gel-coat. Regardless, in the pictures below I did my best to photo-document the before condition and the results from my Test Spots.
Hard or soft?
I assumed the gelcoat would be hard. That's what everyone always says about gelcoat - it's hard. Harder than paint. I think this is generally true when it comes to pigmented gel-coat, but this is clear gelcoat resin OVER the metallic flake pigmented resin. There's a difference. When working on pigmented gelcoat or polyester resin, you're working on both the resin and the pigment at the same time. Some pigments are hard and some or soft - but either way, the pigment alters the hardness or softness of the resin.
When working on straight resin - it is what it is. It's hard or soft or somewhere in-between. It's just clear resin, NOT affected by pigment. I can only go by what I found out using Z1 with two different RUPES CP foam pads. But my initial impression is - this gelcoat on this boat is not that hard. I easily corrected it using the yellow CP foam pad with Z1 and this is not an overly aggressive combination by anyone's standards.
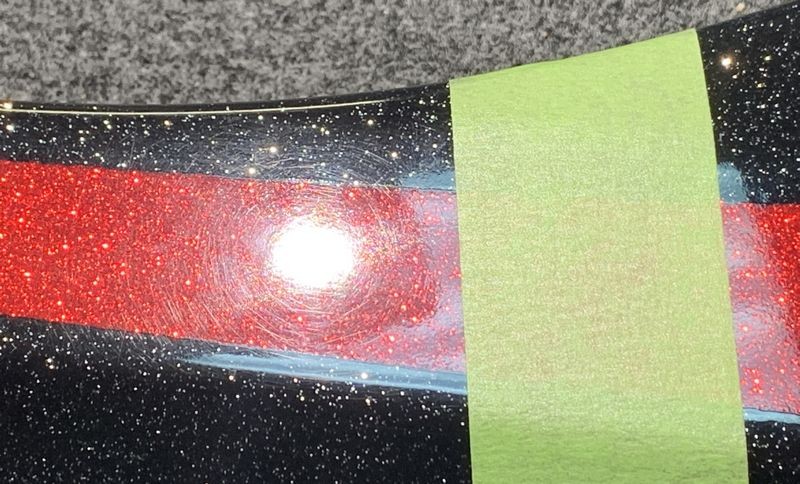
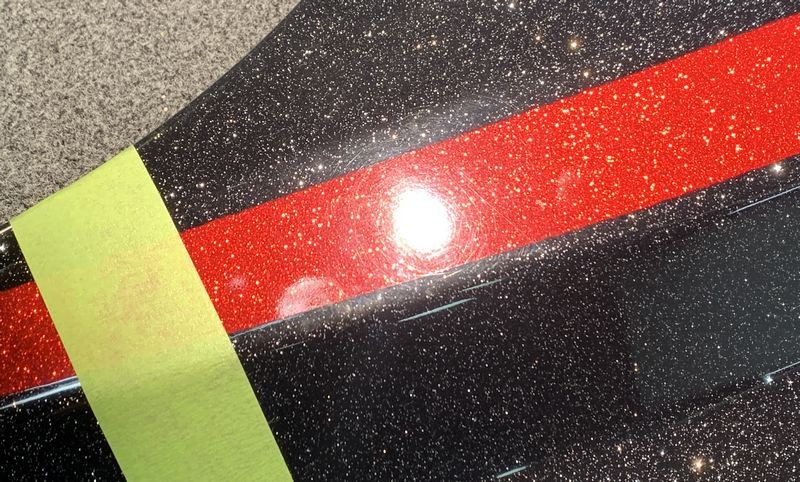
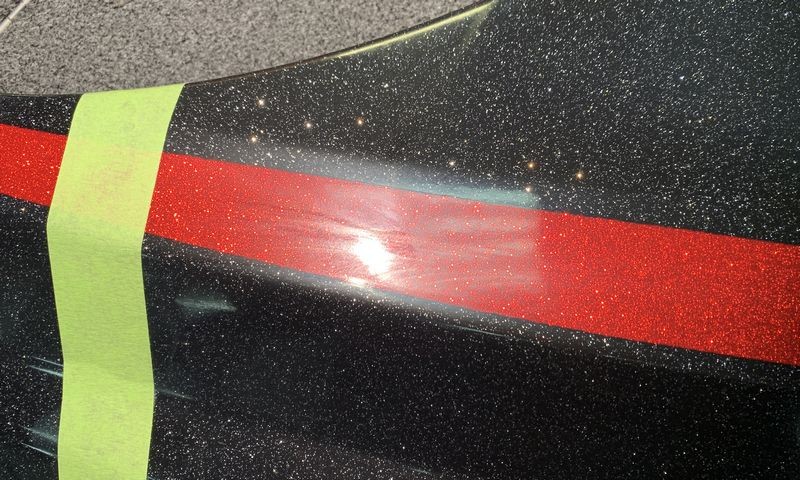
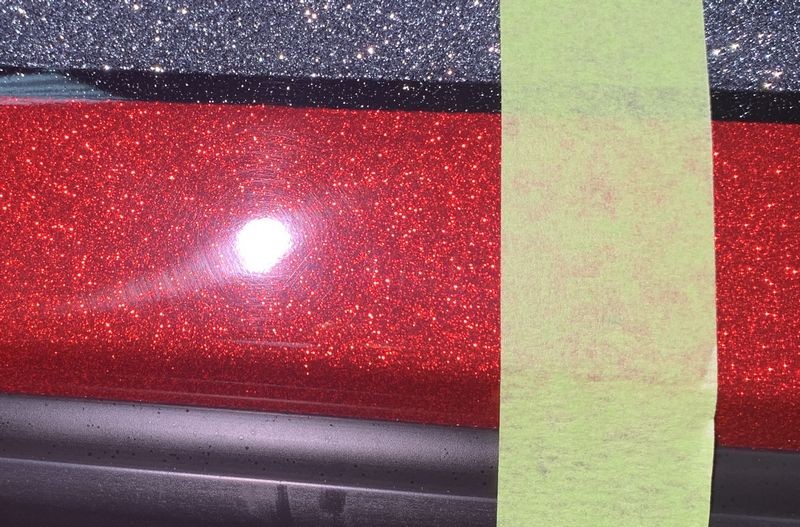
Tape-line
When doing a Test Spot you do NOT have to use a tape line. I do this to better get and then share for decades the before and after results using a strong demarcation line. I think this helps to tell the story and because I never know the knowledge level of the hundreds and thousands of people that will read my work into the future I like to fool-proof it.

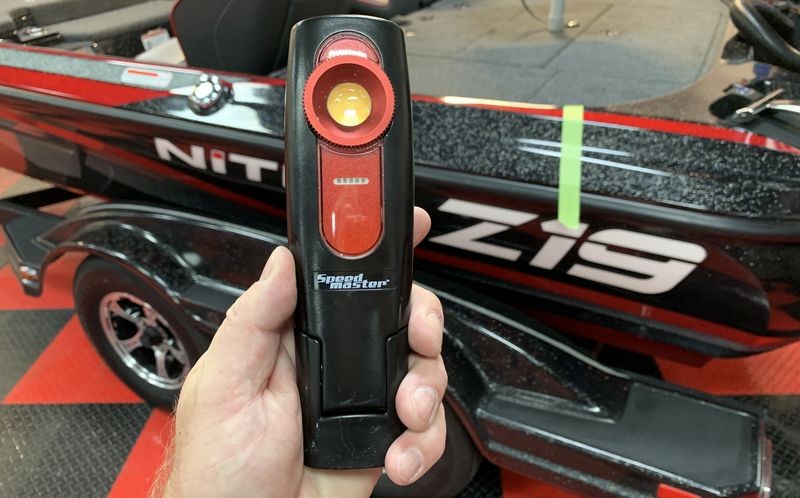
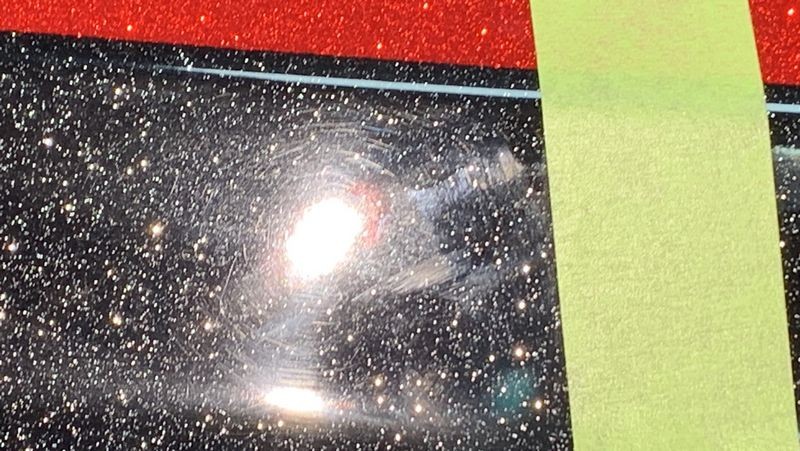
Swirl Finder Light
In order to photograph the before and after results and in order to see for yourself - you need a great hand-held light.
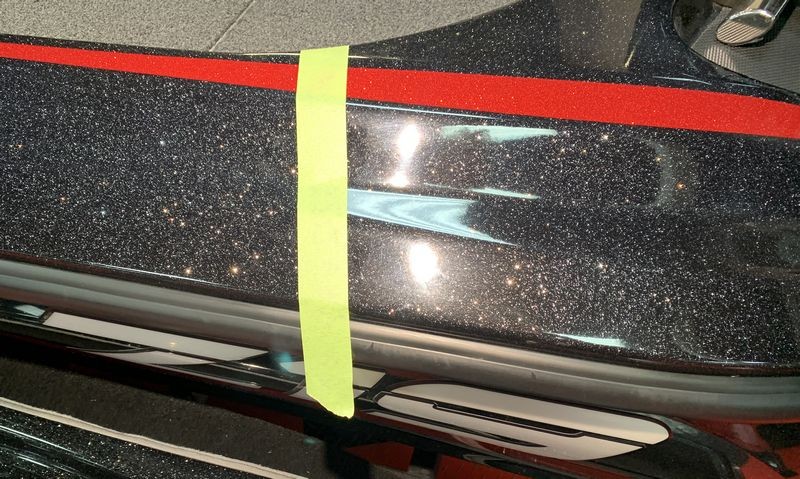
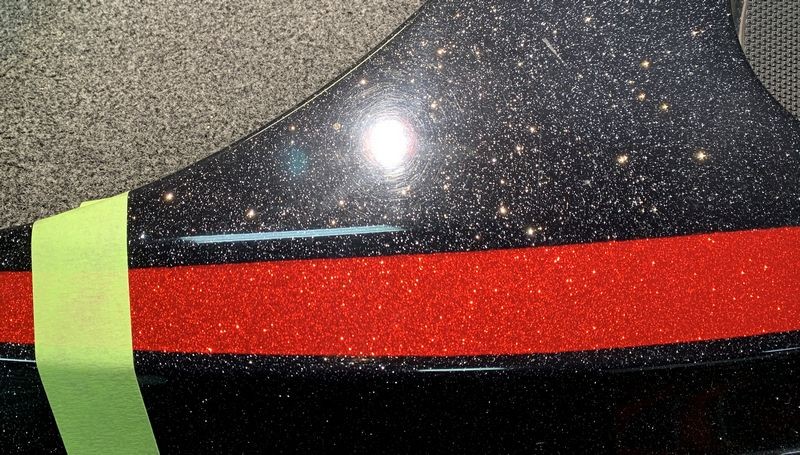
Before & After on both sides of the Tape Line


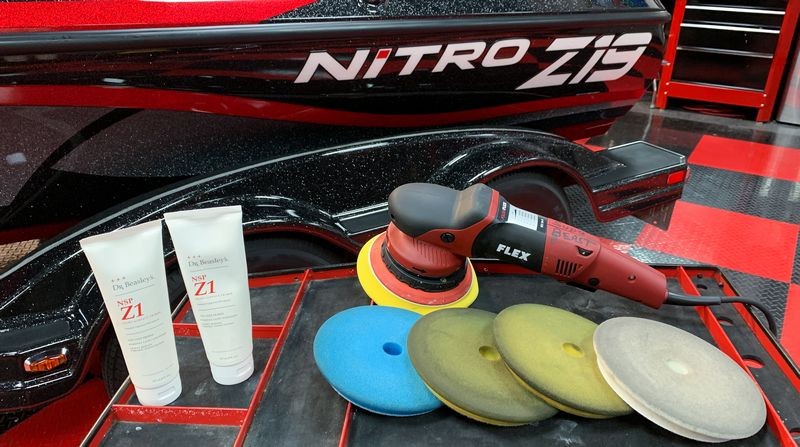
FLEX Supa BEAST
I love this tool. It is a 8mm gear-driver orbital that is lightweight, quiet, smooth and cool-running. In my opinion, tools like this are the fastest way to do correction work as fast as humanly possible while keeping while producing professional results. This tool has a part number but I don't know what it is and don't care to remember or type it out each time I reference it.

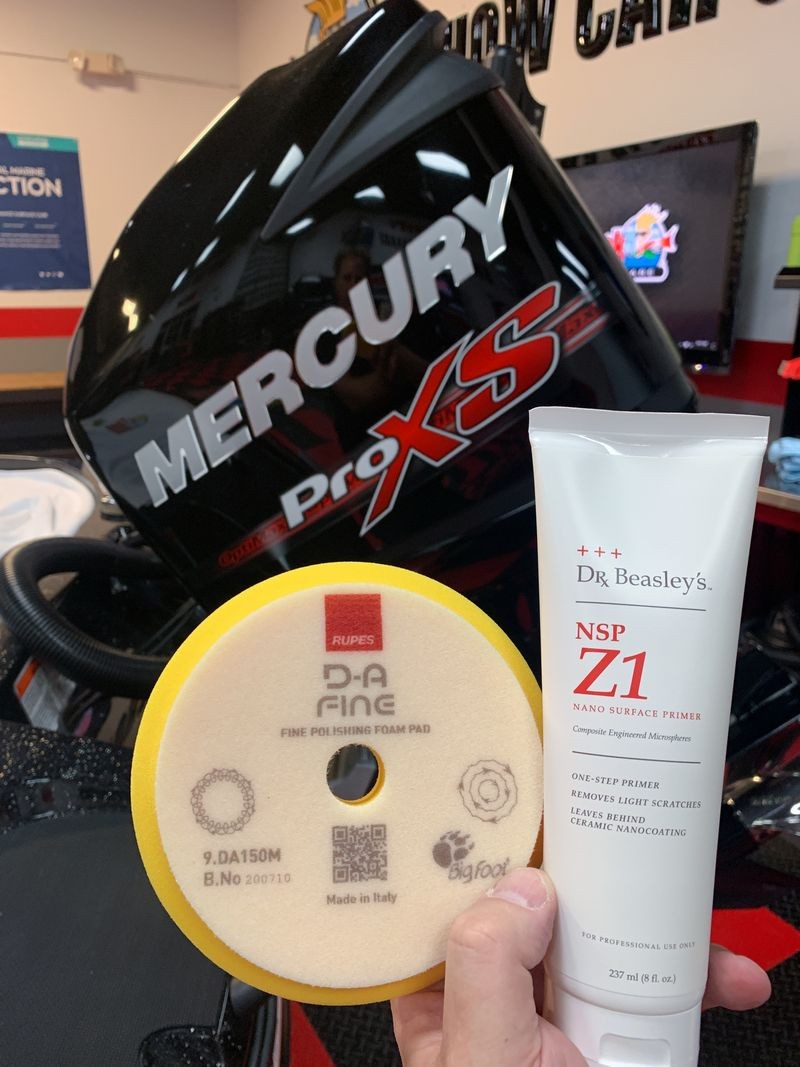
RUPES CP Foam Pads
CP stands for Contour Profile. I don't believe RUPES officially calls their new pad line, "CP Foam Pads" but I do and I type more about their pads than anyone in our industry and probably more than anyone at RUPES - so the name is now established. The new RUPES pads are now referred to as RUPES CP Foam Pads. You can read more about them here.
For my first Test Spot I'll be using the yellow CP polishing pad. This is a great all-around foam polishing pad for all kinds of work. It also fits and runs super on the Supa BEAST.

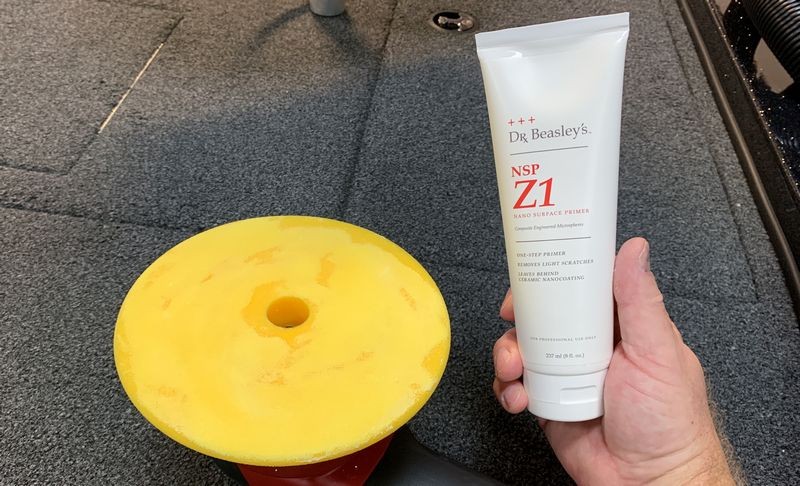
Dr. B's Z1
Priming the pad
I don't normally prime foam pads any more. Quit doing this a number of years ago. Mostly because I'm lazy but also because after you make a few section passes using foam pads with just applying a circle of product or some drops of products, the action of an orbital will enable the product to migrate around the pad and SELF-PRIME the pad.
One reason I'm priming the pad is because the Z1 has a somewhat chunky toothpaste consistency that does not soak in or even grip the face of a foam pad. So if you put some drops of product or a circle of product on the face of the pad and then turn the pad over to place on the surface to be buffed - if you're not fast - the product will via gravity fall off the pad. By priming the pad 100% of the surface is going to go to work for me with or without product migration.

After the pad is primed - then I will add some product to work with...
Working Product
Anyone that's ever read any of my how-to books, how-to articles or video work knows I call the product on the pad my, Working product. It's the product I'm going to be working. When you create as much written content as I do you must have words and terms for the things you talk about or type about.

Film of Z1
I just took these pictures so you could see what a film of Z1 looks like on the surface after doing a number of standard protocol section passes.

Wipe-off
I show these rather inexpensive edgeless flat weave towels a lot - for a reason.

Impressed
Here are the results and I will say considering I'm only using a foam POLISHING PAD - I am impressed with the defect removal and the restored CLARITY to the polyester resin.

Test Spot Number #2
While the results from the foam polishing pad were great I wanted to see how much more defect removal I could get out of the Z1 by testing the blue RUPES CP foam pad.
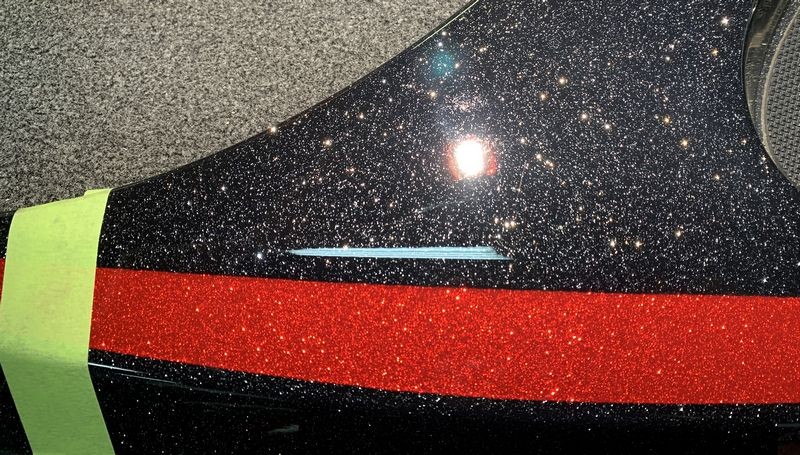
Before and After


My thoughts?
While I did see damn near perfect results, thus more, better and even faster correction using the blue foam cutting pad over the yellow foam polishing pad, I chose to do the entire boat using the yellow foam pad.
Why?
Because it's a fishing boat - not a show boat. The yellow foam pad buffs nicer because it's softer and it did more than enough correction work for what this boat is in context - a fishing boat. A fishing boat that's going to see a LOT of fishing and thus in all likelihood see more swirls and scratches into the future. While my goal IS to make it look nicer, the primary goal is to machine correct the gelcoat finish to get it CLEAN as in nothing else on it while leaving it protected. Plus prep it for the secondary dedicated coating installation.
Process
After testing two different pads I dialed-in my process. I used the Supa BEAST with the Z1 and the RUPES Yellow CP Foam Polishing pad for the majority of the boat. For some sanding marks I found in the trailer I used the blue foam cutting pad with the Z1 to remove these and for the motor I used a RUPES White CP Foam Finishing pad.
")
Gelcoat is polyester resin with different types of pigments added to create color. Bass boats have historically been made out of gelcoat with the addition of LOTS of METALLIC FLAKE added to the gelcoat to give them a very flashy and wild look.
This Nitro Z19 Bass Boat is no exception to the history of this style of building a bass boat. My brother-in-law recently purchased this Nitro Z19 new from a local Bass Pro Shop here in Florida. It's a 2018 model that never sold but over the 3 years has seen enough wear-n-tear on display and also test drives and then fishing trips via PJ, my brother-in-law that it has a swirled-out gelcoat finish.
No Wax Protection
This boat to our collective knowledge has never been waxed or sealed in any way, at least not professionally. My brother-in-law fully understands the benefits of a ceramic coating. He knows besides lasting longer than a wax or sealant, the ceramic coating makes clean-up faster and easier. This is a fresh water boat but the water you might picture when you read the words "fresh water" is not the clear blue bubbling water you imagine in a mountain stream. Far from it. It's a brownish, murky water that is normal to fresh water lakes in Florida. So PJ traded me the use of his boat for a number of projects and in return, I would install a ceramic coating to the boat and the trailer.
Anyway, PJ told me he wanted to get his boat ceramic coated so after a day of fishing, he could simply pull through any Coin-Op Car wash and BLAST the boat and trailer to knock off any Lake Water Scum before storing the boat.
Fast and Easy
So this last Saturday, I coated the boat. I wanted to do a GREAT job for my brother-in-law because he's such a cool dude and has been such great friend to Autogeek over the years BUT I also wanted to make the job (work), as fast and easy as possible. While there's not a ton of real-estate like you would find with a Center Console boat like this one we coated recently, it is a somewhat complicated design to machine correct. The trailer fenders are also gelcoat and very curvy. Then there's the motor and also the front of the console as well as the driver's side of the console with all of it's gauges, switches and buttons.
8 hours
It took me roughly 8 hours to machine correct and then coat this boat working non-stop. And this was the fast and easy approach.
Dr. Beasley's Z1
Recently Jim Lafeber aka Dr. Beasley, released a brand new product he's been working on. I've used it on a few cars with great success. This is basically what I would call a,
Ceramic AIO
That is, it's a one-step cleaner/wax or AIO only instead of using "wax" or some type of "sealant" for the protection aspect of the product it uses a unique nano-structure resin/coating formulated using TiO2, (Titanium Dioxide), and SiO2 (Silicone Dioxide).
Besides using the TiO2 and the SiO2 for protection, Jim also says,
A: You don't need to chemically strip the paint after using the product in you want to apply a dedicated coating over the top of it.
B: You can use your favorite brand of coating over it - you don't have to use a Dr. Beasley's brand of coating over it.
And of course, you don't have to top it at all if you don't want to. The Z1 is a stand-alone product. This means one and done.
I don't think there's anywhere on the label of Z1 or anywhere else where it states the product can be used on gelcoat. There's nothing that says it cannot be used on gelcoat. So throwing caution to the wind, I chose to use Z1 for the correction step, which would also leave everything buffed with it sealed and protected with the TiO2, (Titanium Dioxide), and SiO2 (Silicone Dioxide), nano-structure coating. And because you can apply or top this foundation with any other coating, I also applied a second, dedicated coating after all the gelcoat correction work.
Here's the 2018 Nitro Z19 as it arrived to Autogeek's Show Car Garage.
Metallic finishes hard to photograph
Metallic paint is more difficult to photograph than non-metallic paint. LARGE metallic flake gelcoat is also more difficult to photograph than non-metallic gel-coat. Regardless, in the pictures below I did my best to photo-document the before condition and the results from my Test Spots.
Hard or soft?
I assumed the gelcoat would be hard. That's what everyone always says about gelcoat - it's hard. Harder than paint. I think this is generally true when it comes to pigmented gel-coat, but this is clear gelcoat resin OVER the metallic flake pigmented resin. There's a difference. When working on pigmented gelcoat or polyester resin, you're working on both the resin and the pigment at the same time. Some pigments are hard and some or soft - but either way, the pigment alters the hardness or softness of the resin.
When working on straight resin - it is what it is. It's hard or soft or somewhere in-between. It's just clear resin, NOT affected by pigment. I can only go by what I found out using Z1 with two different RUPES CP foam pads. But my initial impression is - this gelcoat on this boat is not that hard. I easily corrected it using the yellow CP foam pad with Z1 and this is not an overly aggressive combination by anyone's standards.
Tape-line
When doing a Test Spot you do NOT have to use a tape line. I do this to better get and then share for decades the before and after results using a strong demarcation line. I think this helps to tell the story and because I never know the knowledge level of the hundreds and thousands of people that will read my work into the future I like to fool-proof it.
Swirl Finder Light
In order to photograph the before and after results and in order to see for yourself - you need a great hand-held light.
Before & After on both sides of the Tape Line
FLEX Supa BEAST
I love this tool. It is a 8mm gear-driver orbital that is lightweight, quiet, smooth and cool-running. In my opinion, tools like this are the fastest way to do correction work as fast as humanly possible while keeping while producing professional results. This tool has a part number but I don't know what it is and don't care to remember or type it out each time I reference it.
RUPES CP Foam Pads
CP stands for Contour Profile. I don't believe RUPES officially calls their new pad line, "CP Foam Pads" but I do and I type more about their pads than anyone in our industry and probably more than anyone at RUPES - so the name is now established. The new RUPES pads are now referred to as RUPES CP Foam Pads. You can read more about them here.
For my first Test Spot I'll be using the yellow CP polishing pad. This is a great all-around foam polishing pad for all kinds of work. It also fits and runs super on the Supa BEAST.
Dr. B's Z1
Priming the pad
I don't normally prime foam pads any more. Quit doing this a number of years ago. Mostly because I'm lazy but also because after you make a few section passes using foam pads with just applying a circle of product or some drops of products, the action of an orbital will enable the product to migrate around the pad and SELF-PRIME the pad.
One reason I'm priming the pad is because the Z1 has a somewhat chunky toothpaste consistency that does not soak in or even grip the face of a foam pad. So if you put some drops of product or a circle of product on the face of the pad and then turn the pad over to place on the surface to be buffed - if you're not fast - the product will via gravity fall off the pad. By priming the pad 100% of the surface is going to go to work for me with or without product migration.
After the pad is primed - then I will add some product to work with...
Working Product
Anyone that's ever read any of my how-to books, how-to articles or video work knows I call the product on the pad my, Working product. It's the product I'm going to be working. When you create as much written content as I do you must have words and terms for the things you talk about or type about.
Film of Z1
I just took these pictures so you could see what a film of Z1 looks like on the surface after doing a number of standard protocol section passes.
Wipe-off
I show these rather inexpensive edgeless flat weave towels a lot - for a reason.
Impressed
Here are the results and I will say considering I'm only using a foam POLISHING PAD - I am impressed with the defect removal and the restored CLARITY to the polyester resin.
Test Spot Number #2
While the results from the foam polishing pad were great I wanted to see how much more defect removal I could get out of the Z1 by testing the blue RUPES CP foam pad.
Before and After
My thoughts?
While I did see damn near perfect results, thus more, better and even faster correction using the blue foam cutting pad over the yellow foam polishing pad, I chose to do the entire boat using the yellow foam pad.
Why?
Because it's a fishing boat - not a show boat. The yellow foam pad buffs nicer because it's softer and it did more than enough correction work for what this boat is in context - a fishing boat. A fishing boat that's going to see a LOT of fishing and thus in all likelihood see more swirls and scratches into the future. While my goal IS to make it look nicer, the primary goal is to machine correct the gelcoat finish to get it CLEAN as in nothing else on it while leaving it protected. Plus prep it for the secondary dedicated coating installation.
Process
After testing two different pads I dialed-in my process. I used the Supa BEAST with the Z1 and the RUPES Yellow CP Foam Polishing pad for the majority of the boat. For some sanding marks I found in the trailer I used the blue foam cutting pad with the Z1 to remove these and for the motor I used a RUPES White CP Foam Finishing pad.