enamel paints?

kjimpressions

New member
Joined
Mar 14, 2011
Messages
58
Reaction score
0
Ok so I have a client who just bought a 1967 fastback. its all original including the paint. back then ford painted their cars with enamel paint and to be honest i have never buffed enamel.

i know enamel is a two stage paint but does paint come onto the pad? is it extremely hard? soft? what risks are involved in buffing enamel paints. i am using a rotary and i do have plenty of experience using a rotary. im just nervous about attempting a new type of paint on a very nice car.

thanks in advance
 
o and i forgot to ask if enamel paints are usually thin. i know the laquer paints were done thin so they do not crack. does anyone have any info on enamel?
 
Give it more than an hour. Sometimes it can take a little while to get an answer. I'm sure someone will help soon.
 
I'm also curious about this. Any help appreciated!
 
Most if not all paints of that era were single stage paint and factory baked. Paints during the 60's and 70's were much softer then the paints of today as some modern paints actually use a chemical hardening additive or catalyst.

Single stage paints are easy to identify as the color quickly transfers itself to the pad or cloth.

How to Test for Single Stage or Clear Coat Paint

Restoring Single Stage Paint

The Secret to Removing Oxidation and Restoring a Show Car Finish to Antique Single Stage Paints

1972 Challenger - Foam Pads - Meguiar's Microfiber Compound & Polish/Wax - Single Stage Black Paint
 
Ok so I have a client who just bought a 1967 fastback. its all original including the paint. back then ford painted their cars with enamel paint and to be honest i have never buffed enamel.

You're in for a treat, you're going to be working on real paint, nothing like today's modern clear coats which are more akin to plastic than old school lacquers and enamels.

See my article, here it's very indepth...

The practical differences between single stage paints and a clear coat paints

I've worked on hundreds of cars with single stage paints as well as conducted a number of extreme makeovers where the project car had single stage paint and below I'll outline some of the practical differences between single stage paints and clear coat paints. One of the reasons I chose single stage paint for the extreme makeovers was just to give younger detailers a chance to work on single stage paint, usually on very cool cars, this is becoming a more rare opportunity as time passes.

Clearcoat paints were introduced to production cars in the U.S.A. starting in the early 1980's and since that time the technology has continually improved to create automotive paint systems that will last a long time as well as provide a beautiful finish with great gloss, clarity and shine.

The oldest factory clear coat finish I've ever worked on was an all original 1980 Corvette and after that it was an all original 1982 Corvette. Here's a picture of the 1982 Corvette, I'm still searching my hard drive for a picture of the 1980 Corvette.

All original 1982 Corvette
2AprilFinished2.jpg


Since clear coat finishes, or what's called Basecoat/Clearcoat Paint Systems were introduced and become mainstream, we now have entire generations of people that have only owned cars with what's called a basecoat/clearcoat paint system; they have never owned, nor worked on a car that has a single stage paint system.

From time to time a new member will join our forum and ask for help removing oxidation from their car's finish not knowing that the problem with their car's paint, (basecoat/clearcoat), is not oxidation, but is in fact clearcoat failure.

Clear coat paints, when exposed to too much sun over time and without out proper care will deteriorate throughout the entire matrix or thickness of the clear layer of paint. You can't fix it by abrading the surface because the problem isn't just on the surface, it's throughout the entire layer of paint. This is called clearcoat failure and the only honest fix is to repaint the affected panels or the entire car.

Clear Coat Failure
clearcoatfailurebeginning.jpg


The primary problem most people experience with the clearcoat finish on their car is swirls. Swirls are actually scratches in the paint and besides being ugly and unsightly, they block your view of the color coat under the clear coat.

Swirls can be removed because they are topical, that is like oxidation the swirls are in the upper surface of the layer of clear paint and all you have to do is use a compound or a paint cleaner and remove a little paint from off the surface which will act to level or flatten out the surface again. See the below thread for more information.

What it means to remove swirls, scratches and water spots out of automotive clear coats


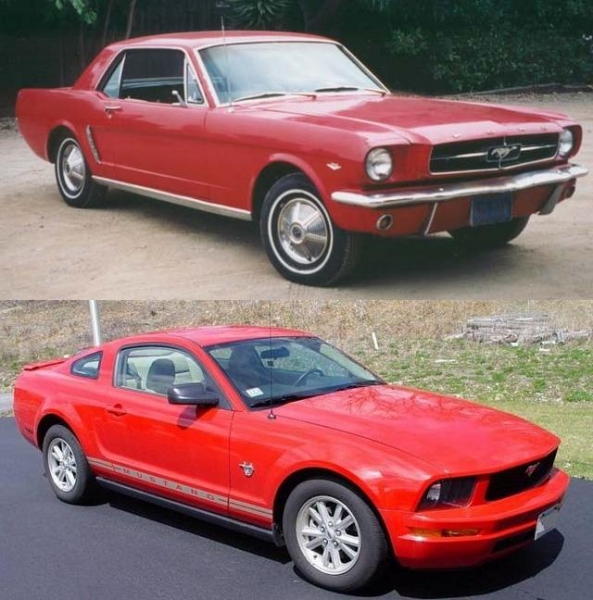
Single stage paints like the type of paint that came on a 1965 Mustang will oxidize and the problem can be fixed because like swirls, the problem is topical and isolated to just the upper surface of the paint. The way you fix oxidation is to abrade or remove just a little bit of paint off the surface to expose a fresh layer of paint or what we call a fresh base.

Top: 1965 Mustang with single stage finish. Bottom: 2009 Mustang with a basecoat/clearcoat finish.
RedMustangs.JPG


Classic cars with oxidized single stage paints are easy to fix, (in my opinion), as well as fun to work on, (again, just my opinion).


The thing to understand is that there's a huge difference between these two types of paint systems; the good news is you can usually fix true oxidation but the bad news is in most cases once a clearcoat finish deteriorates to what we call clearcoat failure there's really nothing you can do to permanently fix the problem and restore a nice looking finish that will hold up over time. Usually you have to repaint the affected sections or repaint the entire car, or learn to live with the problem.


Single stage paints will tend to be messier because whatever color of the paint is will be transferred to all your microfiber polishing cloths as well as to your buffing pads and this worries some people. There's nothing to be worried about. In most cases, washing your polishing cloths and buffing pads will remove most of the transferred pigment but not all of it however there's nothing to worry about as your polishing cloths and buffing pads can still be used for a future detailing session.,


Here's the practical difference

Single Stage Paints
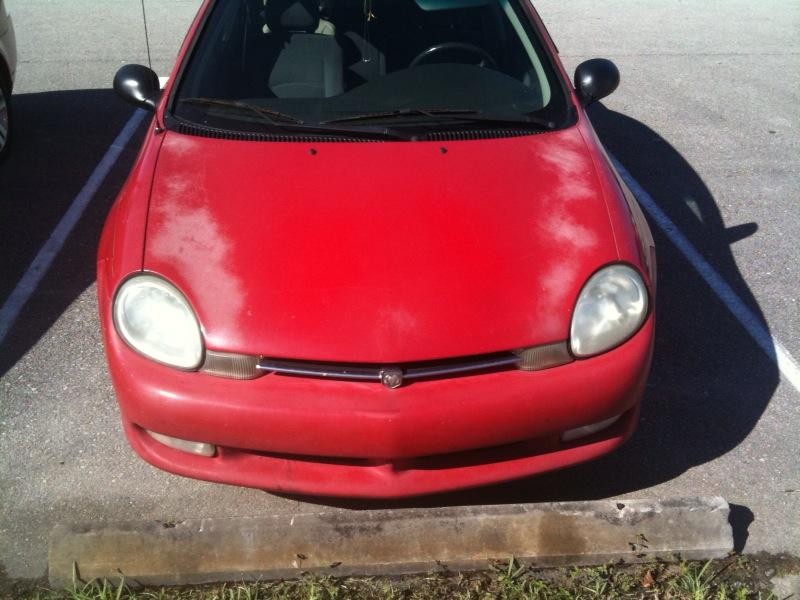
The problem with single stage paints is oxidation as they oxidize very easily. Single stage paints still get swirls and scratches however in the real world the noticeable problem is the dullness and fading by oxidation.
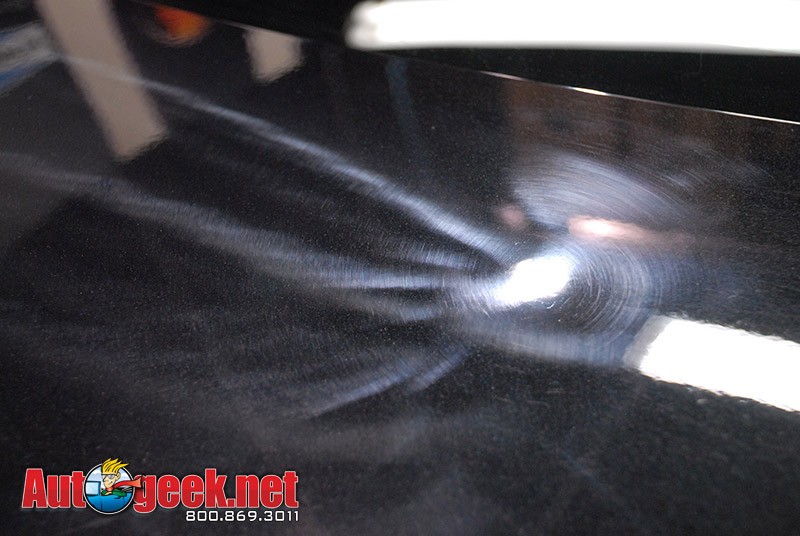
Oxidation Before
1960Ranchero01.jpg


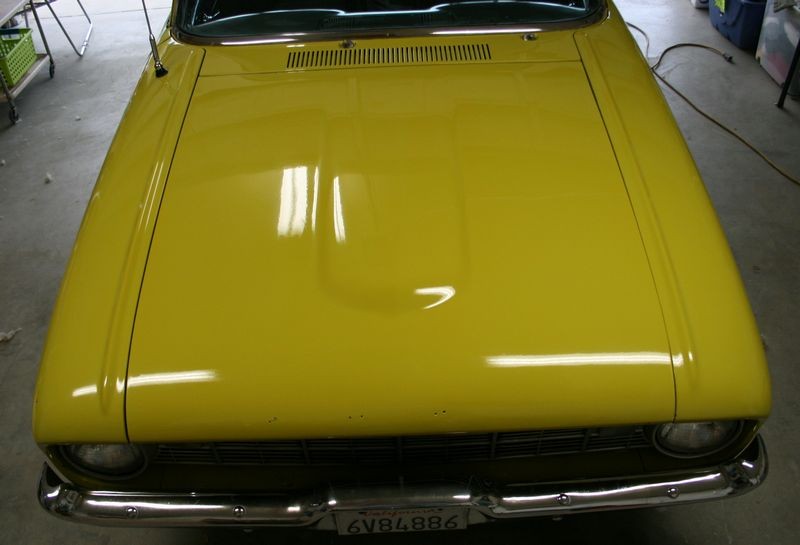
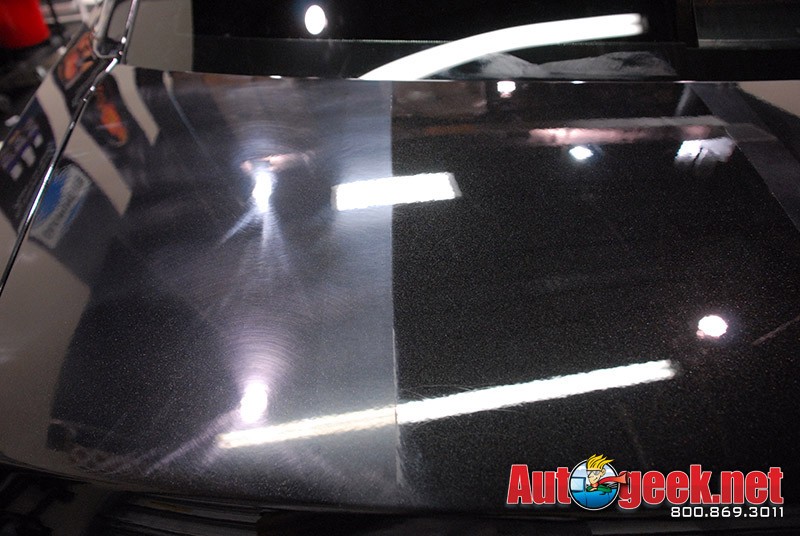
After removing oxidation
1960Ranchero05.jpg


Clear Coat Paints
The problems with clear coat paints is swirls and scratches as they oxidize very slowly. Clear coat paints will oxidize but in the real world the noticeable problem will be swirls and scratches. When you work on your own car or a customer's car your primary goal will be to remove swirls.

Swirls Before
SwirlsInClearCoatBefore.jpg


After removing swirls
SwirlsInClearCoatAfter.jpg


I also talk about this in the first part of my book...

Paperback


i know enamel is a two stage paint but does paint come onto the pad?

Basecoat/Clearcoat is referred to as two stage paints. Single stage paints are lacquers and enamels i.e. one-stage.


is it extremely hard? soft?

When it comes to hardness of softness as it relates to single stage paints the pigment, plus the type of resin determines the hardness or softness. See my article here,

The Lesson White Paint Teaches Us


what risks are involved in buffing enamel paints. i am using a rotary and i do have plenty of experience using a rotary. im just nervous about attempting a new type of paint on a very nice car.

thanks in advance

Use the least aggressive product to get the job done"

In your case, I would avoid compounds, especially caveman compounds and wool pads. If you're not very careful you'll leave

Tiger Stripes


The issue here is... you don't know how many people have "touched this car before you, by "touched" I mean machine buffed on or even hand-compounded. For all you know the paint is,

"Whisper Thin"

Anyone, using anything could remove too much paint and alter the look.

Stick with foam pads and start out using a fine cut or ultra fine cut polish and see if that gets you where you want to go, if not substitute a medium cut polish. Use a compound only as a last resort.

BE VERY CAREFUL ON ANY HIGH POINTS AND PANELS

This doesn't just mean raised body lines it means any panel, like the top horizontal surfaces where all the people before you could simply stand and run a buffer. It's easy to stand and run a buffer over horizontal surfaces and therefor more likely this has happened over time in the history of this car.

Nobody really likes sitting on their butt and buffing vertical panels, so it's likely this has happened less over time for the history of the car.


o and i forgot to ask if enamel paints are usually thin. i know the lacquer paints were done thin so they do not crack. does anyone have any info on enamel?

All factory paint is usually thin as compared to a custom paint job anywhere in time... just focus on the task at hand and use the least aggressive product to get the job done.


Take GREAT before pictures like shown here,

The power in the after shots is created in the before shots


:)
 
Out of all the articles and detailed replies I've ever posted, this is one of my favorites and I explain the importance of the topic in the article,


The Secret to Removing Oxidation and Restoring a Show Car Finish to Antique Single Stage Paints


The below is just a short excerpt, the entire article is very in-depth...

Mike Phillips said:
What to do
If preserving the original paint is important to you then the first thing you want to do is condition the paint before working on it. Most people just jump right in and start rubbing some type of abrasive compound over old, dry, fragile paint and this will remove a lot of paint quickly and possible remove too much. Instead, take the extra step of conditioning the paint and bring it back to life with product that's been around since cars and thus car paints have been around.

Below I will share the product and actually a technique that may restore your car's paint to your expectations without using any abrasives at all. In the car detailing world we're always talking about the idea of,


"Use the least aggressive product to get the job done"

In this article I'll show you at least one way to put that philosophy into practice.


What not to do
The first thing most people do when trying to restore an old, oxidized finish is reach for some rubbing compound and try to rub the dead, oxidized paint off the car. While this will work, it's the caveman approach because it's too aggressive, it will remove too much paint and because there's a better, safer approach that will provide a better chance at preserving as much of the original paint as possible which is the goal if you're trying to preserve the "originalness" of the car.

So if you're reading this and you have an old car out in the garage that has oxidized single stage paint, let me share with you a way of conditioning the paint in a non-abrasive way that will make your car's old, tired paint come back to life. Then you can either stop at that point if you like the results you're seeing and apply a coat of wax or I'll share with you how to machine polish the paint to squeeze out even a little more depth, shine and gloss.


How you approach this project is all up to you...


Good luck!


:xyxthumbs:
 
Great info Mike.

Just out of curiosity when working on a single stage paint, how often should the pad be changed?

Obviously, the paint transfers to the pads, but is there a way to gauge when the pad should be changed due to paint build up? -or can it be cleaned 'on the fly'?
 
my POS Bronco II has single stage paint. Meg's #7 really brings out the gloss, and is polish to start out with with SS paint; that is, so long as you have the time. PO85RD works great on its SS paint as well. Just remember the least-agressive-first when working on the paint.

Especially as BobbyG mentioned, the paint is softer that the clears you are used to working on.

http://www.autogeekonline.net/forum/products-guides/42681-wooooh-megs-7-a.html

http://www.autogeekonline.net/forum...oduct-testing-ongoing-project-thread-1-a.html

Lots of good info on AG about SS paint, especially some of Mike Philips articles!:props:
 
Great info Mike.

Just out of curiosity when working on a single stage paint, how often should the pad be changed?

Obviously, the paint transfers to the pads, but is there a way to gauge when the pad should be changed due to paint build up? -or can it be cleaned 'on the fly'?


With a Rotary Buffer like the OP stated he was using he'll definitely want to clean his pad often as the dead paint and spent product, (that's two things), will be building up on the face of his buffing pad.


  • For wool pads you use a Spur
  • For foam pads you use a nylon brush


There's also a way to use a terry cloth towel to remove both product and excess moisture. I show this in all my classes but don't have a video on it... maybe I can shoot a short one next week when we start a new video project in the studio.


:)
 
Seriously. Huge thanks. I feel like I should PayPal you money for all this info.

I turned down a job on a 1992 Mazda rx7 that I was told it had a single stage paint. I still in the three years detailing professionally, have not come across this. All this info has been extremely helpful!
 
Seriously. Huge thanks. I feel like I should PayPal you money for all this info.

I turned down a job on a 1992 Mazda rx7 that I was told it had a single stage paint. I still in the three years detailing professionally, have not come across this. All this info has been extremely helpful!


Thank you for the kind thoughts but no need... Max is a great guy to work for... :dblthumb2:


Single stage paint on Mazdas are a cake walk and are great for extreme makevers...


I used a black and a red Miata for a Miata car show once in SoCal and buffed out only one-half of each car and then put them on display to show what could be done with the right pads, products and tools.

Was very eye-catching to the Miata crowd, this was around 2003 before the tipping point had been reached for the masses to move from working by hand to working by machine...

With older Mazdas, you just have to be careful around any edges as they seem to have thin panels, i.e. thin sheetmetal at the edges and if you're not careful you can easily burn-through.

I teach people to inspect for this kind of thing in my classes and make a VIF (Vehicle Inspection Form), available to the students.


I love working on single stage paint and encourage anyone with the opportunity to do so but to also focus on the task at hand.


:xyxthumbs:
 
With a Rotary Buffer like the OP stated he was using he'll definitely want to clean his pad often as the dead paint and spent product, (that's two things), will be building up on the face of his buffing pad.


  • For wool pads you use a Spur
  • For foam pads you use a nylon brush


There's also a way to use a terry cloth towel to remove both product and excess moisture. I show this in all my classes but don't have a video on it... maybe I can shoot a short one next week when we start a new video project in the studio.


:)

Thanks Mike.

Looking forward to making a trip down there to attend one (or more) of your weekend classes as soon as time and money permits.
 
Back
Top