Engine Bay Detail - Best Practices

PouncingPanzer

Active member
Joined
May 11, 2017
Messages
961
Reaction score
109
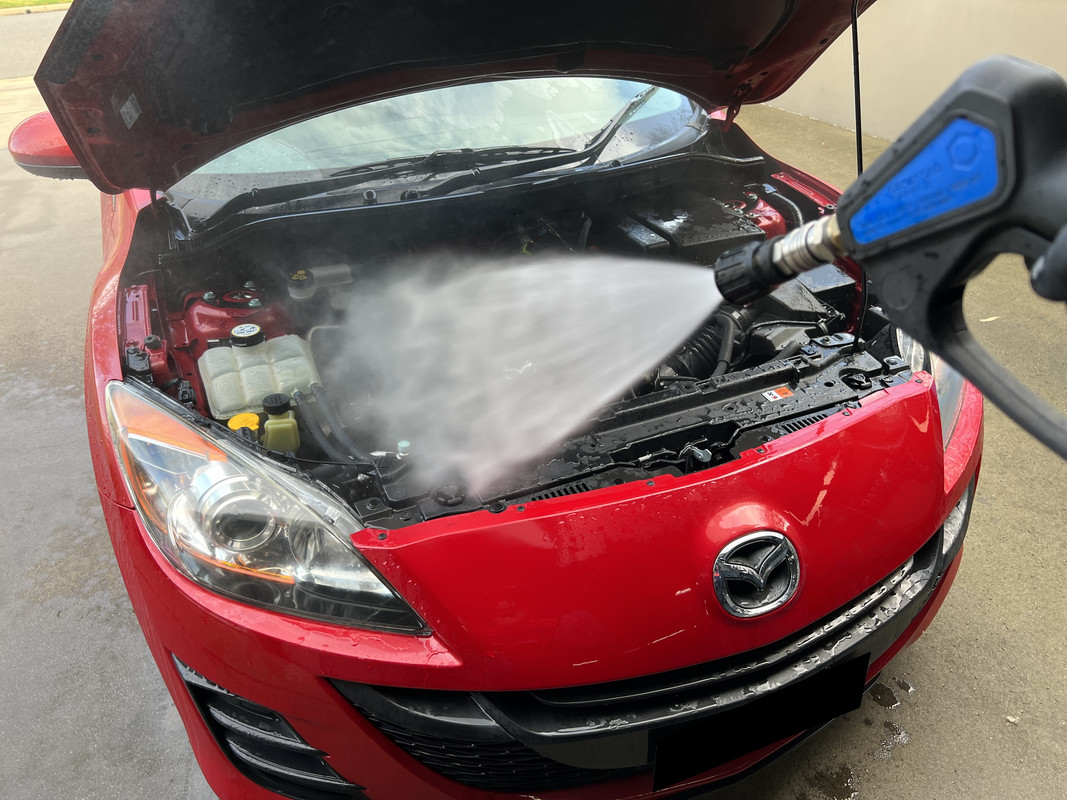
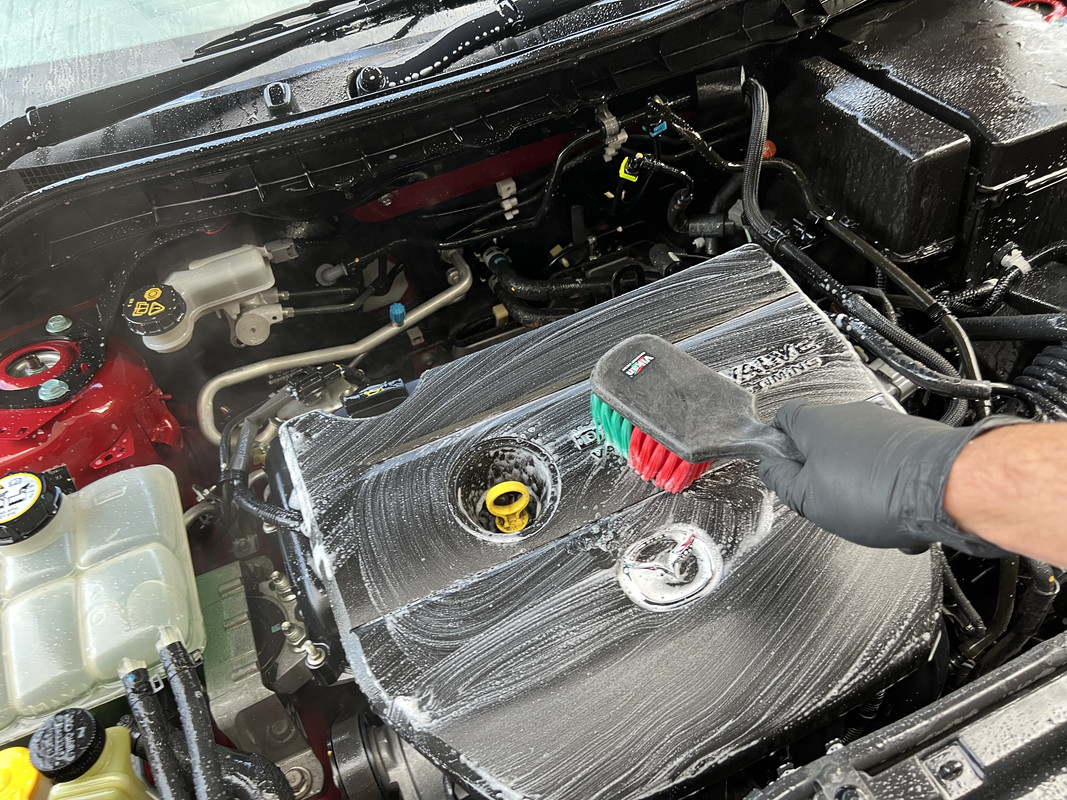
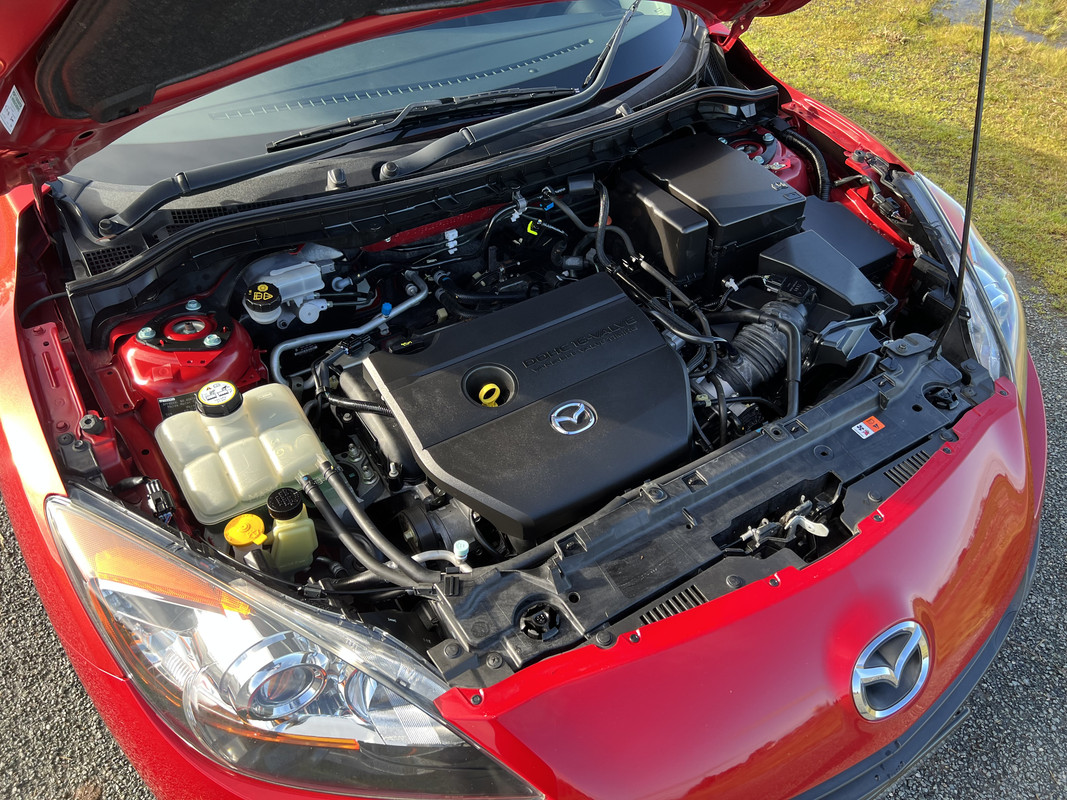
So, either tonight or tomorrow I plan on detailing the GLIs engine bay. I have honestly never done it before. Either had a vehicle too old to care or a new car never stuck around long enough. But the GLI has nearly four years of dust and dirt underhood, and it's looking really gross. I bought Koch Chemie Motorplast after seeing Pan's review on it. First product of theirs I'm using so excited about that. Anyways, what tips do you have? I guess in particular what do you watch for and avoid? What do you cover up? I planned on covering the alternator at a minimum but was also considering the battery and main relay box. I know from experience VW has fairly watertight electrical connectors and essentially everything can handle at least some moisture and I don't plan on using a pressure washer from 4 inches away :laughing:

Thanks for any advice regarding technique!
 
Motorplast is amazing stuff.
I just lightly spray apc around dirty areas under the hood, use a small detail brush and mitt and a bit of water to clean around, then spray off with water from hose. Blow with a leafblower, then liberally spray Motorplast over engine bay and into areas. Shut hood done. Always comes out looking amazing. I also usually start the vehicle and let it idle for a few minutes to get heat under the hood.

Motorolast and FSE are my 2 favorite Koch products.
Gummifix is also a winner.
 
1. Spray and/or foam engine bay with cleaner. Let dwell for 30 seconds.
2. After dwelling, agitate grimy/dirty areas with various brushes particularly in areas where there is a bigger concentration of grime/dirt.
3. Rinse with pressure washer from a reasonable distance avoiding electronical connectors and/or water sensitive areas. (its ok to get everything wet - just use common sense)
4. Immediately after rinsing, start engine.
5. With engine running, use forced air (I use a leaf blower) and blow large standing areas of water as well as most nook and crannies that you can get to.
6. After you have blown away as much water as you can, close hood and let vehicle run for 10-15 mins so that the heat from the engine will evaporate the water in areas you CAN'T reach.
7. Done.
 
I work on your car's brothers(sisters?) and cousins once removed (Audis and BMWs), so I've done my fair share of degreasing. On your car all I'd be worried about is keeping water away from the ignition coils. Long as you're not hitting it with the pressure washer last used for stripping paint off bridges you should be good.

If you have access to compressed air I like to use that as it helps knock dirt and dust out of areas you can't scrub easily. Just don't go crazy around connectors (as you'd figure).
 
Most modern engine bays are pretty protected, but if the battery and alternator are exposed, the cover them with a plastic bag. If you have an open-air intake, obviously cover that too. I find using a saturated towel useful in helping keep the plastic bag weighed down while you are using the hose or pressure washer.


This Mazda I didn't need to cover, so went straight to the rinse. Avoid focusing on one spot for too long and keep a reasonable distance.


The initial rinse will do most of the work, but I then follow up with an APC, be sure to apply to the underside of the hood and windshield scuttle panel.


Agitate with a wheel and body brush, an EZ-Detail brush is also handy.


Rinse thoroughly, then apply your dressing while the engine bay is still wet. In this case I'm using Hyper Dressing, but Motorplast is used in the same way.


Then close the hood. You can speed up the process by using compressed air or a blower.


The next day, open the hood and wipe away any areas that didn't self-level or dry. You may find that Motorplast needs a little more attention at this step as its slightly more glossy than Hyper Dressing at 5:1.

 
Finished product.
7f645e0fac3e90e2a78bb566bb5f154a.jpg


Sent from my SM-S911U using Tapatalk
 
Looks great. I never done an engine detail yet either. I might when I get back home!
 
About to tackle mine soon… was gonna start a thread… glad you did…


Sent from my iPhone using Tapatalk
 
1. Spray and/or foam engine bay with cleaner. Let dwell for 30 seconds.
2. After dwelling, agitate grimy/dirty areas with various brushes particularly in areas where there is a bigger concentration of grime/dirt.
3. Rinse with pressure washer from a reasonable distance avoiding electronical connectors and/or water sensitive areas. (its ok to get everything wet - just use common sense)
4. Immediately after rinsing, start engine.
5. With engine running, use forced air (I use a leaf blower) and blow large standing areas of water as well as most nook and crannies that you can get to.
6. After you have blown away as much water as you can, close hood and let vehicle run for 10-15 mins so that the heat from the engine will evaporate the water in areas you CAN'T reach.
7. Done.

This is exactly what I've been doing for the last 20 years. Works great this way. If you apply a dressing like Motorplast, 303/Hyperdressinge etc after engine is hot and close the hood it will self-level and look great.

Make sure engine is cold. I used Power Clean. It's one of the more safe choices. 3D etc. is as well. I cover the alternator and some of the electronical harnesses. I spray using a garden hose on shower setting, preferably. Agitate all areas with a brush or tool of choice. Rinse. Airy dry, start the car and drive it a few miles. Spray it down and let it self level.

For the longest time I only cared about keeping the engine bay immaculate. And the interior. Overall exterior was always a losing battle so I gave up and was lazy about it. Now I keep everything as factory clean as possible.
 
Take the engine cover off and use a vacuum and brush be careful not to drag the vac hose on the front end of your car.
 
Last edited:
Thought I’d throw this here instead of a new thread. Been a little scared to do it as I’ve never deep clean an engine bay before and this one probably never cleaned since born in 2018.
Before:
4f74ede4fc1009467438d3b7a08609c7.jpg


After:
fe26db24646b55d78d2c62683ab36d42.jpg


Before:
b50d88adaad0f1f9b799ecad4577b4cc.jpg


After:
389a83a8a147238391aa7a6152a2d5d4.jpg


Before:
c663515205b89aeec4f4f2a2fa435cbb.jpg


After:
b6be38575002cd2caadc4afc6f4e9491.jpg


Used a bucket with a detail gaurd scrub wall.

If your still using a Grit gaurd and their scrub wall come into th 2020’s guys.

Speed master detail brush and wheel brush.

WorkStuff detail brushes (best detail brushes)

Wheel woolies boars hair brush.

Mckee’s engine bay degreaser store is strong. Ate away all paint that was chipping from engine cover.

Sonus MotorKote

Covered the filter and used a hose attachment with a mist setting and went to town.


Sent from my iPhone using Tapatalk

Your stoked now for sure! Looks amazing. Nice supercharger:wowwow:
 
Back
Top