Flex 3401 Self Centering Pad

photoadjuster

New member
Joined
Oct 16, 2010
Messages
33
Reaction score
0
Is there a self centering pad available for the 5 1/2" backing plate for the Flex 3401? When I get my Lake Country pads exactly centered it is so nice. When slightly off center, it is like dancing with a less than trim lady.

Regards,
Stephenson
 
...Is there a self centering pad available for the 5 1/2" backing plate for the Flex 3401?...

Given the fact that the Flex XC 3401 VRG never rotates true, as does a rotary, having the pad exactly centered shouldn't make a whole lot of difference.

So... rest easy, slap a pad on, and get to polishing! :buffing:
 
Kevin, with all due respect I would have to disagree a bit with your sentiment that pad centering doesn't matter. Personally, I'm in the camp that says pad centering matters for ANY type of polisher, be it rotary or DA.

My reasoning is that a DA is engineered with a counterweight that assumes whatever is attached to the spindle will be perfectly centered (Flex 3401 included). By placing the load off center, the pad is acting to counteract the counterweight, thus altering the machine's working action to at least some extent.

While the difference may be minuscule at worst, and may not negatively affect the machine's functional performance, I have noticed that from an operator feel perspective the difference can be noticeable in some buffing conditions. Usually this is in the form of more vibration feedback, though with a 3401 it is possible that it could make buffer control take a bit of extra effort -- not impossible, just less smooth than optimal.

I haven't really thought about a way to test this scientifically or determine quantifiable deviation from designed operation, but the "seat of the pants" results tell me there's got to be some difference there.

Over time you just get used to how to visually center a pad on the machine, even if it does sometimes take a couple tries to get right.
 
Kevin, with all due respect I would have to disagree a bit with your sentiment that pad centering doesn't matter...

I agree, you are right... that's why I italicized the word "exactly". But splitting hairs, you are spot-on! :props:

I always take my "theories" to the extremes. In this case, I should have taken my own advice before I blasted a post, and instead pondered what would happen if the pad was placed tremendously off-center. Sure would make a see-saw motion running the machine at full gait. The farther off-center, the more it would make an obvious difference.

An addition to your point... pad saturation will likely throw things off-kilter more notably than an a pad that has been placed 1 or 2mm off-center (not that this was the point of your thread). A guy may spend time to get the pad dead-on, but run the pad into the ground... comfort suffers along with performance because we can't control where the liquid seeps into the pad, or if it does so evenly. FWIW, I'm on a "Just say not to saturation!" kick at the moment.

Thanks for the correction. You got me. :surrender:
 
FWIW, I'm on a "Just say not to saturation!" kick at the moment.

Thanks for the response Kevin!

Now I'll grant that this is a bit off-course for the thread, but one has to ask: being on a "Just say no to saturation!" kick, how does this affect foam pad priming such as you've advocated in the past? Isn't that sort of pre-saturating the pad (albeit in a somewhat controlled manner -- except you state that the nature of saturation is an uncontrollable condition) and already breaking the implied new rule before you've even buffed any paint?

Feed back please:buffing:
 
Hex-logic self centering pads they work great
 
... How does this affect foam pad priming such as you've advocated in the past? Isn't that sort of pre-saturating the pad (albeit in a somewhat controlled manner -- except you state that the nature of saturation is an uncontrollable condition) and already breaking the implied new rule before you've even buffed any paint?...

By priming, I mean: To prepare the face of the pad.

By saturation, I mean: Beyond the point that is necessary or desirable.


Funny, but I am just finishing up an article about pad priming, which I should have ready to post by the weekend.
In the meantime, here's a section taken from a paper I was working on (but has been shelved for quite some time):


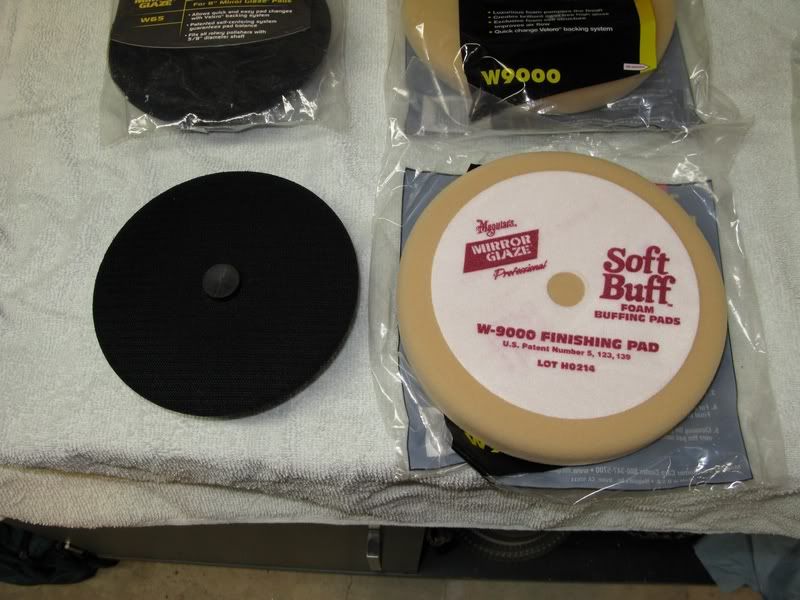
SATURATION OF THE PAD IS A PERFORMANCE KILLER

While a properly primed pad can help to deliver consistent and optimum performance, a saturated pad can have the opposite effect. For clarification, saturation of the pad’s face and the foam immediately below it is desirable, but an overabundance of polishing liquid permeating the majority of the pad is not.

Saturation of the pad has a direct effect on:
• Pad performance and overall polishing results
• Structural integrity of pads and multi-piece backing plates
• User comfort and machine control
• Premature pad and machine failure

Saturation is a pad and performance killer.
Oftentimes, the negative effects of saturation are not realized until the pad is replaced with a fresh one. Even if a decrease in overall polishing performance is obvious, the user does not usually identify saturation as the responsible culprit. Eventually, the pad becomes unusable or fails altogether. When a pad becomes saturated with liquid, it increases in weight. The extra weight puts additional strain on the buffing pad, backing plate, machine, and user. It also slows the pad’s ability to react to directional changes and surface contours.

Saturation can lead to premature failure of the pad’s attachment system.
Most backing plates and pads use Velcro as their attachment medium. Saturation can delaminate the medium’s bond, especially if it is only glued-based. This can occur rapidly if the polishing liquid contains petroleum based solvents or fillers. As the liquid encroaches and softens the glue, the twisting motion placed upon the pad stresses the attachment. Finally, the added weight increases inertia (intensifying friction-induced heat), and separates the glue from the foam. The backing plate is also susceptible to failure if it is of the multi-piece variety.

Saturation affects resiliency and structural integrity of the pad.
Foam buffing pads are designed to revert to their original shape when subjected to twisting, bending, or compression. This ability is referred to as pad resiliency. Pads are also expected to deliver consistent working characteristics, and last a reasonable amount of time before failure. The structural integrity of the pad is counted on to deliver long lasting performance. Unfortunately, once saturation occurs, moisture permeates the foam, altering structural integrity and pad resiliency (in a negative way).

Normally, air resides in the void areas (or pores) of the foam. Since air is easily compressed and light in weight, it is a critical component of the pad, as it allows the pad structure to mimic spring-action when its shape is distorted. Once the polishing liquid displaces the air, spring-action is diminished because the liquid is much heavier than air and cannot be compressed. The added weight of the liquid overburdens the design parameters of the pad, encumbering the pad’s ability to restore its original shape.

Saturation also affects user comfort and longevity of the machine.
The random-orbital polisher utilizes a counterbalancing mechanism designed to smooth the vibration and rotating inertia of the machine. Most times, the counterbalance cannot adequately compensate for the added weight of a saturated pad, and the user is left to control the excessive movements of the machine. The aggressive movement of the machine can become hard to control, and eventually leads to user fatigue.

If the user applies enough force to steady the machine, the rotating inertia is redirected back onto the machine, and can wreak havoc on bearings and other critical internal parts. As excess heat develops (due to friction or torque-load), it has the ability to shorten the life of the machine. Avoid the onset of pad saturation by cleaning and/or changing the pad often.
 
I found an old post about priming for you, too (about using M105):

...There are several benefits that are created with pad priming, and Todd Helme has pointed out two that are invaluable. Here are two more.


1. Most folks deduce that priming the pad at the onset of a polishing session is not a big deal. Think again!

Normally, most guys apply an X or O pattern of product to the pad, run the machine across the paint, and repeat. After two or three application cycles, the pad certainly looks primed (this statement assumes that enough product has been applied to fully coat the pad face in the first place).

Unless there is an overabundance of product being used, it is doubtful that the face has filled with buffing liquid (therefore mimicking the priming that would be achieved if done at the onset, as Todd has shown).

Further, a large group of people use a minimalistic approach, and use only four or five pea-sized dots of product to cut or polish with. In my opinion, (and obviously Todd's) this is a popular yet mechanically-inefficient approach.

Perhaps you're thinking, "Pad priming wastes product." Wrong! In my experience, I have found that it can extend the life of the pad during the polishing session as well as increase the working time per application of Meguiar's M105.

It may be tough to think of buffing liquid in this manner, but to understand the HUGE benefit of priming, you've got to keep in mind that the abrasives used in M105 are HARD. When packed tightly together (such as would be the case when priming), they can form a HARD BARRIER. This hard barrier can slow the ABSORPTION of the liquid ingredients used to make M105, effectively slowing liquid saturation of the pad. Anybody that has used a pad to the point of saturation knows that its ability to cut diminishes; the pad becomes only marginally resilient (liquid resides where air once did); the pad retains heat longer (liquid resides where air once did AGAIN), and; the added weight of the pad can throw the machine out of balance (like mud stuck to the inside of a car wheel).


2. Pad priming can extend the polishing cycle per application of M105.

If there are large areas of the pad available, M105 will eventually find its way into or onto those areas. I suppose this feeds into the theory that ample pad priming is achieved after a few application cycles, but there's no guarantee that there will be an even distribution of particles or liquid. The high speed motion of the machine can also pack abrasives together, so bridging of particles across several pad pores is not uncommon. This happens after the pad is primed, too, but at least we've filled in the pores to a large degree, and have thus created a pretty solid foundation for the loose particles and liquid to rest upon.

Without priming, M105 seems to have a short working cycle- "It dries out fast", is a commonly seen comment. This is because the liquid ingredients of M105 soak into the foam pretty rapidly, while the abrasive particles attach to the membrane-like structure of the pad. So, without an inital priming, it seems as if M105 has "flashed off" or "dried out", when in fact, it has simply moved from the paint surface onto/into the pad.


Pad priming helps you avoid the false sense that M105 "dries too quickly".
 

This should answer the op's question
scratchhead.gif


By priming, I mean: To prepare the face of the pad.

By saturation, I mean: Beyond the point that is necessary or desirable.


Nice information on the issue surrounding pad saturation. I've written on this topic in the past but I don't think I've ever taken it as far as you have and I like what you've written.

Nice work. :xyxthumbs:


Thinner pads like the new Meguiar's Microfiber Pads plus a few other's I've seen not yet introduced will reduce the problem of pad saturation into the future. This is key for anyone using a DA style polish with a free floating spindle assembly because it's only when the pad is rotating that it is effectively removing paint and it's only when you're removing paint that you're removing below surface defects.

The new generation DA Polishers are much more effective at maintaining pad rotation when the pad is under pressure but definitely thinner pads are the trend.


:)
 
Back to my original question . . . please.

Emm wrote <Hex-logic self centering pads they work great >

A quick search found that the backing plate is 5 inches for the Hex logic. Since the Flex 3401 is 5 1/2 inches, how would it fit.

The info on pad priming is great, but the question was about a self centering pad for the Flex.

Regards,
Stephenson
 
go to poorboys world..they got pads specifically for the Flex
 
A quick search found that the backing plate is 5 inches for the Hex logic. Since the Flex 3401 is 5 1/2 inches, how would it fit.

You don't want to use an under size pad on a backing plate as you create a situation where you could possibly run the backing plate into some portion of the vehicle you're buffing out.

You want to use a 6" to 6.5 or even a 7" pad as this will give you some safety margin around the outer edge of the backing plate.

Some people will cut their backing plate down themselves to use smaller pads and this is an option you can use.

We did offer an adapter to use the self-centering Edge 6" pads with the Flex 3401 but we've discontinued carrying this adapter.


The info on pad priming is great, but the question was about a self centering pad for the Flex.

Regards,
Stephenson

Besides the discontinued adapter, I'm not aware of any other self-centering pad specifically for the backing plate used on the Flex 3401.

I agree that all you really have to do is eye it up and get it close and you're good to go...


:)
 
Back to my original question . . . please.

Emm wrote <Hex-logic self centering pads they work great >

A quick search found that the backing plate is 5 inches for the Hex logic. Since the Flex 3401 is 5 1/2 inches, how would it fit.

The info on pad priming is great, but the question was about a self centering pad for the Flex.

Regards,
Stephenson

Hex logic use a 6" backing plate, They are 7.5" pads. I own several and use a 6" backing plate with a PC or the 5.5" plate with my Flex 3401. Fit perfect. Be sure you are looking at the right pads, the 7.5" self centering. They make smaller hex-logic pads also.
 
By priming, I mean: To prepare the face of the pad.

By saturation, I mean: Beyond the point that is necessary or desirable.

Excellent information, Kevin! Makes perfect sense, putting a distinction between surface saturation and deep saturation where the effect on buffing performance is concerned.

The fortunate thing is that although thinner pads do help, it's also easy to avoid deep saturation while following good form and "working clean" on long buffing sessions -- cleaning the pad often "on the fly," extracting excess product/dead paint onto a microfiber or terry towel, and having fresh pads available to swap them out as often as is necessary.

:props:
 
...Back to my original question... please...
...The info on pad priming is great, but the question was about a self centering pad for the Flex...

Regards,
Stephenson

Sorry, but forum rule 388 stipulates that, "Once a thread goes off course to the point of percentages
swaying that thread to a new topic... the original point of the thread has been lost forever and ever."


Sucky rule, but still, a rule.
Perhaps if enough of us complain we can change this hard to find yet "enforceable by banning" rule. :awesome:
 
Just kidding, of course.

If you cannot locate what you are looking for, consider making a centering plug of your own, and use pads that have a hole in the attachment material as shown:

800_IMG_4980.jpg
(Tim Lingor photo):

I don't think it would be overly difficult to do. The Flex backing plate has a hole for the bolt:


You could use a plug of wood or plastic and stuff it in the hole- it's not going to go anywhere because the pad will keep it in place. Any wood shop with a lathe cold make a plug that fits inside the backing plate, and they could turn down the plug to the size of the hole in the attachment material.

You could even make something like this:

flex-XC-3401-centering-plug.jpg
 
Back
Top