Great Indoors: Examples of Vehicle Interior Detailing by AutoLavish

jlb85

New member
Joined
Mar 31, 2008
Messages
734
Reaction score
0
Most of our threads focus on the exterior of the vehicle. Paint correction, wheel cleaning, engine bays, etc. But interiors are important as well. Maybe less of a craft than paint correction but as much or more work, interior detailing can be quite involved. Here are some of the recent interiors we have worked on. Most of these cars had little to any exterior work done, and none are repeated in any other threads ;)


The first vehicle we present is a 2002 Volkswagen Jetta TDi. The vehicle has almost 200,000 miles and is running strong.

DSC03272.jpg


DSC03273.jpg


DSC03275.jpg


DSC03277.jpg


DSC03281.jpg


DSC03276.jpg


We start by removing as much of the loose stuff on all surfaces before further cleaning.

DSC03279.jpg


DSC03280.jpg


The headliner had some staining from a previous attempt at cleaning the headliner. This was removed easily with low strength APC and a hard wipe with a short nap microfiber towel.

DSC03284.jpg


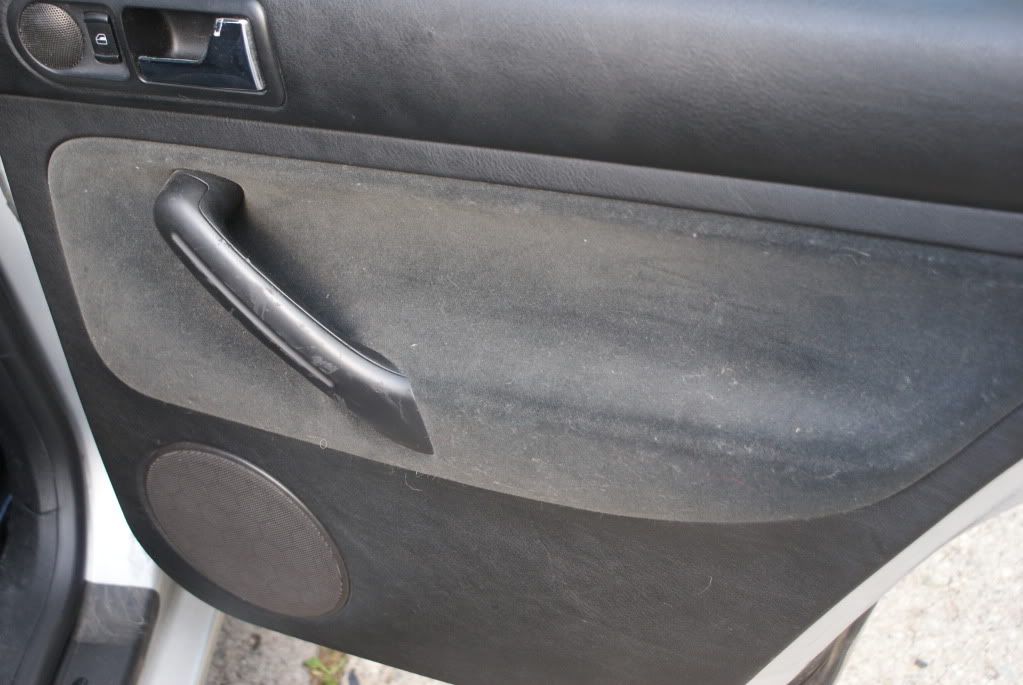
Surfaces were sprayed with medium strength cleaner and agitated, then wiped. Next, we used the steamer to "rinse dry" the cleaners and make sure all grime is out of the grain on the plastics.

DSC03286.jpg


The steamer is held slightly away from the surface the whole time.

DSC03287.jpg


Much better.

DSC03288.jpg


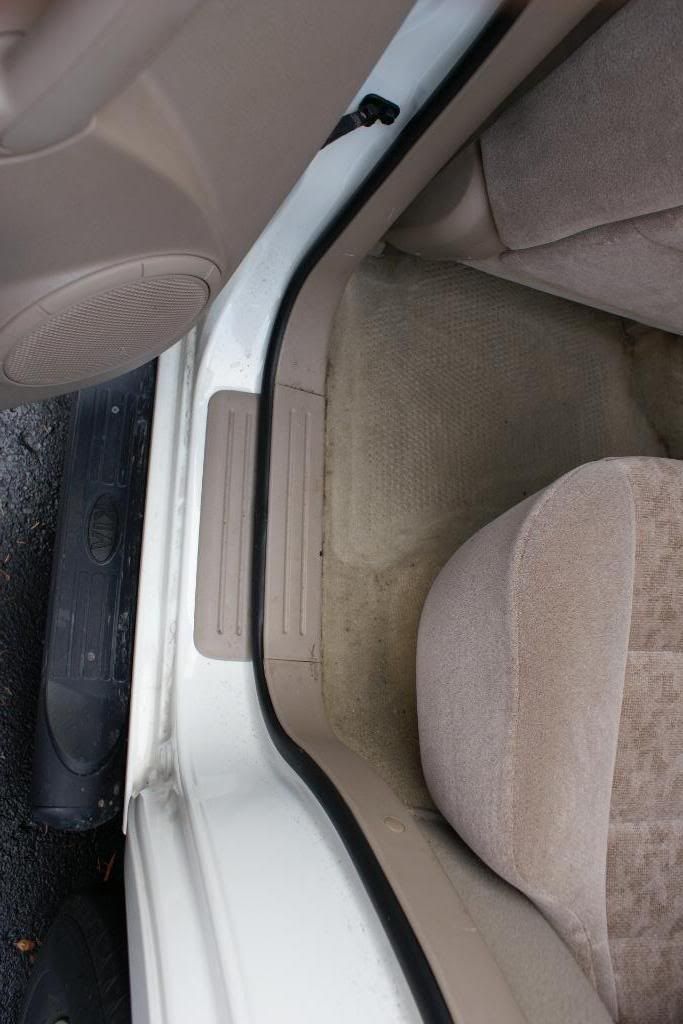
Door jambs were bad and 8 years dirty. We used various degreasers and the steamer to get the as clean as possible with the time constraints and budget we were working with.

DSC03293.jpg


DSC03295.jpg


DSC03296.jpg


DSC03289.jpg


DSC03291.jpg


DSC03292.jpg


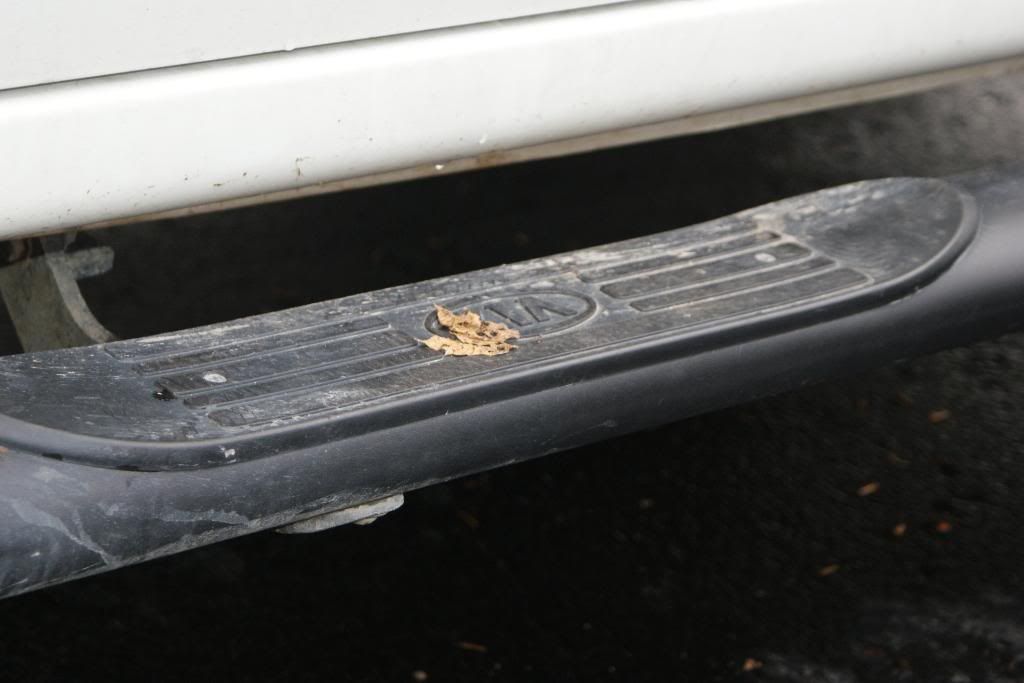
Notice the black liquid staining the ground. All that came off the door jambs.

DSC03299.jpg


Much better:

DSC03312.jpg


DSC03311.jpg


DSC03311.jpg


DSC03312.jpg


Its first foam bath ever:

DSC03304.jpg


DSC03306.jpg


Afters of the interior:

DSC03314.jpg


DSC03316.jpg


DSC03317.jpg


DSC03318.jpg
 
DSC03320.jpg


DSC03321.jpg


Afters of the exterior after a quick polish with an All In One type product.

DSC03308.jpg


DSC03310.jpg


DSC03309.jpg


The interior took 3 hours, and the exterior took 2 for a claying, clay, one-step polish and seal.


Next up is a 2007 Kia Sorento that belonged to a smoker. Little is to be said of this vehicle other than it was used as an ashtray. All of it. It took some serious cleaning to make it look like new. The vehicle had been cleaned prior to our arrival to the best of the new owner's capabilities. We will not work on a car like this again.

DSC07491.jpg


DSC07492.jpg


DSC07493.jpg


DSC07494.jpg


DSC07496.jpg


DSC07497.jpg


DSC07498.jpg


DSC07499.jpg


DSC07501.jpg


DSC07502.jpg


DSC07503.jpg


DSC07505.jpg


DSC07508.jpg


DSC07509.jpg


DSC07510.jpg


DSC07512.jpg


DSC07514.jpg


DSC07517.jpg


DSC07518.jpg


DSC07519.jpg


DSC07521.jpg


Jambs:

DSC07531.jpg


DSC07533.jpg


DSC07534.jpg


DSC07536.jpg
 
DSC07541.jpg


DSC07545.jpg


DSC07572.jpg


Engine before:

DSC07554.jpg


DSC07557.jpg


DSC07558.jpg


Engine after. No dressings were used per request.

DSC07668.jpg


DSC07669.jpg


Wheels:

DSC07563.jpg


DSC07564.jpg


DSC07566.jpg


DSC07585.jpg


Wheels after:

DSC07679.jpg


DSC07677.jpg


Exterior:

DSC07574.jpg


DSC07576.jpg


DSC07579.jpg


DSC07580.jpg


DSC07583.jpg


DSC07588.jpg


A late night wash starting:

DSC07623.jpg


DSC07626.jpg


DSC07630.jpg


Paint was polished with an All In One type product.


Starting to clean the interior:

DSC07590.jpg


DSC07589.jpg


Door panel has APC dweling:

DSC07592.jpg


Yep, and it is quite effective:

DSC07593.jpg


DSC07594.jpg


DSC07595.jpg


DSC07596.jpg
 
50/50 after just APC:

DSC07598.jpg


DSC07601.jpg


DSC07602.jpg


DSC07606.jpg


DSC07607.jpg


Better:

DSC07600.jpg


Everything got steamed multiple times:

DSC07599.jpg


Carpet got Amazing Roll Off and a god scrub:

DSC07610.jpg


DSC07611.jpg


Not perfect, but better:

DSC07612.jpg


Afters:

DSC07613.jpg


DSC07614.jpg


DSC07615.jpg


DSC07617.jpg


DSC07618.jpg


DSC07619.jpg


DSC07636.jpg


DSC07639.jpg


DSC07642.jpg


DSC07644.jpg


DSC07645.jpg


DSC07646.jpg


DSC07647.jpg


DSC07648.jpg


DSC07649.jpg


DSC07650.jpg


DSC07651.jpg


DSC07652.jpg


DSC07653.jpg


DSC07656.jpg
 
DSC07657.jpg


DSC07661.jpg


DSC07662.jpg


DSC07666.jpg


DSC07667.jpg


DSC07683.jpg


DSC07684.jpg


DSC07685.jpg


In all this interior took 5 hours with another 2 on the exterior.


Next is a PT Cruiser that was caught in a rain storm with open windows. A few days later is was dry, but it smelled. The owner wanted to make sure there would be no mold left in the carpet. We couldn't assure it would be sterile, but we would do our best to get it as clean and fresh as possible.

The plan was to remove the seats, all of them, to gain access to the carpet. The vehicle was in overall good and clean condition, which helped hasten things.

DSC01244.jpg


DSC01245.jpg


DSC01246.jpg


DSC01247.jpg


DSC01248.jpg


DSC01250.jpg


DSC01251.jpg


DSC01253.jpg


DSC01255.jpg


DSC01257.jpg


DSC01259.jpg


DSC01260.jpg


DSC01262.jpg


DSC01265.jpg


DSC01272.jpg


DSC01273.jpg


DSC01275.jpg


DSC01280.jpg


DSC01281.jpg


DSC01282.jpg


Removing stuff:

DSC01287.jpg


DSC01288-1.jpg
 
DSC01292.jpg


DSC01293.jpg


DSC01295.jpg


DSC01296.jpg


DSC01297.jpg


The interior was vacuumed, then washed with APC and agitated, wiped, steam rinsed, and topped with 1Z Cockpit Premium in strategic places. The carpet was vacuumed, then extracted using Microban Carpet Sterilizer. After, we applied steam for 15 to 20 seconds to all the carpet, and vacuumed once more.

DSC01298.jpg


DSC01300.jpg


DSC01303.jpg


DSC01304.jpg


DSC01305.jpg


DSC01306.jpg


DSC01307.jpg


DSC01308.jpg


DSC01309.jpg


DSC01310.jpg


DSC01311.jpg


DSC01314.jpg


DSC01315.jpg


DSC01345.jpg


DSC01351.jpg


DSC01352.jpg


DSC01355.jpg


DSC01358.jpg


Ready for leather cleaning:

DSC01318.jpg


Always remove any loose debris from the leather before applying cleaners, or it will turn into a mudded solution which can penetrate the seams and perforations in the leather, impossible to remove ever again.

DSC01320.jpg


For this rear seat we will try to remove what looks like dye transfer:

DSC01330.jpg


DSC01331.jpg


DSC01332.jpg


Started with the Soft Cleaner:

DSC01333.jpg


DSC01335.jpg
 
a little better, but still needs power:

DSC01334.jpg


Now, Strong Cleaner:

DSC01336.jpg


DSC01337.jpg


DSC01338.jpg


More stuff:

DSC01339.jpg


DSC01340.jpg


DSC01341.jpg


Jambs were cleaned with strong APC and steam:

DSC01347.jpg


DSC01348.jpg


Loctite for bolts that hold seat:

DSC01364.jpg


seat frames also cleaned:

DSC01365.jpg


to factory specs:

DSC01368.jpg


The exterior got a quick wash and spray wax"

DSC01369.jpg


DSC01370.jpg


DSC01371.jpg


DSC01373.jpg


DSC01374.jpg


DSC01377.jpg


DSC01378.jpg


DSC01380.jpg


DSC01382.jpg


DSC01383.jpg


DSC01384.jpg


DSC01385.jpg


DSC01387.jpg


DSC01386.jpg


DSC01388.jpg


DSC01389.jpg


DSC01391.jpg
 
DSC01396.jpg


DSC01397.jpg


DSC01399.jpg


DSC01402.jpg


Total time for this interior was 5 hours. The wash was free :)


Next is a thrashed SVT Focus that needed so much work it was insane. The vehicle had been sitting for a few years inside a shop. While protected from sun damage, the dust was thick and everywhere. Underneath, though, was a car in decent shape. Once cleaned up this vehicle would be ready for the market.

DSC06997.jpg


DSC06999.jpg


DSC07000.jpg


DSC07001.jpg


Wheels needed some love, but were in overall decent shape:

DSC07002.jpg


DSC07003.jpg


DSC07005.jpg


DSC07009.jpg


The interior was the main focus of the cleaning:

DSC07012.jpg


DSC07013.jpg


DSC07014.jpg


DSC07015.jpg


DSC07016.jpg


DSC07017.jpg


DSC07018.jpg


DSC07020.jpg


DSC07021.jpg


DSC07022.jpg


DSC07023.jpg


DSC07024.jpg
 
DSC07033.jpg


DSC07034.jpg


We started cleaning the engine:

DSC07038.jpg


DSC07040.jpg


DSC07042.jpg


Removing the seats for easier access:

DSC07048.jpg


DSC07049.jpg


DSC07050.jpg


DSC07051.jpg


DSC07052.jpg


DSC07054.jpg


As clean as they are going to get:

DSC07056.jpg


Door is coming along nicely after APC and a good scrubbing:

DSC07057.jpg


DSC07058.jpg


DSC07059.jpg


The rest of the interior looks much better. No extractors or steamers were used ☹:

DSC07063.jpg


DSC07064.jpg


DSC07066.jpg


DSC07068.jpg


DSC07069.jpg


The exterior was washed, clayed, and one-step-polished with Klasse AIO and a white pad under the PC. The result was better than expected! Corrected many of the swirls and added some decent gloss and protection:

DSC07070.jpg


DSC07072.jpg


DSC07073.jpg


DSC07074.jpg


DSC07075.jpg


DSC07077.jpg


DSC07078.jpg


DSC07080.jpg


DSC07081.jpg


DSC07083.jpg
 
Really nice work! Especially nice to see every day cars get such great treatment.
 
Yup.. I like doing interiors more than exterior personally. I love seeing carpets and mats lighten up and stains coming out. What steamer did you use?

Cant the steamer pretty much be used on all surfaces to make cleaning easier and faster.. and just use a cloth to wipe away all the dirt after the steamer lifts it out of crevices..
 
WOW very nice work. What kind of steamer do you use. A lot of steam in some of those pictures. Brand and model.
 
Those interior before and after pics are amazing!
 
WOW very nice work. What kind of steamer do you use. A lot of steam in some of those pictures. Brand and model.

I picked 1 up @ harbor freight right @ $100.

Works great :dblthumb2:


Beautiful turn arounds BTW top notch work sir
 
Last edited:
Amazing. They all look excellent!

Really nice work! Especially nice to see every day cars get such great treatment.


Those interior before and after pics are amazing!

Thank you, gentlemen!


Yup.. I like doing interiors more than exterior personally. I love seeing carpets and mats lighten up and stains coming out. What steamer did you use?

Cant the steamer pretty much be used on all surfaces to make cleaning easier and faster.. and just use a cloth to wipe away all the dirt after the steamer lifts it out of crevices..

WOW very nice work. What kind of steamer do you use. A lot of steam in some of those pictures. Brand and model.

I picked 1 up @ harbor freight right @ $100.

Works great :dblthumb2:


Beautiful turn arounds BTW top notch work sir


Thank you sirs! The steamer is generic Wagner household steamer, and works great! For the interior I try to keep it away from the softer surfaces or the ones that are coated, like Audi/VW soft-touch consoles. I just keep it slightly above the surface, and just move slow and easy. I also find that although the steamer has good cleaning power, tough stuff and grease needs to be chemically weakened or the steam to be as effective as possible. You do not want to leave the stream of steam constant over any one area to keep it from heating up too much, even on the door jambs and wheels. APC does wonders as an effective agent to break open the grime, wiping with microfiber picks up most of the loosened grime, and steam come in after and removes the rest, leaving a (hopefully) chemically free surface. I wipe dry with a clean MF, and maybe top off with 1Z Cockpit Premium if the surfaces need some conditioning.

Thanks again to all!
 
Great work!

Wanted to give you a heads up, it looks like on the focus you have dust on your camera sensor. It is not in every picture, but a number of them.

DSC07074.jpg

DSC07058.jpg


See that dark dot at the bottom right ----------------------------------------------------------------------------------------------^
 
I love looking at super clean high end stuff I'll never touch. But the reality is I enjoy this type of work the best. That KIA was indeed, killed in action. Holy cow...I smoke in my own car and can't IMAGINE it ever looking like that. Just wow. Amazing turn around.

I have a carbon copy of that focus to do in the next months. We'll see what I can do. It's just as bad, dude lives in his car, almost literally.

Only thing I'd like to add is that with as much seat removal as you guys do I HIGHLY recommend getting a cordless impact gun, Makita 18v white ones are the bomb. Get one, you'll never look back.
 
Back
Top