If you've never machine sanded but have confidence that there's plenty of paint - it's safer than hand sanding because the sanding marks will be more uniform in depth and overall.
You'll need something like a Porter Cable polisher with a 5" or 6" backing plate. An interface pad and the disc.
Here's an old 2-door Chevy I machine sanded (custom paint), to remove surface texture.
Review: Wolfgang Si02 Paint Sealant
My test vehicle
I normally try to use a German manufactured car when using product from Wolfgang as it fits the German theme better, but the reality is, this product is formulated to bond to car paint, specifically URETHANE car paint. So the product doesn't care if you use it on a Chevy, a Mercedes-Benz or even a Yugo - as long as the paint is smooth and clean.
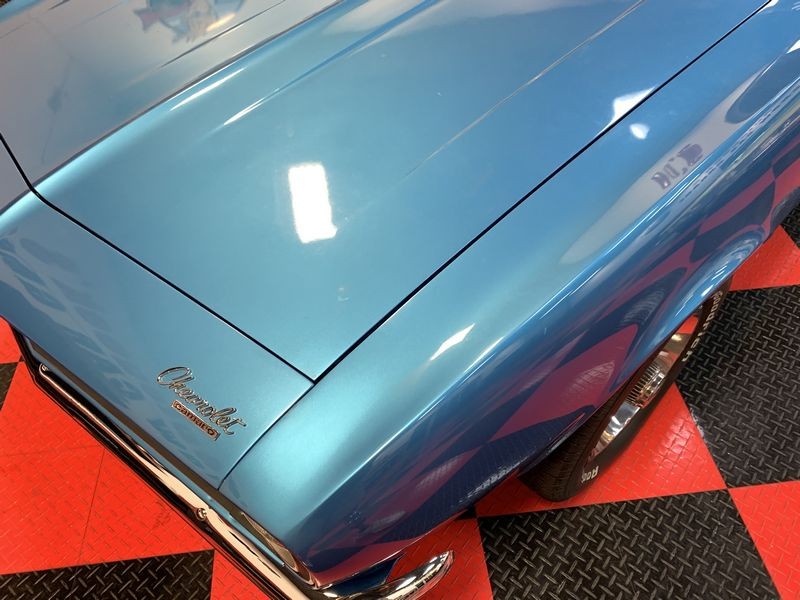
1967 Camaro Convertible
Now to the untrained eye, this Camaro probably looks pretty good?
To the trained eyes, it needs a lot of damage repair.
Mottling
Paint mottling is the term used to describe what looks like a grainy surface texture after respraying. It's DIFFERENT than Orange Peel. Orange Peel, as the name suggests, looks like the surface texture of an orange peel, with high spots, (mountains), and low spots, (valleys). What was interesting to me was the fenders did not have the mottling texture, in fact they had a nice flat surface with excellent
D.O.I. or Distinction of Image.
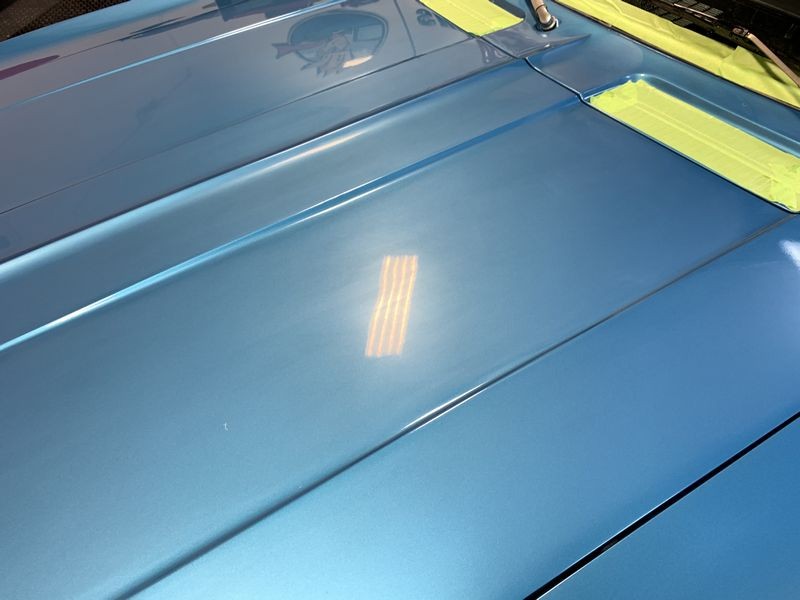
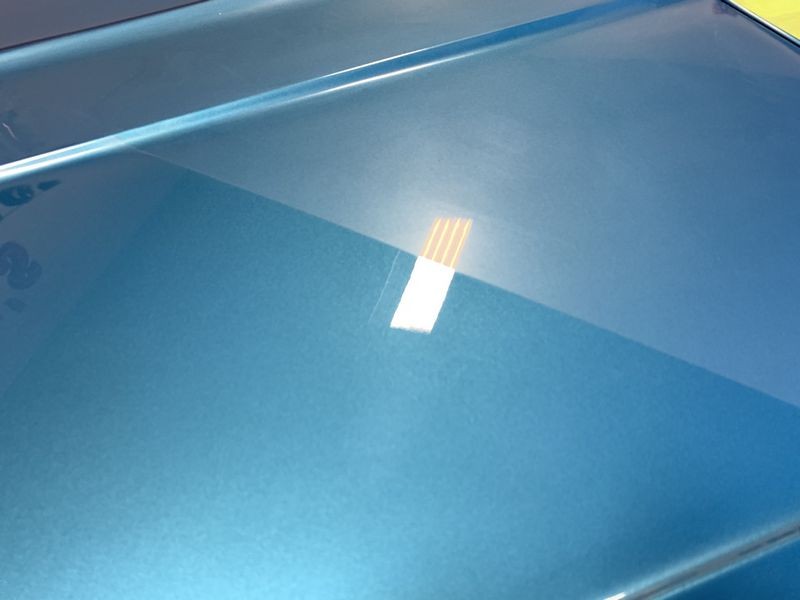
Here's the section of the hood I'm going to get a close-up shot of - I'm framing-up this shot so you can see where I'm looking. I couldn't capture the mottling appearance from this far away.
Now that I've moved my camera in closer and used my finger to give the camera something to focus on - NOW you can see the mottling. Buffing won't fix mottling just like buffing won't fix orange peel. So I'm going to machine damp sand the hood.
Deep RIDS
Besides the mottling, there were a few areas with
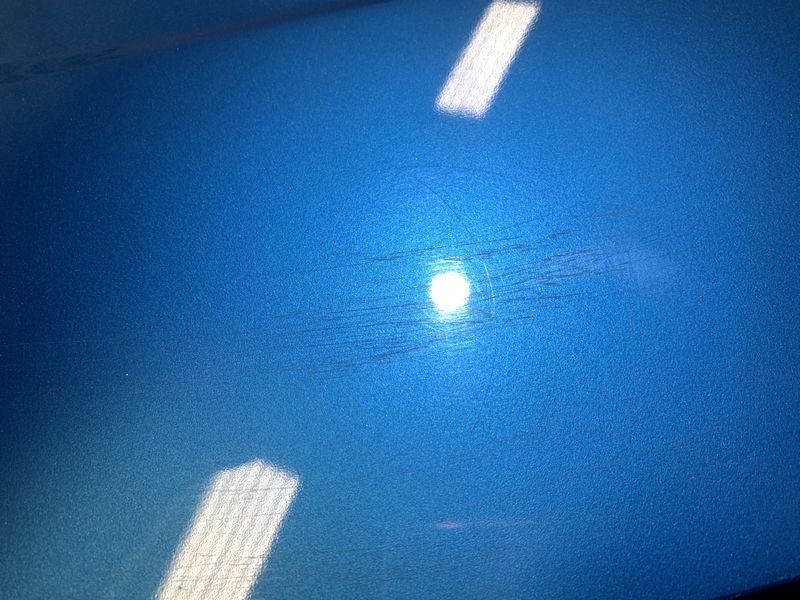
RIDS or Random Isolated Deeper Scratches. for these I'll frame-up the shot and the take a close-up to showcase these defects.
There's some wacky deeper scratches on the driver's side of the hood next to the edge.
There are actually some arc scratches in this area that only appear with a swirl finder light....
See them? Going against the grain of the straight-line scratches? The owner has know idea where these came from.
Machine Damp Sanding
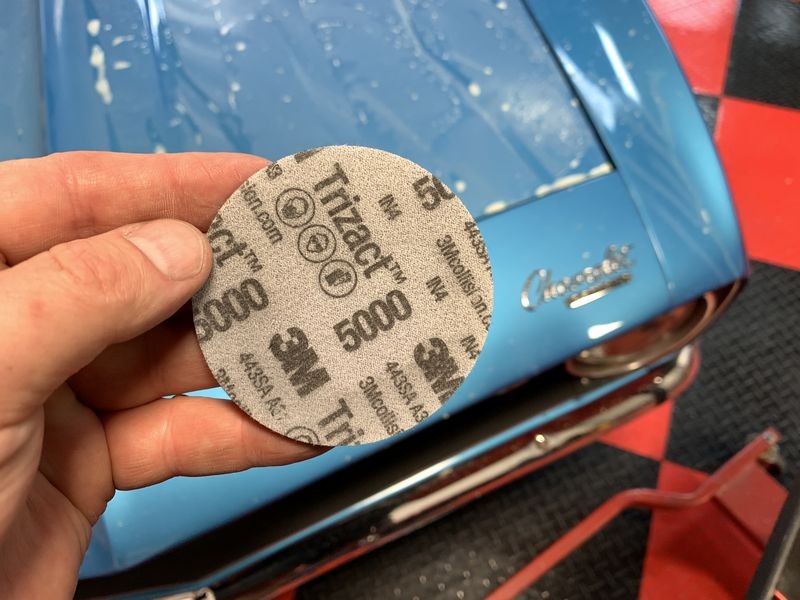
When it comes to machine sanding someone else's toy? My rule of thumb is I do my research first, then measure the paint thickness and then proceed. Because I didn't think this was a super high quality paint job, I chose to play it safe and used 3M Trizact #5000 in 5" and 3" sanding discs.
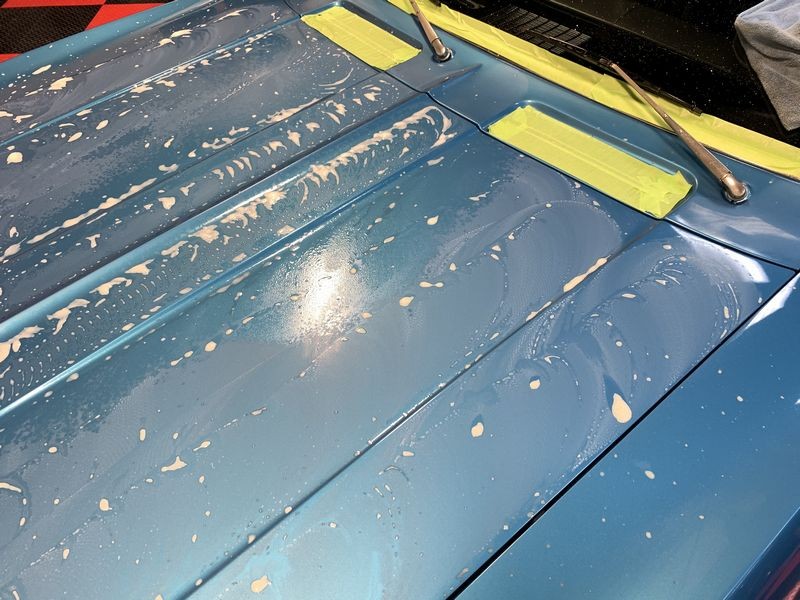
Here's the hood machine damp sanded....
This is a 3M Trizact 5" #5000 grit sanding disc.
It perfectly fits onto my G9 with a 5" Griot's backing plate.
Here you can see a foam interface pad in-between the backing plate and the sanding disc. The foam interface makes for a smoother sanding process as it allows the face of the sanding disc to conform to the curve of a panel. It also decreases the aggressiveness of the sanding a little making it much safer when working on someone else's toy.
")
Here's the Trizact 3" #5000 grit sanding disc...
I prefer the compact size of the now discontinued Griot's 3" Mini Polisher for machine sanding but you can use the new replacement, the Griot's G8
And here you can see the foam interface between the backing plate and the sanding disc.
Here's the machine damp sanded hood after wiping off the sanding slurry.
Even though the sanding marks are still in the paint, you can now see the increase in distinction of image in the reflection of the overhead tube lights. This means my goal is accomplished.
Removing the sanding marks
Next up I need to remove the #5000 grit sanding marks. When you machine damp sand with such a high grit just about any orbital polisher will work, heck you can even remove the sanding marks by hand if you have the skill level.
Synergistic Chemical Compatibility
Years ago while still working at Meguiar's and running their forum, I coined the term,
Synergistic Chemical Compatibility, it's always great to see others use terms I've coined for the detailing industry.
Here's what this term means,
The chemists that formulate the first step products, since they know what's in them, they are better able to formulate the follow-up or next step products. For this reason, there's a synergistic chemical compatibility among the products and/or product line. Using one product designed to be used after the results of the previous product is a system approach.
Article: Synergistic Chemical Compatibility by Mike Phillips
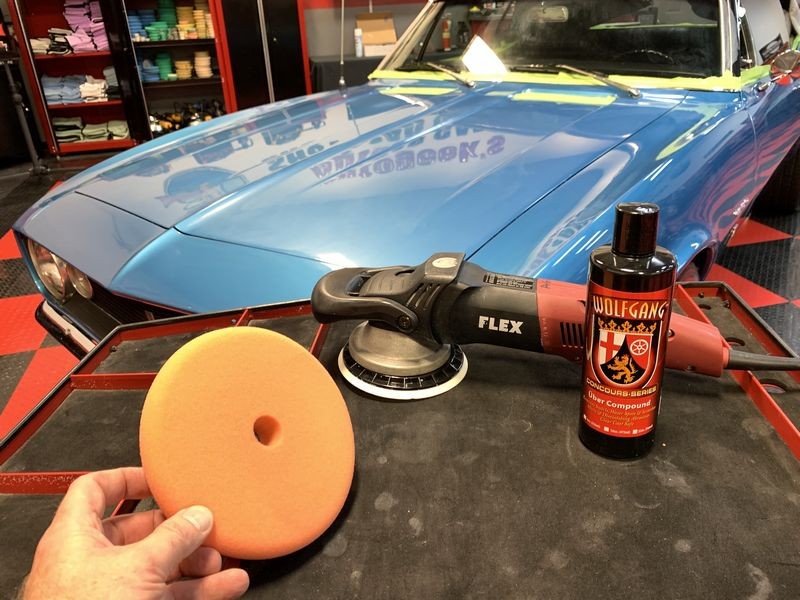
In keeping with this idea, I'll use the Wolfgang Uber Compound to remove the sanding marks and then buff out the rest of the car. After this I'll follow with the Wolfgang Total Swirl Remover.
For the compounded step I'll use the Lake Country 6.5" Force Hybrid Orange Foam Cutting pads and for the polishing step I'll use the Lake Country 6.5" Force Hybrid White Foam Polishing pads.
8 Section Passes
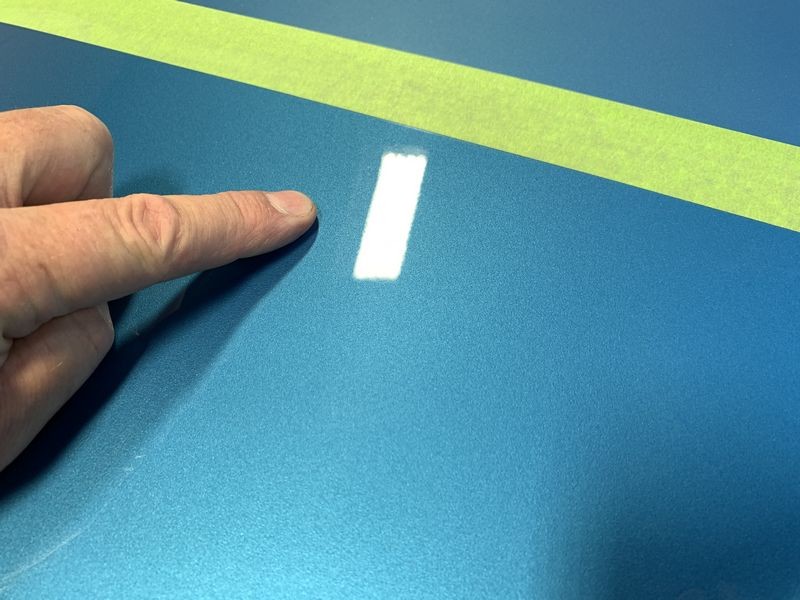
I did 8 thorough section passes and then wiped off the residue and took these pictures.
The Definition of a Section Pass by Mike Phillips
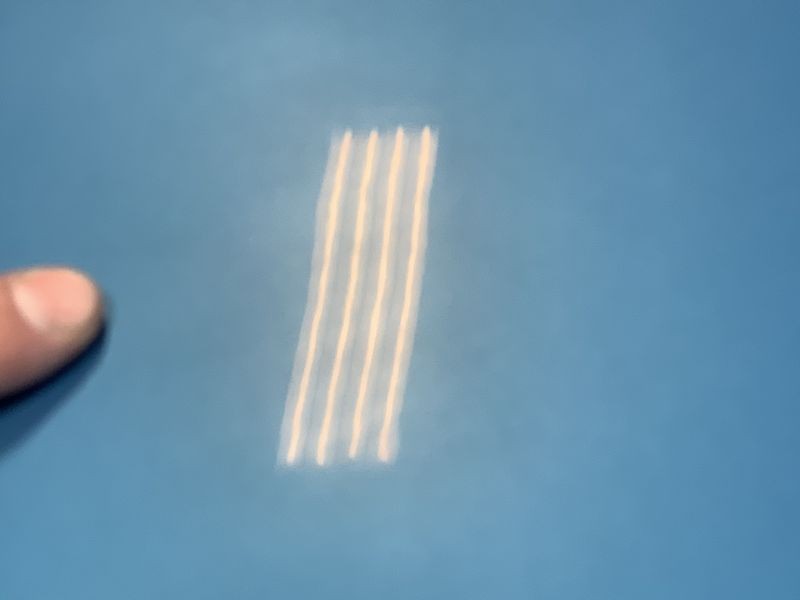
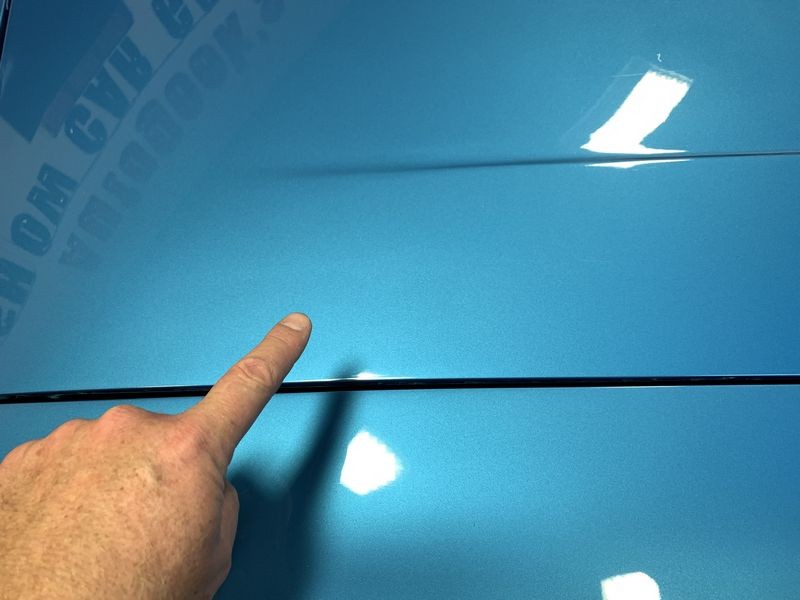
It's not until I get my camera closer where it can focus on the actual surface can you see the true results. See the clear or defined lines of the overhead florescent tube light bulbs? This is what I was aiming for, removing the mottling by flattening out the paint by sanding. Then removing my sanding marks to restore gloss and clarity and
BOOM - SUCCESS!
Now the paint on the hood will match the paint on the fenders and in more simple terms, the Camaro will look like it's supposed to look, like a freaking show car! I teach every skill you see in this write-up in all my car detailing classes. Attend one and flatten out your learning curve and have fun too.
And for perspective, here's how the paint looked before - you cannot see the lines of the overhead florescent tube bulbs.
This is where the other deeper scratches were along the side of the driver's side hood...