How can I polish varnished wood to a nice finish?

verk

New member
Joined
Jul 30, 2013
Messages
7
Reaction score
0
I recently re-did the interior wood on my 1991 Mercedes; the wood around the shifter, console, etc.

I used a clear marine spar varnish (spar meaning for exterior so it can expand/contract during weather changes), and it came out looking terrific, like glass, except wavy, because the varnish is fairly thick so it doesn't self-level very well. I think if I would have put 5% mineral spirits in the final coat, it would have helped it dry a bit more flat. Currently, it looks a bit like slight ripples on a lake.

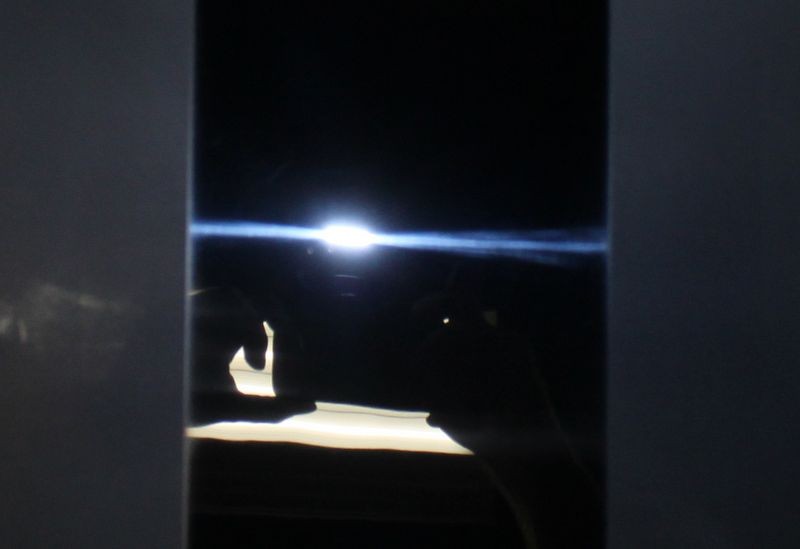
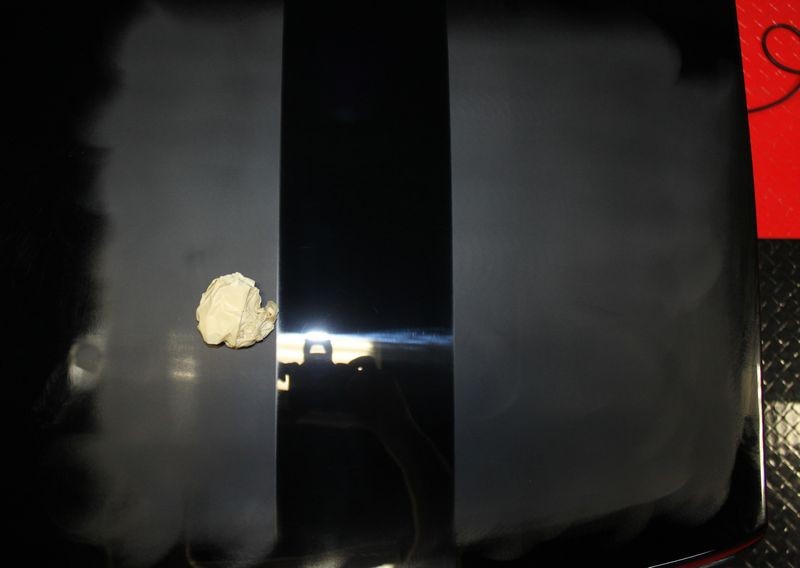
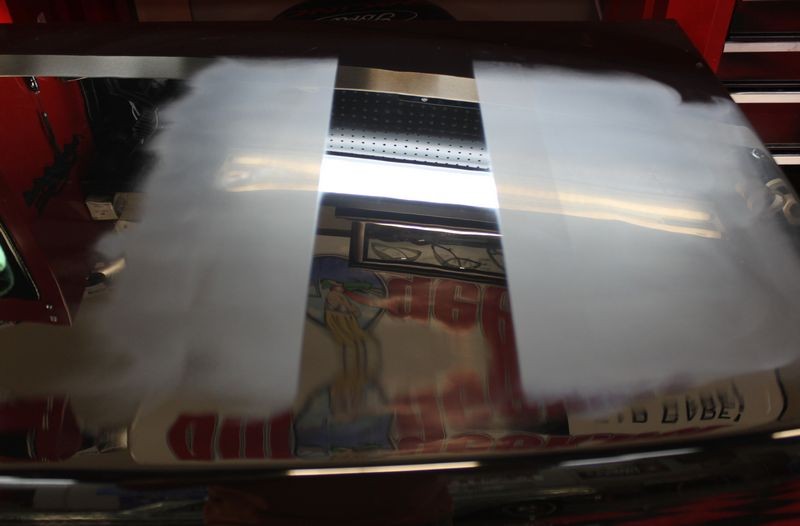
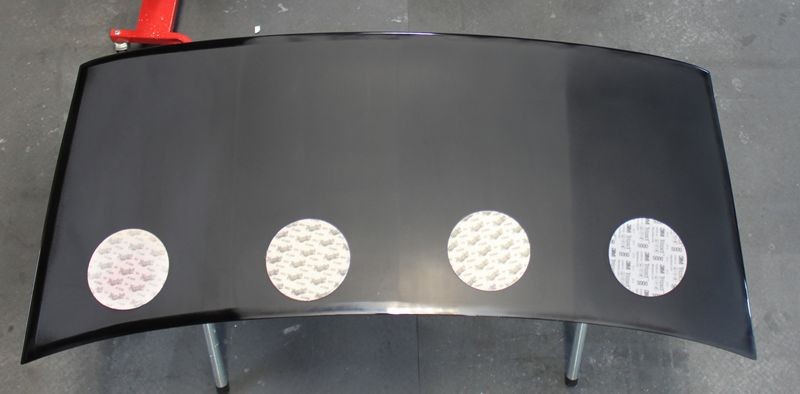
Short of me putting another coat on, which I REALLY don't want to do, does anyone know how I can buff or sand varnish so it gives a nice glass-like finish? When I sand with regular sandpaper like 300 grit (not 3000), it scratches it and turns it opaque since it's scratching it. I tried 2 and 3,000 grit and it sort of does the same, though I did that just 2 days after the final coat was on, and it takes it 7 days to fully cure.

Thanks.
 
I have never worked on wood trim, does it have CC like car paint?

I'll let others chime in
 
Doing 'bright work' can be a real challenge.

I'll relate back to working on boats...multi coats of varnish, sanding between EACH coat. This is to ensure that the surface if level and smooth. The final coat is laid (layed?) down with about a 5-10% cut by 'flowing' the varnish on to the surface. That is to say, a GOOD quality brush and ONE pass. You don't want to play with it, it will just leave brush marks, etc. Lay it down and let it dry.

You can try a spray varnish, I can't comment on that...never tried it.

Is it possible to remove that piece from the car...would REALLY make your life easier.

Bill


Yeah, the parts are out of the car. Still, when it dries, it takes 24 hours. In the meantime you get dust on the parts, little bugs landing on it, etc. I was going to put a bit of mineral spirits in it to make it flow better, but was just thinking, it might be a bad idea since the pieces are not flat. They're curved, and when drying, though one area might be flat, the others might not be. So if it's a vertical surface, having it thinned down could make it look like it's really sagging; sort of like melting ice cream.
 
Yeah, the parts are out of the car. Still, when it dries, it takes 24 hours. In the meantime you get dust on the parts, little bugs landing on it, etc. I was going to put a bit of mineral spirits in it to make it flow better, but was just thinking, it might be a bad idea since the pieces are not flat. They're curved, and when drying, though one area might be flat, the others might not be. So if it's a vertical surface, having it thinned down could make it look like it's really sagging; sort of like melting ice cream.

Not to sound like a smart A**, that's what I mean about bright work being challenging. Can you take the parts into the house and do the final coat there? If your are getting a lot of 'sag', it's a trial and error to get the right 'cut'. I hate to think how many runs I've had to sand off and re-do.

I'm really trying to remember what brand I used (damn, old age is striking big today), but it was paramount that you used "Its'" thinner/reducer. You may have the same situation. Maybe, give the company a shout or e-mail and see what they recommend.

Where are you located? Got a West Marine store close by? If so, give them a look, lotza products.

Good luck...

Bill
 
Menzerna has a specific line for wood finishes . West Marine s pretty good too as stated .
 
West Marine is where I got the varnish.

I did one more coat just to see what would happen if I thinned it out a bit, and I'm glad I didn't thin it anymore. Like I figured would happen, having in thinner is great for any LEVEL surface. But for the curves or turns on a wood surface, thinning it just makes it run more.

Somehow, this still has to come down to buffing it out. Even aside from slight ripples, are the pieces of dust and occasional little bug that gets in there, even though you could have this up high on a table as opposed to being on the floor. Over a 24 hour drying period, all that stuff can get on there.

I talked to Epifanes, the guy said he never did it himself, but someone who used to work there sanded it with a 2500 grit first, then a 3500 grit. I tried that earlier in the week, and maybe mine hadn't dried long enough (only 2 days at the time), and the sanding with 2500 still changed it from crystal clear to opaque, so I stopped sanding.
 
Many years ago I knew a man that wanted a piano finish on kitchen cabinets. He used varnish 3 coats sanding between coats. After the last coat sat for several weeks he simple wet sanded with 1500 wet or dry paper and compounded and polish , all by hand. The cabinets did look great after he finished them.
 
Polished with what?

When you say he sanded, then polished, what did he polish with? I need to sand out any tiny bugs, wavy lines from the product drying, and dust specs. When I sand it, like sanding plastic, it becomes opaque then. I just want that super smooth, clear glass look to it.
 
Re: Polished with what?

When you say he sanded, then polished, what did he polish with? I need to sand out any tiny bugs, wavy lines from the product drying, and dust specs. When I sand it, like sanding plastic, it becomes opaque then. I just want that super smooth, clear glass look to it.

I think I'm getting what you are doing now.

It may very well take more than a day for that finish to dry enough to sand. Let is set! Do a fingernail test (hidden spot), does you nail leave an impression? If so, more time to drying time is needed.

By sanding you are leveling the finish and making it 'smooth.' Much like wet-sanding an automobile finish, you keep moving up on the grit. As you get 'finer and finer' you notice that there is a bit of shine coming through. Are you wet/damp sanding or going dry?

THEN, you will want to use a compound to further refine that shine. Again, using a less aggressive product, much like you did with the sandpaper.

Did the 'man' from Epitanes recommend a particular thinner to use? I think I mentioned above, but some finishes want 'their' own thinner. Z-Spar is one that is really sensitive to that.

Another idea, if you are getting completely frustrated, there are some rattle cans of 'plastic overcoats' that I've seen in the various hardware store paint departments, Would THAT work? Ain't gotta clue...just an idea.

One more thought...Does your local library have decent 'boat' section? Look for a book with the title of (or close to it), The Art of Bright Work. Was written about 10-15 years ago by a lady that specialized in bright work on boats. Great primer on the subject.

Good luck...

Bill
 
I was doing dry sanding, but will go with what works

I was dry sanding, but will switch to anything that works. Maybe it needs more time to fully dry, but sanding it....is like sanding plastic; it turns it anti-clear, as in "opaque".

I've attached a photo. You can see how this dried wavy, since the mix is so thick.

I've since added a thinned down coat while helped relax the varnish a bit. Looks better but still not 'great'. If I would have thinned it more, I fear that the FLAT surfaces would look good, but any of the CURVED areas would look horrible. The thinned varnish would simply run, and dry, like melting ice cream.
 
When you dry sand, you really run into a situation of the paper really clogging up. When it (the paper) get all clogged it does nothing, except maybe to further mat the surface. By wet sanding, you keep the paper clean.

As to the 'opaqueness' that where stepping up (grit numbers) on the sanding. As each finer and finer paper is used, the opaqueness decreases. Then by using a compound/polish is where the finish becomes clear and smooth. Yes, is a lot like refining a plastic surface. You can think of varnish as 'natures' plastic.

From the picture, the right side where (it looks like) you sanded, that to me definitely looks like the stuff ain't/wasn't dry.

An example, the last wooden boat (a 'stripper kayak) I finished out, Ten coats of varnished were laid down, wet sanded between each coat (400-600 grit) and then a final 'shine coat' took just a shade over 2 weeks to do. Trying to say, you CANNOT rush it! Heat, etc. is a waste of time, it just takes time.

I'm still thinking of how to get that piece finished off...due to it's relative small size, I'd be looking seriously at spray cans. Get a good base coat of varnish that is sanded smooth, then shoot that final finish coat. Going that route, the runs/sags that you are fighting may be eliminated. Just try and use the same manufacture, don't want the difference (if any) between the products fighting each other.

Bill
 
I am not certain if this is of any use to you. Whenever I have done any wood varnishing, to eliminate lap marks I do the following. I put the varnish in a small plastic container and then have it floating in a second larger container. The second container has hot tap water in it. Due to the heat, the varnish becomes the viscosity of water. The varnish has to be applied sparingly (multiple coats) to avoid any drips on surfaces that are not horizontal. If you are careful and do it immediately, drips can be wiped with your brush. Also when applying, if you see any air bubbles, simply blow across the piece and the bubbles will burst. This must be done while the varnish is still warm, otherwise it will not self level. I have had people think that the furniture was professionally sprayed. They don’t believe me when I tell them that I used a sponge brush.
Mike
 
As to the 'opaqueness' that where stepping up (grit numbers) on the sanding. As each finer and finer paper is used, the opaqueness decreases.


Here's a picture that shows how moving from course grits to fine grits increases clarity while decreasing opacity.

Video: Wow! 3M #5000 Grit Polishing I mean Sanding Discs!


Did some comparison testing between,

#1500 Grit Sanding Discs - Meguiar's
#1500 Foam Backed Finishing Discs - Meguiar's
#3000 Foam Backed Finishing Discs - Meguiar's
#5000 Foam Backed Finishing Discs - 3M
I'll let the pictures do the talking...

From left to right...

#1500 Grit Sanding Disc, #1500 Foam Backed Finishing Disc, #3000 Foam Backed Finishing Disc and #5000 Foam Backed Finishing Disc

50003M000.jpg


50003M005.jpg


50003M001.jpg


50003M002.jpg


At the #5000 mark you're really starting to restore reflectivity to the paint...
50003M003.jpg


#3000 & #5000 Grit Wetsanding Marks Removed
with a DA Polisher
[video=youtube_share;uCHJdZY9Abs&hd=1"]#5000 Grit Wetsanding Marks..." target="_blank">#5000 Grit Wetsanding Marks...[/video]


:)
 
Then by using a compound/polish is where the finish becomes clear and smooth. Yes, is a lot like refining a plastic surface. You can think of varnish as 'natures' plastic.


And here's some pictures taking sanding marks out of a clear coat finish by hand...


How to remove wetsanding scratches by hand - FG 400


Anytime you're wetsanding a car there will be places you cannot easily or safely get a rotary buffer and a buffing pad to remove your sanding marks. In these situations you need an aggressive compound that you can use by hand.

The trick is to remove your sanding marks while not scouring the paint from the abrasives used in the compound. If you leave light or shallow scratches that's okay because the tricky and important goal is to be able to remove the sanding marks, you can always refine your results using a finer polish applied by hand.

For the wetsanding, cutting and buffing project on the mystery car this weekend there will be places where it will be risky to remove sanding marks using a machine, at least the initial cut.

So before leaving the well equipped Autogeek garage, I machine sanded one of our black paint panels and then tested the new Menzerna FG 400...


Paint panel machine sanded using #3000 Triazact...

Remove_Sanding_Marks_by_hand_001.jpg


Remove_Sanding_Marks_by_hand_002.jpg


Remove_Sanding_Marks_by_hand_003.jpg


Use a cloth applicator with a nap
To make any compound or polish more aggressive use a cloth applicator pad or cloth material that has a nap. The larger more stout the nap the more aggressive the abrading action.

Remove_Sanding_Marks_by_hand_004.jpg


Chemically stripping the paint
Looks great before chemically stripping so lets strip the paint to make sure the sanding mars are in fact removed. I don't care if there are toweling marks because I expect that from the pressure I'm going to be applying when rubbing the paint hard to remove small particles of paint.

Removing clear coat paint by hand requires putting some pressure behind the pad...

Remove_Sanding_Marks_by_hand_005.jpg


Sanding marks removed, only fine or shallow toweling marks remain...

Remove_Sanding_Marks_by_hand_006.jpg


Close-up cropped out of the above shot...

Remove_Sanding_Marks_by_hand_006c.jpg


Chunk of masking tape to give my camera something more definitive to focus on...

Remove_Sanding_Marks_by_hand_007.jpg


From another angle you can see the flash of my camera lighting up the paint but you can also see how distinct the 4 florescent tube lights are overhead.

Remove_Sanding_Marks_by_hand_008.jpg


Here I've pushed the panel closer to the work bench to capture a reflection of the holes in the peg board...

Remove_Sanding_Marks_by_hand_009.jpg


Success!
We'll be using Menzerna FG 400 to cut out our sanding marks for the wetsanding project this weekend and for the areas we cannot safely buff by machine we can use FG 400 by hand. Yancy says he can capture this on video too...


:)
 
To remove sanding marks out of a clear coat finish and NOT leave scouring marks behind, you have to first start with a very high quality compound that works when applied by hand, here's two I can think of as I'm typing,

Meguiar's M105 or the consumer version, Ultimate Compound

Menzerna FG 4000


If you want to remove sanding marks by hand you have to use firm downward pressure and use a firm rubbing motion at the speed of light. In other words, you need to "work" the compound over the surfcace, not merely wipe it on and expect "it" to work itself.


How to use a hand applied abrasive polish or paint cleaner by hand

Like this...

RemvovingSandingMarksbyHand01.jpg


RemvovingSandingMarksbyHand02.jpg


:)
 
If you want to remove sanding marks by hand you have to use firm downward pressure and use a firm rubbing motion at the speed of light. In other words, you need to "work" the compound over the surface, not merely wipe it on and expect "it" to work itself.


But does that trick work with interior wood trim? The trim is out of the car so I can work with it better.

The best thing that I did to make it look a lot better than my 1st few attempts, was to add about 5% of mineral spirits into a small cup of the varnish. It has helped the varnish relax a bit, then it down so it can level out better, because the varnish is very thick, thicker than honey. it's not perfect by any means, but it's better than it was, to do a final coat with a bit of mineral spirits in it.
 
But does that trick work with interior wood trim? The trim is out of the car so I can work with it better.


The varnish you're using is a coating. Early cars were coated with Shellac, Varnish and Lacquer. I share this in the beginning of my how-to book.

Automotive paints are coatings.


I've sanded and buffed a lot of coatings in my life and I'm pretty sure you can sand and buff varnish. I may have sanded and buffed varnish in my life but offhand I cannot remember.

Varnish is soft, so you want to avoid getting it too hot as this can make it rubbery while you're rubbing it.


Two things you can do,

1. Experiment. Get another piece of would that is NOT important to you, clean it, prep it and apply varnish to it just like you did the components that ARE important to you.

Now practice sanding and buffing. Learn from any mistakes, tweak your technique and perfect a process that works or discover it simply cannot be done, which I highly doubt.

Once you dial in a process that works on the test varnish, duplicate it to the components that go to your car.


2. Do a little Googling and find a discussion forum for wood workers, that is furniture craftsmen. I'm POSITIVE these forums exist and on every forum you'll find helpful and friendly people always willing to help others with no benefit to themselves. People that will take the time to type out information, share pictures, videos and links to even more resources to help you be successful.

You'll also likely find a handful of grumpy people and people that post, "use the search button", but ignore those people.


No matter what, please post a follow-up to this thread as to your success so that this thread will end up helping others into the future.


Thank you...


:dblthumb2:
 
Back
Top