Mike Phillips
Active member
- Dec 5, 2022
- 51,004
- 6
How long to wait before waxing a brand new car?
One of the most common questions asked goes like the title of this article, and that is,
How long should I wait before I wax my brand new car?
The answer to that question is,
As soon as possible
Don't wait for the condition of the car to start going downhill before taking action. By the time you see visible signs of wear-n-tear, swirls and scratches, water spots and oxidation, it's already too late. At this point now you're going to have to bring out the big guns, that is get out all the tools like compounds, polishes, buffers, etc. and then try to undo the damage.
Some people just plain don't know it's not only perfectly okay to wash and wax a brand new car it's in the car's best interest as well as the owners.
Some people confuse a brand new car with a brand new paint job? They think because the car is brand new this also means the paint is new or f-r-e-s-h as in just painted a few days ago.
By the time a new car travels down an assembly line and is kicked out the door, the paint is already completely dried, cured and hardened. Even more time goes by before the car travels from the manufacturing plant to the show room floor at your local new car dealership.
What this means to you is that by the time you purchase the car and get it home the paint is perfectly dried, cured and hardened and ready to be sealed with a coat of wax, a synthetic paint sealant or a paint coating.
The BEST time to start taking care of a brand new car is while the car is still in brand new condition. It's when everything is new and in excellent condition that washing, waxing and detailing your car inside and out will be the easiest ever... and in most cases, also the most fun.
2014 Mercedes-Benz E350 detailed by Mike Phillips
Here's my buddy Jim's brand new 2014 Mercedes-Benz E350. Jim just purchased this Mercedes-Benz at a South Florida Mercedes-Benz Dealership and the car only has 200 miles on it. Jim contacted me to detail it. Here's a few pictures to tell the story...
I took this picture early Saturday morning, before 9:00am. There were clouds in the sky so it was hard to get the perfect "Sun Shot" but I'll describe what I saw and that was an almost perfect finish.

No real swirls or scratches that show up in sunlight...

Here's the sun shining onto the trunklid...

Not to bad at all, there's a few very shallow swirls here and there but overall the finish on this car looks like how a finish should look when you purchase a brand new car.

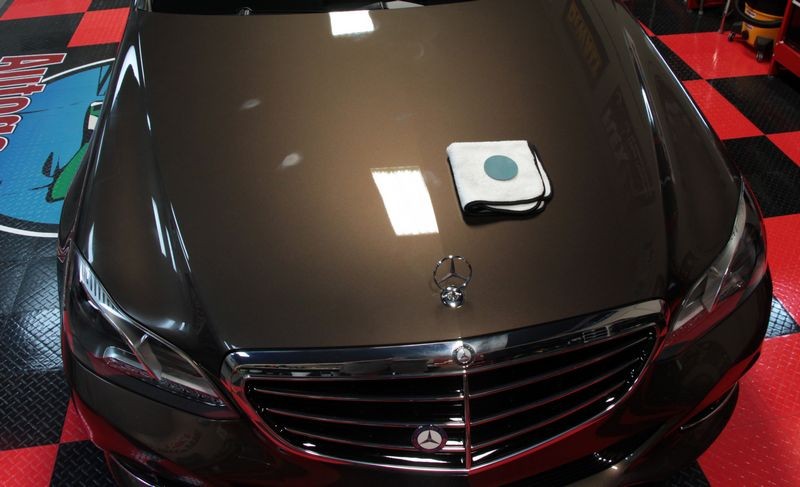
Under florescent lights we found some DIP or Dirt in Paint, these looked and felt like small particles of dirt that somehow land in the paint while it's still wet.
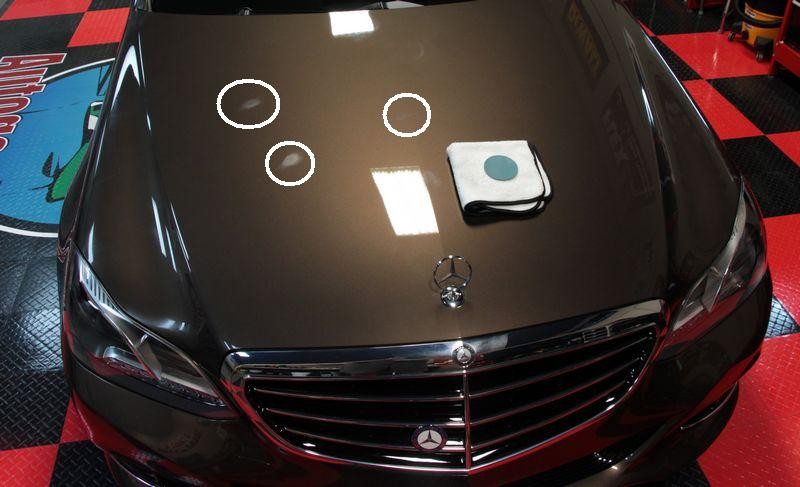
Here they are with circles drawn around them to make it easier to see where they were. I used a 3" Trizact Disc in #5000 grit to lightly sand them flat Then buffed out my sanding marks using the Rupes Mini 12 with the Rupes Blue Foam Cutting Pad and matching Rupes Compound.

Process
Jim washed his car beforehand so I wiped the car down using Pinnacle Liquid Crystal Waterless Wash with Carnauba.
Step 1 - Decontaminated using the Nanoskin Autoscrub Medium Foam Pad – 6 inch.
Step 2 - Machine Polish using Rupes Duetto Orbital Polisher with Rupes Yellow Foam Polishing Pad and Rupes Keramik Gloss Fine Gel Polish
Step 3 - Re-Cleaned paint to remove polishing oils using Pinnacle Black Label Surface Cleansing Polish
Step 4 - Applied Pinnacle Black Label Diamond Paint Coating
Step 5 - Sealed tires with TUF Shine Tire Clearcoat


On Autogeek
Pinnacle Black Label Diamond Paint Coating
Pinnacle Black Label Surface Cleansing Polish
Nanoskin Autoscrub Medium Foam Pad – 6 inch
Rupes Duetto Orbital Polisher
Rupes Yellow Foam Polishing Pad
Rupes Keramik Gloss Fine Gel Polish
Pinnacle Liquid Crystal Waterless Wash with Carnauba
TUF Shine Tire Clearcoat
")
One of the most common questions asked goes like the title of this article, and that is,
How long should I wait before I wax my brand new car?
The answer to that question is,
As soon as possible
Don't wait for the condition of the car to start going downhill before taking action. By the time you see visible signs of wear-n-tear, swirls and scratches, water spots and oxidation, it's already too late. At this point now you're going to have to bring out the big guns, that is get out all the tools like compounds, polishes, buffers, etc. and then try to undo the damage.
Some people just plain don't know it's not only perfectly okay to wash and wax a brand new car it's in the car's best interest as well as the owners.
Some people confuse a brand new car with a brand new paint job? They think because the car is brand new this also means the paint is new or f-r-e-s-h as in just painted a few days ago.
By the time a new car travels down an assembly line and is kicked out the door, the paint is already completely dried, cured and hardened. Even more time goes by before the car travels from the manufacturing plant to the show room floor at your local new car dealership.
What this means to you is that by the time you purchase the car and get it home the paint is perfectly dried, cured and hardened and ready to be sealed with a coat of wax, a synthetic paint sealant or a paint coating.
The BEST time to start taking care of a brand new car is while the car is still in brand new condition. It's when everything is new and in excellent condition that washing, waxing and detailing your car inside and out will be the easiest ever... and in most cases, also the most fun.
2014 Mercedes-Benz E350 detailed by Mike Phillips
Here's my buddy Jim's brand new 2014 Mercedes-Benz E350. Jim just purchased this Mercedes-Benz at a South Florida Mercedes-Benz Dealership and the car only has 200 miles on it. Jim contacted me to detail it. Here's a few pictures to tell the story...
I took this picture early Saturday morning, before 9:00am. There were clouds in the sky so it was hard to get the perfect "Sun Shot" but I'll describe what I saw and that was an almost perfect finish.
No real swirls or scratches that show up in sunlight...
Here's the sun shining onto the trunklid...
Not to bad at all, there's a few very shallow swirls here and there but overall the finish on this car looks like how a finish should look when you purchase a brand new car.
Under florescent lights we found some DIP or Dirt in Paint, these looked and felt like small particles of dirt that somehow land in the paint while it's still wet.
Here they are with circles drawn around them to make it easier to see where they were. I used a 3" Trizact Disc in #5000 grit to lightly sand them flat Then buffed out my sanding marks using the Rupes Mini 12 with the Rupes Blue Foam Cutting Pad and matching Rupes Compound.
Process
Jim washed his car beforehand so I wiped the car down using Pinnacle Liquid Crystal Waterless Wash with Carnauba.
Step 1 - Decontaminated using the Nanoskin Autoscrub Medium Foam Pad – 6 inch.
Step 2 - Machine Polish using Rupes Duetto Orbital Polisher with Rupes Yellow Foam Polishing Pad and Rupes Keramik Gloss Fine Gel Polish
Step 3 - Re-Cleaned paint to remove polishing oils using Pinnacle Black Label Surface Cleansing Polish
Step 4 - Applied Pinnacle Black Label Diamond Paint Coating
Step 5 - Sealed tires with TUF Shine Tire Clearcoat
On Autogeek
Pinnacle Black Label Diamond Paint Coating
Pinnacle Black Label Surface Cleansing Polish
Nanoskin Autoscrub Medium Foam Pad – 6 inch
Rupes Duetto Orbital Polisher
Rupes Yellow Foam Polishing Pad
Rupes Keramik Gloss Fine Gel Polish
Pinnacle Liquid Crystal Waterless Wash with Carnauba
TUF Shine Tire Clearcoat
