2. The best way to prevent water spots is to prevent the vehicle from getting wet
I agree. Hard to do if you have to park your car outside and where you live it rains.
I lived in the Mojave Desert for about 7 years and while it did rain we went through a lot of dry spells and that was nice, especially since I drove a convertible year around.
3. Based on how long the water spots have been set on your car, you should be able to just use a quick detailer or a wash to remove the water spots.
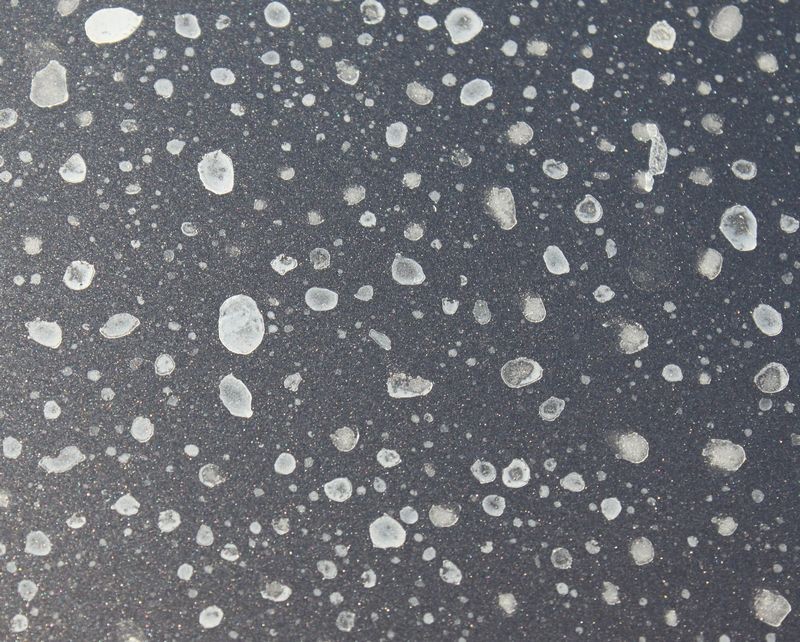
Sometimes this works... here's an example and these are WATER SPRINKLER Water Spots... that means City Water and it's usually the worst offender.
How To Remove Sprinkler Water Spots
How To Remove Sprinkler Water Spots using The Least Aggressive Method Approach
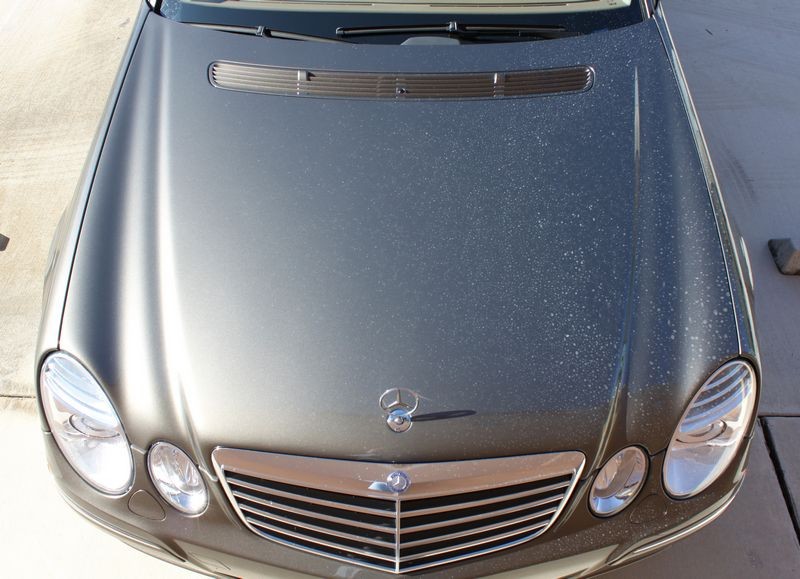
This is a nasty problem that usually happens after you've just washed and waxed your favorite ride... and unaware you've parked next to a sprinkler. Then when you return to your car....
Sprinkler Water Spots!
Luckily they're only on half the car...
The question is, are they Type I or Type II Water Spots? Let's hope they're Type I and will wipe-off or wash off, if they're Type II Water Spots we'll have to use some type of abrasive compound or polish to level the paint surface in order to remove the spots.
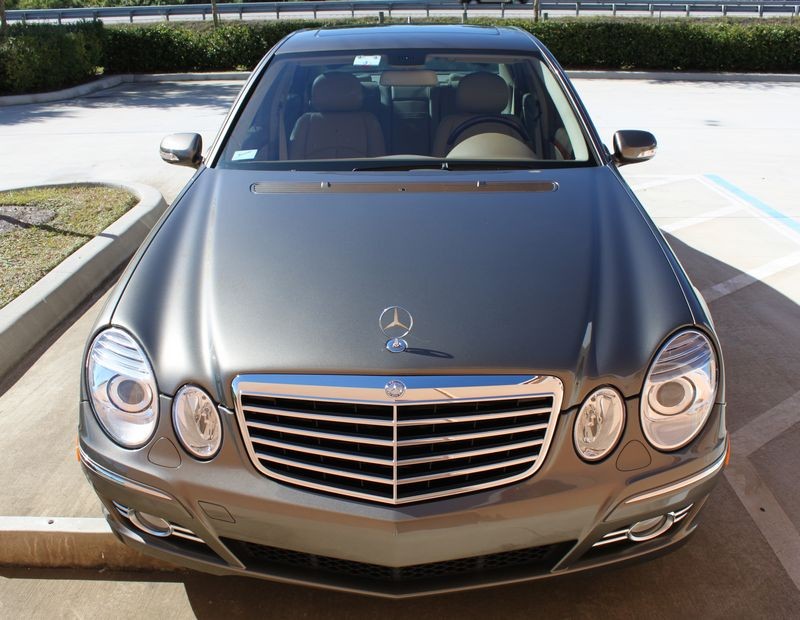
We've pulled the Mercedes-Benz into our studio where we can work out of direct sunlight on a cool surface.
The terms
Hard Water or
Hard Water Spots are commonly used to describe these types of spots on the surface of the paint. What's actually making up the spots are
minerals and other substances dissolved in the water. After the water evaporates off the paint, the minerals, (the components referred to with the word
hard in the terms
Hard Water or
Hard Water Spots), remain behind.
Our hope is that these spots are simply a
topical defect and not a
sub-surface or
below surface defect. You will find out by simply washing and drying the car or wiping the panels clean using a clean, soft microfiber towel.
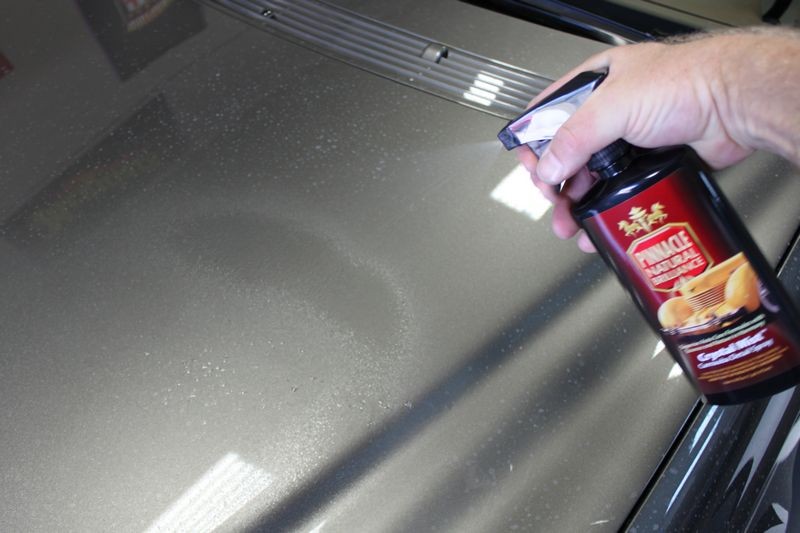
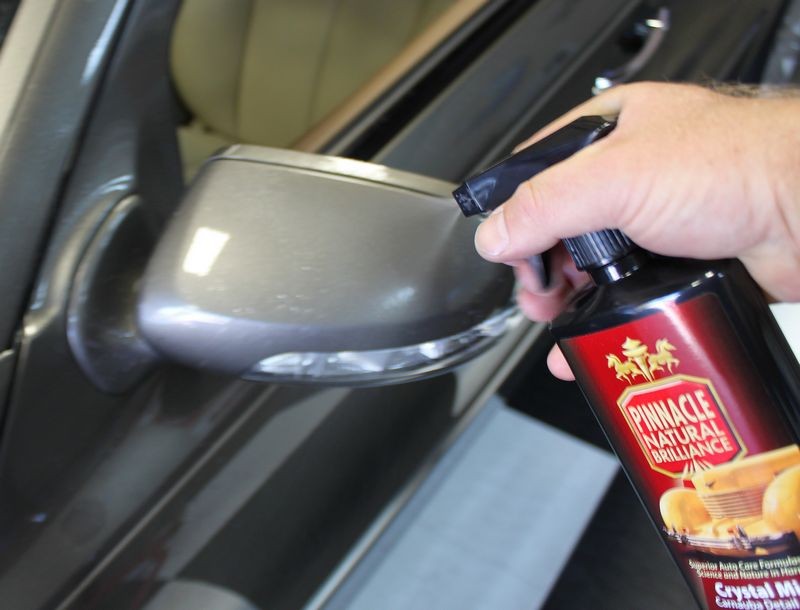
When following the approach of
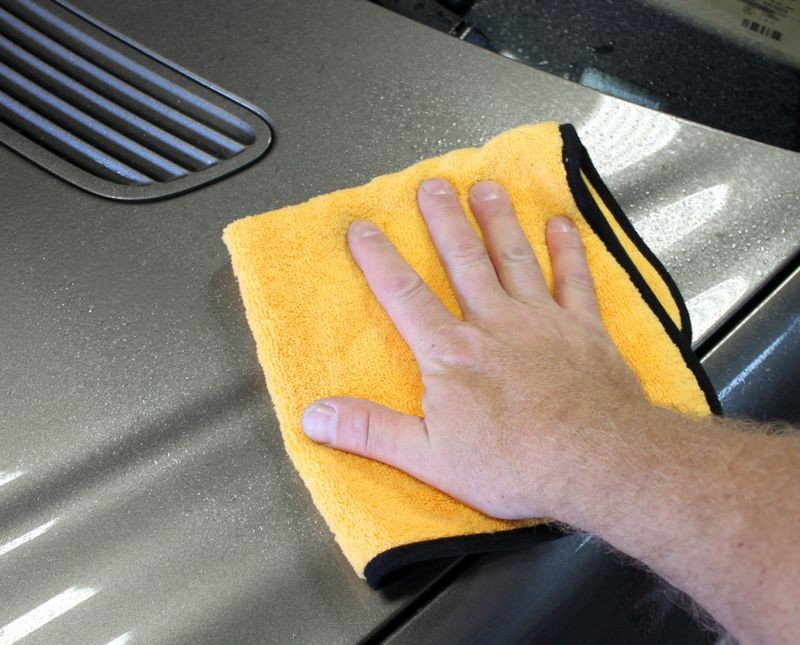
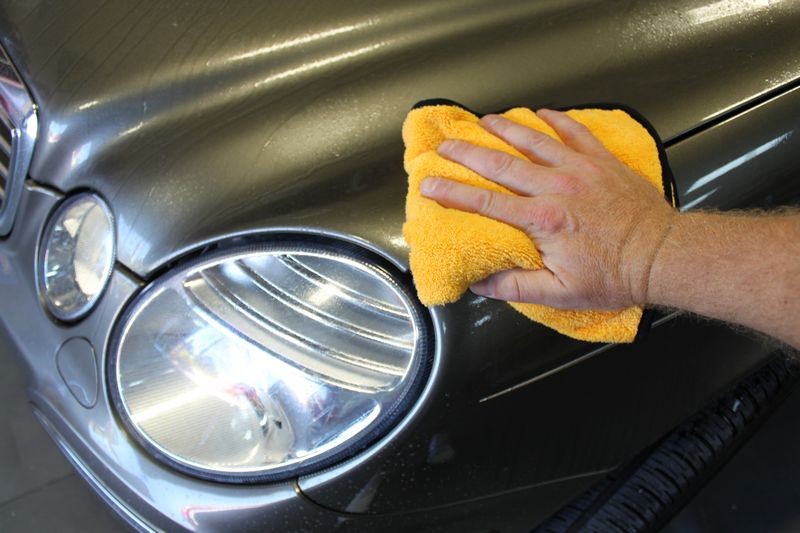
using the least aggressive product to get the job done, the first thing you want to do is to see if you can either wipe the sprinkler water spots off or wash the sprinkler water spots off. Since this car was recently washed and waxed and it's kept inside a garage when not being driven, we're going to try to wipe them off using a spray detailer with a clean, plush microfiber towel.
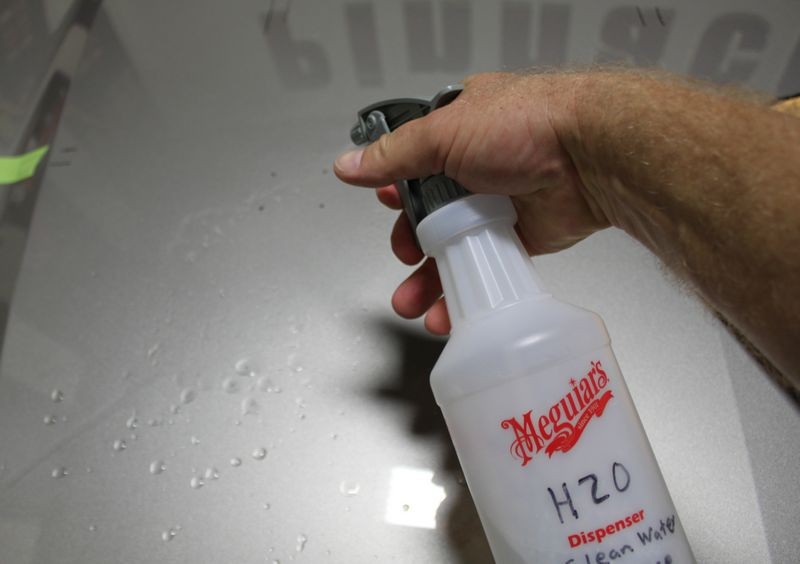
When removing fresh water spots, use your spray detailer
heavy, or
wet. Using a product heavy or wet means using extra product, more than you might normally use. The reason for his is you want
lots of lubrication on the surface to help prevent any potential scratching or marring of the finish as you're wiping.
Remember, always fold your microfiber towels 4 ways to give you 8 wiping sides with plenty of cushion to spread out the pressure from your hand and wipe the paint gently.
Start out by spreading the spray detailer around to one section and then flip or fold your microfiber towel to a fresh or clean portion to remove the residue and buff to a dry, high shine.
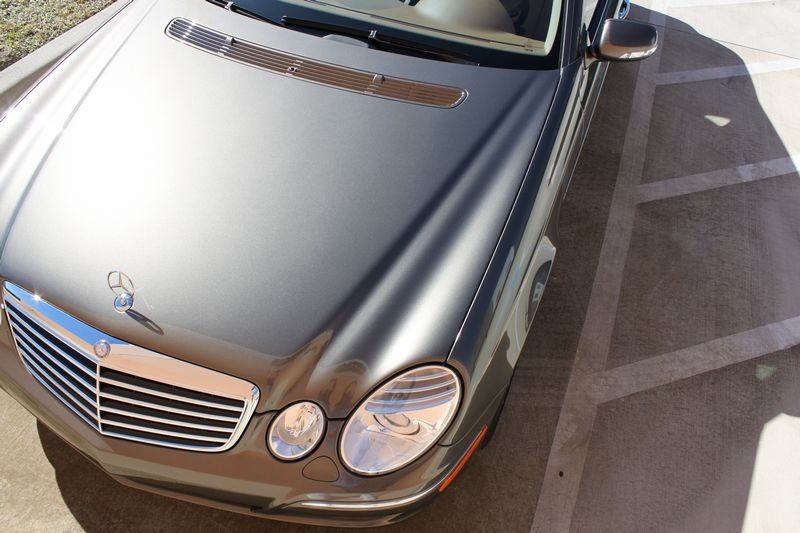
Luck is with us... the paint is safe as the Sprinkler Water Spots did not etching into the paint and using plenty of spray detailer and a clean plush microfiber towel left a scratch-free finish.
The best time to prevent serous damage is to remove the water spots as soon as you see them.
Good advice, same goes for Bug Splatter... always keep an emergency kit in your car.
How To Build Your Own Emergency Car Care Kit
Go on YouTube and search ammonyc and look for his video where he shows how professionals wetsand and he uses a paint depth to show you exactly how much on average wetsanding, compounding, and polishing removes from the clear after each set.
Hope this helps.
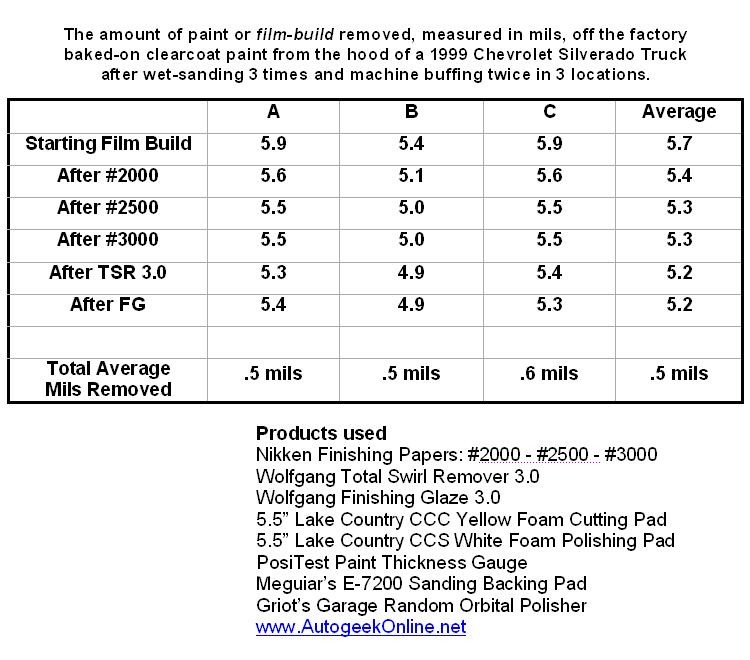
While not a video, I documented this by taking paint thickness readings after each step and the results were...
After sanding, compounding and polishing I remove approximately .5 mils and this was a factory GM clearcoat.
See the complete article here, something I did back in
2009
Removing Orange Peel & Sanding Marks with the Griot's ROP and the Wolfgang Twins
Below are just a FEW pictures from the entire write-up which is probably one of the most complicated projects and write-ups I've ever undertaken.
Next, use
plenty of water from a clean source to lubricate the surface while sanding. Add a little soap, (a few drops is all that's needed, don't go crazy with the soap), and as you sand, continually spray water to the section you're sanding as this will make each stroke easier. Seriously, spray water onto the surface after every other stroke or two you'll find the paper will cut a lot smoother.
Hold the backing pad
canted, or at an angle, see how the tip of the paper-wrapped backing pad is leading as I move my hand forward. Don't hold the pad squared-up as you sand because you'll tend to cut deeper ruts if you sand with the pad in perfect perpendicular alignment in the direction of your strokes.
Right - Hold backing pad at a little bit of an angle while making front to back strokes.
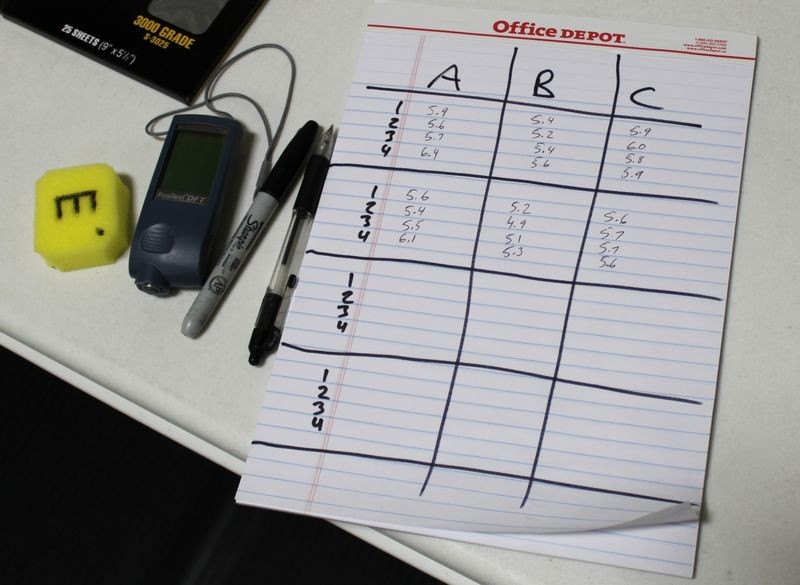
After wiping the surface clean, I placed the
3M Painter's Tape Grid System back onto the panel as best as I could and then made my marks using the Foam Equalizer and then used the PosiTest PTG to take measurements and record them.
In this shot I'm taking the last measurement in Location C and then recording it.
The PosiTest Paint Thickness Gage is easy to read...
Crunching the numbers, here's the results...
Here's a graph showing the very small amount of paint removed during each procedure.
Most car manufactures say that .5 mils can be removed safely from a factory finish. During this entire process my goal was to approach the sanding and buffing just like I would if I were really sanding down the factory finish on a customer's car.
I let the PosiTest Paint Thickness Gage tell its own story as I measured after each step as accurately as possible.
From the measurements taken, it looks like the process in totality removed approximately .5 mils of film-build. This is at the safety margin.
")