Mike Phillips
Active member
- Dec 5, 2022
- 51,004
- 6
How to machine wax your car using the Griot's Garage 6" DA Orbital Polisher
The below was originally posted in 2016 in post #6 of this article,
How to use Griot's Garage to detail your car - A detail job Richard Griot would be proud of!
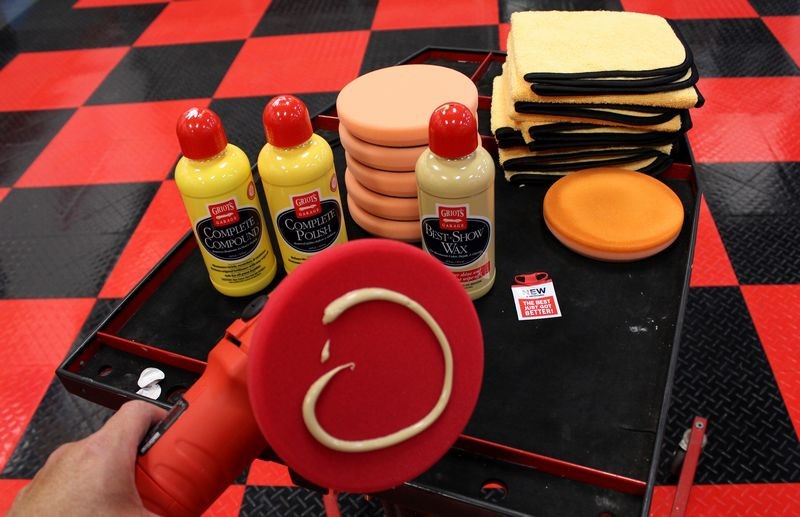
Step 6: The Sealing Step with Griot's Best Show Wax
Products used
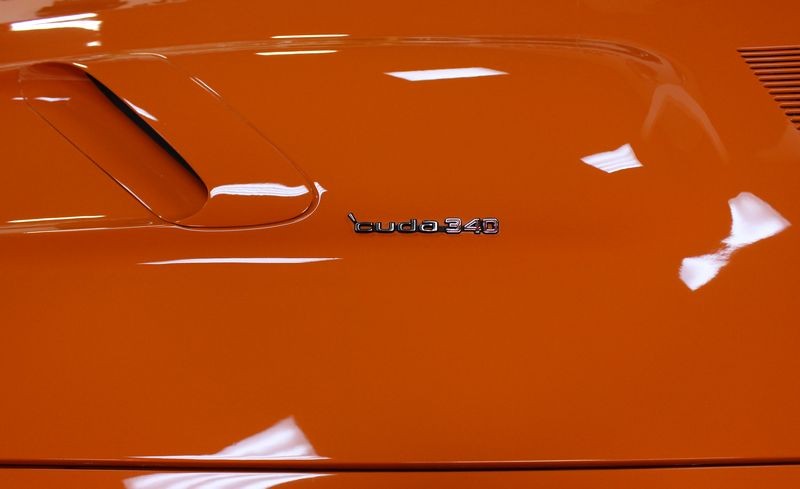
If you look closely you can see a thin film of wax on the paint.
.
Machine Waxing Technique
The machine waxing technique is nothing like the compounding or polishing steps. At this point all you're trying to do is spread a thin uniform layer or wax over the paint.
Work large sections
You DON'T have to work small sections like you do when compounding and polishing. In fact, you work as large of a section as you can reach as long as you can see that you still have enough product on the surface to spread out via the polisher.
The big idea
The big idea behind machine waxing is to remove your hand from the process and thus pressure points from your fingertips. You're also able to work faster and do better work. The human hand can never compete with a machine applied wax.
Allow the wax to dry to a haze
Before removing the wax allow it to dry to a haze. In most cases after applying the wax, you can start removing the wax where you first started out when applying it and then simply,
Follow your path of travel
The Griot's Best of Show Wax dries quickly when applied correctly and applied correctly means a thin layer.
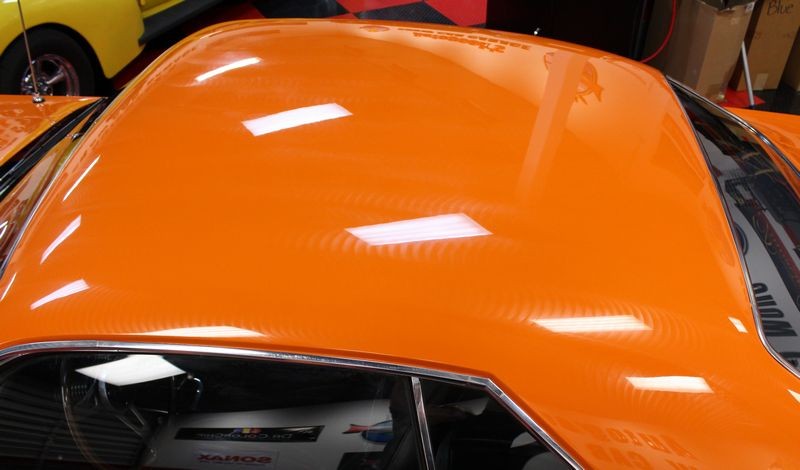
Roof is Finished
Here's the results after the roof was compounded, polished and waxes.


I explain why to knock out the roof first, (before doing the rest of the car), all the way from start to finish here,
Knock out painted roofs first, then tackle the rest of the car...
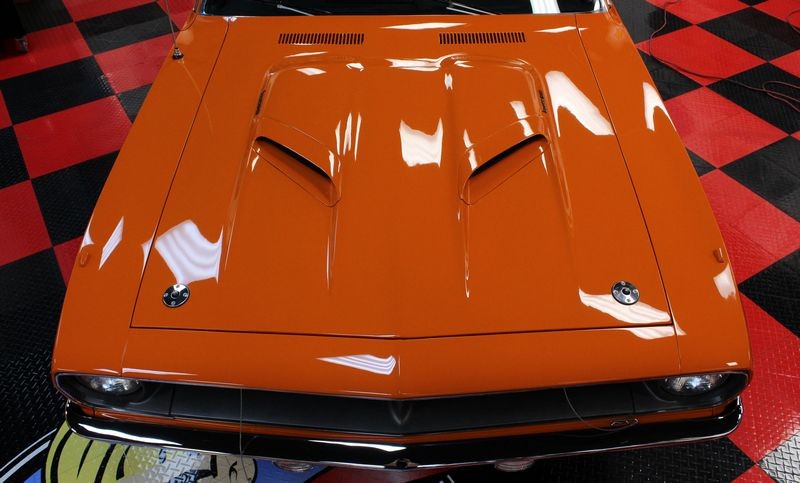
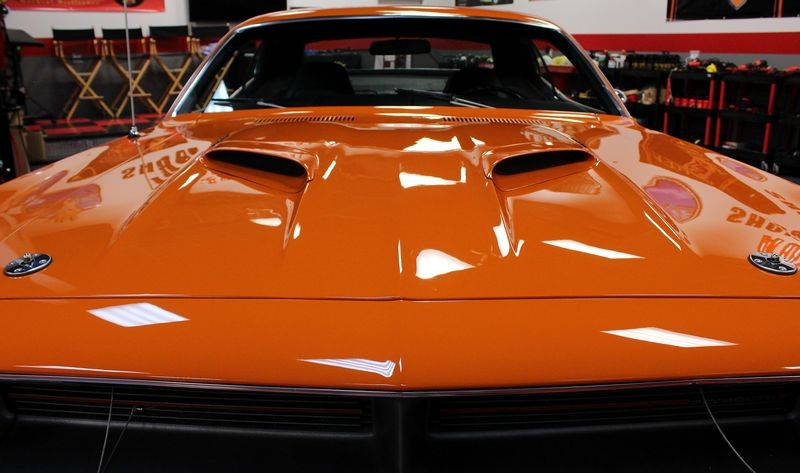
Hood and Trunk Lid Finished
Here's the results after the hood and trunk lid were compounded, polished and waxed.
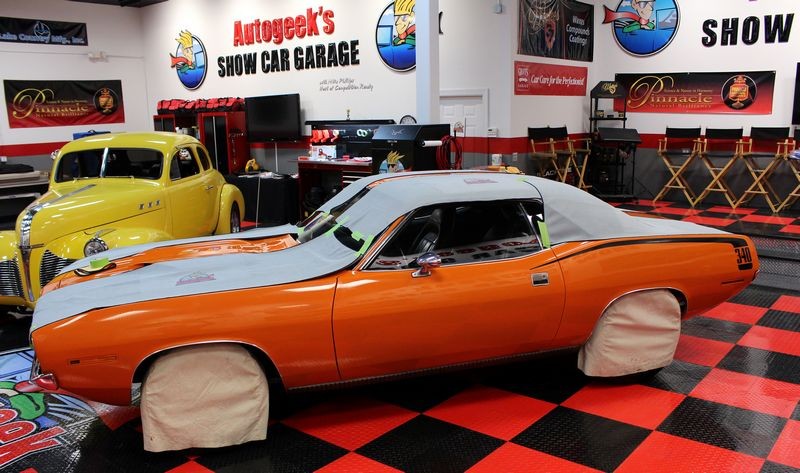
All that's left now are the 6 side panels.
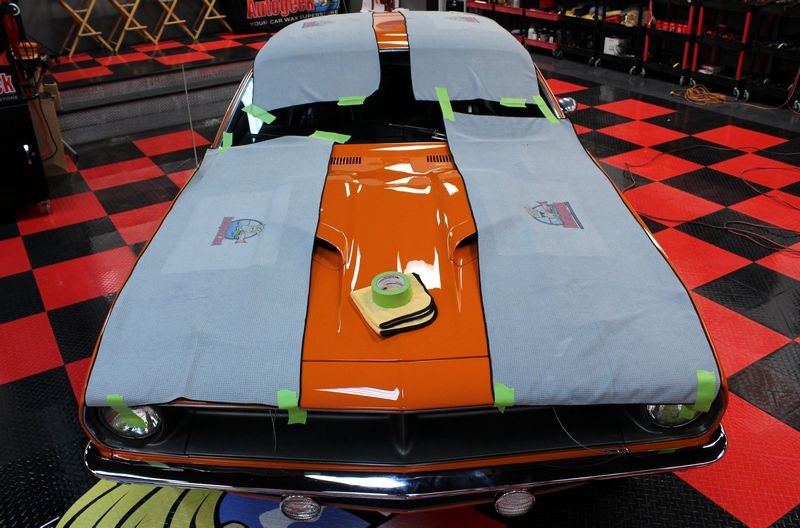
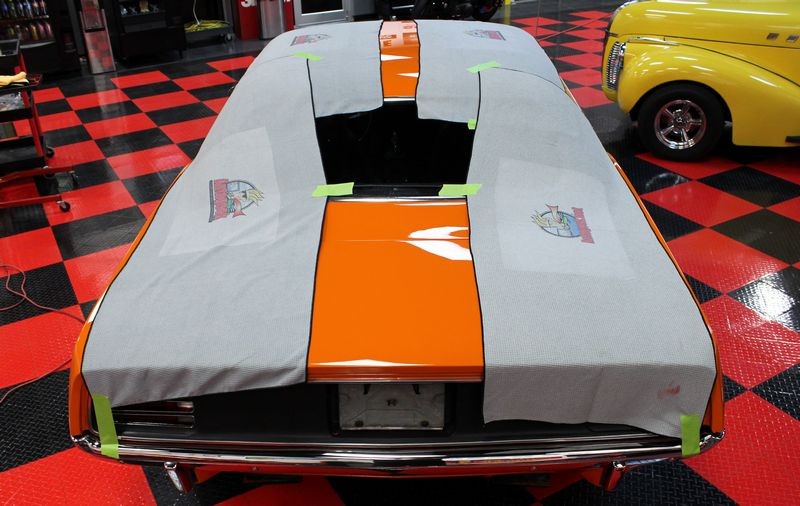
Autogeek Cover-up Towels
Horizontal surfaces are finished, before I tackle the vertical panels I placed Autogeek Cover-up Towels over the waxed surface to protect them from any compound or polish splatter as I work around the sides of the car.
I cover this technique and why to do it on page 118 of my how-to book The Complete Guide to a Show Car Shine

Sorry... no pictures of any of the compounding, polishing or waxing being performed to the horizontal surfaces or the vertical surfaces. I detailed this car a few days before Team Autogeek left for SEMA 2016 and all staff was busy with normal job duties.
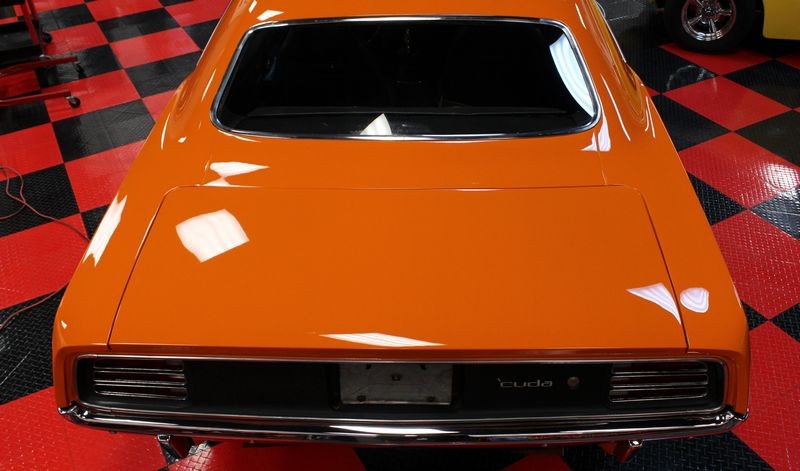
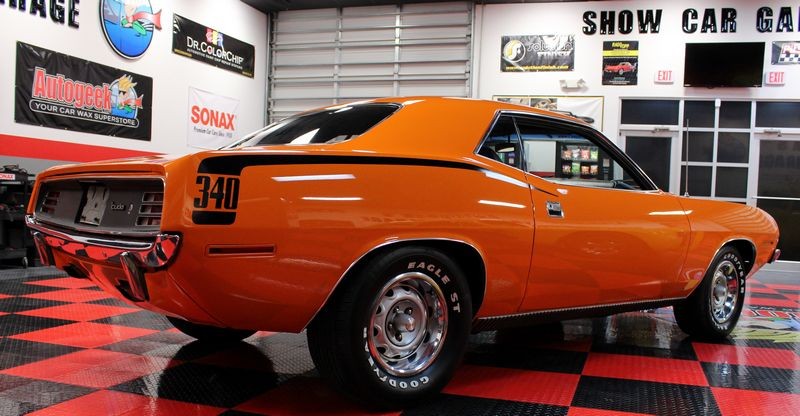
Here's the final results or what I call...
The Beauty Shots!


On Autogeek.com
Griots Garage 6 Inch Random Orbital Polisher
Griots Garage 5.5 inch Red Foam Waxing Pad
Griots Garage 6 inch Surface Prep Pad
Griots Garage Best of Show Wax 16 oz
")
The below was originally posted in 2016 in post #6 of this article,
How to use Griot's Garage to detail your car - A detail job Richard Griot would be proud of!
Step 6: The Sealing Step with Griot's Best Show Wax
Products used
- Griot's Garage Best of Show Wax
- Griot's Garage 5.5" Red Foam Waxing Pad
- Speed Setting - 2.0
If you look closely you can see a thin film of wax on the paint.
.
Machine Waxing Technique
The machine waxing technique is nothing like the compounding or polishing steps. At this point all you're trying to do is spread a thin uniform layer or wax over the paint.
Work large sections
You DON'T have to work small sections like you do when compounding and polishing. In fact, you work as large of a section as you can reach as long as you can see that you still have enough product on the surface to spread out via the polisher.
The big idea
The big idea behind machine waxing is to remove your hand from the process and thus pressure points from your fingertips. You're also able to work faster and do better work. The human hand can never compete with a machine applied wax.
Allow the wax to dry to a haze
Before removing the wax allow it to dry to a haze. In most cases after applying the wax, you can start removing the wax where you first started out when applying it and then simply,
Follow your path of travel
The Griot's Best of Show Wax dries quickly when applied correctly and applied correctly means a thin layer.
Roof is Finished
Here's the results after the roof was compounded, polished and waxes.
I explain why to knock out the roof first, (before doing the rest of the car), all the way from start to finish here,
Knock out painted roofs first, then tackle the rest of the car...
Hood and Trunk Lid Finished
Here's the results after the hood and trunk lid were compounded, polished and waxed.
All that's left now are the 6 side panels.
Autogeek Cover-up Towels
Horizontal surfaces are finished, before I tackle the vertical panels I placed Autogeek Cover-up Towels over the waxed surface to protect them from any compound or polish splatter as I work around the sides of the car.
I cover this technique and why to do it on page 118 of my how-to book The Complete Guide to a Show Car Shine
Sorry... no pictures of any of the compounding, polishing or waxing being performed to the horizontal surfaces or the vertical surfaces. I detailed this car a few days before Team Autogeek left for SEMA 2016 and all staff was busy with normal job duties.
Here's the final results or what I call...
The Beauty Shots!
On Autogeek.com
Griots Garage 6 Inch Random Orbital Polisher
Griots Garage 5.5 inch Red Foam Waxing Pad
Griots Garage 6 inch Surface Prep Pad
Griots Garage Best of Show Wax 16 oz