How to prep your car for winter

Joined
Dec 5, 2022
Messages
51,004
Reaction score
6
How to prep your car for winter


Prepping_You_Car_For_Winter_05.jpg


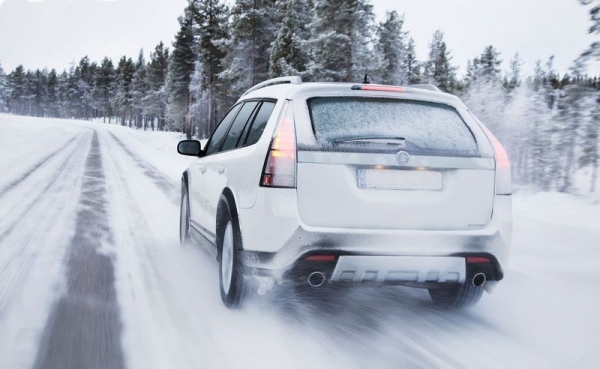
When old man winter arrives and sets in, for a lot of people, there won’t be another good chance to wash and do any type of exterior car detailing due to the weather and cold temperatures. That is, it’s just too cold outside to work or it’s too wet to much of the time to make detailing your car worth the time, energy and expense.

Instead of washing and detailing their car in the winter months, what a lot of people do is prep their car for winter. The goal of winter prepping is two fold,
1. Choose the best products that will protect your car against the harsh winter weather.

2. Choose the best products that will hold up and last over the length of the winter season.
So lets take a look at a few things you can do for your car help it make it through the winter season unscathed. Then when the sunny, warm weather returns in the spring you can remove any accumulated road film, brake dust, bonded contaminants, swirls and scratches when spring cleaning start!

There’s been a lot of really great new products introduced using the latest in car care technology in the last few years and even in the last few months that will fulfill numbers #1 and #2 which are the goals for winter prepping.


How to prep your car’s paint for winter
Lets start with the big picture, that’s your car’s paint and then we’ll take a look at the other areas of your car that you need to protect before winter hits.

Your car’s paint is one of the most expensive components of your car. It is the process that is the most complicated and most important from a customer’s point of view when any new vehicle is built on an assembly line.

If the paint fails for any reason on your car, getting a top quality paint job that will functionally replace the factory paint job will cost you’re a low of $3000.00 to upwards of $10,000.00 depending upon what you want and the vehicle you’re having painted.

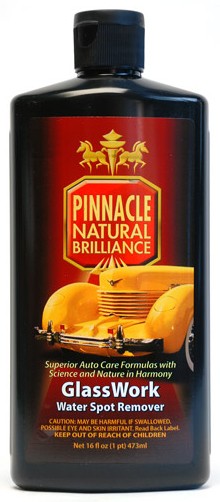
Because most of us would rather invest in taking care of the paint we already have on our car and saving the money it would cost to get it repainted, and because from a visual point of view, the paint makes or breaks the beauty appearance of any vehicle, lets take a look at how to prep your car’s paint for the winter season. Lets look at products that will protect your car’s paint against the harsh winter elements and environment and at the same time can and will last through the winter season.


Let’s take a look at paint coatings...


Paint Coatings
There are three primary categories of products commonly used to protect automobile paint.


1. Car Waxes
Historically, most people think of and consider a car wax as a product that uses a waxy substance to protect the paint, endure over time and add beauty. Most car waxes use Brazilian Carnauba Wax as the ingredient for protection, long life and beauty but there are other types of waxes that are also used in the automotive detailing industry, such as Montan Wax, Beeswax and even Paraffin Wax which is a petroleum distillate.

Traditional car waxes, both paste and the liquid versions have been with us the longest in the context of the history of the automobile and have a strong and loyal fan base for the rich, warm glow they impart and the positive aesthetics and even therapy associated with hand applying a coat of wax on a Saturday afternoon to your pride and joy.

Until man-made synthetic paint sealants were introduced starting in the 1950’s, the traditional car wax was in it’s time considered a long lasting option to protect your car’s paint. But then in the 1950’s car wax companies started introducing synthetic paint sealants that used man-made ingredients for protection, endurance and beauty.


2. Synthetic Paint Sealants
As science progressed chemist discovered ways to create substances that could provide the benefits of car wax while providing the chemist with control over the production of and thus quality of these man-made protection ingredients.

The benefits are generally protection ingredients that protect better than a waxy substance, last longer than a waxy substance when compared to identical environments and also create the gloss and shine that everyone loves. While most synthetic paint sealants are liquids there are some options available in paste form.


3. Paint Coatings
It used to be a paint coating was something a less than honest salesperson would try to sell you when you bought a new car but for the most part these were just synthetic paint sealants with a warranty that most people forgot about and/or never took advantage of once the newness of buying a new car wore off.

Although sold as a miracle product that would create an invisible force field around your car and protect it forever, this just wasn’t true and they only lasted as long as products described in the synthetic paint sealant category. While they will last longer than a traditional car wax they did not live up to the promises they were sold with.


Real paint coatings are now a reality
In the last few years, paint coatings have transitioned from snake oil to the real deal. The technology behind this is real and claims for protection, durability and beauty are honest. The best news is you don’t have to pay an arm and a leg to have someone apply them to your car using some secret technique… you can do it yourself.


Below we’ll take a look at Detailer’s Paint Coating as an option for meeting the two goals I’ve listed above for prepping your car’s paint for winter. Besides being able to protect your car’s paint and the ability to last through a harsh winter, it will also impart a high gloss appearance with a slick finish, which is also important to us car guys and car gals.


Detailer’s Paint Coating

detailer-s-paint-coating-2.jpg


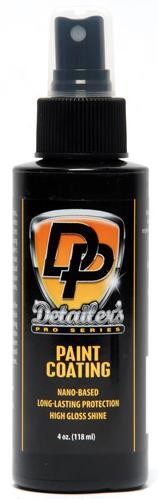
This is the new kid on the block but this paint coating has taken a great idea, that is a coating that becomes a functional part of the paint itself, and tweaked it in a way as to make it a lot more user-friendly.


What’s in the bottle?
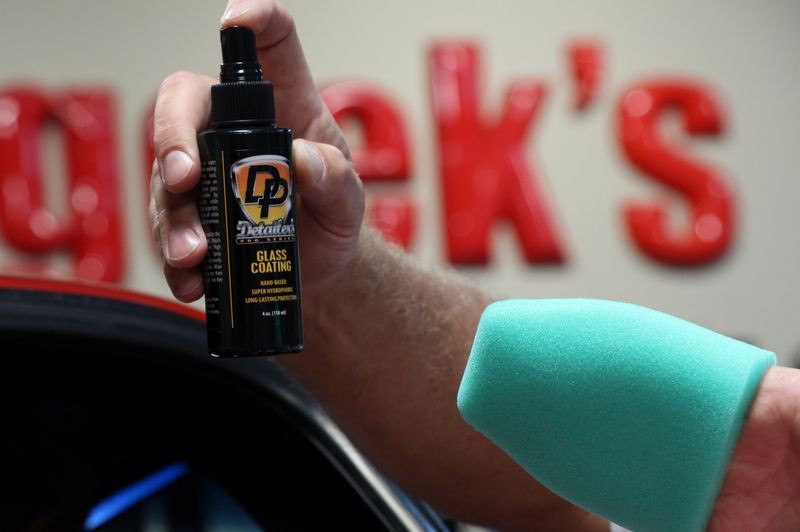
Detailer’s Paint Coating uses nano-glass ceramic particles blended with state of the art cross-linking polymers to form a strong bond to automotive paints functionally becoming a part of the paint. It’s almost like adding another layer of clear paint to your car’s current finish.


High gloss, slick finish
Some coatings leave your car’s paint feeling rubbery which is opposite from how most people like their car’s paint to feel to the touch. Detailer’s Paint Coating is unique in this area as it leaves your paint feeling very slick and glassy. This slickness plus the high surface tension produced by the nano-glass ceramic particles work together to create a self-cleaning effect. This self-cleaning effect keeps your car cleaner longer in-between regular washings. This characteristic is another reason why Detailer’s Paint Coating is a great choice for protecting your car’s finish through the winter season.


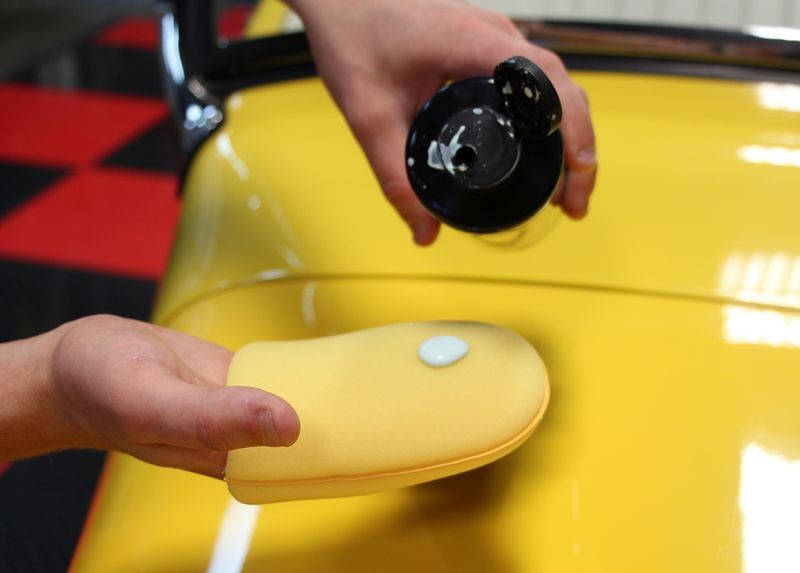
Spray-on Application
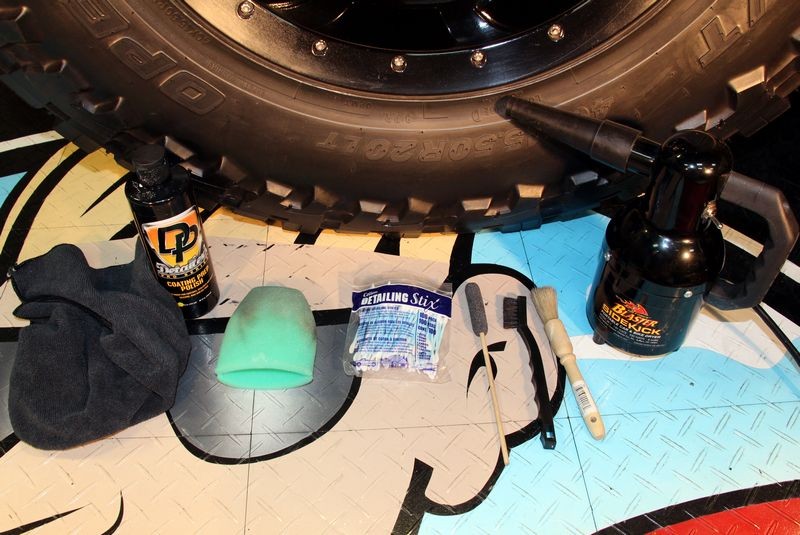
Unlike other paint coatings, Detailer’s Paint Coating comes in a bottle that includes a pump sprayer to make application a lot easier. An important part of the pump sprayer is how well it atomizes the liquid coating. By atomizing the liquid into a very fine mist this enables the user to spray small amounts of the coating to a large area thereby aiding in the most important step and that’s spreading out a thin, uniform layer of the coating. Detailer’s Paint Coating is incredibly easy to use, even if it’s you’re very first time using a paint coating instead of a car wax or synthetic paint sealant.


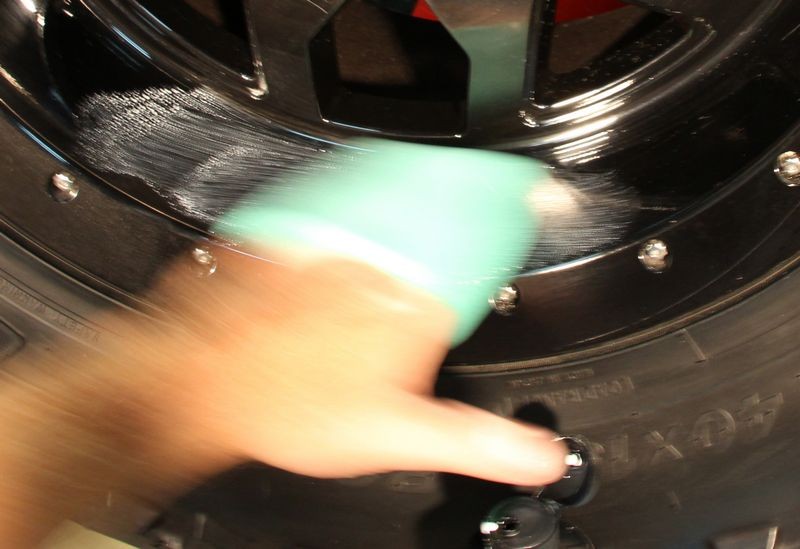
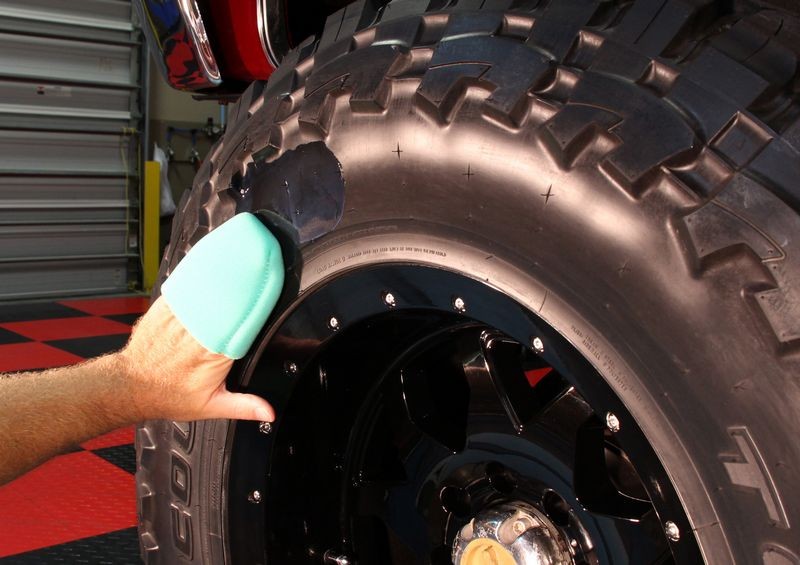
Gently spread over one panel at a time
After misting a light spray of the liquid paint coating onto a panel, all you have to do next is spread the coating over the entire panel using a clean, soft foam applicator pad. As you’re spreading the product out you look at the panel being coated at an angle to ensure any high spots or excess residue is smoothed over.


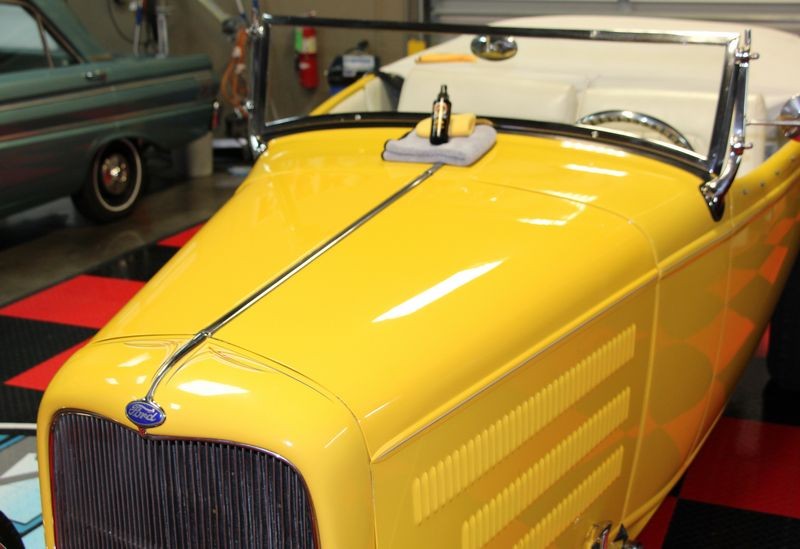
Lightly buff to to a high shine
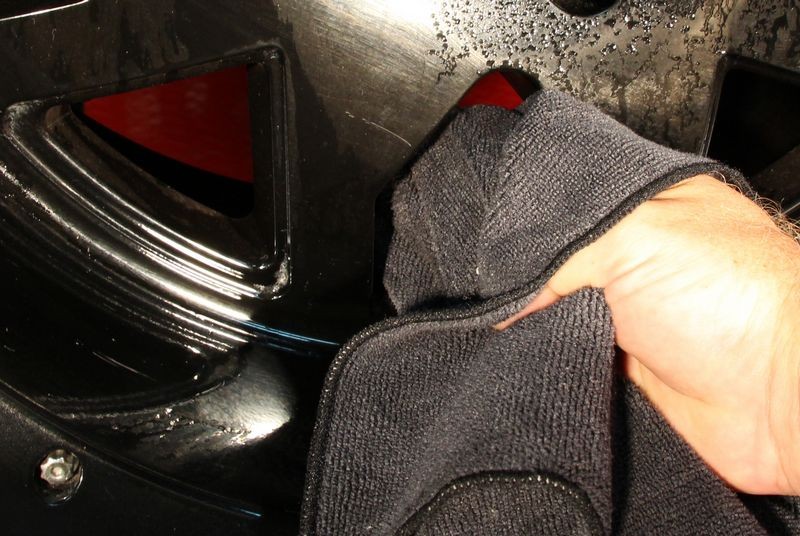
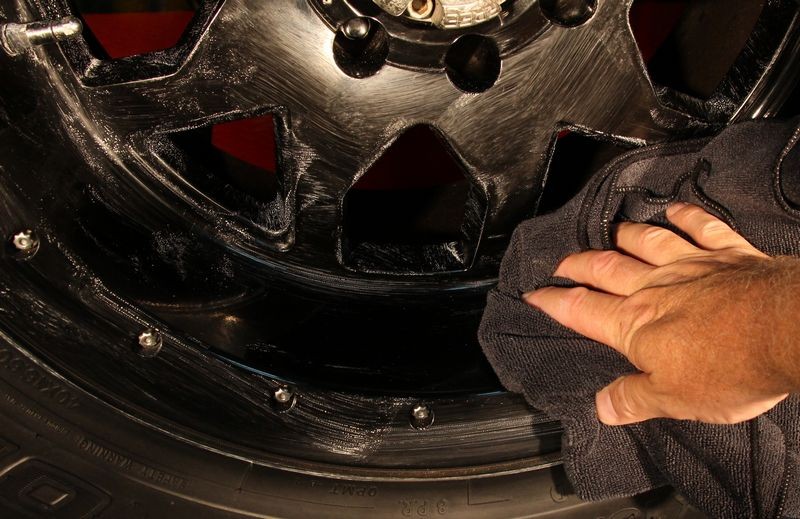
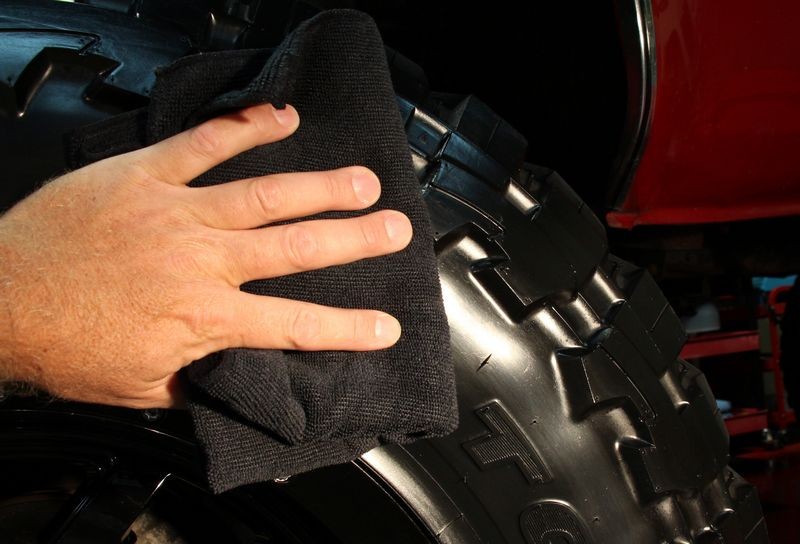
After treating a single panel, next you take a clean, dry microfiber towel and lightly buff the panel to remove any excess residue and to create a high gloss, uniform appearance. After the final wipe you’re done with this panel and then simply repeat this process to each painted panel.


For tips on how to apply Detailer’s Paint Coating, see my article here,

How to apply Detailer's Paint Coating

1932_Ford_Phaeton_117.jpg


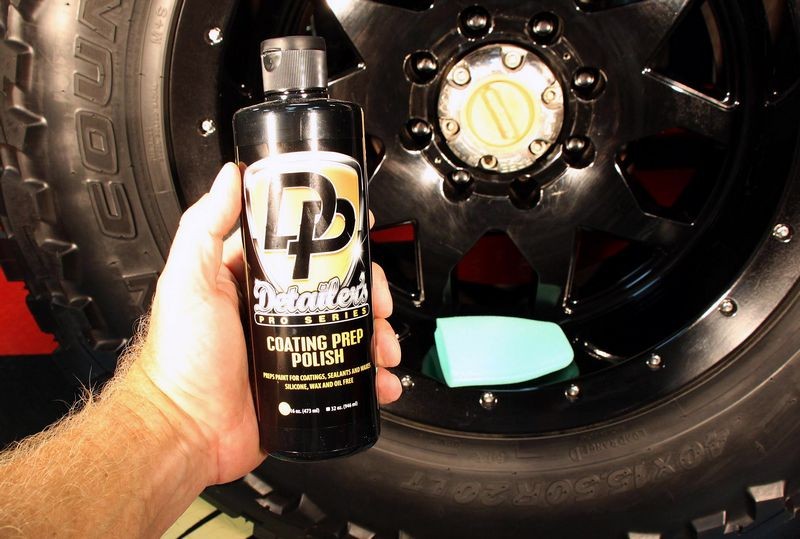
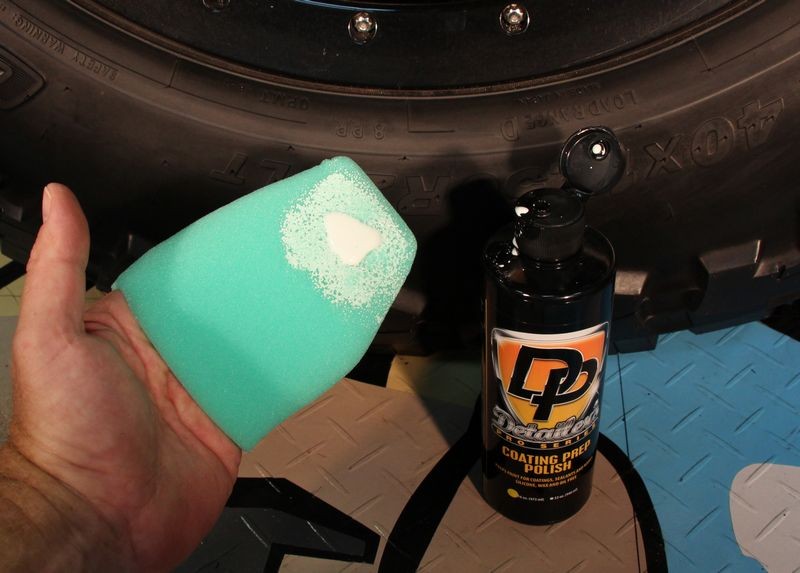
Pre-Coating Paint Prep
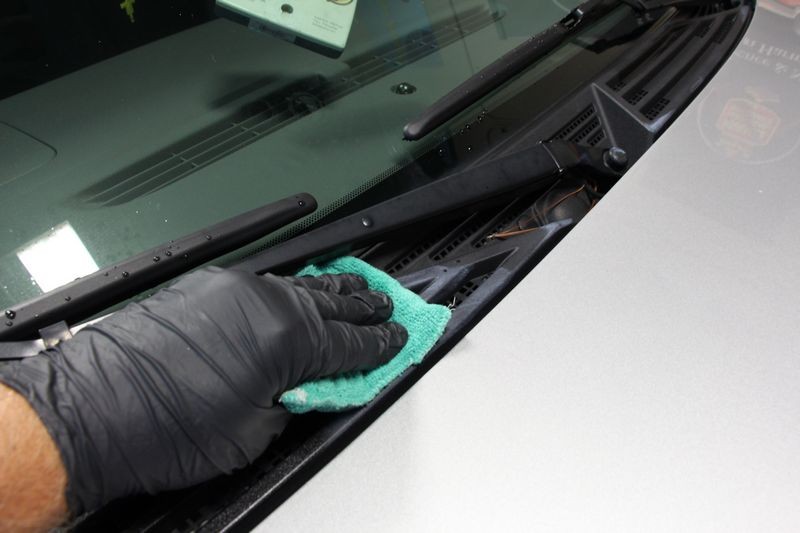
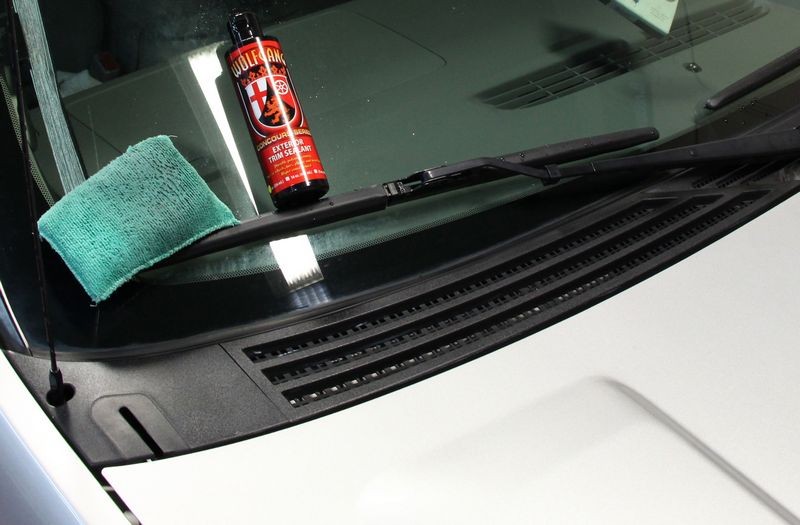
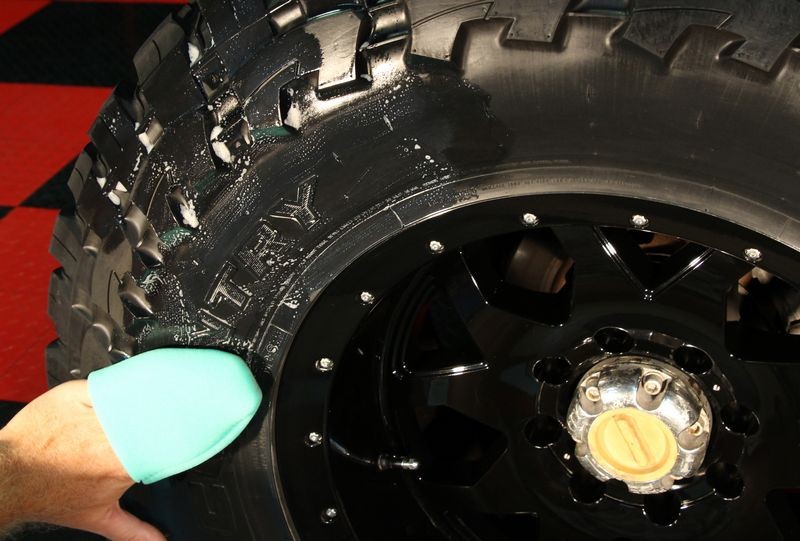
In order to prepare your car’s finish for application of the Detailer’s Paint Coating you must first clean the paint surface to remove any contaminants, previously applied waxes or sealants or polishing oils. This too is a very easy procedure that you can do by hand or machine.

For tips and techniques on how to use Detailer’s Paint Coating Prep, see my article here,

How to use Detailer's Paint Coating Prep

1932_Ford_Phaeton_104.jpg


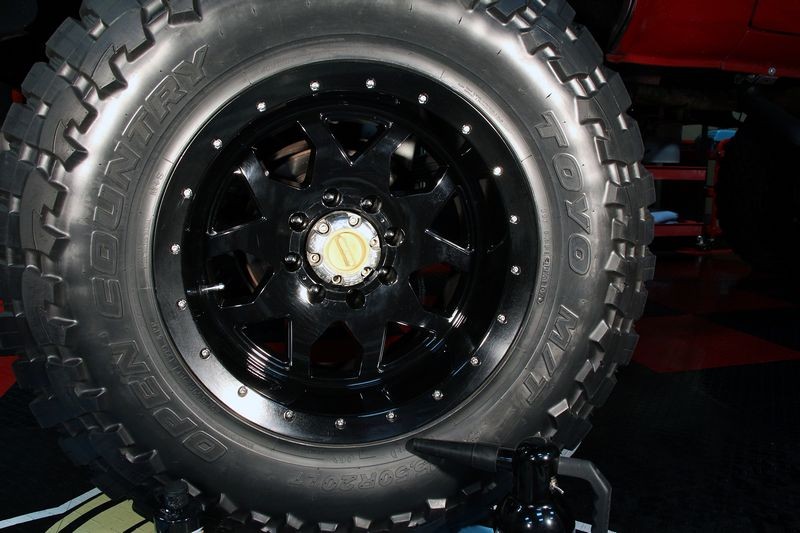
Paint fully protected and ready for winter
After prepped and then coated your car's exterior painted body panels not only will your car look great! It will also be protected to get your car through the harsh winter months until the sunshine returns in the spring!
1932_Ford_Phaeton_127.jpg


:)
 
How to prep your car’s glass for winter


Let’s take a look at how to prep your car’s exterior glass for the harsh and wet winter season.

Keeping you’re car’s glass and especially the front windshield clean and clear is crucial for winter driving conditions. Depending upon where you live you’ll be exposed to rain, snow, hail and yes, even fog which is tiny droplets of water that can hinder your vision.

There are two primary steps to maximize glass clarity through the winter,
1. Polish glass to remove road film and water spots.

2. Seal glass with a coating to help keep glass clean and create a hydrophobic surface.
How to remove road film & water spots
Just like your car’s paint can become stained by road film this same thing can happen to your car’s exterior glass and especially the front windshield because it’s the front windshield that receives all the tire spray from cars driving in front of you.

What is road film?
Road film is an oily dirt film that is created from all the various fluids older vehicles drip as they are driven down the road. Fluids like motor oil, transmission fluid, radiator fluid, brake fluid, gear oil, etc., drip on to roads and highways as cars are driven in the same way they drip when they are parked. To show you what I mean, take a look at the parking spaces in the parking lot of any store and in the front center of most spaces you’ll see dark patches which are all the fluids all the thousands of cars have dripped over the years after the owner has parked the car to go into the store.


In the same way cars, trucks and suvs drip fluids when they are parked they also drip these same fluids as they are being driven. These oily fluids build up down the center of the driving lanes of roads and freeways and when it rains these oils fluids mix with the rain water and the dirt that is also accumulated on roads and highways and then sprayed all over your car by the tires of vehicles driving in front of you.


This oily, dirty splatter coats your entire car with road film and this includes your windshield. Because it build up over time you don’t notice it until really becomes a problem. Normal washing and regular glass cleaners are not strong or effective enough to cut through the film and remove the road film so this is why before winter arrives it’s a good idea to prep your car’s windshield and other windows by polishing them with a glass safe polish.


Water Spots
Besides road film, most cars that are driven on a daily basis have water spots on the glass. The spots are actually the residue rings made from minerals, dirt and chemicals in the form of air pollution that are all dissolved into water sources like rain water and also city or well water.

Anytime your car’s exterior glass windows gets wet with rain water, wash water from car washes or sprinklers, after the water evaporates the dissolved dirt, minerals and pollution remain behind to form water spots. Normally these residues form a strong bond to the glass, mixing with the road film and normal washing and the use of spray-on glass cleaners won’t remove them. This is another reason why you need to polish your car’s exterior glass using a glass-safe polish.

A glass safe polish, whether applied by hand or machine will remove both road film and water spots and restore a crystal clear glass surface for safe driving.

Pinnacle GlassWork Water Spot Remover

Prepping_You_Car_For_Winter_06.jpg


This glass polish uses glass-safe abrasive technology plus a blend of citrus based mineral dissolving agents to safely clean and remove road film and water spots off glass. You can apply this glass polish by hand or machine.


Glass Coatings
Polishing your car’s glass and then applying a glass coating is an excellent way to prep your car for the winter season. Removing road film and water spots will make driving safer by ensuring maximum clarity for your car’s windshield, side and back windows.

Detailer’s Glass Coating

Prepping_You_Car_For_Winter_07.jpg


Detailer’s Glass Coating uses nano-glass ceramic particles to create an extremely hard, crystal clear coating over glass that fill in the microscopic imperfections to make glass perfectly smooth. This glass coating helps keep your glass cleaner longer and which helps keep your glass clearer longer. Once your glass has been polished optically clear you can apply a glass coating which will do four things,
1. Create a super hydrophobic surface that repels rain, water, dirt, air-borne contaminants, pollution and oily road film from splatter slung by cars driving in front of you.

2. Cause rain water to bead-up and fly off your windshield at medium to fast travelling speeds.

3. Make it easier for your wipers to clear your windshield faster and more completely.

4. Hinder future road film and water spots from forming.
Application is simple,

Step 1 - Prep glass by removing any pre-existing road film or water spots using

Step 2 - Mist a spray or two onto the face of a clean, foam applicator pad.

Step 3 - Spray a mist of Detailer Coating directly onto a window and then spread over the glass.

Step 4 - Use a clean microfiber towel to lightly buff to a clear shine.


Prep_Glass_For_Winter_020.jpg


Windshield Washer Additives
Here's one more great way to keep your car’s windshield clear and clean through the winter months and that is to add a windshield water additive to your windshield washer reservoir.


Pinnacle GlassWork Windshield Washer Booster

Prepping_You_Car_For_Winter_08.jpg


This is a concentrated product that offers some great benefits for safer winter driving.
1. Increases the cleaning power of your windshield washer fluid.

2. Decreases streaks and smears.

3. Helps your wipers to remove and clear glass faster and easier.
Simple to use
Pinnacle GlassWork Windshield Booster is concentrated, on ounce will treat 1 gallon of windshield washer fluid. The bottle comes with a built-in measuring chamber to ensure the correct dilution each time you re-fill your windshield washer reservoir.

Simply squeeze the bottle to fill the chamber then remove the lid and pour the concentrate into the reservoir.

Prepping_You_Car_For_Winter_09.jpg
Prepping_You_Car_For_Winter_10.jpg


For tips on how to use Pinnacle GlassWork Windshield Washer Booster see my co-worker Nick's article here,


Pinnacle GlassWork Windshield Washer Booster


:)
 
Exterior Plastic, Rubber & Vinyl Trim


Modern cars often times have a lot of black or gray rubber, plastic or vinyl trim that when neglected and left exposed to outdoor climates, repeated exposure to the sun and inclement weather will cause these materials to oxidize, fade and in simple terms, turn ugly.

My best advice - Seal Trim when it's brand new!
When people buy a brand new car with any type of black or gray exterior trim, it looks good, often times adding sharp contrast to the panted panels. The reason it looks good is because it’s new and because it looks good most people don’t perform any type of preventative maintenance to keep it looking new.

Instead, most people wait till the trim on their car is visually and noticeably faded before taking any action.

My best and strong advice is to start taking care of your car’s black and gray plastic, rubber and vinyl trim immediately. Don’t wait for it to fade and turn ugly because once these types of materials go south restoring them to a like new appearance will require more work and more frequent attention.

Besides regularly maintaining black plastic, rubber and vinyl trim as preventative maintenance, it’s a good idea to do a thorough cleaning and then sealing of these surfaces before winter arrives.

Wolfgang Exterior Trim Sealant
Trim_Sealant.jpg


I love this product. It makes your trim look great. It lasts a long time. It won’t run or wash off the car in the rain. It’s easy to use.

The most common complaint I hear from people about trim dressings sold for exterior plastic, rubber and vinyl trim is they don’t last very long. More than that, people get angry and upset to see the dressing they recently applied run off the trim and streak down the side of their car when it rains or after the car is washed. It frustrates people to see previously rich looking trim components revert back to the dull, faded and ugly looking appearance they had before the dressing was applied.


Here’s the good news…

Wolfgang Exterior Trim Sealant isn’t a dressing… it’s a sealant and there’s a difference. Plastic, rubber and vinyl surfaces don’t absorb liquids very well and dressings tend to be very topical, that is they sit on the top of the surface and are easily rinsed or washed off.


Wolfgang Exterior Trim Sealant is clear and highly water resistant. The synthetic polymer formula cures to the surface making it highly water resistant while UV blockers provide excellent protection from the sun. By sealing the surface and making it water proof oxidation is virtually stopped in it’s tracks. The formula is clear, not a dye and yet it restores a deep, dark rich look to black and gray trim.

Like I said, the trick to keeping your black and gray trim protected and looking great for as long as you own your car is to using Wolfgang Exterior Trim Sealant when your car is brand new and regularly apply it to keep it that way.


What about faded trim?
If you’ve neglected your car’s trim or perhaps you purchased your car used and the previous owner neglected the trim then Wolfgang Exterior Trim Sealant can and will restore a like new condition in most cases. For situations where the trim is past the point of no return than chances are good nothing short of dying the trim will restore a like new appearance and just like you need to regularly maintain trim in good condition, now you’ll have to continue to apply the dye to maintain its appearance. There are no one-application miracle products for materials like plastic, rubber and vinyl when they are exposed to the elements as part of the exterior design on a car.


How to prep plastic, rubber and vinyl for winter

For trim in good to excellent condition
Simply wash your car as you normally do and then after the trim has dried, apply the Wolfgang Exterior Time Sealant using a clean, soft foam or microfiber applicator pad. Work the product thoroughly into and over the surface and allow it to penetrate for a few moments and then wipe the surface dry removing any excess using a clean, dry microfiber towel.

Here's some black pebble textured plastic trim on a Chevrolet Avalanche. Not only has it been neglected, it also looks like someone applied some type of wax to it not knowing that you don't use wax on plastic trim. When I washed this truck I scrubbed the plastic trim using an APC but the sad thing is, once you get wax on this type of plastic it's almost impossible to remove 100%.

Faded_Black_Trim_001.jpg


For a little extra scrubbing action I'm using a microfiber applicator pad and you can see I've poured just a small amount of Wolfgang Exterior Trim Sealant onto the pad. The trim sealant is very thin so hold the pour spout right onto the pad when applying product to the pad.

Faded_Black_Trim_002.jpg


Work the product aggressively over the plastic

Faded_Black_Trim_003.jpg


Faded_Black_Trim_004.jpg


Faded_Black_Trim_005.jpg


Allow the product to penetrate and dwell for a few moments...

Faded_Black_Trim_006.jpg


Wipe off any excess using a clean, dry microfiber towel...

Faded_Black_Trim_007.jpg


This plastic is sealed and ready for winter. I will tell the owner that if they want to keep their black plastic trim looking beautiful like this then they should re-apply the Wolfgang Exterior Trim Sealant at least a 2-3 times a year.

Faded_Black_Trim_008.jpg


Here's another example of what neglected plastic looks like and how it should look going into the winter season...

Faded_Black_Trim_009.jpg


Faded_Black_Trim_010.jpg


Faded_Black_Trim_011.jpg


For trim that is dull, faded and oxidized from neglect
For trim in bad condition, now you’re going to have to do some extra work to restore the trim. What I do is use an all purpose cleaner and a scrub brush to thoroughly and even aggressively scrub the surface of the trim. You can do this by hand or if the trim is large enough what I’ll do is attach a Cyclo brush to a dual action polisher and machine scrub the trim components.

I’d suggest scrubbing the trim first and then washing the car afterwards because chances are good you’re going to get splatter for the scrubbing process onto adjacent painted panels or glass.

After cleaning the trim as best as you can and then washing and drying the car, apply the Wolfgang Exterior Trim Sealant as described above for trim in good to excellent condition.


:)
 
How to prep wheels and tires for winter by Mike Phillips

Winter driving means exposing your car to wet, cold weather and this means exposing your car and especially your wheels, tires and lower body panels to road film.

Road Film
Road film is the oily film splattered all over your car when you drive in the rain. Oils and other fluids that drip out of cars, truck and suvs accumulate on roads and highways over time. When it rains, these accumulated oils and other fluids mix with the rain and are then splattered all over your car in effect staining you're entire car from top to bottom. The highest concentration of road film accumulates on your wheels, tires and lower body panels.


Road_Film_From_Driving_in_the_Rain_01.jpg


Rainy Weather
It's been unusually rainy this summer here in Stuart, Florida, more so than I can remember since I moved here almost five years ago. I haven't washed my truck in at least 2 weeks due to the constant rain and as a result not only is my truck dirty but so are my wheels and tires.

Detailing_Wheels_Tires_For_Winter_001.jpg


Detailing_Wheels_Tires_For_Winter_002.jpg


Detailing_Wheels_Tires_For_Winter_003.jpg


Here you can see the dirt and road film that has built-up on my wheels...

Detailing_Wheels_Tires_For_Winter_004.jpg


Detailing_Wheels_Tires_For_Winter_005.jpg


And my tires are ready for some attention too...

Detailing_Wheels_Tires_For_Winter_006.jpg


Washing Wheels & Tires
Normally I wash my wheels and tires first and then wash my truck starting at the top and work down. But it's hot outside and humid, so to get my wheels clean for this article I'm going ot use a waterless wash.

Detailing_Wheels_Tires_For_Winter_007.jpg


Hyper-Lubricate the surface
The key to using a waterless wash for any cleaning job is to juse lots of product, you want to hyper-lubricate the surface. You also want to use plenty of wheel cleaning towels like the black micoriber towles you see me using.

Detailing_Wheels_Tires_For_Winter_008.jpg


Detailing_Wheels_Tires_For_Winter_009.jpg


Detailing_Wheels_Tires_For_Winter_010.jpg


Detailing_Wheels_Tires_For_Winter_011.jpg


Detailing_Wheels_Tires_For_Winter_012.jpg


Detailing_Wheels_Tires_For_Winter_013.jpg


Much better...

Detailing_Wheels_Tires_For_Winter_014.jpg


Prepping Painted Wheels
Because my wheels are painted and becuase I want to make sure there's no oily film left behind, I'm gong to prep the wheels the same way I would prep body panels for application of Detailer's Paint Coating and that's by using Detailer's Coating Prep Polish.

Detailing_Wheels_Tires_For_Winter_015.jpg


The Wolfgang Foam Fingerpockets work great for my wheel design...

Detailing_Wheels_Tires_For_Winter_016.jpg


Detailing_Wheels_Tires_For_Winter_017.jpg


Getting busy....

Detailing_Wheels_Tires_For_Winter_018.jpg


I'm coating not only the face fot also the insides of the spoke area...

Detailing_Wheels_Tires_For_Winter_019.jpg


Black Microfiber Towels
These towles are perfect for working on both wheels and tires and then dedicate them only for use for wheels and tires. If they get any black stains the stains won't really show so it won't bug you.
Detailing_Wheels_Tires_For_Winter_020.jpg


Detailing_Wheels_Tires_For_Winter_021.jpg


Detailing_Wheels_Tires_For_Winter_022.jpg


Metro-Vac SideKick
I love this tool! If you don't have an air compressor get one of these compact but pwoerful air blowers. In this picture there was some dusty residue left over from the prepping step so instead of chaging it around on the wheel I simply blew it off.

Detailing_Wheels_Tires_For_Winter_023.jpg


Here's some of the tools I used to get the wheels ####-n-span clean...

Detailing_Wheels_Tires_For_Winter_024.jpg


Prep work results...
Here's the wheels after cleaning with Detailer's Coating Prep Polish, they already look a lot nicer.

Detailing_Wheels_Tires_For_Winter_025.jpg


:)
 
How to prep your wheels for winter using Detailer's Wheel Coating

According to the two criteria I use for how to prep your car for winter, you want to,
1. Choose the best products that will protect your car against the harsh winter weather.

2. Choose the best products that will hold up and last over the length of the winter season.
Like paint coatings, wheel coatings form a stronger bond to the surface and thus last longer and of course protect longer. To help protect my wheels through the winter I'm going to seal them with Detailer's Wheel Coating.

The wheels on my truck while not the most expensive wheels on the market are still on the higher end for truck wheels. These are Rolling Big Power 20" custom wheels and are a little north of $400.00 a piece. So I want to protect their gloss black finish.


Detailing_Wheels_Tires_For_Winter_026.jpg


Prime Pad
First I prime my pad using a little Detailer's Wheel Coating to dampen it with product.

Detailers_Paint_Coating_Tips_005.jpg


Mist Detailer's Wheel Coating to section of rim
Next I mist on some wheel coating to one section at a time and then work the coating over the surface and between the spokes. I repeat this until I've worked all the way around the rim.

Detailing_Wheels_Tires_For_Winter_027.jpg


Detailing_Wheels_Tires_For_Winter_028.jpg


Working the coating over the face, barrel and inside the slots between the spokes...

Detailing_Wheels_Tires_For_Winter_029.jpg


Here I'm even using my finger to work the coating into the lug nut barrel...

Detailing_Wheels_Tires_For_Winter_030.jpg


Wipe off any excess coating
Next I take a clean, dry black microfiber towel and softly wipe any excess product or high spots off the wheel.
Detailing_Wheels_Tires_For_Winter_031.jpg


Detailing_Wheels_Tires_For_Winter_032.jpg


Detailing_Wheels_Tires_For_Winter_033.jpg


Black as night...
Washing, prepping and now coating the paint on the wheels has restored a dark, black glossy finish that's incredibly slick to the touch.

Detailing_Wheels_Tires_For_Winter_035.jpg


Detailing_Wheels_Tires_For_Winter_036.jpg


Detailing_Wheels_Tires_For_Winter_034.jpg


:)
 
How to seal and waterproof your tires for winter

Winter weather, that is both the water that comes in the forum of rain, snow, sleet and hail, plus freezing temperatures is hard on your rubber tires.

You can’t do much to change the temperature that affects your tires once winter sets in except if you have a garage to park your car in. So not much I can do for you in this area. You can however do something about water.


Waterproof your tires
There are hundreds of tire dressings on the market. Tire dressings range from high gloss, high shine to low gloss natural sheen. My personal preference is for a dark black, natural sheen, like tire rubber looks when it first comes out of the tire mold only a few ticks darker, just not shiny.

I also don’t like any dressing that is oily or gooey, or makes the tire a dust and dirt magnet. To this point I’m happy to say and even happier to use a product called TUFF SHINE Tire Clearcoat. This is the only tire dressing, or more specifically, tire clear coat that I will use on my vehicles. It’s also for the most part my first product of choice for any and all of my customer’s tires and that’s because it works so well.
• Gives the tires a deep, dark black sheen. The level of sheen depends upon the surface texture of your tires.

• Lasts a long time. In fact, as long as you don’t use a strong cleaner on this coating you won’t remove it.
Dries to the touch and there is no greasy, oils gooey film to have to deal with. The thing I don’t like about most tire dressings is the tire is never really dry to the touch, instead it’s wet with some type of silicone oil or other type of wet oil and anything that touches the tires ends up getting a black, oily residue transferred to it. This could be your hand, your clothes, your wash mitt, tire brushes, microfiber towels and chamois of any type. I abhor this staining issue with other tire dressings, coatings, gels and sprays but that’s just me.

Here's the greasy look...

TUF_SHINE_Review_001.jpg


TUF_SHINE_Review_002.jpg


If you look closely, you can see the sidewall on these tires shows them to be coated with some type of non-drying, oily tire dressing. I'll guarantee you if you run your hand across these tires your hand will turn black.

TUF_SHINE_Review_003.jpg


The Secret to your Tire Success
The secret to getting GREAT results from TUFF SHINE Tire Clearcoat is to start with a surgically clean rubber surface to apply the TUFF SHINE Tire Clearcoat.


TUFF SHINE Tire Clearcoat

TUFF SHINE Tire Clearcoat Kit

Prepping_You_Car_For_Winter_12.jpg


TUFF SHINE offers a top notch tire cleaner that does in fact work incredibly well and I do like to use it. That said, most tire specific tire cleaners and most all purpose cleaners will also do a good job of getting the rubber super clean.

The most common problem surrounding cleaning tires is trying to remove previously applied tire dressings as most tire dressings are by design, waterproof and/or water resistant. This means not only do they not come off in rainy weather but it can be difficult to remove these dressings 100% even with a good tire cleaner. All I can tell you for the cleaning portion of prepping your tires for winter is to do the best you can.

For my current daily driver I got lucky. It came with brand new tires and from all appearances no one has ever applied any type of tire dressing. Score for me because there was nothing to remove when I went to clean them.

I did still want to scrub them perfectly clean because I really only want to do this once as these tires are 40” tall and that’s a lot of rubber to scrub. To tackle the cleaning process I chose to machine scrub the tires using a Cyclo brush on a Porter Cable dual action polisher. If you don’t have a Cyclo brush or a Porter Cable dual action polisher you can still clean your tires the old fashioned way.

For tips, tricks and techniques to machine scrub tires see my article here,

Best darn tire cleaning brush I've ever used!


How to apply TUFF SHINE Tire Clearcoat
After you get the rubber sides of your tires as clean as you can the application of the TUFF SHINE Tire Clearcoat is pretty straightforward. A foam applicator works best and a thin applicator pad is better in my opinion than a thick foam applicator pad because it won’t absorb and then waste any of the precious liquid.

The liquid itself is VERY thin, so don’t try to pour it on your applicator but instead, hold the tip of the bottle where the product comes out directly against the surface of your applicator pad and slowly pour some product onto the applicator pad. Move the tip over a section of the pad and allow it to penetrate into the foam. After the initial wetting of your applicator pad applying more product will be a lot easier as you work around the tire.


Detailing_Wheels_Tires_For_Winter_037.jpg


Spread out and work in...
Spread the product over the sidewall and work the product into any grooves or designs like the lettering and numbering on most tires. Tires with a simple, smooth design are easier to coat and tires with complicated designs or patterns to the sidewall will require more work.

Detailing_Wheels_Tires_For_Winter_038.jpg


Detailing_Wheels_Tires_For_Winter_039.jpg


Add more product as needed...

Detailing_Wheels_Tires_For_Winter_040.jpg


Detailing_Wheels_Tires_For_Winter_041.jpg


Metro-Vac Sidekick = Handy tool to have around...
The inside of the letters have serrated lines so I'm using the Metro-Vac Sidekick to blow out any excess tire coating.

Detailing_Wheels_Tires_For_Winter_042.jpg


Light buff...
Next I take a clean, dry black microfiber towel and lightly give the tire a wipe to ensure a smooth, uniform appearance.

Detailing_Wheels_Tires_For_Winter_043.jpg


End results...
And here's the final results. The wheels and tires are coated, protected and ready for winter driving...

Detailing_Wheels_Tires_For_Winter_044.jpg


Detailing_Wheels_Tires_For_Winter_045.jpg


Detailing_Wheels_Tires_For_Winter_046.jpg


And they look good too!

Detailing_Wheels_Tires_For_Winter_047.jpg


The White Glove Test
And besides giving your tires a dark black sheen TUFF SHINE Tire Clearcoat also leaves behind a clean dry finish.
Detailing_Wheels_Tires_For_Winter_048.jpg


Detailing_Wheels_Tires_For_Winter_049.jpg


Detailing_Wheels_Tires_For_Winter_050.jpg


Detailing_Wheels_Tires_For_Winter_051.jpg


And that's how to prep your wheels and tires for winter driving.


:)
 
We do not get a lot of Winter here in Florida but hopefully this helps the rest of you out!
 
Great article and info. Being new to detailing I have a couple of questions. Are there any draw backs to applying a sealer like the DP Sealer? Will it inhibit your ability to do paint correction in the future? At what point during a paint correction process would you apply the DP product instead of other traditional waxes, polishes or sealant?

Thanks and sorry for all the newb questions
 
Awesome article. I have a question though.

I use Tuff Shine on my DD as well. I've been using it since the tires were brand new - so they have never seen any conventional dressing. I also scrubbed them extensively (even though they were new) with the TS tire cleaner prior to first application of the coating.

However, occasionally I get black residue on the applicator when applying more coating. This is after cleaning the previous coating well with wheel cleaner and rinsing well. What is that?

I'm just asking because I noticed the same thing in one of your photos on the green finger pocket when you were applying the clear coat. What is that "black stuff"? Is it dirt? Rubber?
 
Great information Mike, thanks for taking the time to share the tips.
 
Fantastic write ups! What kind of finger applicators are used for the paint prep and coating?
 
Awesome article. I have a question though.

I use Tuff Shine on my DD as well. I've been using it since the tires were brand new - so they have never seen any conventional dressing. I also scrubbed them extensively (even though they were new) with the TS tire cleaner prior to first application of the coating.

However, occasionally I get black residue on the applicator when applying more coating. This is after cleaning the previous coating well with wheel cleaner and rinsing well. What is that?

I'm just asking because I noticed the same thing in one of your photos on the green finger pocket when you were applying the clear coat. What is that "black stuff"? Is it dirt? Rubber?

Don't quote me on this, but from what I've read tires have an additive called antiozonant that prevents the tire from prematurely degrading. Apparently this stuff just seeps out of the tire constantly. Tire dressing is the best way to get rid of it by basically just masking it. Wikipedia, the free encyclopedia
 
Great article and info. Being new to detailing I have a couple of questions. Are there any draw backs to applying a sealer like the DP Sealer? Will it inhibit your ability to do paint correction in the future?

No drawbacks and it won't stop you from doing correction work in the future.


At what point during a paint correction process would you apply the DP product instead of other traditional waxes, polishes or sealant?

Thanks and sorry for all the newb questions


After you do the last correction or polishing step to remove defects the next thing you would do is to apply the Detailer's Paint Coating Prep to remove any leftover polishing oils from the compounds/polishes.

After you remove the Detailer's Paint Coating Prep then you would apply the Detailer's Paint Coating.


No such thing as a dumb question on this forum....

And since this was your first post...


Welcome to AutogeekOnline!


:welcome:
 
Awesome article. I have a question though.

I use Tuff Shine on my DD as well. I've been using it since the tires were brand new - so they have never seen any conventional dressing. I also scrubbed them extensively (even though they were new) with the TS tire cleaner prior to first application of the coating.

Yes, I read your thread here,

http://www.autogeekonline.net/forum/show-n-shine/70411-new-tires-tuff-shined.html


However, occasionally I get black residue on the applicator when applying more coating.

This is after cleaning the previous coating well with wheel cleaner and rinsing well.

What is that?

Supposedly, you don't have to or want to use a strong cleaner on the coating to clean it and instead you're supposed to be able to use a simple approach like using your car wash soap. The reason Tuff Shine states not to use a strong cleaner is because a strong cleaner will degrade and even remove the Tuff Shine Tire Clearcoat.

I think a Rep from TuffShine posted something about this in the thread below,

TUF SHINE - Helpful hints and FAQ's

Here's the relevant portion...

How do I care for the Clearcoat?
Once the TUF SHINE Clearcoat has been applied to the tire, strong/harsh cleaners are no longer necessary. Wash the tires with the same solution you use to wash the vehicle. A mild soapy solution or car wash soap and a soft car wash brush or mitt is all it takes. Always rinse the tire thoroughly after cleaning. Do not use harsh tire cleaners, they will dull the finish.


I'm just asking because I noticed the same thing in one of your photos on the green finger pocket when you were applying the clear coat. What is that "black stuff"? Is it dirt? Rubber?


It's impossible to 100% seal a surface, especially a flexible rubber surface that takes a pounding every time you drive your car.

So it could be oxidized rubber but it could also be road film and brake dust.


:)
 
Don't quote me on this, but from what I've read tires have an additive called antiozonant that prevents the tire from prematurely degrading.

Apparently this stuff just seeps out of the tire constantly.

The above is correct. I talked to a chemist about the chemical make-up of rubber when I re-wrote the Megs FAQ back in 2002 to cover this topic.

Rubber formulated for use for tires includes an ingredient called antiozonant. As you drive your car the antiozonant migrates out of the rubber to the outer surface to somehow maintain the flexibility of the rubber and reduce cracking and drying out.

Blooming is the brown color you see on tires and blooming happens when antiozonant meets the ozone in the air and the chemical interaction turns the antiozonant brown.

The above is at least my understanding of the process but I'm not a chemist and don't play one on this forum.


Tire dressing is the best way to get rid of it by basically just masking it.

This is not technically correct.

A tire cleaner or some type of APC is the best way to scrub and remove blooming, get rid of it.

A tire dressing can work like antiozonant to help preserve and maintain exterior rubber only "we" apply it whereas antiozonant comes from within.

I'm not sure how the TUFF SHINE Tire Clearcoat overcomes the migration of antiozonant to the tire surface? Don't know and don't really care that much either.

What I do know is I like to clean my tires really good ONE TIME and then apply this product because it keeps them black, clean and non-greasy or non-oily.

I have to wash my truck and this would include the tires and when I do, I'm going to freshen up the face of the tires with Tuff Shine Tire Clearcoat.

:dblthumb2:
 
Very nice write up!!! You always kill it Mike! I like to see a guy happy at his job. Very appropriate at this time of year. Just going out to plow eight inches of the nasty white stuff. The DP coating is on all my cars. That is a great product! Resists dirt and makes life in New England a bit easier regarding paint protection. Keep up the GREAT work!
 
Is there anything that should or could be done to the undercarriage, mainly for us in snow/salt zones?
 
Back
Top