Mike Phillips
Active member
- Dec 5, 2022
- 51,004
- 6
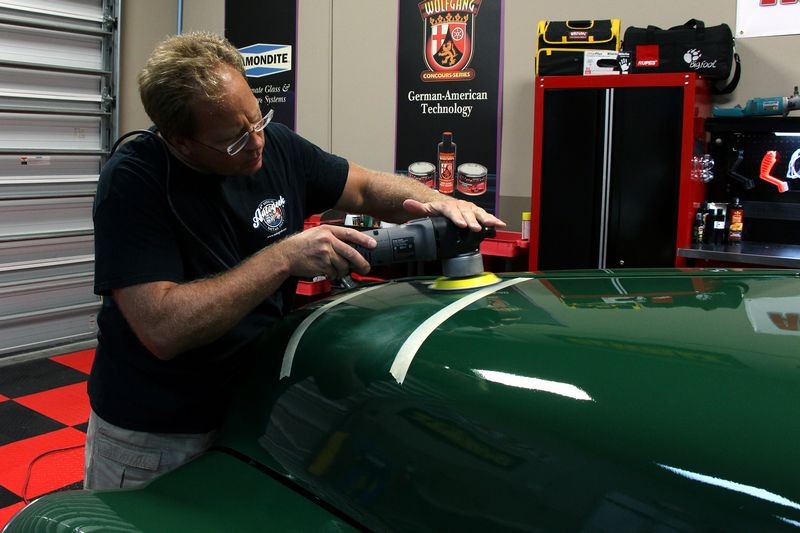
How to remove Orange Peel using a Porter Cable Dual Action Polisher
How to remove Orange Peel using a Porter Cable Dual Action Polisher
Step 1 - Wash or wipe the car or panel to be de-peeled clean.
Step 2 - Inspect for above surface bonded contaminants and remove if discovered.
Step 3 - Place compound on fact of CarPro Denim Pad
Step 4 - On a medium speed setting use polisher to spread product out over an area about 18" squarish or so, don't try to work to large of an area and divide larger panels up into smaller sections.
Step 5 - Increase speed setting to the 6 setting and then start making VERY slow overlapping passes in a crosshatch pattern. Make 8-12 section passes but don't run buffer till product is dry on the surface.
Step 6 - Wipe residue off section and visually inspect the paint to determine how much orange peel has been removed. If you're happy with the results move onto a new section and be sure to overlap a little into the previous section. If you want to remove more peel repeat the process.
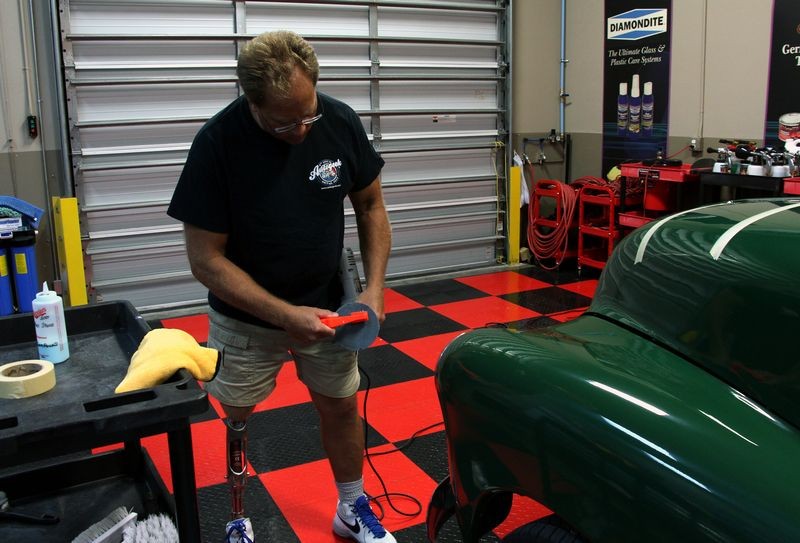
Pad Cleaning
Clean any excess product off the face of the pad after each use of pad to a section.
Ensure Pad Rotation
Removing orange peel using a dual action polisher requires the pad be rotating during the the process. To make it easier to make sure you have good pad rotation, mark your backing plate.
Tape off any raised edges
The edges of the CarPro Denim Pads are harder than a foam buffing pad and if you accidentally bump the edges of the pads into any raised edges, trim or components you could mar these surfaces, so tape them off to protect them.
Framing up the shot so you can clearly see where on the truck I'm working...

Here's the test section taped off...

Dieback or Shrinkback
The below close-up shows what is called Dieback or Shrinkback in the basecoat and the clearcoat.
See this article...
Here's what Dieback or Shrinkback looks like in fresh paint
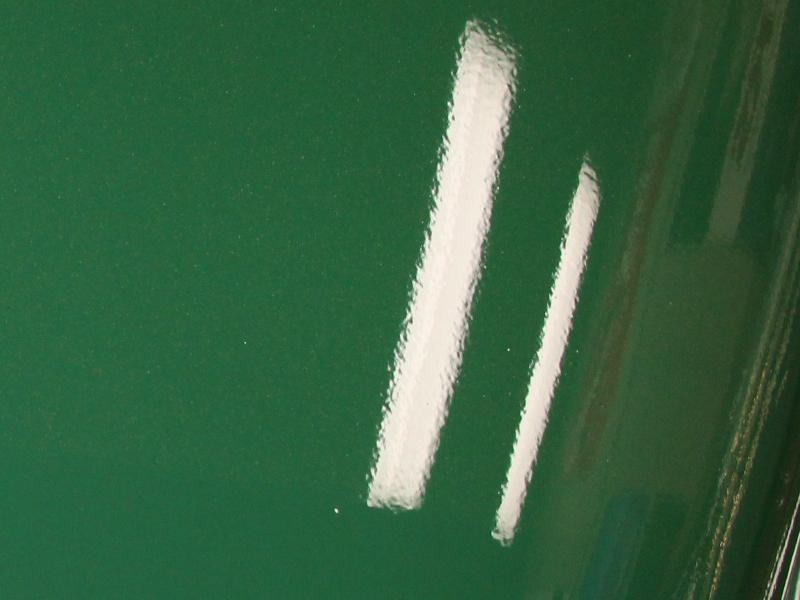
Orange Peel
The term orange peel gets it's meaning because the surface of the paint has a texture that looks like the texture of an orange. You can think of orange peel as being hills and valleys over the surface of the body panels of your car's paint job. That is high spots and low spots. The effect this has is to make reflections look fuzzy or muted. The opposite of clear and sharp.
Most people do not like the look orange peel gives their car. Lots of people would like to find a way to safely remove orange peel to increase the DOI or Distinction of Image in their car's paint job. The higher the DOI the sharper an image is reflected in the paint. A true show car finish does not have any orange peel in the paint and this is the goal of custom car builders and custom painters.
Meguiar's M100 Pro Speed Compound
This is an aggressive cutting compound formulated for use with rotary buffers and wool pads to remove down to #1200 grit sanding marks. In this example I'm using it wrong in a quest to both test this type of compound with Denim Pads and for removing orange peel using a dual action polisher.
I've placed a squiggly line on the face of the product and next I'm going to place the face of the pad against the paint and smear it around on the 4.0 Speed Setting to get the product all over the face of the pad and to spread it out all over the section I'm going to work on. It's not a very scientific method of priming the pad, you can call it the Mike Phillips Method or the lazy guys' method.

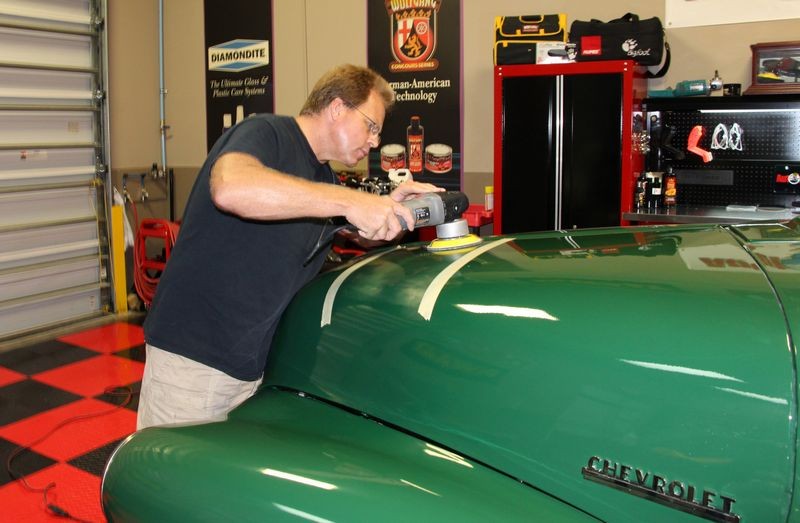
Slow Overlapping Passes on the 6.0 Speed Setting
I buffed this section out three times to really knock the orange peel down. Each time repeating the same process. Apply product to the face of the pad, spread it over the section on the 4.0 setting to prime the pad and to spread the product out over the section to be worked. Then turn the speed up to the 6.0 setting and then s-l-o-w down my Arm Speed, moving the polisher very slowly over the paint. Using a crosshatch pattern and overlapping each pass by about 50%. Very basic DA procedure for most DA type work. No rocket science here folks.
Product residue on worked section
Sometimes I take a picture just to show a picture of what the action is taking place on the surface. In this example, this is M100 residue that I'm going to wipe-off.

Clean you pad often
There's literally no place for any paint you're removed or spent product to hide or bury into because the surface of the pad is as flat as the jeans you wear. So clean your pad often, or as I always say, work clean.
To do this I'm using the standard Nylon Pad Conditioning Brush and while it does work to remove any excess residue off the face of the pad it still doesn't leave a pad surface that looks new. So don't get all worked up over it. Just do the best you can and get back to work.
This is the third time I worked this section
Just a picture to show that "yes" I really did work the section. You can take my word for it that I worked this section 3 times or I can get forum member miamijd7 aka Detective John to be my witness as he was there and took some of these pictures.
Make sure the pad is rotating
The feature of a rotary buffer is it rotates a pad in a single, circular motion. If you're going to use a Porter Cable like a rotary buffer, then you need to make sure the pad is always rotating. This is pretty easy to do on the 6.0 speed setting because these pads are THIN.
Thin pads rotate better than thick pads when it comes to "foam buffing pads" and this is true for other types of pads too. Hint hint... take a clue from how thin Meguiar's made their Microfiber DA Cutting pads. They know how to take advantage of the Free Rotating Spindle Bearing Assembly used in these types of tools including their G110v2 and the Griot's Garage DA Polisher.

Results...
Before
Okay, we started here...
After
And now we're here... note how I purposefully framed this shot up showing the center trim down the middle of the hood behind my hand so you would know this is the exact same area.


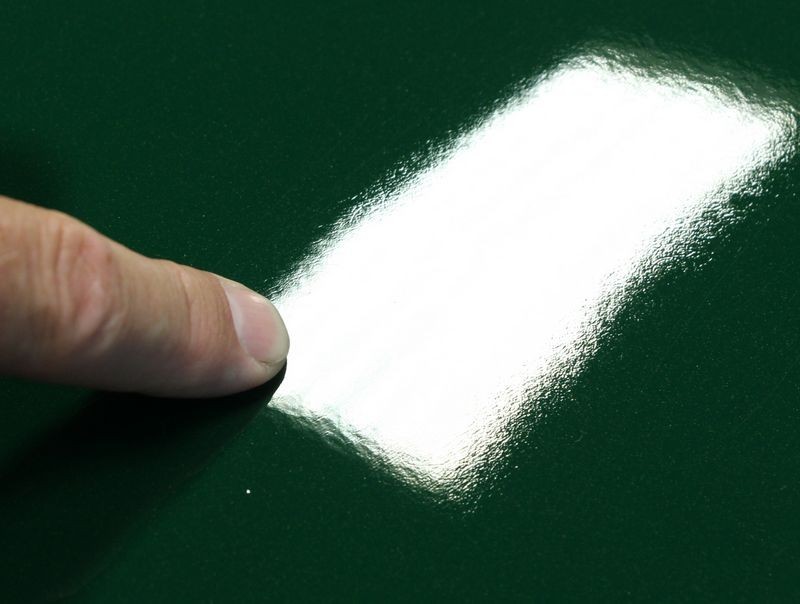
Demarcation Line
In the below picture you can see there are two sides to the results, this is where the tape-line ran across the hood.

More Demarcation Lines
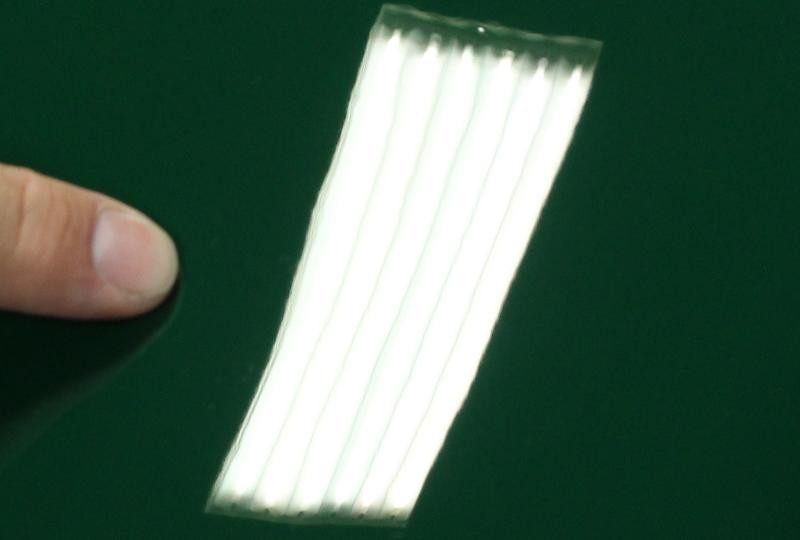
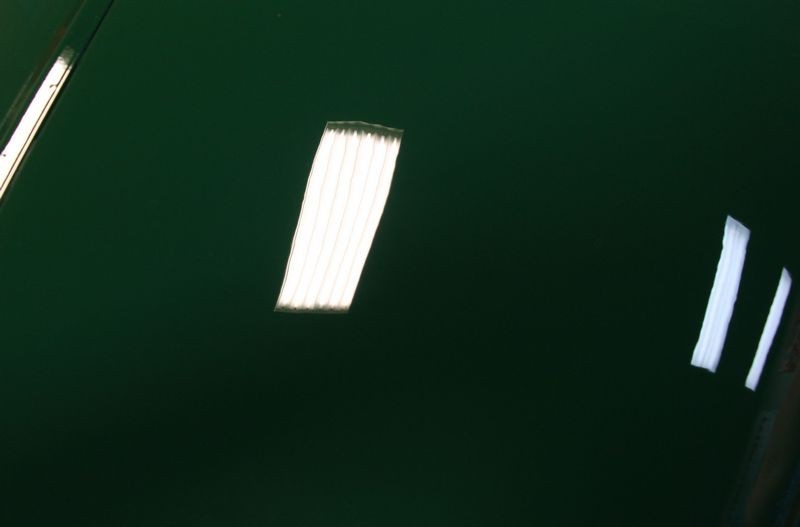
These pictures were taken of the overhead lights reflecting on the paint on the windshield side of the tape-line.
Here's the overhead florescent lights totally reflecting in a section of paint that has NOT been buffed with the CarPro Orange Peel Pads.

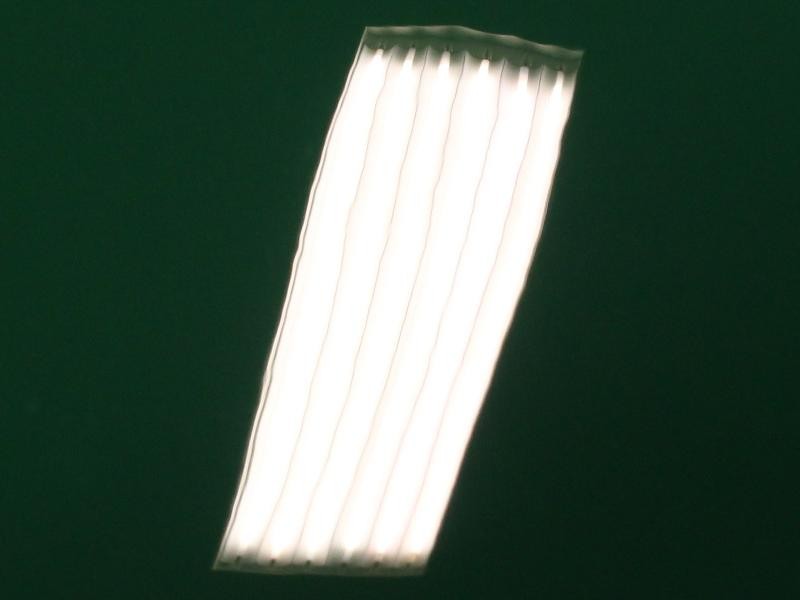
Close-up of the same shot above...

In this shot, with my flash on, you can see where I've moved the reflection of the overhead florescent lights into the section that was buffed with the Denim pads.
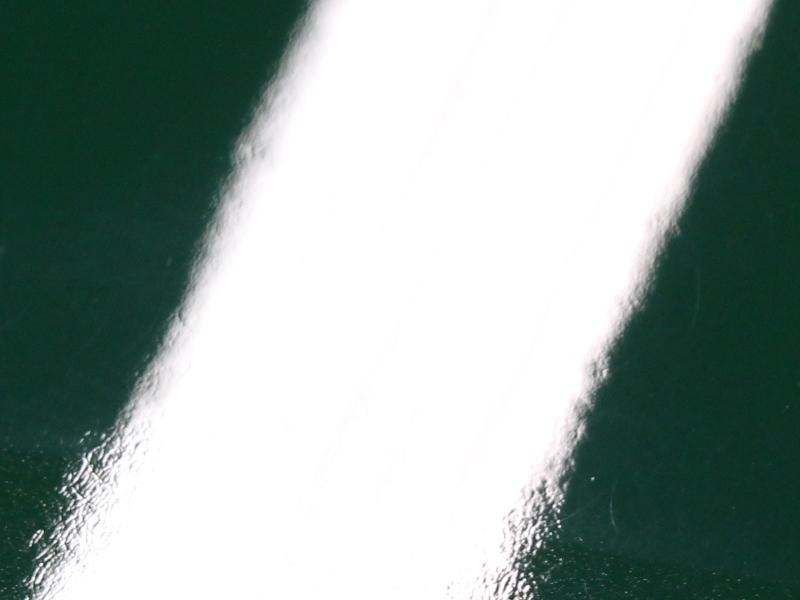
In this shot, so far the paint has only been buffed with the Denim pads and the M100 but notice how nice the paint looks in the flash of the camera. Not bad...

Close-up of the same shot above...

Orange Peel Removed Section with flash on...

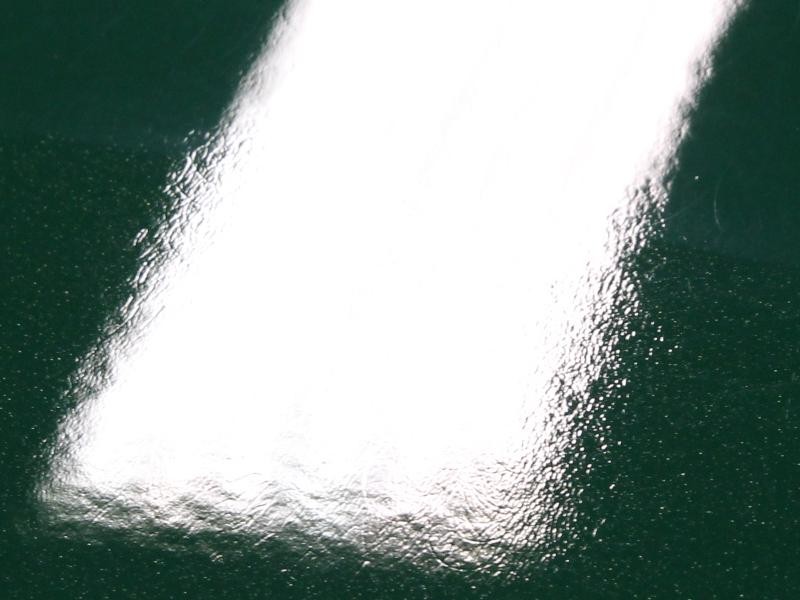
Extreme Close-up
And here's an extreme close-up shot I took in the close-up mode on my Canon T5i
One thing I would like to point out and that is anytime you're buffing next to an actual strip of tape on paint, it's harder to remove as much paint right near the tape line as it is a few inches away, even so... you can really see a difference in surface texture in the before and after sections separated by here the tape-line wax.
After Machine Polishing
After I was finished testing the CarPro Denim Orange Peel Pads a team of guys and myself buffed out the rest of the truck because it was a mess. It arrived covered with yellow overspray paint and filled with swirls and scratches. Click the below two links to see articles on these topics.
A $4.00 Plastic Drop Cloth could have prevented this...
How to remove overspray paint using the Cyclo Polisher
1949 Chevy 5-Window Pickup Extreme Makeover - Pictures & Videos
Back to the results...
Here's the hood after polishing and waxing...
On Autogeek.net
Denim Pads
This style of pad is recommended for custom paint jobs or re-paints that are THICKER than factory paint.
CarPro Denim Orange Peel Removal Pad – 5.25 Inches 2 Pack
Velvet Pads
This style of pad is recommended for FACTORY thin and allow me to also remind everyone, FACTORY BAKED ON paints, which will tend to be harder than body shop paint jobs due to the paint technology and the much higher temperatures the paint is baked to dry and cure it.
CarPro Velvet Orange Peel Removal Pad – 5.25 Inches 2 Pack
Meguiar's M100
Porter Cable 7424XP

")
How to remove Orange Peel using a Porter Cable Dual Action Polisher
Step 1 - Wash or wipe the car or panel to be de-peeled clean.
Step 2 - Inspect for above surface bonded contaminants and remove if discovered.
Step 3 - Place compound on fact of CarPro Denim Pad
Step 4 - On a medium speed setting use polisher to spread product out over an area about 18" squarish or so, don't try to work to large of an area and divide larger panels up into smaller sections.
Step 5 - Increase speed setting to the 6 setting and then start making VERY slow overlapping passes in a crosshatch pattern. Make 8-12 section passes but don't run buffer till product is dry on the surface.
Step 6 - Wipe residue off section and visually inspect the paint to determine how much orange peel has been removed. If you're happy with the results move onto a new section and be sure to overlap a little into the previous section. If you want to remove more peel repeat the process.
Pad Cleaning
Clean any excess product off the face of the pad after each use of pad to a section.
Ensure Pad Rotation
Removing orange peel using a dual action polisher requires the pad be rotating during the the process. To make it easier to make sure you have good pad rotation, mark your backing plate.
Tape off any raised edges
The edges of the CarPro Denim Pads are harder than a foam buffing pad and if you accidentally bump the edges of the pads into any raised edges, trim or components you could mar these surfaces, so tape them off to protect them.
Framing up the shot so you can clearly see where on the truck I'm working...
Here's the test section taped off...
Dieback or Shrinkback
The below close-up shows what is called Dieback or Shrinkback in the basecoat and the clearcoat.
See this article...
Here's what Dieback or Shrinkback looks like in fresh paint
Orange Peel
The term orange peel gets it's meaning because the surface of the paint has a texture that looks like the texture of an orange. You can think of orange peel as being hills and valleys over the surface of the body panels of your car's paint job. That is high spots and low spots. The effect this has is to make reflections look fuzzy or muted. The opposite of clear and sharp.
Most people do not like the look orange peel gives their car. Lots of people would like to find a way to safely remove orange peel to increase the DOI or Distinction of Image in their car's paint job. The higher the DOI the sharper an image is reflected in the paint. A true show car finish does not have any orange peel in the paint and this is the goal of custom car builders and custom painters.
Meguiar's M100 Pro Speed Compound
This is an aggressive cutting compound formulated for use with rotary buffers and wool pads to remove down to #1200 grit sanding marks. In this example I'm using it wrong in a quest to both test this type of compound with Denim Pads and for removing orange peel using a dual action polisher.
I've placed a squiggly line on the face of the product and next I'm going to place the face of the pad against the paint and smear it around on the 4.0 Speed Setting to get the product all over the face of the pad and to spread it out all over the section I'm going to work on. It's not a very scientific method of priming the pad, you can call it the Mike Phillips Method or the lazy guys' method.
Slow Overlapping Passes on the 6.0 Speed Setting
I buffed this section out three times to really knock the orange peel down. Each time repeating the same process. Apply product to the face of the pad, spread it over the section on the 4.0 setting to prime the pad and to spread the product out over the section to be worked. Then turn the speed up to the 6.0 setting and then s-l-o-w down my Arm Speed, moving the polisher very slowly over the paint. Using a crosshatch pattern and overlapping each pass by about 50%. Very basic DA procedure for most DA type work. No rocket science here folks.
Product residue on worked section
Sometimes I take a picture just to show a picture of what the action is taking place on the surface. In this example, this is M100 residue that I'm going to wipe-off.
Clean you pad often
There's literally no place for any paint you're removed or spent product to hide or bury into because the surface of the pad is as flat as the jeans you wear. So clean your pad often, or as I always say, work clean.
To do this I'm using the standard Nylon Pad Conditioning Brush and while it does work to remove any excess residue off the face of the pad it still doesn't leave a pad surface that looks new. So don't get all worked up over it. Just do the best you can and get back to work.
This is the third time I worked this section
Just a picture to show that "yes" I really did work the section. You can take my word for it that I worked this section 3 times or I can get forum member miamijd7 aka Detective John to be my witness as he was there and took some of these pictures.
Make sure the pad is rotating
The feature of a rotary buffer is it rotates a pad in a single, circular motion. If you're going to use a Porter Cable like a rotary buffer, then you need to make sure the pad is always rotating. This is pretty easy to do on the 6.0 speed setting because these pads are THIN.
Thin pads rotate better than thick pads when it comes to "foam buffing pads" and this is true for other types of pads too. Hint hint... take a clue from how thin Meguiar's made their Microfiber DA Cutting pads. They know how to take advantage of the Free Rotating Spindle Bearing Assembly used in these types of tools including their G110v2 and the Griot's Garage DA Polisher.
Results...
Before
Okay, we started here...
After
And now we're here... note how I purposefully framed this shot up showing the center trim down the middle of the hood behind my hand so you would know this is the exact same area.
Demarcation Line
In the below picture you can see there are two sides to the results, this is where the tape-line ran across the hood.
More Demarcation Lines
These pictures were taken of the overhead lights reflecting on the paint on the windshield side of the tape-line.
Here's the overhead florescent lights totally reflecting in a section of paint that has NOT been buffed with the CarPro Orange Peel Pads.
Close-up of the same shot above...
In this shot, with my flash on, you can see where I've moved the reflection of the overhead florescent lights into the section that was buffed with the Denim pads.
In this shot, so far the paint has only been buffed with the Denim pads and the M100 but notice how nice the paint looks in the flash of the camera. Not bad...
Close-up of the same shot above...
Orange Peel Removed Section with flash on...
Extreme Close-up
And here's an extreme close-up shot I took in the close-up mode on my Canon T5i
One thing I would like to point out and that is anytime you're buffing next to an actual strip of tape on paint, it's harder to remove as much paint right near the tape line as it is a few inches away, even so... you can really see a difference in surface texture in the before and after sections separated by here the tape-line wax.
After Machine Polishing
After I was finished testing the CarPro Denim Orange Peel Pads a team of guys and myself buffed out the rest of the truck because it was a mess. It arrived covered with yellow overspray paint and filled with swirls and scratches. Click the below two links to see articles on these topics.
A $4.00 Plastic Drop Cloth could have prevented this...
How to remove overspray paint using the Cyclo Polisher
1949 Chevy 5-Window Pickup Extreme Makeover - Pictures & Videos
Back to the results...
Here's the hood after polishing and waxing...
On Autogeek.net
Denim Pads
This style of pad is recommended for custom paint jobs or re-paints that are THICKER than factory paint.
CarPro Denim Orange Peel Removal Pad – 5.25 Inches 2 Pack
Velvet Pads
This style of pad is recommended for FACTORY thin and allow me to also remind everyone, FACTORY BAKED ON paints, which will tend to be harder than body shop paint jobs due to the paint technology and the much higher temperatures the paint is baked to dry and cure it.
CarPro Velvet Orange Peel Removal Pad – 5.25 Inches 2 Pack
Meguiar's M100
Porter Cable 7424XP


