Mike Phillips
Active member
- Dec 5, 2022
- 51,004
- 6
How to resize your photos with Easy Thumbnails - Free software
Modern cameras take great pictures that are also incredibly HUGE and way to large to post to a discussion forum without resizing.
2 things,
This is 600 pixels wide
(I drove a Scoop for a Pulp Mill in this shot)

This is 700 pixels wide
(Machine applying wax to Nate's 1966 Batmobile recreation)

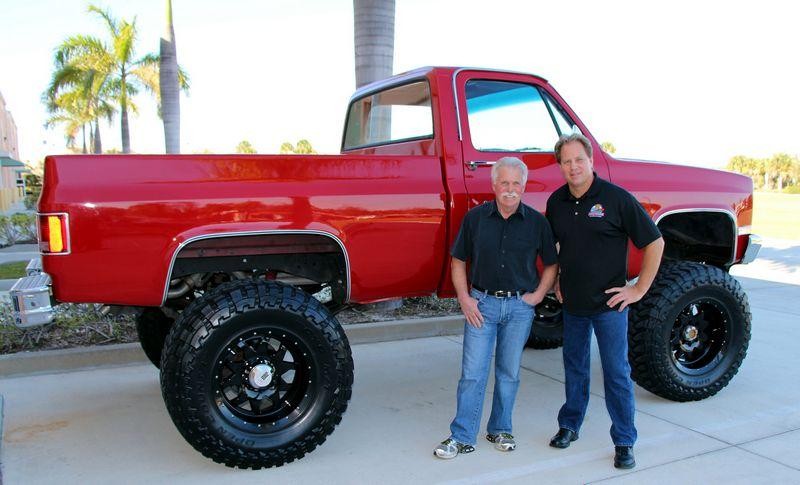
This is 800 pixels wide
It's really not that hard to resize your pictures to a "Viewable Size" which is a courtesy to both your reader and whoever's photo gallery you're uploading your pictures to.
I first started using Easy Thumbnails when I was looking for software to help me make Avatars without distorting the original picture. What I found out is that it works great for not only making huge pictures tiny, (most Avatars are small), but it works great for making huge pictures ANY size, like 800 pixels wide.
The software is very easy to use but to flatten out your learning curve, here's some screenshots that will show you how to set it up.
Easy Thumbnails Website
Screenshot of the Easy Thumbnails Website

Create and name a folder Easy Thumbnails on your C-drive in either your Download folder or the Program Files folder on your Hard Drive and then click the Free Download button on the left hand side of the page and a dialog box will appear. Click on the Save button, and save it to the EZ Thumbnail folder you created on your C-drive.

After the program is finished downloading, go to that folder and double click on the .exe file and your now in business.
There are three tabs across the top of this software program. The only tabs you need to be concerned is the Files and Settings tabs.
The Files Tabs enables you to browse to the folder in which you keep your pictures, this would be where it says, Look in.
Towards the bottom of the page you will see the words, Save in, over to the left is a button, the shape of a square. By clicking on this button, you can choose where the Easy Thumbnails programs saves the pictures you resize. This can be the same folder the pictures are in, or a different folder.

Now click the Settings tab.

In the settings tab, there are three settings you need to be aware of.
The Max Width setting
The Maximum Width setting is used to adjust the width of your pictures. For most discussion forums 500 to 800 pixels wide is the maximum width you want to make your pictures. Otherwise, you will force the reader to horizontal scroll. I switch between 600 and 800 pixels wide on most of the photo's I upload.
The PhotoPost software that Autogeek Online uses for archiving and displaying photos automatically resizes photos to two different widths if your pictures are larger than 600 pixels wide. These would be,
* Thumbnail
* 600 pixels wide, This is the first size photo you click to when you click on a thumbnail.
If you upload a picture wider than 600 pixels wide you can get to that size by clicking on the 600 pixel wide photo and this is where you get the HUGE pictures that you often see in a thread because the original wasn't resized before uploading. You can read more about this here,
How to insert an image from your photo gallery into your message
The Max Height setting
The Maximum Height setting should be set to a very high number, like 100000000. The reason for this is because the Easy Thumbnail software will resize your photo's using the Max Width setting as a baseline. The height will be configured optimally according to the original photo's dimensions. That is of course as long as the number in the Max Height is larger than any photo you are resizing, (Which for most people, 100000000 pixels should be taller than any photo you can take). With settings like this, Easy Thumbnails will automatically resize the photo based solely upon the width you choose and there will be NO DISTORTION of the pictures.
If you are going to resize a photo that is taller than it is wide, then set your Maximum Width to something like 300 or 400 pixels wide. (After you do a couple of tall pictures, you will see what I mean.
The Prefix/Suffix setting
The Prefix/Suffix setting inserts a prefix number in front of the original file name. You can use this to help you identify the files you have created using Easy Thumbnails. For example: If your photo is named, car.jpg and the original photo is 800 pixels wide. If you put 600 in the Max Width setting, and then put 600_ in the Prefix setting, after you click on the Make button to resize the photo, the new photo you will have made will be called, 600_car.jpg
If you leave this setting blank, it will add nothing to the name of the photo.
Be warned that if your Save in folder is the same as your original photo folder, then your original photo will be overwritten and be the new size you have put into the Max Width setting.
This can be a good thing or a bad thing.
If you want to keep your original photos the same size for safe keeping, then you should either put some type of prefix in the Prefix setting box, or make your Save in folder something different than where your original photos are stored. If you don?t want to fill up your hard drive with space hogging pictures, and keeping an original copy of your photos isn?t important to you, then go a head and leave the Prefix setting box blank, and save your photo?s into the same folder the original photos are stored in.
Give this free program a try, it works great and from what I can tell it has never distorted any of my photos in anyway.
Here's some other articles I've written on working with photos on discussion forums...
How-To capture swirls, scratches, etchings and other surface defects with your camera
How to crop out the fluff and resize your pictures! - Using FREE online software!
How to upload a photo into your Autogeek Photo Gallery
How to insert an image from your photo gallery into your message
Handiest little picture viewer tool I've been using for years now...
:xyxthumbs:
Modern cameras take great pictures that are also incredibly HUGE and way to large to post to a discussion forum without resizing.
2 things,
1. Sharing a photo that is so large that your force your reader to horizontal scroll defeats your purpose of sharing your photo.
A good rule of thumb is to resize your photos to 800 pixels wide if your really want to show a large photo. By doing this, the majority of the people in the world will be able to see the entire picture without having to horizontal scroll.
Anytime someone has to horizontal scroll to see an entire picture they can't really see the entire picture because as they scroll to one side on their monitor to see what's not on the screen, a portion of the picture on the opposite side of the screen is disappearing off the monitor.
Therefore they can never really see the entire photo which kind of takes away from the value of the photo and usually the goal of the poster, (to show a photo, not a portion of a photo).
2. Uploading HUGE pictures files requires more space on the host's server. It's not a responsible use of your hosts server space or hard drive space and over time, if everyone simply uploads huge files like your huge pictures, it uses up a lot of your hosts resources. Not a big deal if the forum is a flash-in-the-pan but if someone is in this for the long run, (like Autogeek Online), then it is important to be a good steward of AG's resources.
This is 600 pixels wide
(I drove a Scoop for a Pulp Mill in this shot)
This is 700 pixels wide
(Machine applying wax to Nate's 1966 Batmobile recreation)
This is 800 pixels wide
It's really not that hard to resize your pictures to a "Viewable Size" which is a courtesy to both your reader and whoever's photo gallery you're uploading your pictures to.
I first started using Easy Thumbnails when I was looking for software to help me make Avatars without distorting the original picture. What I found out is that it works great for not only making huge pictures tiny, (most Avatars are small), but it works great for making huge pictures ANY size, like 800 pixels wide.
The software is very easy to use but to flatten out your learning curve, here's some screenshots that will show you how to set it up.
Easy Thumbnails Website
Screenshot of the Easy Thumbnails Website
Create and name a folder Easy Thumbnails on your C-drive in either your Download folder or the Program Files folder on your Hard Drive and then click the Free Download button on the left hand side of the page and a dialog box will appear. Click on the Save button, and save it to the EZ Thumbnail folder you created on your C-drive.
After the program is finished downloading, go to that folder and double click on the .exe file and your now in business.
There are three tabs across the top of this software program. The only tabs you need to be concerned is the Files and Settings tabs.
The Files Tabs enables you to browse to the folder in which you keep your pictures, this would be where it says, Look in.
Towards the bottom of the page you will see the words, Save in, over to the left is a button, the shape of a square. By clicking on this button, you can choose where the Easy Thumbnails programs saves the pictures you resize. This can be the same folder the pictures are in, or a different folder.
Now click the Settings tab.
In the settings tab, there are three settings you need to be aware of.
The Max Width setting
The Maximum Width setting is used to adjust the width of your pictures. For most discussion forums 500 to 800 pixels wide is the maximum width you want to make your pictures. Otherwise, you will force the reader to horizontal scroll. I switch between 600 and 800 pixels wide on most of the photo's I upload.
The PhotoPost software that Autogeek Online uses for archiving and displaying photos automatically resizes photos to two different widths if your pictures are larger than 600 pixels wide. These would be,
* Thumbnail
* 600 pixels wide, This is the first size photo you click to when you click on a thumbnail.
If you upload a picture wider than 600 pixels wide you can get to that size by clicking on the 600 pixel wide photo and this is where you get the HUGE pictures that you often see in a thread because the original wasn't resized before uploading. You can read more about this here,
How to insert an image from your photo gallery into your message
The Max Height setting
The Maximum Height setting should be set to a very high number, like 100000000. The reason for this is because the Easy Thumbnail software will resize your photo's using the Max Width setting as a baseline. The height will be configured optimally according to the original photo's dimensions. That is of course as long as the number in the Max Height is larger than any photo you are resizing, (Which for most people, 100000000 pixels should be taller than any photo you can take). With settings like this, Easy Thumbnails will automatically resize the photo based solely upon the width you choose and there will be NO DISTORTION of the pictures.
If you are going to resize a photo that is taller than it is wide, then set your Maximum Width to something like 300 or 400 pixels wide. (After you do a couple of tall pictures, you will see what I mean.
The Prefix/Suffix setting
The Prefix/Suffix setting inserts a prefix number in front of the original file name. You can use this to help you identify the files you have created using Easy Thumbnails. For example: If your photo is named, car.jpg and the original photo is 800 pixels wide. If you put 600 in the Max Width setting, and then put 600_ in the Prefix setting, after you click on the Make button to resize the photo, the new photo you will have made will be called, 600_car.jpg
If you leave this setting blank, it will add nothing to the name of the photo.
Be warned that if your Save in folder is the same as your original photo folder, then your original photo will be overwritten and be the new size you have put into the Max Width setting.
This can be a good thing or a bad thing.
If you want to keep your original photos the same size for safe keeping, then you should either put some type of prefix in the Prefix setting box, or make your Save in folder something different than where your original photos are stored. If you don?t want to fill up your hard drive with space hogging pictures, and keeping an original copy of your photos isn?t important to you, then go a head and leave the Prefix setting box blank, and save your photo?s into the same folder the original photos are stored in.
Give this free program a try, it works great and from what I can tell it has never distorted any of my photos in anyway.
Here's some other articles I've written on working with photos on discussion forums...
How-To capture swirls, scratches, etchings and other surface defects with your camera
How to crop out the fluff and resize your pictures! - Using FREE online software!
How to upload a photo into your Autogeek Photo Gallery
How to insert an image from your photo gallery into your message
Handiest little picture viewer tool I've been using for years now...
:xyxthumbs:


")
