Mike Phillips
Active member
- Dec 5, 2022
- 51,004
- 6
How to restore original paint on a 1991 Toyota Pickup Truck
Good afternoon. I have a 1991 Toyota pickup and it was passed down from my grandpa. It’s special to me and I want to fix the paint.
It’s a single stage white. It has quite a bit of surface contamination and paint stains.
I don’t have much money to pay someone to do this for me or to buy a polisher so I want to do this by hand.
I was really hoping that I could get some tips for getting a good shine back and getting the stains out by hand. I have attached some photos for you to view.
Respectfully,
Elijah
Hi Elijah,
Cool truck. Cool to see you appreciate it and want to restore the original factory paint.


There's a million ways to do this , I'll outline 2 options.
Option 1
Step 1: Wash and dry the truck.
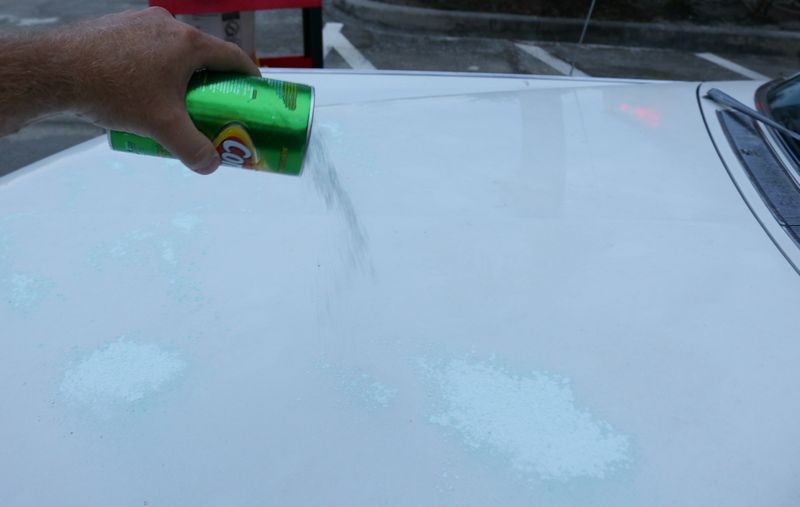
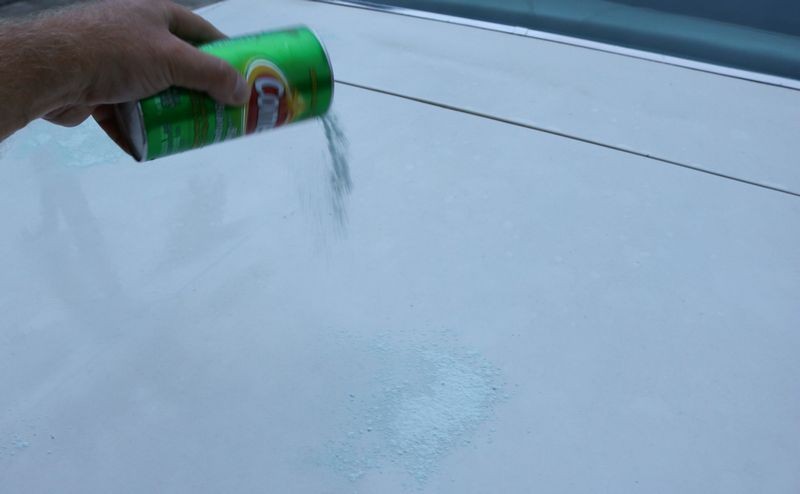
Step 2: Use detailing clay to clay the paint. You're paint is going to load up with dead paint and you should plan on throwing it away after this truck.
Step 3: Hand apply Meguiar's Ultimate Compound. Work small areas at a time. Massaging this product over the paint will require a LOT of elbow grease. If you tackle to large of any are you simply wont' do a good job and the end results is the paint will look SPLOTCHY. So work an area about the size of a 16" x 16" microfiber towel. To do this, use a microfiber applicator pad. Meguiar's makes a really nice one with a thick foam core that will spread out the pressure from you FINGERS. The microfiber surface will work with the compound to chew off the dead, oxidized paint.
Step 4: Seal the paint with your favorite wax or sealant. If you use the Meguiar's Compound, might as well get a Meguiar's wax or sealant.
Option 2
Step 1: Wash and dry the truck.
Step 2: Use detailing clay to clay the paint. You're paint is going to load up with dead paint and you should plan on throwing it away after this truck.
Step 3: Use a one-step cleaner/wax and apply like the compound I referenced above. Apply the same way. With this approach, you'll still do a good job and you can do it in one step. Also, if you repeat this process, say like once or twice a year, the paint will get better and better until it looks like you compound it first.
Working by hand is a skill most people don't possess and most people don't have the muscle and energy for. Consider ONLY tackling ONE PANEL at a time. This way you'll be fresh and do your best work and you can take your time restoring the paint.
All the products I've mentioned are on the Autogeek store, you can call our Customer Care Staff and reference this thread and they can help you to get it. You can also find it at your local auto parts store. What you can't get at your local auto parts store is this kind of customer service i.e. me typing out how-directions that are bonafide accurate.
Hope this helps, can't way to see the after pictures.
")
Good afternoon. I have a 1991 Toyota pickup and it was passed down from my grandpa. It’s special to me and I want to fix the paint.
It’s a single stage white. It has quite a bit of surface contamination and paint stains.
I don’t have much money to pay someone to do this for me or to buy a polisher so I want to do this by hand.
I was really hoping that I could get some tips for getting a good shine back and getting the stains out by hand. I have attached some photos for you to view.
Respectfully,
Elijah
Hi Elijah,
Cool truck. Cool to see you appreciate it and want to restore the original factory paint.
There's a million ways to do this , I'll outline 2 options.
Option 1
Step 1: Wash and dry the truck.
Step 2: Use detailing clay to clay the paint. You're paint is going to load up with dead paint and you should plan on throwing it away after this truck.
Step 3: Hand apply Meguiar's Ultimate Compound. Work small areas at a time. Massaging this product over the paint will require a LOT of elbow grease. If you tackle to large of any are you simply wont' do a good job and the end results is the paint will look SPLOTCHY. So work an area about the size of a 16" x 16" microfiber towel. To do this, use a microfiber applicator pad. Meguiar's makes a really nice one with a thick foam core that will spread out the pressure from you FINGERS. The microfiber surface will work with the compound to chew off the dead, oxidized paint.
Step 4: Seal the paint with your favorite wax or sealant. If you use the Meguiar's Compound, might as well get a Meguiar's wax or sealant.
Option 2
Step 1: Wash and dry the truck.
Step 2: Use detailing clay to clay the paint. You're paint is going to load up with dead paint and you should plan on throwing it away after this truck.
Step 3: Use a one-step cleaner/wax and apply like the compound I referenced above. Apply the same way. With this approach, you'll still do a good job and you can do it in one step. Also, if you repeat this process, say like once or twice a year, the paint will get better and better until it looks like you compound it first.
Working by hand is a skill most people don't possess and most people don't have the muscle and energy for. Consider ONLY tackling ONE PANEL at a time. This way you'll be fresh and do your best work and you can take your time restoring the paint.
All the products I've mentioned are on the Autogeek store, you can call our Customer Care Staff and reference this thread and they can help you to get it. You can also find it at your local auto parts store. What you can't get at your local auto parts store is this kind of customer service i.e. me typing out how-directions that are bonafide accurate.
Hope this helps, can't way to see the after pictures.