How to restore the original single stage metallic paint on my 1968 Corvette?

Joined
Dec 5, 2022
Messages
51,004
Reaction score
6
How to restore the original single stage metallic paint on my 1968 Corvette?


Anytime I get questions via e-mail, a PM or a FB message I prefer to invest my typing time where

A: It's easier for me to share links, pictures and videos.

B: More people can read and thus benefit from the information. (no just one set of eyeballs)


So I get an e-mail asking,

I have a 68 corvette with moderate paint oxidization (metallic paint).

I see Klasse has an All-In-One Paint Cleaner & Polish. would this be a good choice for an older oxidized paint?

Also I was interested finishing with a sealant glaze But your site indicates klasse high gloss sealant glaze is for new cars without oxidation.

what sealant glaze would you recommend for my application?


Hi Greg,

For the original paint on your 1968 Corvette, which is also a metallic, I would rub that paint job down with a heavy application of Meguiar's #7 like I show here,

The #7 Rub Down Technique by Mike Phillips


Also read through this and it explains the problems you'll have working on single stage metallic paints.

The Secret to Removing Oxidation and Restoring a Show Car Finish to Antique Single Stage Paints


After rubbing it down with the #7 then I'd apply a high quality Carnauba wax. Here's one that's real easy to use by hand or machine. Apply a thin coat and then wipe off - it wipes off super easy.

Finally Liquid Souveran Wax achieves the Pinnacle of Perfection. Liquid Souveran Carnauba Wax has the ease of a liquid wax with the protection and


If you want a really nice past wax, then get one of these,

Pinnacle Souveran Paste Carnauba Wax is Brilliant on Red- Awesome on Black! Souvern is hand poured, one container at a time, and boxed with an

Pinnacle Signature Series II Carnauba Paste Wax will give you a deep, wet finish will exceed your expectations. car wax, carnauba paste wax, pinnacle


Also, the word "glaze" is so confusing. The #7 is a TRUE glaze, most everything else on the market with the name glaze is either a wax, a sealant or a polish. So don't get hung up on that word.


On Autogeek.com


Meguiar's #7 Show Car Glaze


Hope this helps...

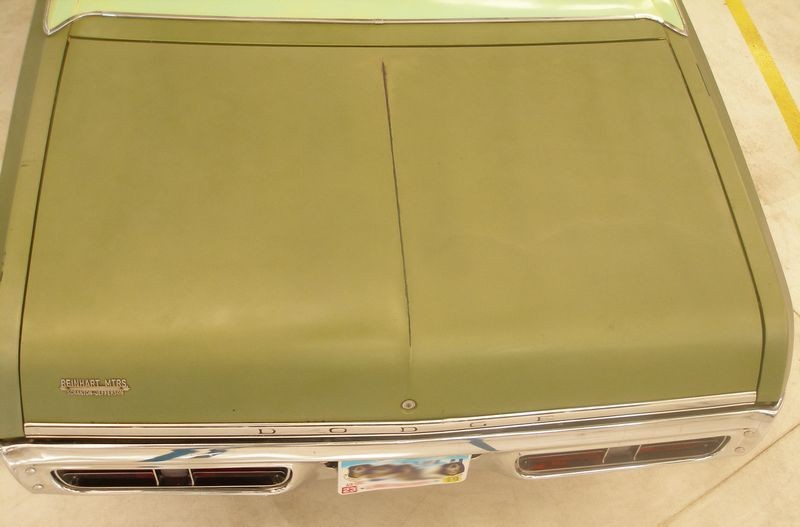
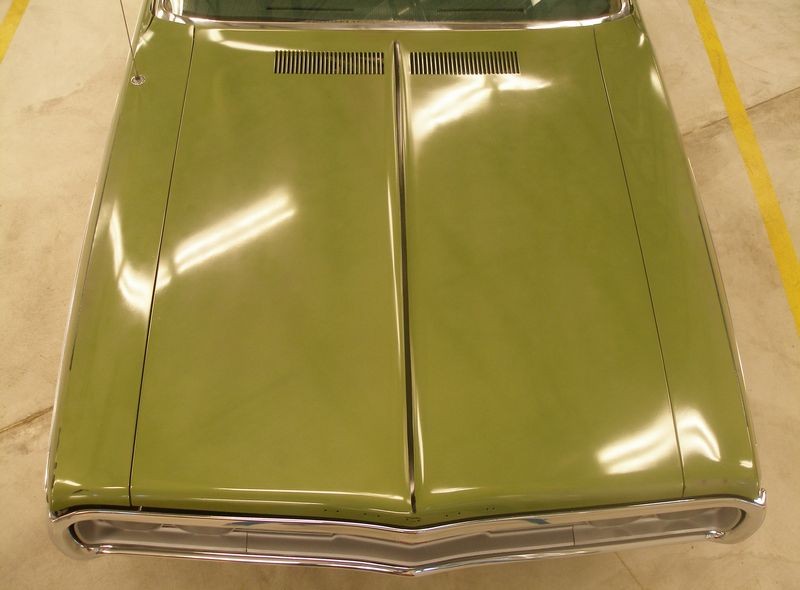
Cool car by the way...


:)
 
Would love to see the results once that car is ready. Nothing beats original.

The early C3's/chrome bumpers are great looking cars.
 
Another concern when working on single-stage metallic's that I didn't see mentioned in Mike's thread on restoring single-stage paints, especially lacquer's, which is the type of paint used on GM cars of that era, is that it is easy to create halos in the metallic which are caused by an uneven distance from the surface of the metallic particles.

Sometimes with lacquers it is possible to buff through one coat of paint to the next and there will be a visually apparent ring (or halo) at the area of buff through.

That ring you see is the blend edge of one coat into the next. The metallic particles are now right at the surface at that blend edge as a result of buffing through the uppermost coat into the underlying coat and the ring is visible as a result of the metallic particle placement and orientation within the paint film.


I thought I had an article on this topic but all I can find is a post.... I'll turn it into an article but until then...


Tiger Stripes from the buffing process
For this meaning of the term tiger stripes, if you buff too much on single stage metallic paint you will remove enough pigmented or colored paint plus abraded the aluminum flakes enough to leave stripes or lines in the paint that mimic the way you moved the buffer over the paint.

I don't have any good pictures of Tiger Stripes from over-buffing single stage metallic paint. I've seen it in my life but must not have had a camera handy.

You can get an idea of what this over buffing of single stage paint can look like in this write-up. I'm not saying my friend Craig over buffed this paint, it could have happened from before he owned the car. But you can definitely see a pattern of light and dark lines in the paint after he removed the extreme oxidation and restored clarity and gloss to the finish.

1971 Dodge Coronet Original Paint Extreme Makeover with Meguiar's #7 Show Car Glaze


Before

1971_Dodge_Single_Stage_009.jpg


1971_Dodge_Single_Stage_010.jpg


After

1971_Dodge_Single_Stage_011.jpg


1971_Dodge_Single_Stage_012.jpg


What can you do?
The best thing you can do when buffing on single stage metallic paint is to take a very non-aggressive approach when choosing compounds and polishes and use a light touch. Then always use a crosshatch pattern when buffing, don't simply go from side to side.

And if it's not your car then less is more...

First educate your customer on the type of paint their car has and the unique issues buffing on and restoring this type of paint brings to the table. Then under promise what you can do and then do your best to over deliver. And of course this forum is always here to help.

:)
 
I thought I had an article on this topic but all I can find is a post.... I'll turn it into an article but until then...

Tiger Stripes from the buffing process
For this meaning of the term tiger stripes, if you buff too much on single stage metallic paint you will remove enough pigmented or colored paint plus abraded the aluminum flakes enough to leave stripes or lines in the paint that mimic the way you moved the buffer over the paint.

I don't have any good pictures of Tiger Stripes from over-buffing single stage metallic paint. I've seen it in my life but must not have had a camera handy.

...

Yes, same principle, same phenomenon. We just described the result in different shapes, i.e., stripes vs. rings. Both are real concerns.

Back in the day, I would always put 4-6 coats of clear lacquer on all of my metallic lacquer paint jobs to eliminate this issue. Enamels not so much as "rubbing out" of enamels was not a standard or mandatory process as it is for lacquers.

Also, some of the striping evident in single stage metallics is a result of the paint application, not necessarily buffing. I've seen striping in paint jobs before they ever saw a buffer.
 
So I heard back from the owner and the info I'm going to share it to in-detpth to send out for one set of eyeballs.... so here you go...


Mike, thanks for the info. Read over the links you suggested. I see that clay detailing is suggested before moving on to # 7 glaze.

1.What grade (fine or medium) detailing clay should I use on my 68 with original paint?

2.Also what size eg. 100 grams 160 grams 180 grams etc. do I need to do my whole car?

Thanks


Greg


Hi Greg,

The primary difference in all the clay bars on the market are the aggressiveness of the abrasives and the quantity of the abrasives in the clay. With an aggressive clay you may be able to remove the bonded contaminants with 8 back and forth strokes. With a less aggressive clay you may be able to remove the bonded contaminants with 20 strokes. They will both work it’s just one tends to be faster than the other due to the aggressiveness of the abrasives.

Also, the abrasives in clay are not like grit like most people think of when they think of abrasives, they are pulverized and that’s why clay doesn’t scratch. You can mar paint when claying simply because paint is scratch sensitive but not physically scratch it unless your clay is dropped onto the ground and picks up some dirt or abrasive particles.


Claying oxidized single stage paint is a tick on the tricky side. There are two ways to do it and after doing both ways the approach I would use and recommend would be to clay first and then hit the paint with the #7.


Method 1: Clay before rubbing the paint down with the #7

With this method you're going to waste a bar of clay because you're going to load it up with dead, oxidized paint. Here's a picture of a white bar of clay, (Meguiars), that I used to clay an oxidized Ford Bronco with blue paint.


Here's the write-up for a 1986 Ford Bronco I rubbed out in 2004 with single stage paint.


1986 Ford Bronco II - Extreme Makeover


Here's a picture from the above write-up that shows what happens when you use clay on oxidized single stage paint.

2006BroncoContaminantsonClay.jpg


Not a huge deal but the point being when you clay oxidized single stage paint it's going to load up your clay with dead paint.


The cost of the clay compared to the cost of a 1968 Corvette with the original single stage paint is meaningless to me and I'd waste a bar of clay any day to bring back a beautiful finish on an incredibly cool survivor car.


Method 2: Clay the paint AFTER the #7 Rub Down

Rubbing down neglected, oxidized original single stage paint 2-3 times with #7 and a terry cloth wash cloth like I show in my how-to articles will gently remove the dead paint while gorging the paint with the TS oils found in Meguiar's #7 bringing the color of the pigments back to life.

This tends to leave the paint very oily and trying to rub clay over oily paint is sticky and not much fun to do. It can be done but know what you're getting into before you start. You can try to remove any residual oils off the surface after the #7 process and before claying but that' working backwards as anything that will remove these oils will also tend to dull down the paint and I practice and teach to always be working forward in your process, not backwards.


Recommendation


Step 1: I'd wash this Corvette using a waterless wash.

Step 2: Next I'd clay it really good.

Step 3: Then I'd rub the paint down 2-3 times with the #7 letting each application soak for a few hours and possibly letting the first application soak over night. (I've never seen a picture of the car so I don't know what the oxidation level looks like)


Seal the deal
After the above, the paint may look so good (to you) that at this point you could apply a quality Carnauba wax and then stick a fork in it and call it done and go cruising.


Machine polishing
If you want to try to squeeze a little ore gloss and shine out of the paint and also remove some swirls and scratches then you could do some machine polishing with a medium to fine cut polish. I don't know if I would use a compound as you may alter the appearance by buffing too much on the metallic flake.


Let me know what you want to do after the #7 Rub Down and I'm happy to help.


:)
 
Here's a good clay kit, the clay is easy to knead. Most brand name clay works the same but some clays are easy to knead and some clays are a real pain in the rear to try to knead and the last thing you want to do is fiddle around trying to knead your clay when what you want to do is clay the car (not knead the clay).


Mothers California Gold Clay Bar - Mothers California Gold Clay Bar Paint Saving System, detailing clay bar, 2 clay bars


Pinnacle’s Ultra Poly Clay is the single finest detailing clay available today.


Last time I used the Meguiar's clay it seemed rubbery?


If you need some #7 here's the link,

Meguiar's #7 Show Car Glaze


And normal everyday cotton wash cloths like you probably already have in the linen closet work great. These towels from Griot's also work like cotton even though they are microfiber

Griots Garage Micro Fiber Wax Removal Cloths - 3 Pack


BEFORE PICTURES

Everyone on this forum would love to see the before pictures of your Corvette, so please take a few and send them to me and I'll post them to this thread for you.


Remember, after you restore the paint on your Corvette you can ALWAYS get some after pictures. You can never go back in time to get the before pictures.


:)
 
Back
Top