How to use a Rotary Buffer to buff out a truck swirl free

Joined
Dec 5, 2022
Messages
51,004
Reaction score
7
How to use a Rotary Buffer to buff out a truck swirl free


When you attend one of our 3-day Detailing Boot Camp Classes you get more hands-on time with every polisher working on real world cars both special interest and daily driver than anywhere else in the world. I guarantee it.

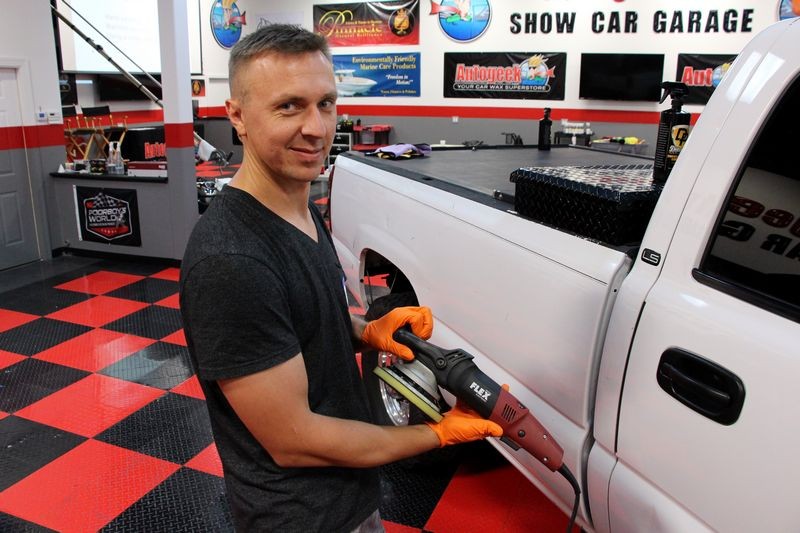
Starting on Friday we begin with the easiest tools to learn how to use and the progress our way up to the tools that require the most technique to master, which would be rotary buffers.

This truck belongs to a local contractor that does a lot of work for use here at Autogeek and he's also a competitive paddle boarder. So he uses this as his work truck and also to transport his paddle board to local rivers, waterways and the ocean to train and compete for competition.

We used this truck to go over,

  1. The aggressive approach to washing a vehicle
  2. Traditional engine detailing
  3. Headlight correction
  4. Hot water extractors
  5. Tornador air tool
  6. How to use a rotary buffer
For this set of pictures I'll share the rotary buffer detailing class. The truck had already been washed and chemically decontaminated but it still needs to be mechanically decontaminated.

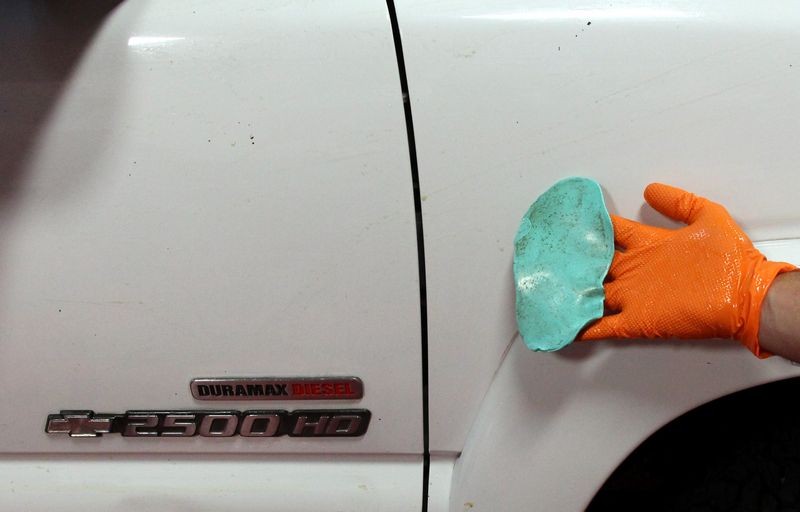
For those that might no know what Mechanical Decontamination means, it's the step where you use detailing clay or some other tool to remove the above surface bonded contaminants like,

  • Overspray paint
  • Industrial fallout
  • Transportation pollution
  • Air-borne dirt and contaminants
  • Tree sap mist
For this section of the class, we've already worked through 5 other types of tools and a total of 6 other cars. So by now the students in this class have all had a chance to use,

  • Detailing clay
  • Nanoskin Wash Mitts
  • Nanoskin Towels
  • Nanoskin Pads
So when we tackle the rotary buffer project car I allow the class to choose whatever tool they want to spend more time with to mechanically decontaminate the paint. I call this....

free for all


Here you can see Cody using a Griot's Garage 6" DA and a Nanoskin Autoscrub pad to decontaminate the paint.

watermark.php


watermark.php


Here's Rob and Chris using detailing clay...

watermark.php


Here's Reeves using a Nanoskin Wash Mitt which can be used like a Nanoskin Towel with clay lube.
(you don't have to reserver it for decontaminated cars during the car washing step)

watermark.php


Here's Tomasz using a Nanoskin pad on the Flex 3401.
Note he's working on the glass here and think about it... if the paint is contaminated don't you think the glass might be contaminated too?

watermark.php


watermark.php


Here's Sean using detailng clay...

watermark.php


watermark.php


:)
 
Next - How to use the rotary buffer


In this class session I go over everything you need to know about holding and using a rotary buffer to make fast work of removing years of neglect.

watermark.php


watermark.php


watermark.php


I also bring out the Flex PE8 and show that the same basic techniques for using a full size rotary buffer apply to the PE8.

watermark.php


watermark.php


People learn best by doing....
At my classes, there's very, very little sitting time. In fact, most of the time you're working because people learn best by doing, not looking at a power point or listening to someone drone on about this and that.

After the demonstrations the students are turned loose and Nick and I walk around and monitor everyone's technique and offer suggestions and corrections to technique to make using the rotary buffer easier.

No one that's brand new to the rotary buffer becomes an expert with this tool the first time they use it. Becoming an expert takes investing time behind the buffer.


Here's Chelsea showing the guys how it's done!

watermark.php


Here's Tim showing the DeWALT who's boss!

watermark.php


watermark.php


Here's Walter taming the Flex PE14....

watermark.php


Here's Rob knocking out the swirls, scratches and oxidation on this old Chevy work truck....

watermark.php


watermark.php


:)
 
Removing the holograms and polishing to a high gloss

The fast, simple and intelligent way to insure zero holograms after using a wool pad, an aggressive compound and a rotary buffer is to simply do what I call

Change the action of the tool


What that means is simply switch over to any quality dual action polisher.


By doing this and using a quality polish with a foam pad you will not only polish the finish to a high gloss but you'll remove the hologram scratches at the same time.

Simple Simon and the way to work smarter instead of harder....

And again, since by now the class has used 5 different types of dual action polishers and 8 different brands/models before we moved on to rotary buffers, I let the students choose which dual action polisher they want to get more time with and call this the free for all portion of the rotary buffer class.


Here's Bob and Reeves, Bob is using a Porter Cable and Reeves is using a Flex 3401

watermark.php


Here's Mike using the RUPES Duetto...

watermark.php


Here's Chris and Michael using the Flex 3401...

watermark.php


watermark.php


Here's Reeves using the Flex 3401 and polishing the tail lights....

watermark.php


:)
 
Seal the deal...


In the car detailing world and even more broad, in the consumer retail world, there are,


  1. Car waxes
  2. Synthetic paint sealants
  3. Paint coatings
And they all do the same thing they just do it differntly....

They seal the paint.


They also add gloss, shine, increase depth and reflectivity and of course, create a sacrificial barrier of protection.

After polishing we sealed the paint and in my world we do this by machine.


Here's Sean using a 6.5" Hybrid red waxing pad with the Flex 3401.
If you look closely this is the Flex 3401 without the bail handle. I keep this one around for getting into tight areas where the bail handle would be in the way.


watermark.php


Here's Bob using the Porter Cable 7424XP
Bob owns a 1957 Chevy and I expect to see it glistening with the new skills he's acquired at the class. Look for Bob's Chevy at Detail fest in 2016

watermark.php


Here's Walter using the Flex 3401...

watermark.php


Here's Michael and Chris knocking out the hood....

watermark.php


:)
 
Here's the results...

watermark.php


watermark.php


watermark.php


watermark.php


watermark.php


Update
This picture was taken with my iPhone about 2 days ago and in this pic you can see Don has his paddle board mounted back in the roof racks and his truck is looking good!

watermark.php


Thanks Don for trusting Autogeek with your truck!


And great job class!


:dblthumb2: :dblthumb2: :dblthumb2:
 
The white color on this truck definitely masked the level of paint damage. The truck was truly transformed. The engine bay looked real purdy after we were done too.

Using a rotary machine for the first time is truly hard work. It does take a lot of technique and the right touch to make it do what you want. If you don't it will let you know in a hurry. This is an area I have to work on, but glad I was exposed to it in class.

Bob in rare form, caught buffing in Nick's spy shots above! Bob I miss you MAN!! Also shout-out to all the class!

I have to say I'm impressed with the shine on those tires!! Its been since the middle of July and that tire coating is still shining!


Best,
Rob
 
The white color on this truck definitely masked the level of paint damage. The truck was truly transformed. The engine bay looked real purdy after we were done too.

Somewhere I have the before shots of this truck and they show horrific swirls in the paint and now they're all gone.

I'm pretty sure I posted them on the forum to show the class the condition of the truck BEFORE the class but for some reason I was unable to find them yesterday but I'll look again because I agree with you, when people see the before condition they'll really be impressed.


Using a rotary machine for the first time is truly hard work. It does take a lot of technique and the right touch to make it do what you want. If you don't it will let you know in a hurry. This is an area I have to work on, but glad I was exposed to it in class.

Definitely a tool you need to put some hours behind to learn how to master it. I recommend buffing on junker cars no one cares about for practice.


Bob in rare form, caught buffing in Nick's spy shots above! Bob I miss you MAN!! Also shout-out to all the class!

I'll send an e-mail out today to the class to let them know I've added HUNDREDS of pictures from their class. Sad to say most of them don't appear to be "forum people".

Maybe they are Facebook people? I just posted a few pictures and the link to this thread on my Facebook page.

Mike Phillips Facebook Page


I have to say I'm impressed with the shine on those tires!! Its been since the middle of July and that tire coating is still shining!


Best,
Rob


I also have all the pictures from washing the car and showing the paint bleeding plus the pictures showing the tires being cleaned and then coated with DP Tire Coating.

Pictures are always time consuming to do them right but when you do them right they a picture tells a thousand words and Google indexes them really well for people searching car detailing topics.


:dblthumb2:
 
Mike, what is the largest size pad one would want to use on the PE8?

Great write up - as usual. I've been missing the rotary lately....
 
Mike, what is the largest size pad one would want to use on the PE8?

Great write up - as usual. I've been missing the rotary lately....


Flex recommends no larger than 8" and somewhere on this forum I have an article on the Flex PE14 that shares that official recommendation by Bob Eichelberg.


My own experience shows a 7.5 to be a better match and there's a number to choose from.

Also, smaller pads tend to be easier to manage when buffing with a rotary buffer.


Good question.


:)
 
Back
Top