Mike Phillips
Active member
- Dec 5, 2022
- 51,004
- 6
How to use the Dr. ColorChip Paint Chip Repair Systems
Dr. ColorChip how-to videos here,
Dr. ColorChip How-To Videos with Dan McCool and Mike Phillips
Begin Article
Have you ever been driving down the road, having a great day and then all of a sudden here that dreaded sound....
Ting.....

There's nothing more annoying than a rock chip in the paint on your brand new car except for having to deal with the rock chip once you discover it.
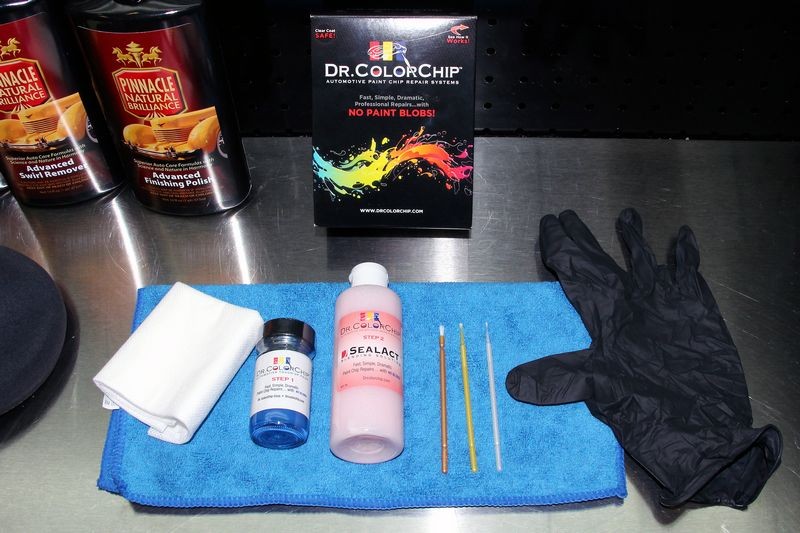
The folks at Dr. Color Chip have created a kit that makes fixing rock chips fast and easy, so easy anyone can do it. It's really as simple as 1, 2, 3 just follow the directions that come with the kit and before you know it the unsightly rock chips will have disappeared and you can get on with your life.
Question
Do I do the rock chip repair first or do the paint correction, polishing and waxing first?
Answer
Probably the most common question I get about doing rock chip repair goes like this,
My car has rock chips and there's also swirls, scratches, water spots and oxidation in the paint. Should I polish the paint before using the Dr. ColorChip Rock Chip Repair Kit or after I fix the rock chips?
The answer is, for most people you'll be better off to polish the paint first.
By polishing the paint first you'll already be starting with a clean, polished finish and you might even locate rock chips you were not previously aware off. You will also have cleaned via abrading all of the paint including the paint surrounding the chips or scratches and the surface that is chipped or scratched. Then wiping the chips or scratches with IPA will remove any trace compound, polish or wax residues.
Also, by compounding, polishing and waxing first you won't risk removing any of the touch-up paint via the compounding and polishing process.
More info
To learn more about polishing your car's paint before using the Dr. ColorChip Rock Chip Repair Kit, see how we polished the paint on Mitch's Mustang Mach 1 before fixing the rock chips.
From working by hand to working by machine - You can do it.
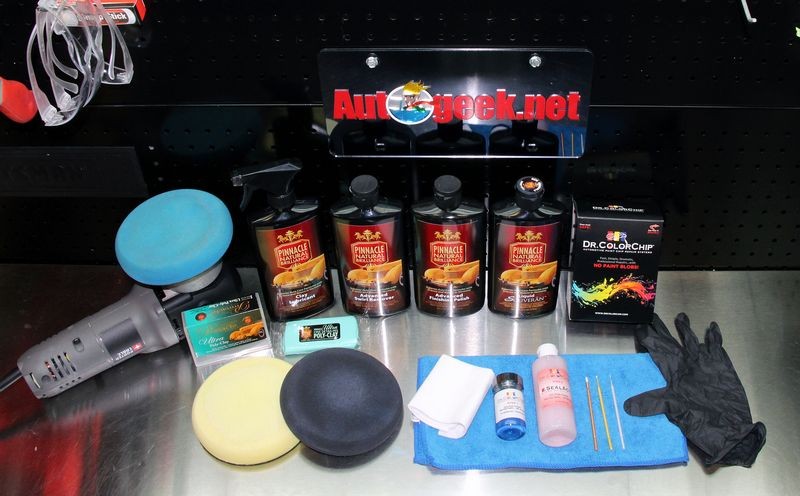
How to use the Dr. ColorChip Paint Chip Repair Systems
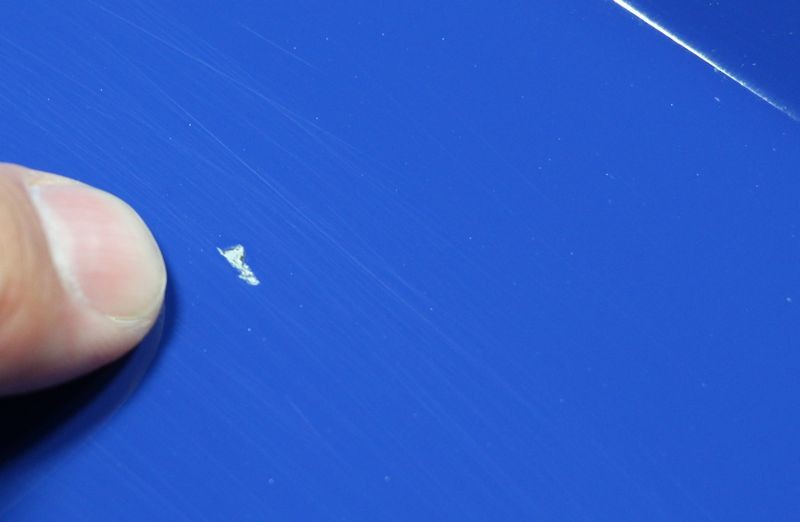
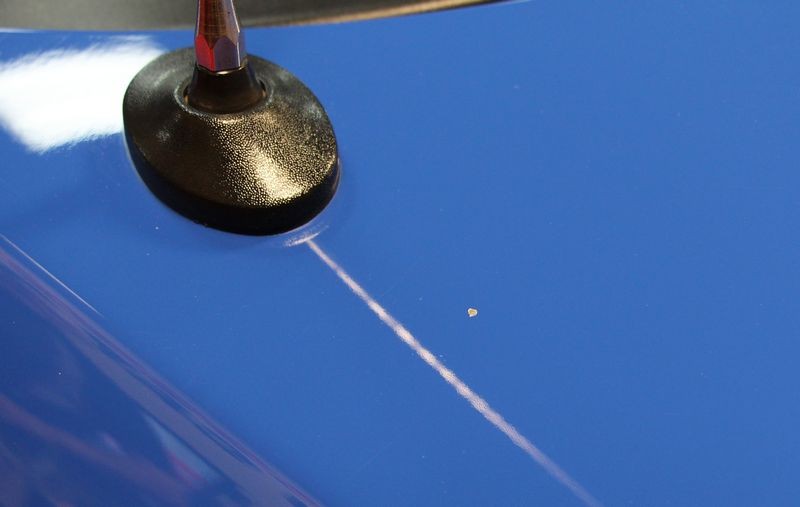
See the detailed pictures below to see exactly how to use the Dr. ColorChip Rock Chip Repair Kit as we walk through the steps to Mitch's 2003 Mustang Mach 1 in Azure Blue.

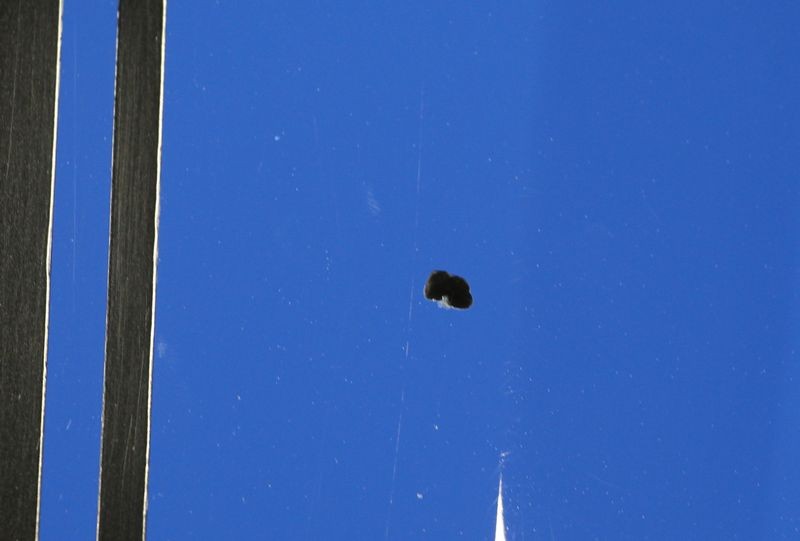
There were about a dozen rock chips randomly located over the front clip of Mitch's Mustang from large to very small...
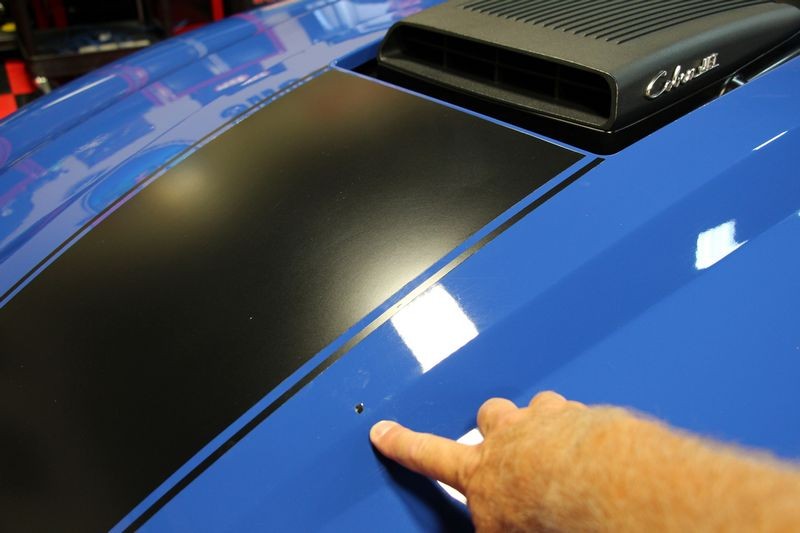
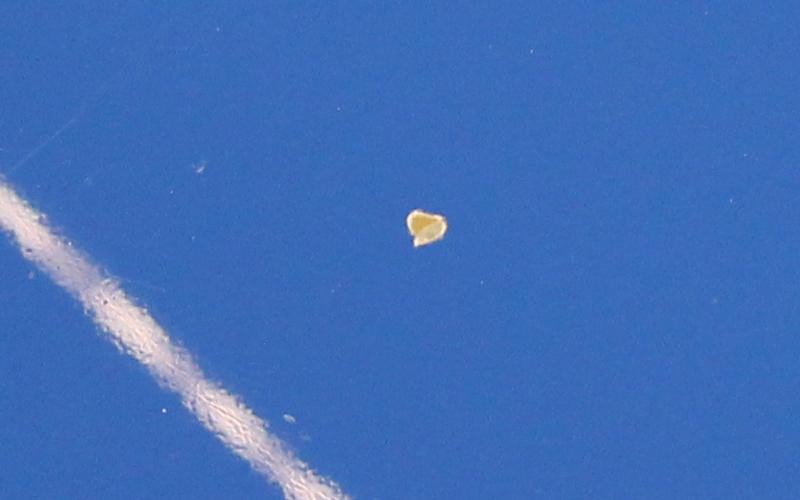
This was the largest rock chip and because it was so large and deep we used a modified technique to fill this chip in that I'll share below.

")
Dr. ColorChip how-to videos here,
Dr. ColorChip How-To Videos with Dan McCool and Mike Phillips
Begin Article
Have you ever been driving down the road, having a great day and then all of a sudden here that dreaded sound....
Ting.....
There's nothing more annoying than a rock chip in the paint on your brand new car except for having to deal with the rock chip once you discover it.
The folks at Dr. Color Chip have created a kit that makes fixing rock chips fast and easy, so easy anyone can do it. It's really as simple as 1, 2, 3 just follow the directions that come with the kit and before you know it the unsightly rock chips will have disappeared and you can get on with your life.
Question
Do I do the rock chip repair first or do the paint correction, polishing and waxing first?
Answer
Probably the most common question I get about doing rock chip repair goes like this,
My car has rock chips and there's also swirls, scratches, water spots and oxidation in the paint. Should I polish the paint before using the Dr. ColorChip Rock Chip Repair Kit or after I fix the rock chips?
The answer is, for most people you'll be better off to polish the paint first.
By polishing the paint first you'll already be starting with a clean, polished finish and you might even locate rock chips you were not previously aware off. You will also have cleaned via abrading all of the paint including the paint surrounding the chips or scratches and the surface that is chipped or scratched. Then wiping the chips or scratches with IPA will remove any trace compound, polish or wax residues.
Also, by compounding, polishing and waxing first you won't risk removing any of the touch-up paint via the compounding and polishing process.
More info
To learn more about polishing your car's paint before using the Dr. ColorChip Rock Chip Repair Kit, see how we polished the paint on Mitch's Mustang Mach 1 before fixing the rock chips.
From working by hand to working by machine - You can do it.
How to use the Dr. ColorChip Paint Chip Repair Systems
See the detailed pictures below to see exactly how to use the Dr. ColorChip Rock Chip Repair Kit as we walk through the steps to Mitch's 2003 Mustang Mach 1 in Azure Blue.
There were about a dozen rock chips randomly located over the front clip of Mitch's Mustang from large to very small...
This was the largest rock chip and because it was so large and deep we used a modified technique to fill this chip in that I'll share below.

 rops:
rops: