How to use the Flex 3401 to remove swirls & water spots

Joined
Dec 5, 2022
Messages
51,004
Reaction score
7
How to use the Flex 3401 to remove swirls & water spots


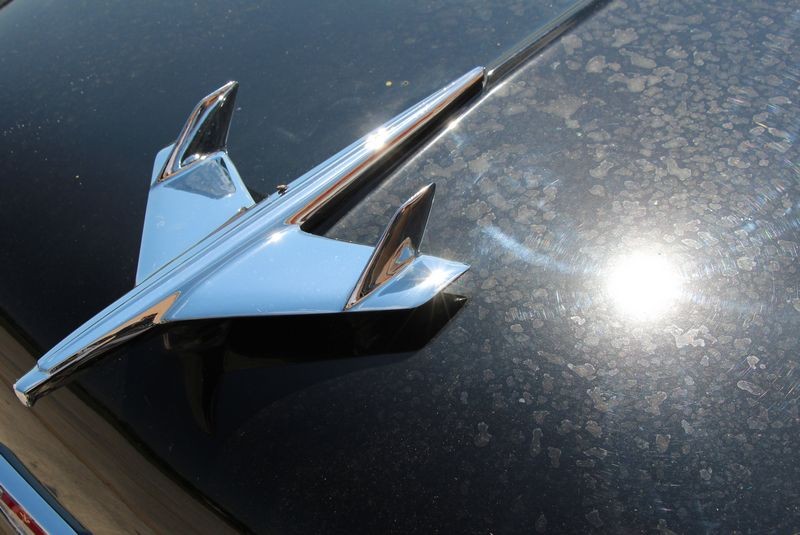
For the Flex 3401 Forced Rotation/Oscillation Orbital Polishers I have a a black 1955 Chevy 210 in what I would consider absolutely horrendous condition.

This car will really put my class to the test. So far every tool they've used is of the free spinning spindle design. Now they're switching over the the gear-driven Flex 3401, a tool that is very different than everything they've used so far at our 3-day class.


Process
  1. IronX to chemically decontaminate the paint - The paint on this Chevy bled like a stuck pig
  2. Foam gun to wash the car
  3. Foam gun plus Nanoskin Autoscrub Mitts to mechanically decontaminate the paint.
  4. Remove holograms, swirls, scratches, water spots and oxidation using Wolfgang Uber Compound with LC 6.5" and 5" Hybrid White Foam Polishing pads
  5. Polish to a high gloss using Wolfgang Finishing Glaze with LC 6.5" and 5" Hybrid Black Foam Finishing pads.
  6. Machine wax using Wolfgang Fuzion Paste Wax with 6.5" and 5" LC Red Foam Waxing pads.
First a few pictures showing the swirls in the paint.... here's how the car looked when she arrived....

watermark.php


watermark.php


This is a section cropped out of the above picture to really give you a full dose of ugly!

watermark.php


Here's the other side of the hood....

watermark.php


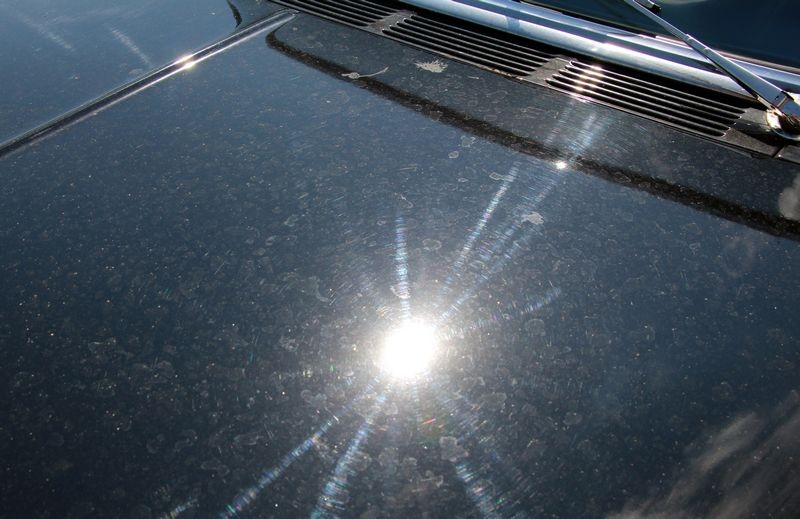
This is the middle area of the hood out in front of the windshield....

watermark.php


This is the driver's side of the roof....

watermark.php


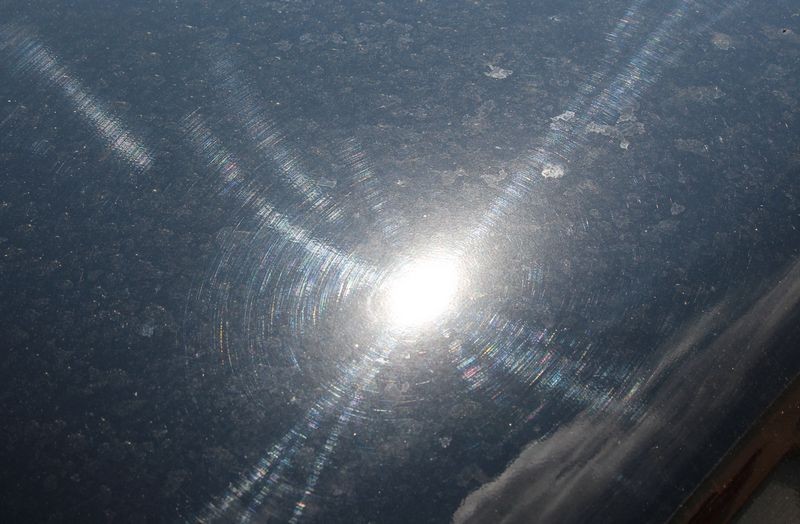
Here's the driver's side of the trunk lid - the holograms are super visible in this shot...

watermark.php


A close up of the same section of paint in the above picture....

watermark.php


The above were taken BEFORE we used the IronX, Nanoskin Wash Mitts an Foam Gun to wash the car to prep her for machine buffing.


:)
 
Continued...

First up a demonstration on how to use the Flex 3401 to correct the paint and the specific tips and techniques for using this tool.


watermark.php


watermark.php


watermark.php


watermark.php


I love it when people inspect closely!

watermark.php


watermark.php


How to buff out thin, tight panels....

watermark.php


watermark.php


:xyxthumbs:
 
Time for our students to get busy!


Machine Polishing

watermark.php


watermark.php


watermark.php


watermark.php


watermark.php


Machine Waxing


watermark.php


watermark.php


watermark.php


watermark.php


This is a machine applied layer of Wolfgang Fuzion Paste Wax!

watermark.php


watermark.php


Microfiber gloves and Gold Plush Jr. Microfiber Towels....

watermark.php


watermark.php


:xyxthumbs:
 
The results to the black paint on this 1955 Chevy were the most dramatic our of all the cars the class worked on during the 3-day class.

The owner thought we painted his car!


watermark.php


watermark.php


watermark.php


watermark.php


watermark.php


watermark.php


watermark.php


watermark.php


watermark.php


watermark.php


watermark.php


watermark.php


watermark.php


watermark.php


Nice.....


:dblthumb2:
 
The above 1955 Chevy is just one of the many cars used for training and hands-on learning here at Autogeek's Detailing Boot Camp Classes.

We always have a mix of modern and special interest cars so everyone learns using the widest spectrum of different types of cars. Plus it makes for a fun and enjoyable experience that you can't get anywhere else.


Next class is coming up in Juy....

Next Detailing Boot Camp Class - July 17th, 18th & 19th


I posted a new thread today about just ONE of the cars that will be here for this upcoming class.


Anyone remember the movie Christine? (and the car?)


watermark.php


For more information or to get registered click this link

Register for the July 17th, 18th and 19th 3-day class


If you have any questions about the class you can call and ask to speak with either myself or Nick.


See you in July!


:dblthumb2:
 
Nothing beats that forced rotation on the Flex.
 
Wow Beautiful work and real cool what the class learned....awesome!!
 
What I always appreciate is the passion the people that attend our classes bring to the table when working on cars like this.

Sure they work hard on the 2012 Chevy Traverse and the 2003 Dodge Ram Truck we also had at this class but "hey" I think guys like working on cars like this classic Chevy more than mundane daily drivers.

The techniques and head knowledge you learn working on a car like this applies to any car so it's less about the car and more about a way of learning that's fun.

And when the class is having fun I know they're going to remember what they learned.


:)
 
Mike, great results on that Chevy. Why didn't you tape the car? I couldn't help notice in several of your photos some were using improper technique by not draping the power cord over their shoulder.
 
Mike, great results on that Chevy.

Why didn't you tape the car?

Great question. We actually don't tape classics with chrome or stainless steel trim because we buff it out just like the paint.

Chrome and stainless steel trim become dull, stained and in the case of stainless steel, it oxidizes. So when doing the first step, (the correction step), after buffing out the paint I practice and teach to take the same pad and product you're already using and run your buffer down the trim, including the bumpers. It only takes a few seconds and dramatically "brightens" all the brightwork.

Here's another classic car I detailed myself where I shared this tip/technique about 3 years ago.

See Step 7

How to use a one-step cleaner/wax to maximize profits

1970_442_by_Mike_Phillips.013.jpg


That's one of the reasons I prefer to work on muscle cars, street rods, classics and antiques.

NO PLASTIC TRIM TO TAPE OFF

Now this car was part of my last 3-day detailing boot camp class and at all my classes I have both old and new cars so we do go over how to detail modern cars with plastic exterior trim and how to properly tape-off a car.


I couldn't help notice in several of your photos some were using improper technique by not draping the power cord over their shoulder.

No problem.... that's what our classes are about.... learning.

Most people don't pick up perfect technique the first time they buff out a car. Some might but I've been teaching detailing classes since 1987. I've probably had more people go through my classes than any other class taught anywhere and I know from watching people that most don't pick up perfect technique their first time using machine to polish.

For example, Same attended my September 2014 class and it was her first time machine polishing. She was a fast learner, always had the cord over her shoulder when buffing out large horizontal panels.

watermark.php


We have a lot of people that are always brand new to working by machine. So not only do they have to learn everything there is about using the tool and avoiding mistakes but they also have to learn all the little things like placing the cord over your shoulder when buffing on horizontal panels like the roof, hood and trunk lid.

It's less important when doing vertical panels as the cord typically comes out the back of the tool and falls to the floor out of the way.

By the way, this 1956 Dodge Royal Lancer continues to win awards for best car, best paint, etc. and most of the people at our class that buffed it out were all newbies.


Pictures & Comments: Sept 2014 Detail Boot Camp Class

watermark.php


Good questions, thank you for asking them....


:dblthumb2:
 
Back
Top