Mike Phillips
Active member
- Dec 5, 2022
- 51,004
- 6
How to wash your car KISS style!
KISS stands for Keep it Simple Simon
Here in the forum world it's normal for people to take seemingly simple tasks that require a few steps to do a good job and turn the project into Rocket Science requiring multiple steps with sub-steps to boot.
Here's a simple way to wash a car, do a good job and get it clean and ready for detailing.
First things first - whose approach is better?
I go against the grain, that is I don't follow the advice handed down for decades by others on where to start when washing a car. Most of what I've ever read or been told by anyone that's anyone in the car detailing world when it comes to washing a car goes like this,
Traditional Recommend Approach to wash a car
Start at the wheels, tires and wheel wells, and after these are washed and rinsed, then start at the top and work your way down.
Why?
Water spots
If you start at the top, wash and rinse all the body panels, you now have a wet car that needs to be dried off before the water dries and potentially leaves water spots on and even in the paint.
Water Filter Systems
If you have a water filter system like the CR Spotless Water Deionization System you don't have to worry about water spots. But if you don't have their system or something similar, then corrosive elements in the water could lead to nasty water spots on the paint and everything else unless you dry the water immediately.
Here's the deal though, if you do what most people do when using the traditional approach, that is leave the water on the car as you move onto washing and rinsing the wheels and tires next, (without drying the car), by the time you're done washing and rinsing the wheels and tires, (and doing a great job), the water will have already dried on some areas of the car potentially leaving water spots.
Dry the car before washing the wheels and tires
If you dry the car after washing it and then tackle the wheels and tires, it's pretty much impossible to not get the car wet again when washing and rinsing the wheels and tires so you end up drying the car a second time.
I'm not lazy, but I hate doing a job twice.
Here's my approach,
Wheels and tires first, then start at the top and work your way down.
Now lets put a little twist to the age-old traditional approach and instead of starting at the top and working your way down, lets start at the bottom and then move to the top.
Wash and rinse one wheel at a time. After washing and rinsing one wheel, move onto the next wheel and tire and occasionally re-rinse the previous wheel and tire because soap suds and wheel and tire cleaning chemicals have a way of re-appearing and pooling in voids due to gravity.
Continue washing, rinsing and re-rinsing until you've washed all four wheels and tires.
Now move to the top or highest point
Now that the wheels and tires are clean and rinsed, grab your wash mitt and gather some car wash suds and start at the roof and begin working your way down as you wash.
Divide the car you're washing up into sections or work panel by panel.
After washing a section or a panel, immediately rinse that section or panel to remove loosened dirt and other abrasive particles and to prevent any soap suds from drying on the car.
Continue this until you've worked your way from the top of the car to the bottom of the car washing the lowest body panels last as that's where the majority of the major dirt and road grime will accumulate.
By washing the lowest panels last, you prevent cross-contamination and by this I mean removing abrasive dirt particles off the lower portions of the car and moving them in your wash mitt to the higher portions of the car where you could possibly instill heavier swirls and scratches.
While you were washing and rinsing the car from top to bottom, you can occasionally give the wheels and tires a repeated blast of water to ensure any soapy water, wheel and tire cleaners, or even dirt particles that have flowed downward and pooled are continually rinsed clean.
At the very end of the process, give the car a final rinse and then you're ready to dry the car, wheels and tires and at no point will there ever have been the potential for water to dry on anything and thus no risk of water spotting on any portion of the car.
Plus, you won't have to repeat any steps.
That's how I wash a car.
But wait there's more...
If you're the type that REALLY wants to be careful so as to not induce any swirls and scratches into the paint, then here's a tweaked version of the above just for you.
Wash wheels and tires, then lowest body panels and then move to the top
A twist on my approach outlined above for the most anal retentive people would be to,
By doing step #2 after washing and rinsing the wheels and tires, you've removed and reduced the potential to instill swirls and scratches into the upper body panels with gritty particles from the lower body panels BECAUSE you've removed the gritty dirt particles first.
This is an extra step that will take more time so use this technique if appeals to you and time is not an issue. It's also a good technique for washing a car with a flawless, show car finish to start with.
It is important however that after washing the lower panels that you do in fact change out the car wash solution in your bucket and switch to a clean, non-contaminated wash mitt.
Here's some pictures to show you how to wash a car starting with the wheels and tires first and then moving to the top and working your way down...
Tools Needed
GTechniq Gwash Car Wash Soap
CarPro Wool Wash Mitt
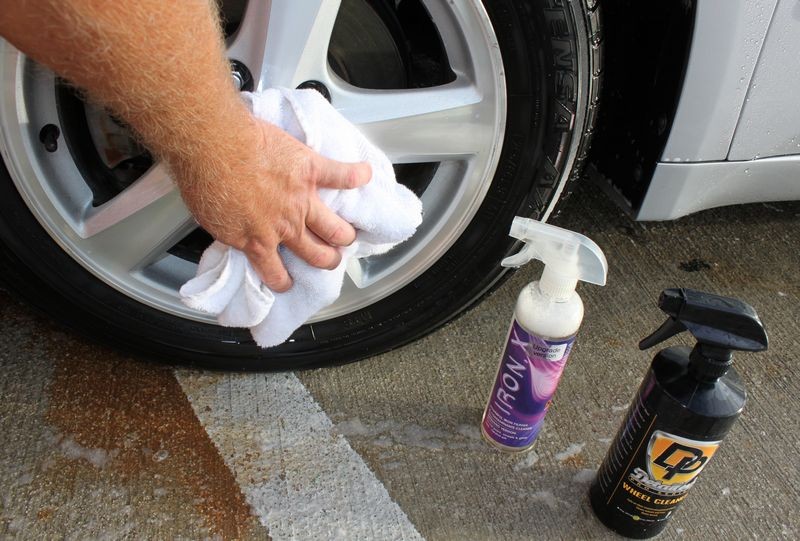
Detailer's Wheel Cleaner
CarPro's Iron X Iron Remover
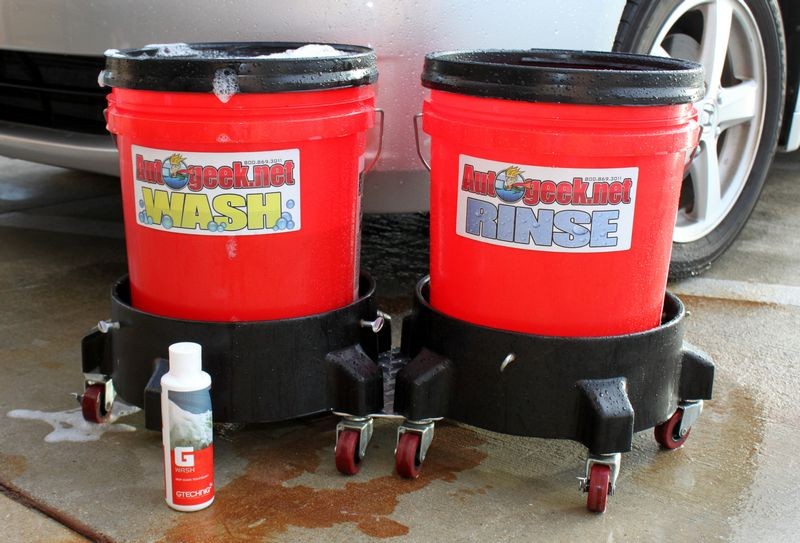
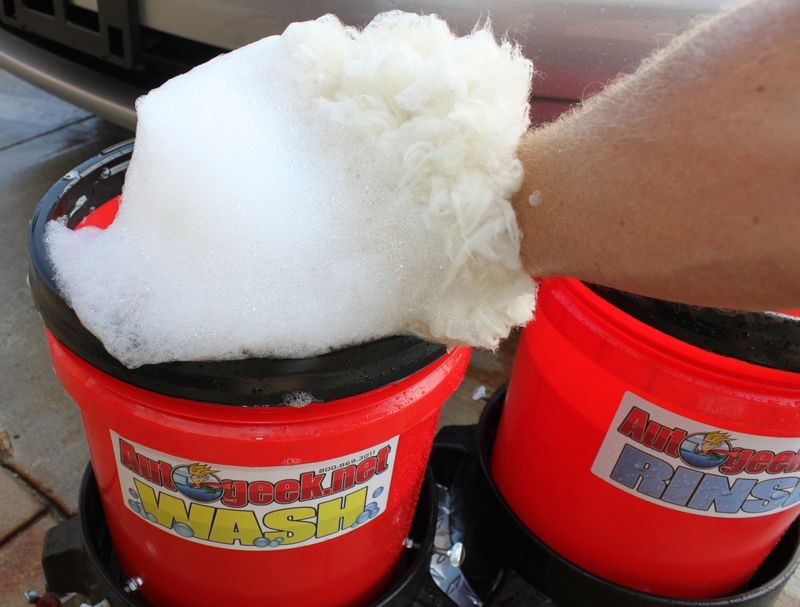
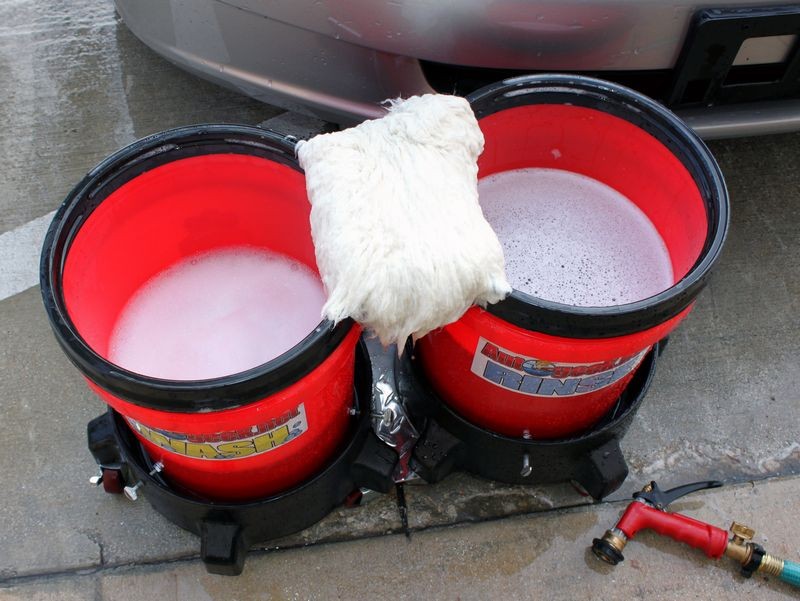
Dual Bucket Wash System
Grit Guard Inserts
Short Handle Tire Brush
8" Boar's Hair Wheel Brush
Carrand Lug Nut Brush - Not pictured below
Optional
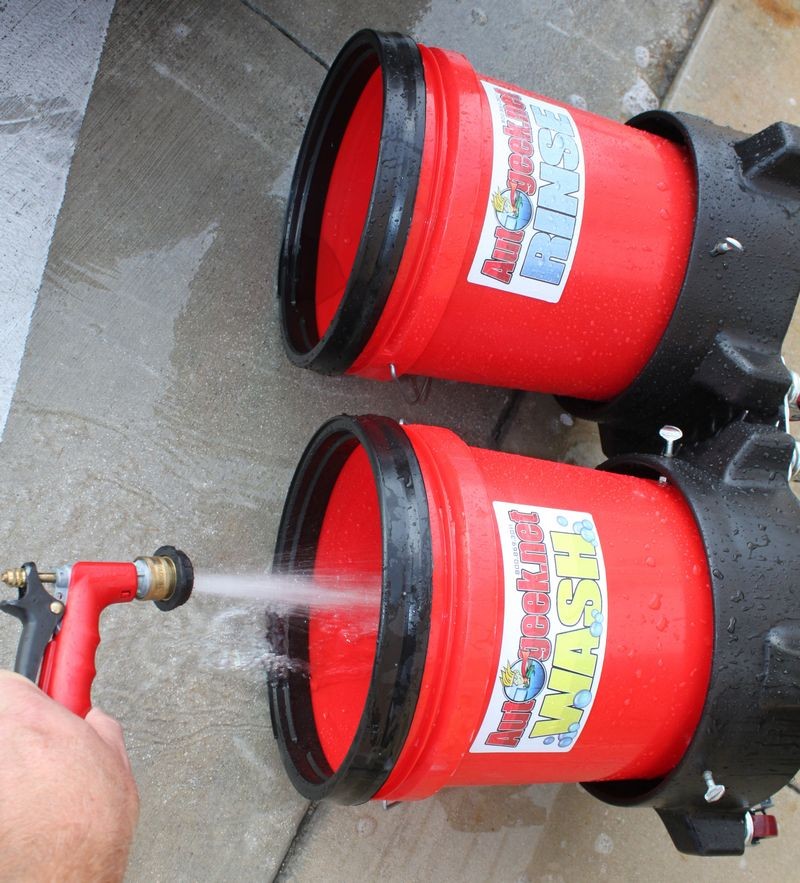
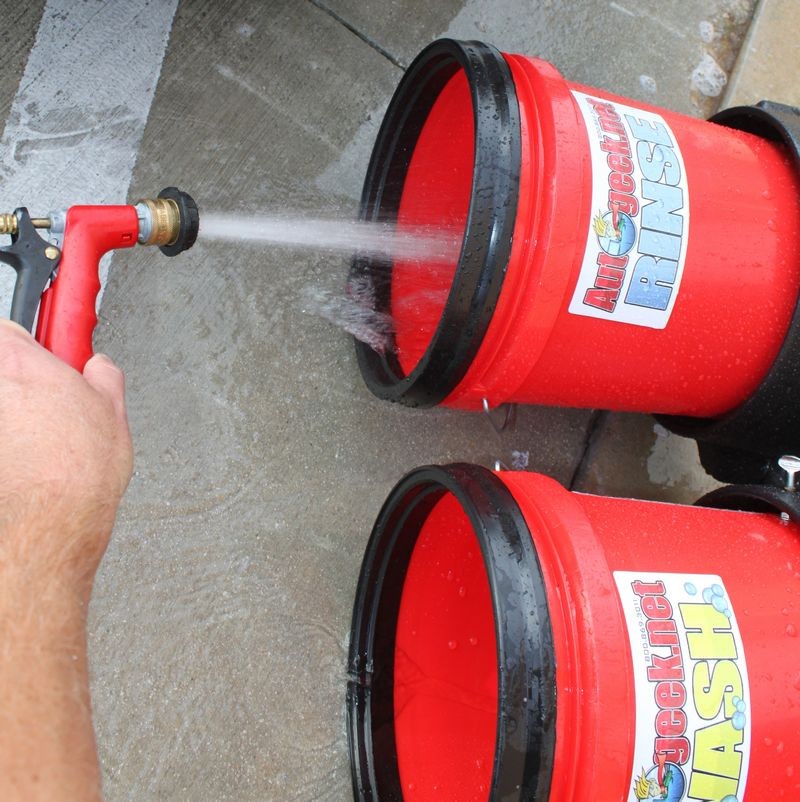
Wash & Rinse Bucket Labels
Quickly in a visually way, ensures you don't mix up your wash solution with your rinse solution
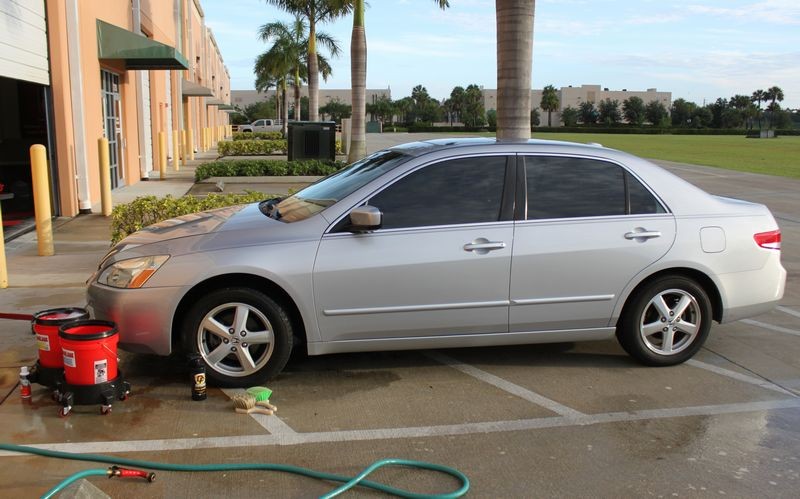
Here's my victim car, it's a 2004, low mileage Silver Metallic Honda Accord, probably the only one like it in the world.

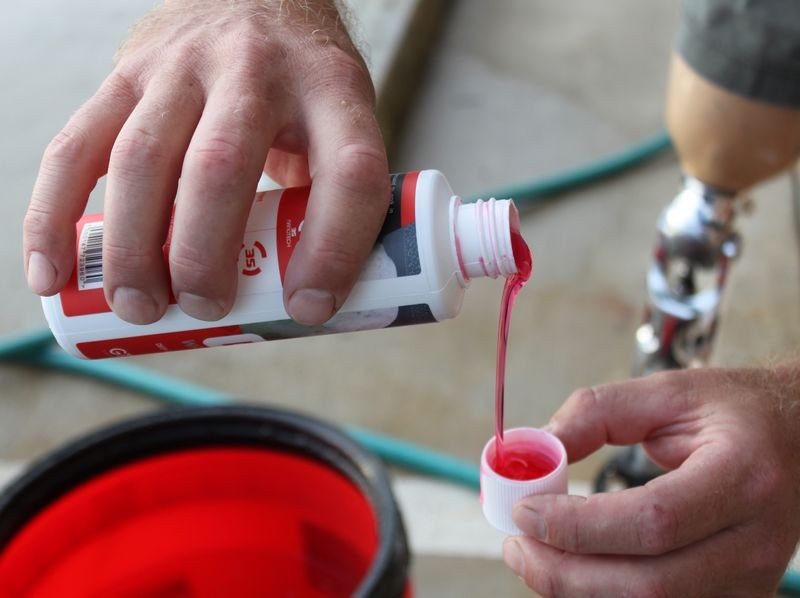
Premium quality car wash soap, GTechniq GWash with a 100% Merino Wool Wash Mitt

Mixing two cupful of GWash with about 3+ gallons of water. The GWash Car Wash Soap has a pleasant cherry scent, it makes washing your car enjoyable.
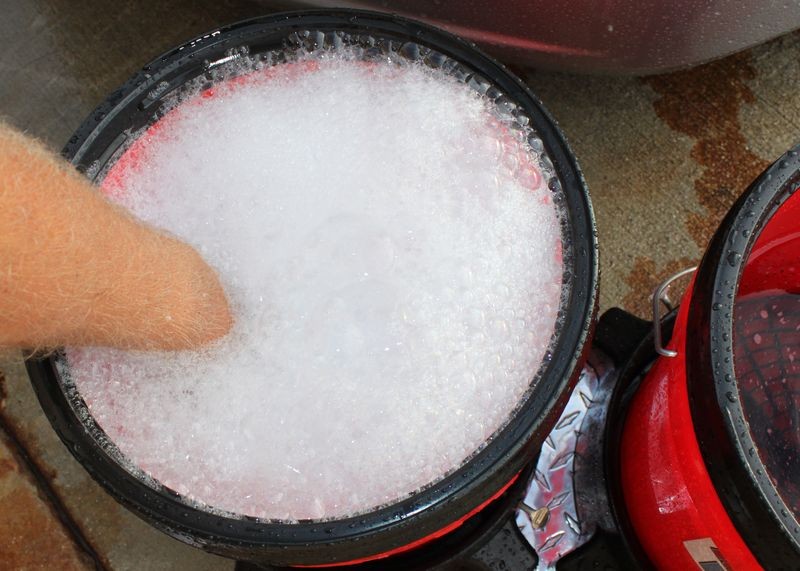
After adding the car wash solution to my water I agitate the water with my fingers spread apart to create piles of rich suds....

Agitating... see the volume getting higher...

TTT or To The Top!
GWash car wash solution and clean rinse water are ready to go...
I'm washing in the early morning, before the sun gets too hot or the wind kicks up...
I start with the wheels and tires first...
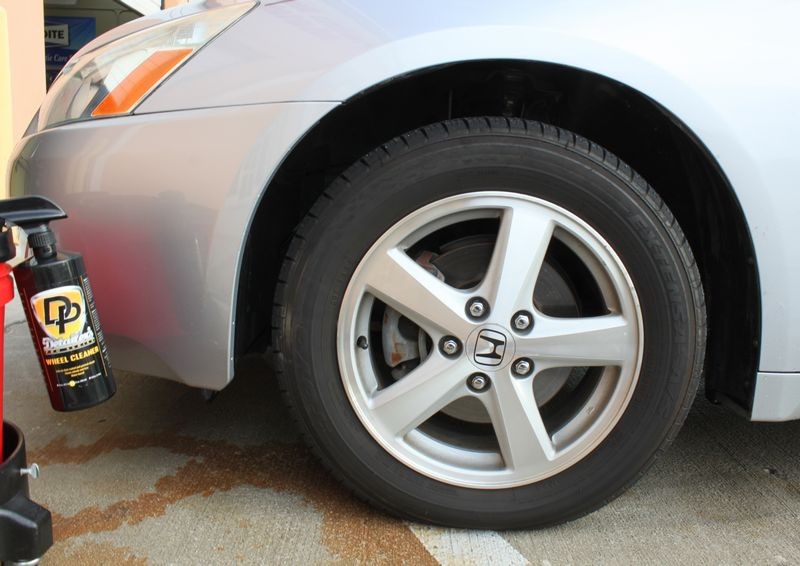
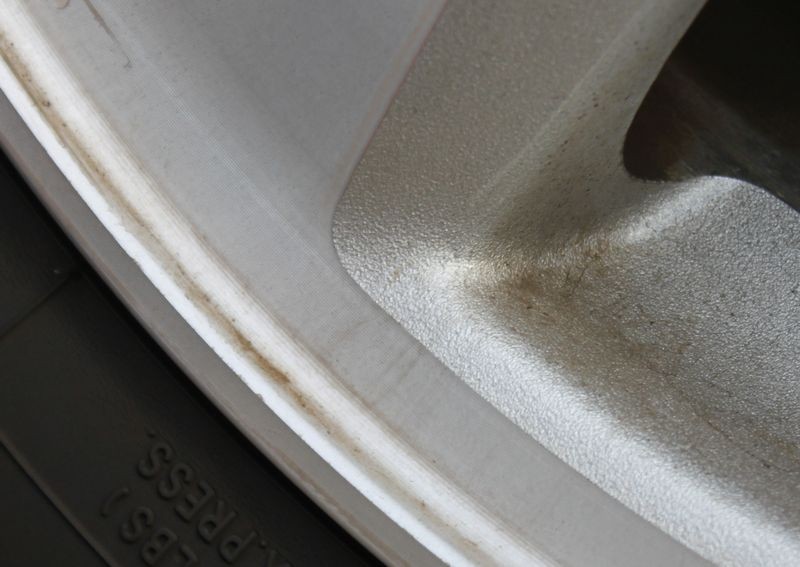
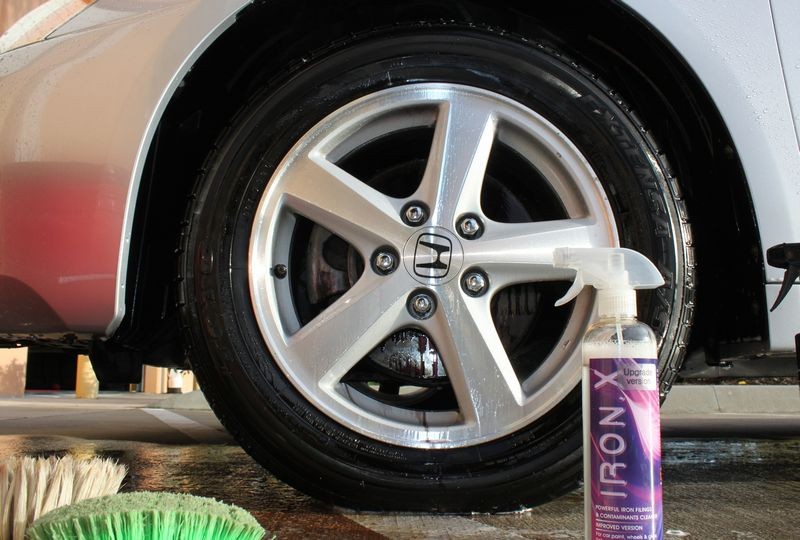
I coated these wheels with Meguiar's Hot Rims Brake Dust Barrier back in January and it seems to be doing a good job of preventing brake dust and road grime from accumulating on the wheel.
These are the factory clear coated rims, likely very rare and hard to find. For this reason I'm going to use a 8" Boars Hair Wheel Brush to ensure I don't scratch the clear coat finish. The green tire brush is for the tires and the wheel wells.
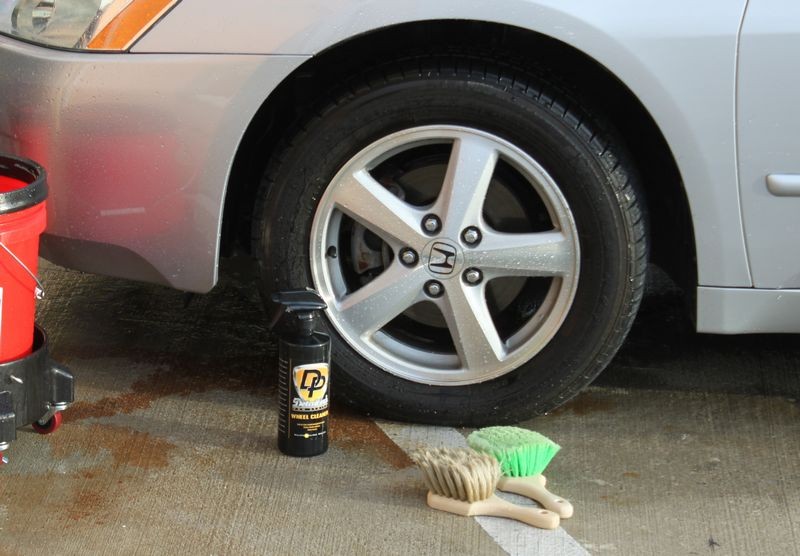
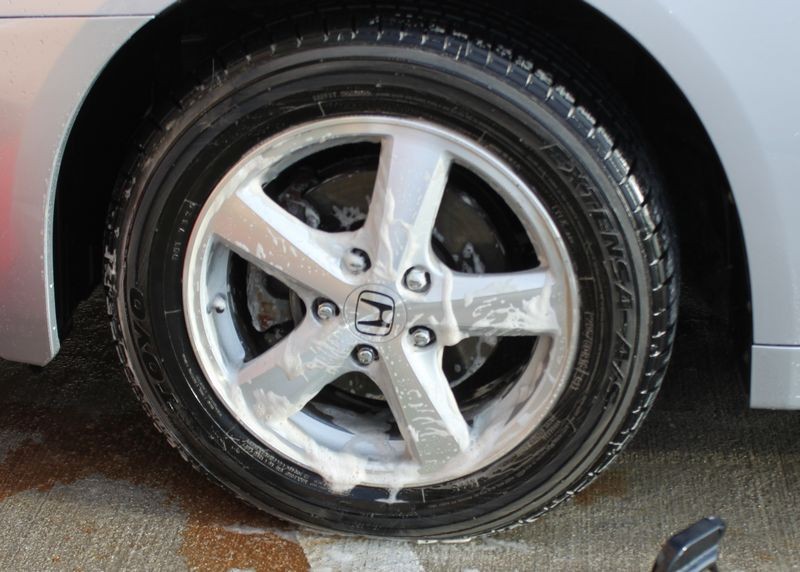
Wheels and tires are agitated after spraying with the Detailer's Wheel Cleaner, which is non-acid and safe for both wheels and tires. After agitating the rims and tires, rinse well with water.
Tip from BobbyG
A while back there was a discussion on the best way to use Iron X there were three camps...
I was in Camp 2 because I believed that by removing the road grime, (an oily coating), and the brake dust first, you enable the Iron X to do it's job more effectively to get the most bang for your buck.
The people in Camp 1 thought the Iron X was too costly to allow to possibly drip off the wheel with the excess water after washing and rinsing first.
Camp 3
BobbyG's technique was to simply wash the wheel and tire first, thus removing the oily road grime and brake dust but then pat the wheel dry using a clean utility towel so there would be no excess water to flush the freshly sprayed-on Iron X off the wheel and onto the ground where it's not doing anything for you.
I agree with BobbyG and wanted to share his tip and give him credit for an incredibly easy tweak to my technique so I can get the best performance out of Iron X and get the most bang for your Iron X bucks...
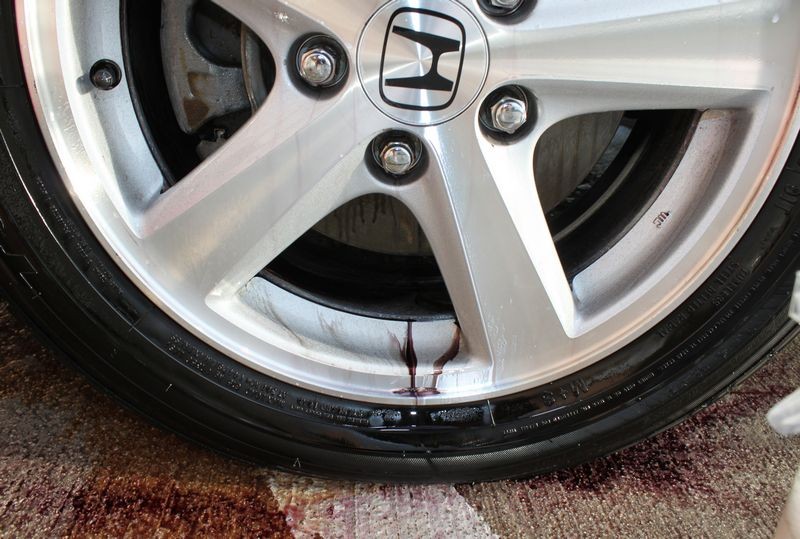
Now spray the Iron X onto the wheel to remove any Iron Particles (if any).

Everyone wants to see the red bleeding effect from the Iron particles being dissolved and in the process turning the water red. Actually, seeing no red water bleeding off the wheel is a good sign because it means your wheels are not contaminated.
If the wheels are contaminated and they have a clear layer of paint on them, this would mean iron particles had embedded onto and into the clear layer of paint causing corrosion to some degree.
No color, no corrosion = longer lasting finish on the wheel.
Continue washing and rinsing the wheels and tires until all four wheels and tires are washed clean and rinsed free from any residual chemicals and dirt.
Now it's time to wash the car starting at the top and then working your way down...
Washing the roof and sun roof first...

Moving quickly,

As you're working around the car, you should be rinsing your mitt in the RINSE bucket to remove dirt particles gathered onto the wash mitt. When you do this suds build up in the RINSE bucket and it can be difficult to tell which bucket is the WASH solution bucket and which bucket is the RINSE bucket. The simple stickers shown on the buckets make it easy to quickly tell which bucket is which.
Next I gave the car a final rinse and wa la... a squeaky, clean Honda Accord.

As a good habit, I set my wash buckets on their side and rinse them and any dirt that has built up under the Grit Guard inserts out so the buckets will be clean and ready to use for the next detailing session.
And there you go... how to do a great job of washing your car, truck, suv intelligently, using the KISS method and at the same time avoiding water spots.

")
KISS stands for Keep it Simple Simon
Here in the forum world it's normal for people to take seemingly simple tasks that require a few steps to do a good job and turn the project into Rocket Science requiring multiple steps with sub-steps to boot.
Here's a simple way to wash a car, do a good job and get it clean and ready for detailing.
First things first - whose approach is better?
I go against the grain, that is I don't follow the advice handed down for decades by others on where to start when washing a car. Most of what I've ever read or been told by anyone that's anyone in the car detailing world when it comes to washing a car goes like this,
Traditional Recommend Approach to wash a car
Start at the top and work your way down
I totally disagree.
Start at the wheels, tires and wheel wells, and after these are washed and rinsed, then start at the top and work your way down.
Why?
Water spots
If you start at the top, wash and rinse all the body panels, you now have a wet car that needs to be dried off before the water dries and potentially leaves water spots on and even in the paint.
Water Filter Systems
If you have a water filter system like the CR Spotless Water Deionization System you don't have to worry about water spots. But if you don't have their system or something similar, then corrosive elements in the water could lead to nasty water spots on the paint and everything else unless you dry the water immediately.
Here's the deal though, if you do what most people do when using the traditional approach, that is leave the water on the car as you move onto washing and rinsing the wheels and tires next, (without drying the car), by the time you're done washing and rinsing the wheels and tires, (and doing a great job), the water will have already dried on some areas of the car potentially leaving water spots.
Dry the car before washing the wheels and tires
If you dry the car after washing it and then tackle the wheels and tires, it's pretty much impossible to not get the car wet again when washing and rinsing the wheels and tires so you end up drying the car a second time.
I'm not lazy, but I hate doing a job twice.
Here's my approach,
Wheels and tires first, then start at the top and work your way down.
Now lets put a little twist to the age-old traditional approach and instead of starting at the top and working your way down, lets start at the bottom and then move to the top.
Wash and rinse one wheel at a time. After washing and rinsing one wheel, move onto the next wheel and tire and occasionally re-rinse the previous wheel and tire because soap suds and wheel and tire cleaning chemicals have a way of re-appearing and pooling in voids due to gravity.
Continue washing, rinsing and re-rinsing until you've washed all four wheels and tires.
Now move to the top or highest point
Now that the wheels and tires are clean and rinsed, grab your wash mitt and gather some car wash suds and start at the roof and begin working your way down as you wash.
Divide the car you're washing up into sections or work panel by panel.
After washing a section or a panel, immediately rinse that section or panel to remove loosened dirt and other abrasive particles and to prevent any soap suds from drying on the car.
Continue this until you've worked your way from the top of the car to the bottom of the car washing the lowest body panels last as that's where the majority of the major dirt and road grime will accumulate.
By washing the lowest panels last, you prevent cross-contamination and by this I mean removing abrasive dirt particles off the lower portions of the car and moving them in your wash mitt to the higher portions of the car where you could possibly instill heavier swirls and scratches.
While you were washing and rinsing the car from top to bottom, you can occasionally give the wheels and tires a repeated blast of water to ensure any soapy water, wheel and tire cleaners, or even dirt particles that have flowed downward and pooled are continually rinsed clean.
At the very end of the process, give the car a final rinse and then you're ready to dry the car, wheels and tires and at no point will there ever have been the potential for water to dry on anything and thus no risk of water spotting on any portion of the car.
Plus, you won't have to repeat any steps.
That's how I wash a car.
But wait there's more...
If you're the type that REALLY wants to be careful so as to not induce any swirls and scratches into the paint, then here's a tweaked version of the above just for you.
Wash wheels and tires, then lowest body panels and then move to the top
A twist on my approach outlined above for the most anal retentive people would be to,
- Wash wheels and tires first
- Wash lowest, dirtiest body panels
- Change out water and wash mitt and start at the top and work your way down
By doing step #2 after washing and rinsing the wheels and tires, you've removed and reduced the potential to instill swirls and scratches into the upper body panels with gritty particles from the lower body panels BECAUSE you've removed the gritty dirt particles first.
This is an extra step that will take more time so use this technique if appeals to you and time is not an issue. It's also a good technique for washing a car with a flawless, show car finish to start with.
It is important however that after washing the lower panels that you do in fact change out the car wash solution in your bucket and switch to a clean, non-contaminated wash mitt.
Here's some pictures to show you how to wash a car starting with the wheels and tires first and then moving to the top and working your way down...
Tools Needed
GTechniq Gwash Car Wash Soap
CarPro Wool Wash Mitt
Detailer's Wheel Cleaner
CarPro's Iron X Iron Remover
Dual Bucket Wash System
Grit Guard Inserts
Short Handle Tire Brush
8" Boar's Hair Wheel Brush
Carrand Lug Nut Brush - Not pictured below
Optional
Wash & Rinse Bucket Labels
Quickly in a visually way, ensures you don't mix up your wash solution with your rinse solution
Here's my victim car, it's a 2004, low mileage Silver Metallic Honda Accord, probably the only one like it in the world.
Premium quality car wash soap, GTechniq GWash with a 100% Merino Wool Wash Mitt
Mixing two cupful of GWash with about 3+ gallons of water. The GWash Car Wash Soap has a pleasant cherry scent, it makes washing your car enjoyable.
After adding the car wash solution to my water I agitate the water with my fingers spread apart to create piles of rich suds....
Agitating... see the volume getting higher...
TTT or To The Top!
GWash car wash solution and clean rinse water are ready to go...
I'm washing in the early morning, before the sun gets too hot or the wind kicks up...
I start with the wheels and tires first...
I coated these wheels with Meguiar's Hot Rims Brake Dust Barrier back in January and it seems to be doing a good job of preventing brake dust and road grime from accumulating on the wheel.
These are the factory clear coated rims, likely very rare and hard to find. For this reason I'm going to use a 8" Boars Hair Wheel Brush to ensure I don't scratch the clear coat finish. The green tire brush is for the tires and the wheel wells.
Wheels and tires are agitated after spraying with the Detailer's Wheel Cleaner, which is non-acid and safe for both wheels and tires. After agitating the rims and tires, rinse well with water.
Tip from BobbyG
A while back there was a discussion on the best way to use Iron X there were three camps...
Camp 1 - Spray Iron X directly onto dry, dirty wheel.
Camp 2 - Wash wheel and tire, then rinse then spray Iron X onto clean, rinsed wheel.
Camp 3 - Wash wheel and tire, then rinse, then DRY off water and then spray on Iron X
Camp 2 - Wash wheel and tire, then rinse then spray Iron X onto clean, rinsed wheel.
Camp 3 - Wash wheel and tire, then rinse, then DRY off water and then spray on Iron X
I was in Camp 2 because I believed that by removing the road grime, (an oily coating), and the brake dust first, you enable the Iron X to do it's job more effectively to get the most bang for your buck.
The people in Camp 1 thought the Iron X was too costly to allow to possibly drip off the wheel with the excess water after washing and rinsing first.
Camp 3
BobbyG's technique was to simply wash the wheel and tire first, thus removing the oily road grime and brake dust but then pat the wheel dry using a clean utility towel so there would be no excess water to flush the freshly sprayed-on Iron X off the wheel and onto the ground where it's not doing anything for you.
I agree with BobbyG and wanted to share his tip and give him credit for an incredibly easy tweak to my technique so I can get the best performance out of Iron X and get the most bang for your Iron X bucks...
Now spray the Iron X onto the wheel to remove any Iron Particles (if any).
Everyone wants to see the red bleeding effect from the Iron particles being dissolved and in the process turning the water red. Actually, seeing no red water bleeding off the wheel is a good sign because it means your wheels are not contaminated.
If the wheels are contaminated and they have a clear layer of paint on them, this would mean iron particles had embedded onto and into the clear layer of paint causing corrosion to some degree.
No color, no corrosion = longer lasting finish on the wheel.
Continue washing and rinsing the wheels and tires until all four wheels and tires are washed clean and rinsed free from any residual chemicals and dirt.
Now it's time to wash the car starting at the top and then working your way down...
Washing the roof and sun roof first...
Moving quickly,
- I washed all the horizontal surfaces and the side windows too and then rinsed these sections of paint.
- Next I washed one side of the car tackling the vertical sides of the fenders and doors. After the sides, I hit the front grill and bumper then rinsed
- Next I washed the vertical panels on the back of the car including the trunk lid, license plate and bumper.
- Lastly, I washed the very lowest portions of the vertical panels.
As you're working around the car, you should be rinsing your mitt in the RINSE bucket to remove dirt particles gathered onto the wash mitt. When you do this suds build up in the RINSE bucket and it can be difficult to tell which bucket is the WASH solution bucket and which bucket is the RINSE bucket. The simple stickers shown on the buckets make it easy to quickly tell which bucket is which.
Next I gave the car a final rinse and wa la... a squeaky, clean Honda Accord.
As a good habit, I set my wash buckets on their side and rinse them and any dirt that has built up under the Grit Guard inserts out so the buckets will be clean and ready to use for the next detailing session.
And there you go... how to do a great job of washing your car, truck, suv intelligently, using the KISS method and at the same time avoiding water spots.


