How to wet sand paint flat by hand by Mike Phillips
Why wetsand paint?
Great question. The answer is to create a more perfect reflection when you look at the finish on a car. Sanding removes orange peel and other surface texture and irregularities by leveling the surface until it's completely flat. After you have sanded the finish flat then your buff out your sanding marks usually with a compound, wool pad and rotary buffer. After that you polish using a foam pad to maximize gloss and shine. If you do everything right you will end up with a show car finish.
NOTE: Wet sanding by hand or by machine is really only safe for custom paint job, not factory clearcoats. The reason why is a custome paint job will have more paint compared to a factory finish. For more information see this article,
Hand sanding techniques
Below are the basics. If you really want to know how to wetsand, I recommend taking a class from an experienced instructor that covers this topic in their class.
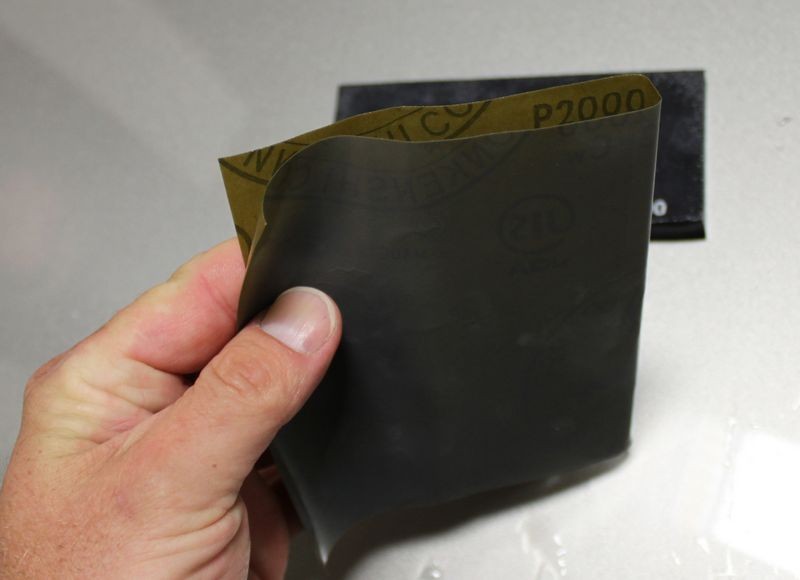
Soak your papers at least 15 minutes before use.
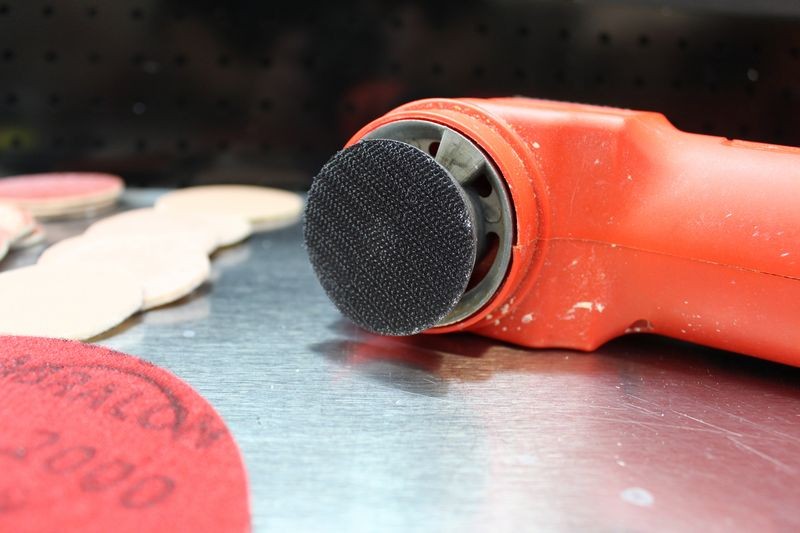
The Nikken Finishing papers have a latex rubber impregnated paper backing that is waterproof and this prevents the finishing paper from breaking-down into pulp from over soaking. It's possible for grit particles to enter into your water source so if you can, use Grit Guards in the bottom of your bucket.
Try to place your papers in water and soak them at least 15 minutes before sanding.
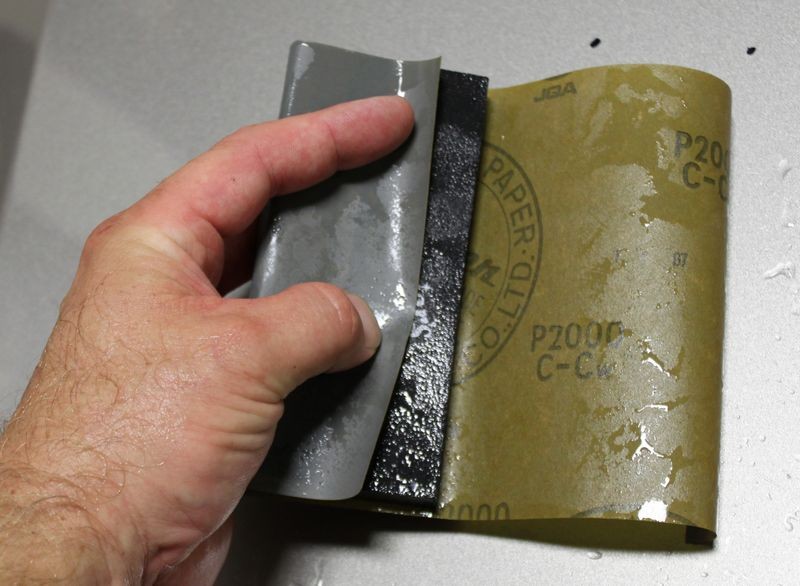
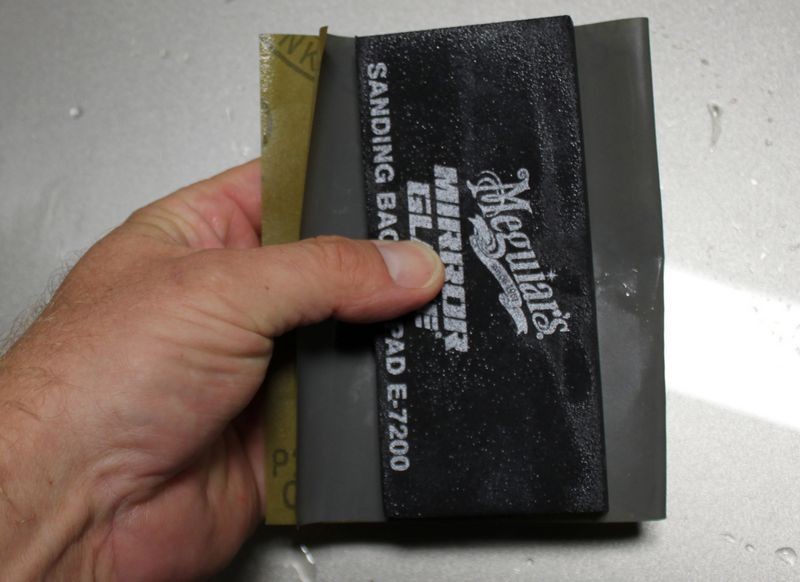
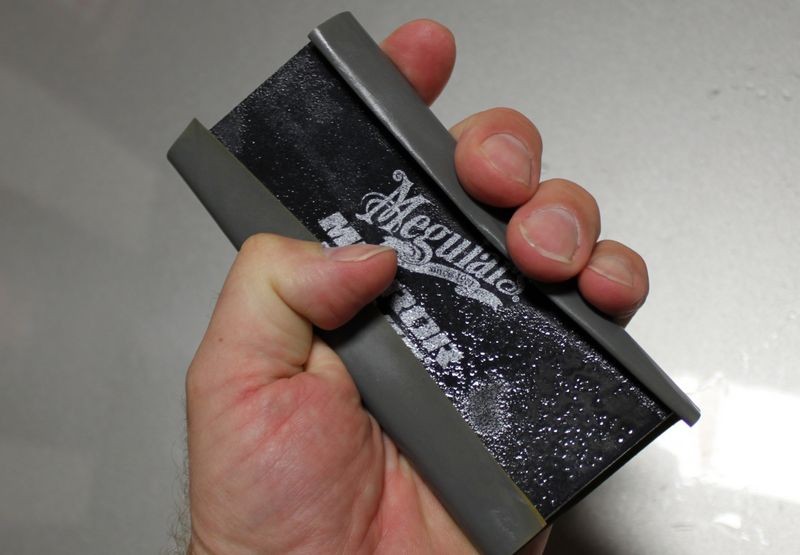
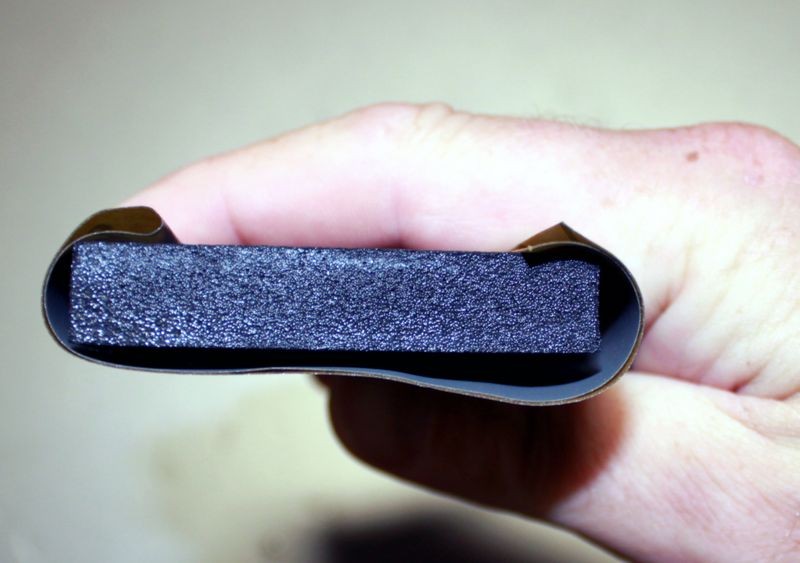
There are two common ways to wrap your paper around a backing pad
1: Wrapping - this is where you wrap a half sheet around a backing pad.
One side is covered with a seamless portion of sandpaper. This of course is the side you sand with.
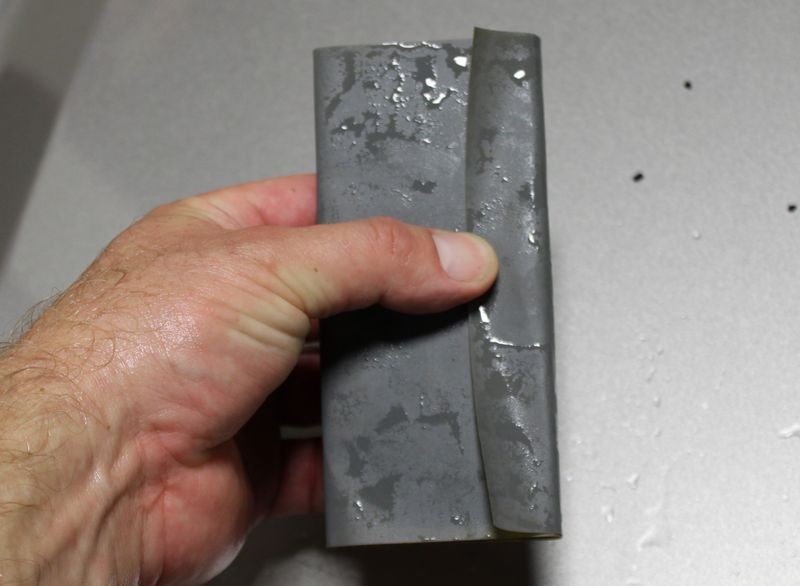
2: Folding - this is where you fold a single half-sheet of paper in half once and then fold this around your backing pad.
One side is completely covered, this if course is the side you sand with.
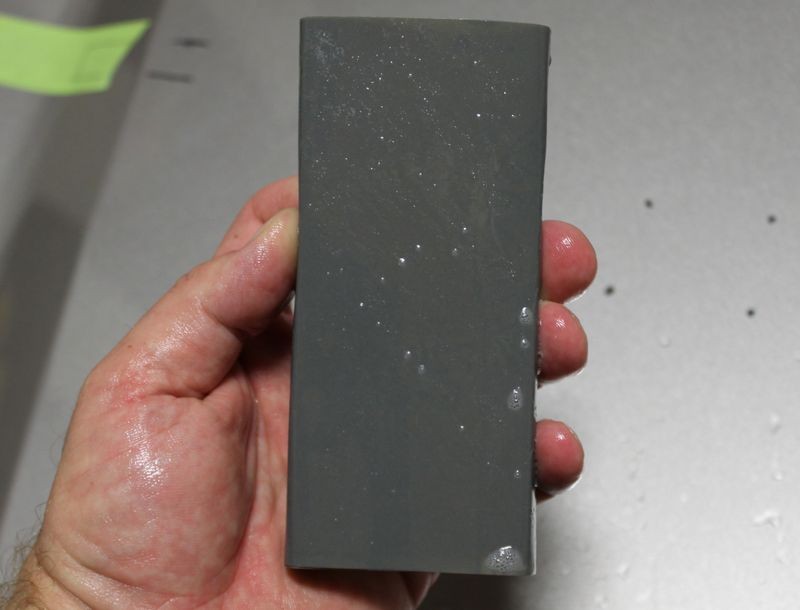
Half sheet folded around the backing pad.
What it looks like from a top view.
Clean water
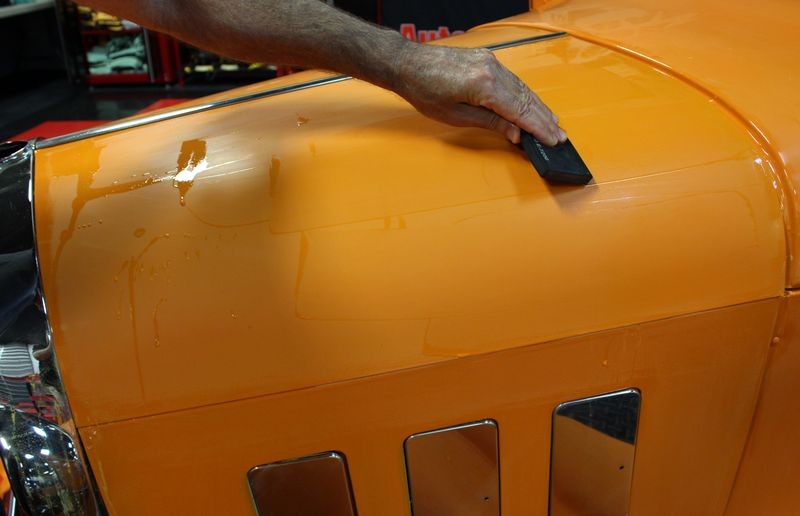
Use water from a clean source to lubricate the surface while sanding. Add a little soap, (a few drops is all that's needed, don't go crazy with the soap), and as you sand, continually spray water to the section you're sanding as this will make each stroke easier. Seriously, spray water onto the surface after every other stroke or two you'll find the paper will cut a lot smoother.
Hold the backing pad
canted, or at an angle, see how the tip of the paper-wrapped backing pad is leading as I move my hand forward. Don't hold the pad squared-up as you sand because you'll tend to cut deeper ruts if you sand with the pad in perfect perpendicular alignment in the direction of your strokes.
Right - Hold backing pad at a little bit of an angle while making front to back strokes.
Wrong - Don't sand with the backing pad in a perpendicular alignment with your front to back strokes, you risk gouging or putting in deeper scratches where the paper is cutting on the outside edges of the length of the backing pad.
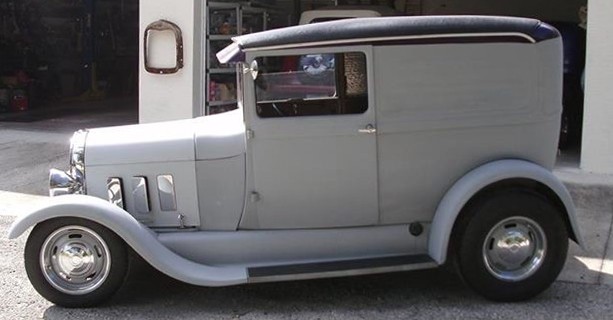
1929 Model A Wetsanding Project at Autogeek
One of the things I like to do with my job here at Autogeek is invite our forum members and our facebook group members to Autogeek to be part of projects I put together. These are NOT classes in the sense of a formal class like I teach here three times a year or the Roadshow Classes I teach at off-site locations, but simply "projects". In the past these have been held on Thursday nights, like the TNOGs I started for Meguiar's back in 2006 that continue to this day. Nick and Joe over at McKee's 37 have been holding Thursday night classes since Bob McKee sold Autogeek but kept his own name brand of products so I've moved my Thursday night classes to Wednesday night so as not to create confusion.
For some project however, a weeknight isn't enough time to do the job properly - for these projects I schedule them for a Saturday. As is the case for this project. Trying to wetsand, cut and buff an entire car on a weeknight is ridiculous, so I scheduled it for a Saturday and we had a great turnout. Sad to say, half the guys that showed up left early, some said they had other obligations. My guess is they had know idea how much work this type of craft is nor did they understand how much time goes into a project like this. No worries -
now they know.
So after washing the Model A and removing the overspray paint which you can read bout here,
How to remove overspray while washing your car
Next up was a few lessons on correct technique (shared above in the pictures), and then I turned the guys loose...
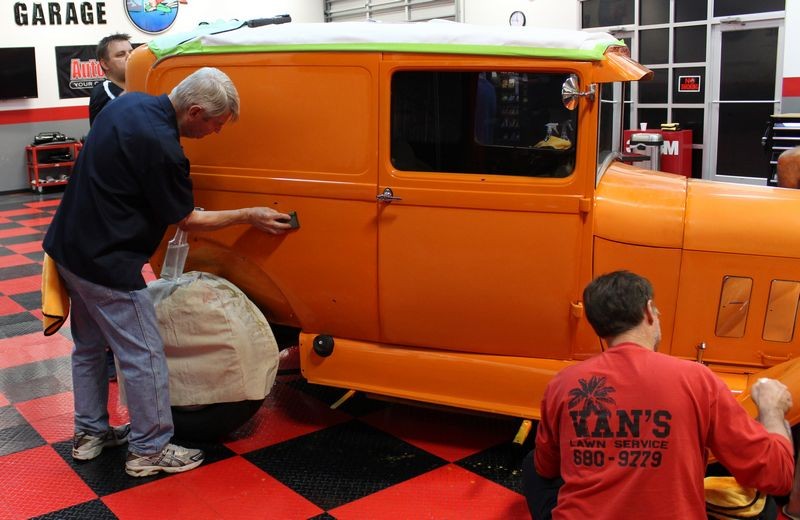
Here's Frank using a sanding backing pad to squeegee off the sanding slurry to inspect for orange peel. If all the orange peel has been removed you can move onto a new area to sand.
After sanding the hood flat - Frank moves onto the side panels of the engine cover.
At the back is Antti sanding the orange peel flat above the rear door
Here's Jim sanding to remove orange peel on the passenger side of the Model A
Glen is tackling the side of the engine cowl and the passenger front fender...
Arthur and his boys are sanding one of the rear fenders, which were left off the Model A on purpose to make sanding and buffing them and the rear section of the Model A easier.
Craig and Mark are tackling the other fender...
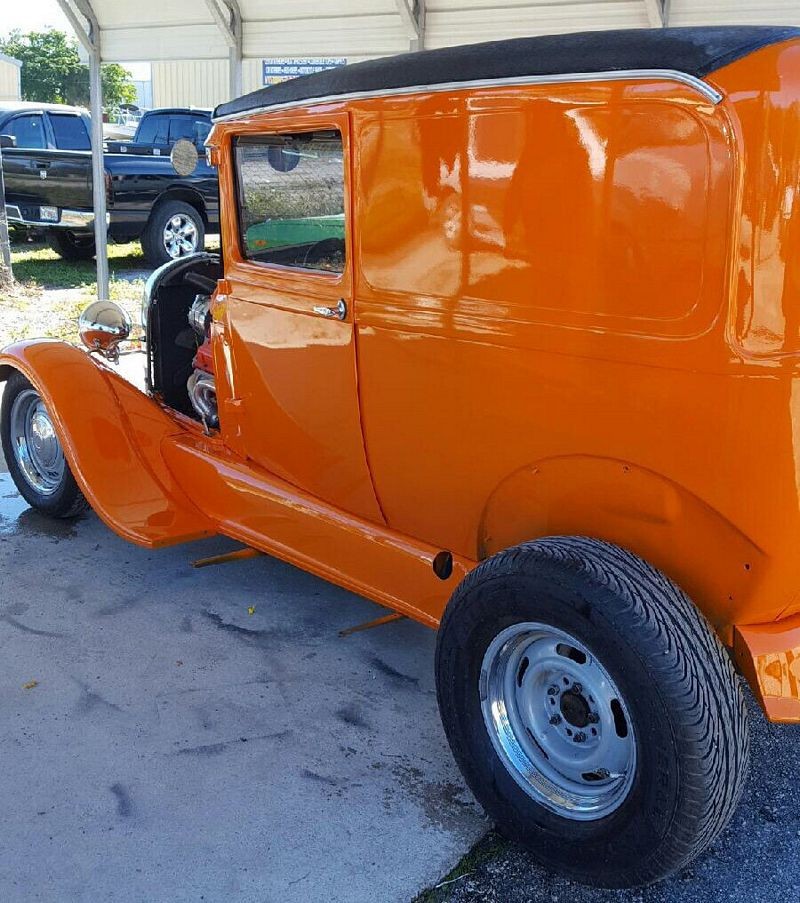
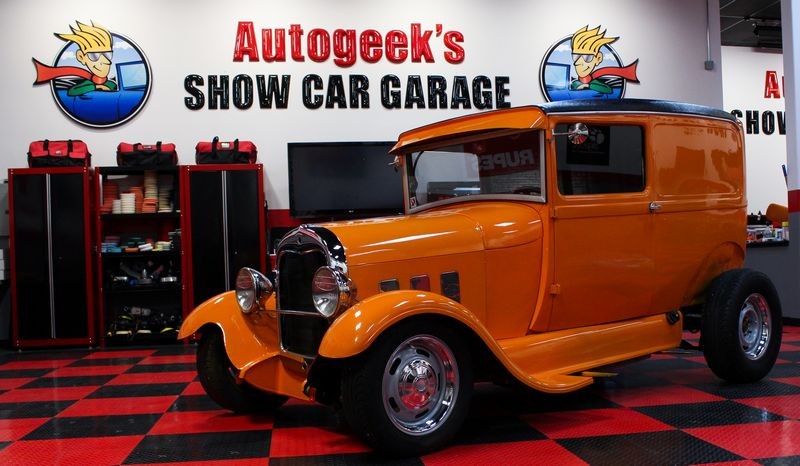
Hand sanding results - the major panels are all now sanded completely flat
Next step...
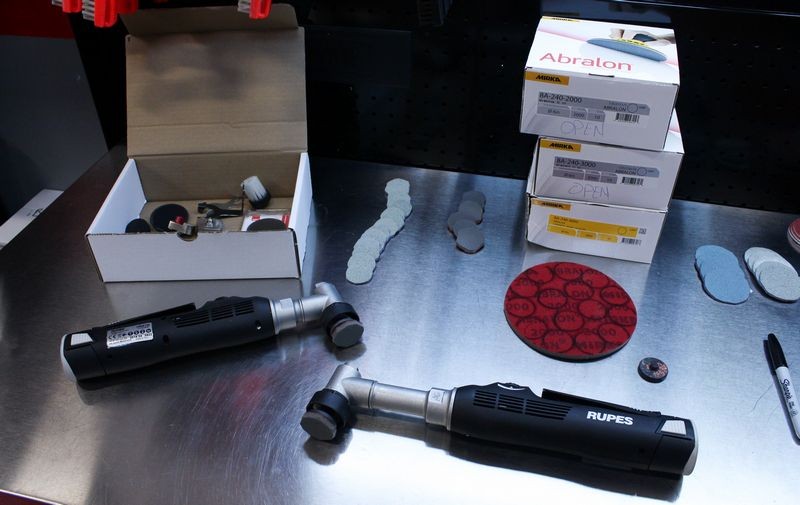
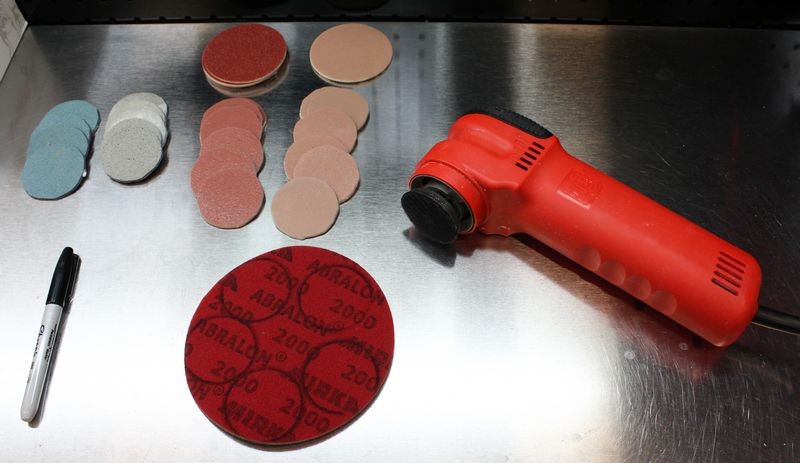
After hand sanding you can remove your sanding marks via the compounding process or you can refine your sanding marks to a much higher grit level via hand sanding again or via machine sanding. I chose to use machine sanding for the next step and those pictures are available here.
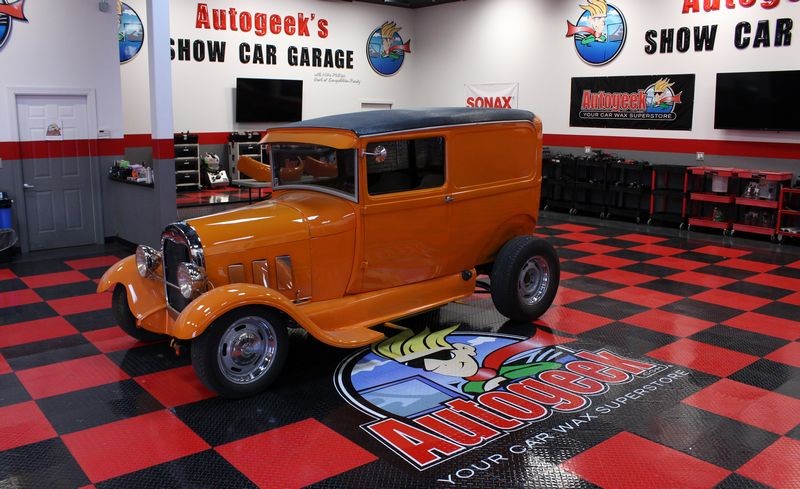
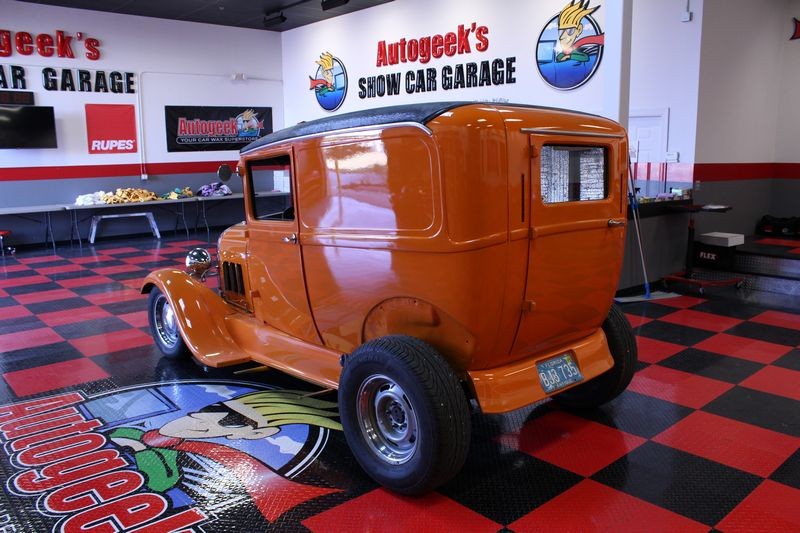
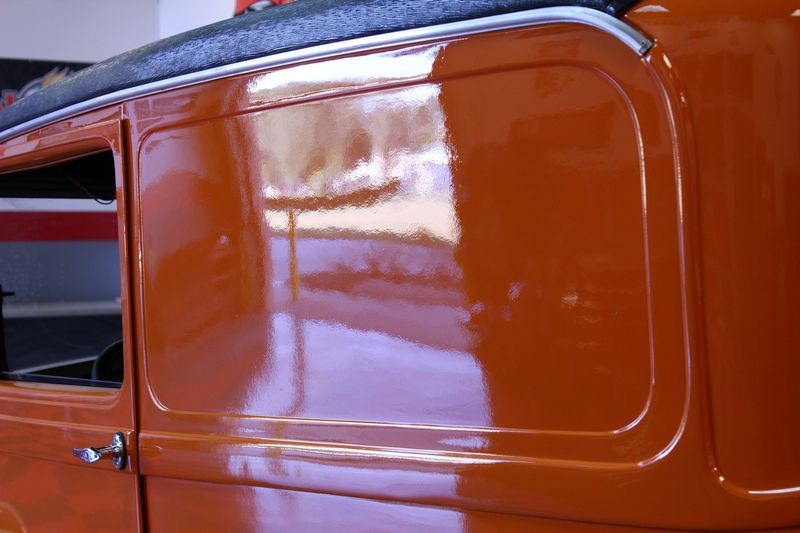
When you do everything right, the final results looks like wet paint...
Recommendations
Before ever taking on any type of wetsanding project, first you will need the right supplies and tools. For more information on the tools and supplies we used to hand sand this freshly painted streetrod, see this article,
Cost to wetsand a car? Example of tools needed and the cost
On Autogeek.com
For just the hand sanding step, here's what we used...
Griot's Garage BOSS Finishing Papers #2000 precision finishing papers -
$29.99
Meguiars Sanding Pad E7200 -
$3.99
")


 rops:
rops:


