ive ruined my cars paint help

kar1zma

New member
Joined
May 21, 2014
Messages
8
Reaction score
0
i got a brand new dodge charger almost a year ago
its a nice red!!!!!

so ive washed my car only once a month thinking ill get the right products and do it weekly so now
i have more scratches than when i took delivery of the car. the shine and glossy look is gone

i live in the middle east so it gets dusty a lot and im not happy with the detailers here

ive finally researched for microfiber towels and am getting a set. now i need to get my car back in superb condition

where do i begin. what products do u recommend(from washing the car to paint correction waxing/polishing and after wash detail spray etc.)

what steps do i take to regain that rich red color.i wanna do it myself and do it right

help me gurus
 
There's a number of ways to approach this but the simplest would be to get,

Porter Cable 7424XP/Meguiar's G110v2/Griot's Orbital Polisher
(These are all the same "type" of tool, just pick your brand)

I tend to like the PC as it's well built and as long as you stick with 5.5" thin flat pads it will work just fine.

Then get Wolfgang Uber Compound and Wolfgang Finishing Glaze, this is an aggressive compound and fine cut polish and these two products with Lake Country 5.5" flat pads and the PC will tackle this job and do it right the first time with no problems.

Then pick a wax or sealant and seal the paint. The natural product in this line to seal the paint with would be the Wolfgang Deep Glass Paint Sealant 3.0 which will make the paint very slick to the touch as well as give it a deep, wet shine.

Then after you get the paint back to how you like it wash this car very carefully.


Welcome to AGO!


:welcome:
 
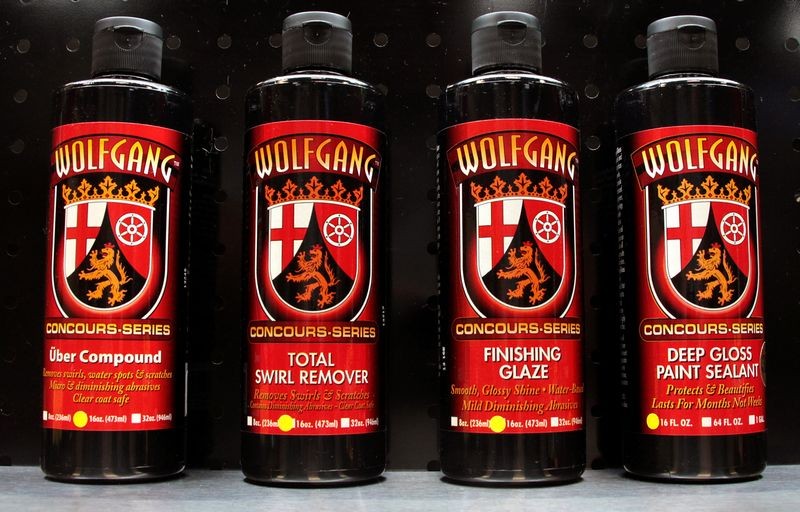
The Wolfgang Four


Here are four products that will take care of about 99.9% of any exterior paint correction product you'll ever have in your garage.


The Wolfgang Four
The_Wolfgang_Four.jpg


Forum member RFulmer coined this term, (due credit where credit is due), and since there's been a lot of questions about what each product is, what they do, the order of aggressiveness and when you use one over the other, here's some info...


Uber Compound
  • Aggressive Compound - More aggressive than Wolfgang Total Swirl Remover and Wolfgang Finishing Glaze.
  • For use with any type of polisher/buffer and can be used by hand.
  • Body Shop Safe = Can be used in a fresh paint. environment (body shop) and can be used on fresh paint, (paint just sprayed and less than 30 days old).
  • Safe for Ceramiclear paints.
  • Cafe for all clear coat paints.
  • Safe for all single stage paints.
  • For some people on some cars it can be used as a compound/polish after which the paint can be sealed with a wax or synthetic paint sealant.


Total Swirl Remover
  • Medium Cut Polish - Less aggressive than Uber Compound and more aggressive than Wolfgang Finishing Glaze.
  • For use with any type of polisher/buffer and can be used by hand.
  • Body Shop Safe = Can be used in a fresh paint. environment (body shop) and can be used on fresh paint, (paint just sprayed and less than 30 days old).
  • Safe for Ceramiclear paints.
  • Cafe for all clear coat paints.
  • Safe for all single stage paints.
  • Should be tested before using Uber Compound to see if it will remove defects to our satisfaction in keeping with the practice of using the least aggressive product to get the job done.


Finishing Glaze
  • Fine Cut Polish - Much less aggressive than Wolfgang Total Swirl Remover and of course dramatically less aggressive than Wolfgang Uber Compound.
  • For use with any type of polisher/buffer and can be used by hand.
  • Body Shop Safe = Can be used in a fresh paint. environment (body shop) and can be used on fresh paint, (paint just sprayed and less than 30 days old).
  • Safe for Ceramiclear paints.
  • Cafe for all clear coat paints.
  • Safe for all single stage paints.
  • Should be tested before using Wolfgang Total Swirl Remover to see if it will remove defects to our satisfaction in keeping with the practice of using the least aggressive product to get the job done.
  • Great "Maintenance Polish" for use removing shallow swirls that show up over time from normal wear-n-tear on daily drivers and after a person has already performed a multi-step procedure to remove serious paint defects.


Deep Gloss Paint Sealant 3.0
  • German engineered synthetic paint sealant.
  • Non-cleaning, pure synthetic - Paint must be in excellent condition as in brand new or previously polished to like new condition before use.
  • Can be applied by hand or any type of dual action polisher wit foam pads.
  • This product "seals" the paint in the say way a car wax or paint coating will seal the paint. It is water insoluble and as such like all synthetic paint sealants, car waxes and paint coatings is not body shop safe.
  • Requires 30 to 45 minutes of drying time before removal.
  • Oxygen activated. After buffing off the excess sealant the remaining protection ingredients should be allowed to cure and fully set-up for an approximate 12 hour window of time before the vehicle is put back into service where it will be exposed to water.


Synergistic Chemical Compatibility
Each product is chemically compatible and chemically beneficial when used as a system approach to take a diamond in the rough and turn it into a glistening gemstone. Using the entire line in the correct order or just a few of the product in the correct order is an example of working forward in the paint polishing process.


All Inclusive System-Approach
This group of four products with just about any tool, any pad and even by hand will produce not only show car results but do it consistently across a VERY wide spectrum of paint systems including,
  • Hard paints, soft paints and everything in-between.
  • Factory OEM paints and aftermarket repaints at your local body shop or custom paint shop.
  • Single stage and basecoat clearcoat.
Which products do you need?
Which product you'll need depend upon the condition of the paint on the car. Click to my list of paint condition categories and read through the descriptions for the different categories. Then after washing and drying your car, inspect the paint both with your sense of touch, (The Baggie Test), and visually with your eyes in bright light for swirls and scratches.

Then determine which category your car's paint fall into. Here are some general guidelines but the best way to determine which exact product you'll need to remove the defects and restore the finish on your car to your expectations can only be determined by doing a Test Spot


How To Do a Test Spot


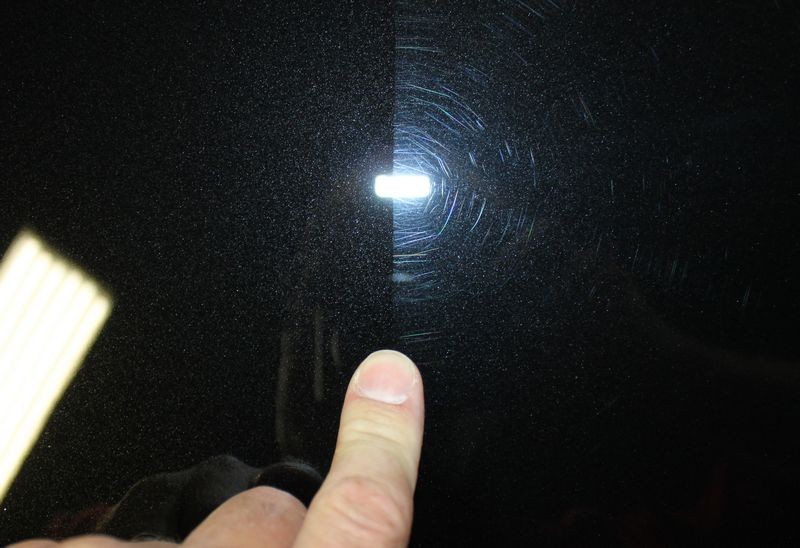
Test Spot results showing the before and after difference...

FlexVideo005.jpg


On Autogeek.net

Wolfgang Uber Compound 3.0

Total Swirl Remover

Finishing Glaze


Deep Gloss Paint Sealant 3.0


:xyxthumbs:
 
Read through this BEFORE starting.....

DA Polisher Trouble Shooting Guide


Tyler, age 15 removing swirls using a Porter Cable 7424XP Dual Action Polisher
1965Plymouth035.jpg


When you're first starting out machine polishing and learning to use a DA Polisher it's common to have questions about your results and your results are directly tied to your technique.

Here's a list of the most common problems,

1. Trying to work too large of an area at one time.

2. Moving the polisher too fast over the surface.

3. Using too low of speed setting for removing swirls.

4. Using too little downward pressure on the head of the polisher.

5. Using too much downward pressure on the head of the polisher so the pad quits rotating.

6. Not holding the polisher in a way to keep the pad flat while working your compound or polish.

7. Using too much product or using too little product.

8. Not cleaning the pad often enough.
Here's a list of the solutions in matching order,

1. Trying to work too large of an area at one time.
Shrink the size of your work area down. You can't tackle to large of an area at one time. The average size work area should be around 20" by 20". Most generic recommendations say to work an area 2' by 2' but for the correction step, that's too large. You have to do some experimenting, (called a Test Spot), to find out how easy or how hard the defects are coming out of your car's paint system and then adjust your work area to the results of your Test Spot. The harder the paint the smaller the area you want to work.


2. Moving the polisher too fast over the surface.
For removing defects out of the paint you want to use what we call a Slow Arm Speed. It's easy and actually natural for most people new to machine polishing to move the polisher quickly over the paint but that's the wrong technique. One reason I think people move the polisher too quickly over the paint is because they hear the sound of the motor spinning fast and this has psychological effect which causes them to match their arm movement to the perceived fast speed of the polisher's motor.

Another reason people move the polisher too quickly over the paint is because they think like this,

"If I move the polisher quickly, I'll get done faster"

But it doesn't work that way. Anytime you're trying to remove swirls, scratches, water spots or oxidation using a DA Polisher you need to move the polisher s-l-o-w-l-y over the paint.


3. Using too low of speed setting for removing swirls.
When first starting out many people are scared of burning or swirling their paint, so they take the safe route of running the polisher at too low of a speed setting but this won't work. The action of the polisher is already g-e-n-t-l-e, you need the speed and specifically the pad oscillating and rotating over the paint as well as the combination of time, (slow arm speed), together with the abrasives, the pad aggressiveness, and the downward pressure to remove small particles of paint which is how your remove below surface defects like swirls or scratches.

Removing below surface defects is a leveling process where you need the abrasives to take little bites out of the paint and to get the abrasives to take these little bites with a tool that uses a Free Floating Spindle Bearing Assembly you need all of the above factors working for you including a high speed setting.


4. Using too little downward pressure on the head of the polisher.
For the same reason as stated in #3, people are scared, or perhaps a better word is apprehensive, to apply too much downward pressure to the polisher and the result of too little pressure is no paint is removed thus no swirls are removed.


5. Using too much downward pressure on the head of the polisher so the pad quits rotating.
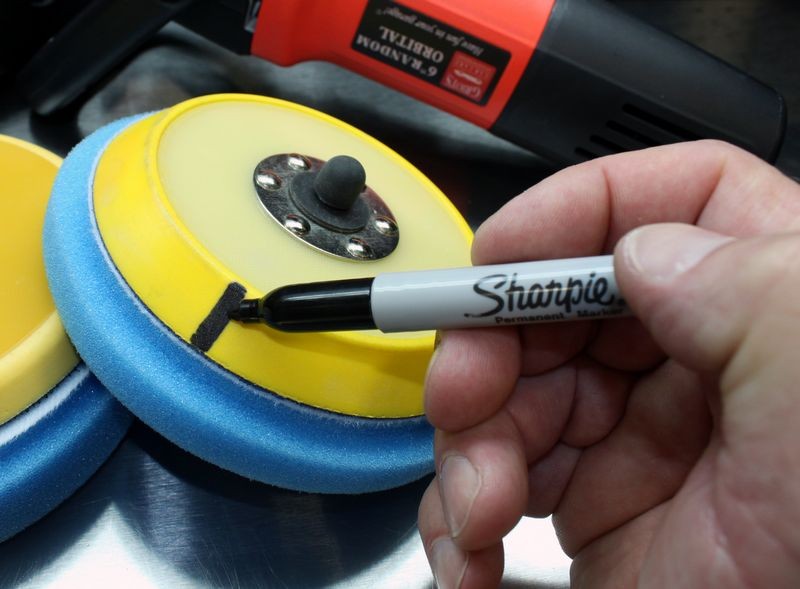
If you push too hard you will slow down the rotating movement of the pad and the abrasives won't be effectively worked against the paint. You need to apply firm pressure to engage the abrasives against the paint but no so much that the pad is barely rotating. This is where it's a good idea to use a permanent black marker to make a mark on the back of your backing plate so your eyes can easily see if the pad is rotating or not and this will help you to adjust your downward pressure accordingly.

Correct technique means finding a balance of applying enough downward pressure to remove defects but not too much downward pressure as to stop the rotating movement of the pad.

This balance is affected by a lot of factors like the lubricity of the product you're using, some compounds and polishes provide more lubrication than others and this makes it easier to maintain pad rotation under pressure.

Another factor that can affect pad rotation are raised body lines, edges and curved surfaces as anytime you have uneven pressure on just a portion of the face of the pad it can slow or stop pad rotation. This is where experience comes into play and experience comes from time spent behind the polisher.


6. Not holding the polisher in a way to keep the pad flat while working your compound or polish.
Applying pressure in such a way as to put too much pressure to one edge of the pad will cause it to stop rotating and thus decrease abrading ability.


7. Using too much product or using too little product.
Too much product hyper-lubricates the surface and the result is that abrasives won't effectively bite into the paint but instead will tend to skim over the surface. Overusing product will also accelerate pad saturation as well increase the potential for slinging splatter onto adjacent panels.

Too little product will means too little lubrication and this can interfere with pad rotation.

Again there needs to be a balance between too much product and too little product and finding this balance comes from reading articles like this one, watching videos an most important, going out into the garage and putting in time behind the polisher and as you're buffing with specific product and pad combinations, pay attention to pad rotation.


8. Not cleaning the pad often enough.
Most people simply don't clean their pad often enough to maximize the effectiveness of their DA Polisher. Anytime you're abrading the paint you have two things building up on the face of your buffing pad,
  • Removed paint
  • Spent product
As these to things build up on the face of the pad they become gummy and this has a negative affect on pad rotating plus makes wiping the leftover residue on the paint more difficult. To maintain good pad rotation you want to clean your pad often and always wipe-off any leftover product residue off the paint after working a section. Never add fresh product to your pad and work a section that still has leftover product residue on it.


Pad Cleaning Articles

Why it's important to clean your pads often...

How to clean your foam pad on the fly
 
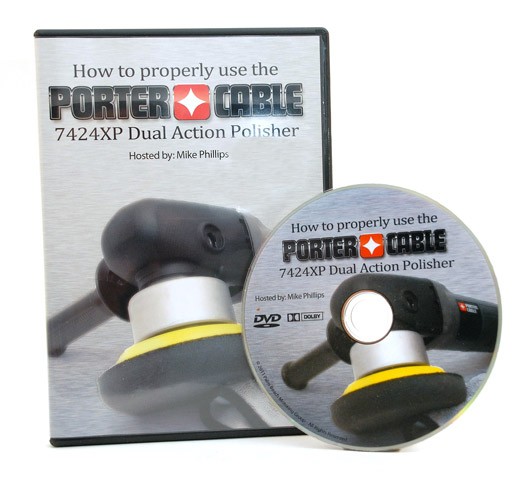
I think you need to do some research on your own, maybe buy Mike's book, then come back with more specific questions. To be honest, nobody has time to teach you everything, you need to get some initiative and do some goundwork.
 
thank you sir for that great write up

im going thru the different threads and reading
but the amount of brands i have to choose from
is overwhelming

since i am in the middle east i dont have access to a lot of the brands mentioned

but im going to go to the store and check out
what is available here

as a general rule i believe i need to follow these steps

1- wash
2- clay bar
3- a good swirl remover
4- wax
5- sealent
6- after wax spray

i have a question though can these be done by hand
or a machine is neccessary

thanks
 
You can do all of it by hand if you want. But a machine is much more beneficial and can "cut" easier and quicker when removing swirls.

Also, do sealant first, then wax. The sealant needs to bond to the paint to protect, and the was is there just do give it a warmer glow.

Good luck!
 
A couple of points,

If you buy a machine from the US or elsewhere make sure it matches your country's electric, the US electric is 110 V whereas most middle east is 220V+.

Also after clay (This is #3 on your list) you need to polish and depending on the condition of your paint you may get by with a finishing polish if there are no severe defects, if there are heavy scratches etc. you may need a compound before the finishing polish.

#4 on your list should be either a wax or a sealant, waxes don't go before sealants. It's usually either wax or sealant, in case you want to do both it's sealant first then after it has cured a wax on top. If you use oily waxes they probably attract more dust.

For a top up spray Sonax Briliant shine detailer or BSD gets rave reviews, i got it and it helps somewhat with the dust issues though it's not full proof it adds an extra layer of protection on your sealant or wax.

Don't forget about a good wheel cleaner and brushes, tire dressing, interior cleaner, trim dressing, and a good APC.

All can be done by hand but by machine is a different level, and if you want to go the machine route try to stick to DA, you may find rotaries in your local shops but those machines could be dangerous in inexperienced hands causing severe damage to your paint.
 
And i would add that you can retitle your post by saying you have "damaged" or "marred" your paint but haven't ruined it. You'll see once you get some equipment and materials to cut it down and polish it out to a nice gloss again that it wasn't ruined...just hidden underneath some crap you have now removed!
 
A couple of points,

If you buy a machine from the US or elsewhere make sure it matches your country's electric, the US electric is 110 V whereas most middle east is 220V+.

Also after clay (This is #3 on your list) you need to polish and depending on the condition of your paint you may get by with a finishing polish if there are no severe defects, if there are heavy scratches etc. you may need a compound before the finishing polish.

#4 on your list should be either a wax or a sealant, waxes don't go before sealants. It's usually either wax or sealant, in case you want to do both it's sealant first then after it has cured a wax on top. If you use oily waxes they probably attract more dust.

For a top up spray Sonax Briliant shine detailer or BSD gets rave reviews, i got it and it helps somewhat with the dust issues though it's not full proof it adds an extra layer of protection on your sealant or wax.

Don't forget about a good wheel cleaner and brushes, tire dressing, interior cleaner, trim dressing, and a good APC.

All can be done by hand but by machine is a different level, and if you want to go the machine route try to stick to DA, you may find rotaries in your local shops but those machines could be dangerous in inexperienced hands causing severe damage to your paint.

we have both 110 and 220v in my country so thats no issue
thanks for pointing that out though

i went to the store today and i found they have only two brands of orbital buffers

1- 1300W from some brand i cant recall
2- 60W from Black and decker

and i found the following products in order of the work to be done

1- car wash - meguiar deep crystal car wash / mothers car wsh
2- clay bar - couldnt find a single clay bar ( will get it online)
3- polishing - meguiars ultimate compound
4- swirl removar - meguiars swirl remover X
5- wax- meguiars gold class carnuba wax/deep crystal carnuba wax
6- after washes/wax- meguiars quick detail spray

And i would add that you can retitle your post by saying you have "damaged" or "marred" your paint but haven't ruined it. You'll see once you get some equipment and materials to cut it down and polish it out to a nice gloss again that it wasn't ruined...just hidden underneath some crap you have now removed!

thanks i just felt so bad after seeing my car in this condition
it looked ruined.

ive identified some towels from TRC
and finally need to identify the right applicator pads to start the work

im not going for sealents at the moment
let me get the shine and gloss back
 
and i found the following products in order of the work to be done

1- car wash - meguiar deep crystal car wash / mothers car wsh
2- clay bar - couldnt find a single clay bar ( will get it online)
3- polishing - meguiars ultimate compound
4- swirl removar - meguiars swirl remover X
5- wax- meguiars gold class carnuba wax/deep crystal carnuba wax
6- after washes/wax- meguiars quick detail spray

Meguiar's Ultimate Compound is not a polish, it's a compound. :)

If Meguiar products is all you have access to, I suggest you pick up the ultimate compound to remove the swirls, followed by ultimate polish and top it off with a wax or sealant.
 
Back
Top