Mike Phillips
Active member
- Dec 5, 2022
- 51,004
- 6
Let there be light...
(when inspecting the condition of your car's paint)
Before you can choose and use any paint care products you first need to visually inspect the paint to find out what types of paint defects are present. To do this you want and need to use multiple sources of light.
In the below example I use
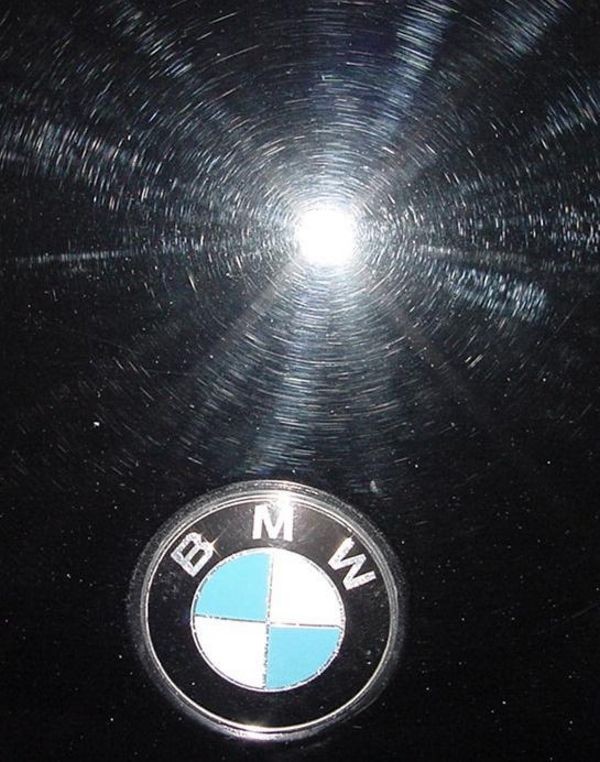
Sunlight
The sun works best when it's high overhead but if it's not high overhead you can still use it by shifting the angle of your body. Here's what's called the "Sun Shot", that is I've put myself in front of the hood on a 1991 BMW with the sun directly overhead and shining down on the hood to reveal the swirls.
Cobweb or Spiderweb Swirls
(Photo courtesy of MeguiarsOnline although I actually took the photo)
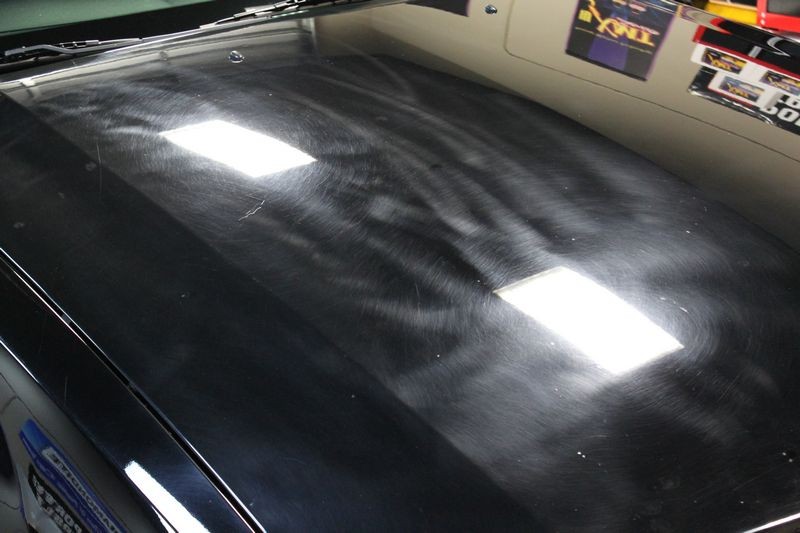
Florescent Light
Florescent lights are good for showing swirls, scratches and water spots. Here's a picture where I use florescent lights to show holograms from the mis-use of a rotary buffer.
Holograms also called Rotary Buffer Swirls revealed using Florescent Lights
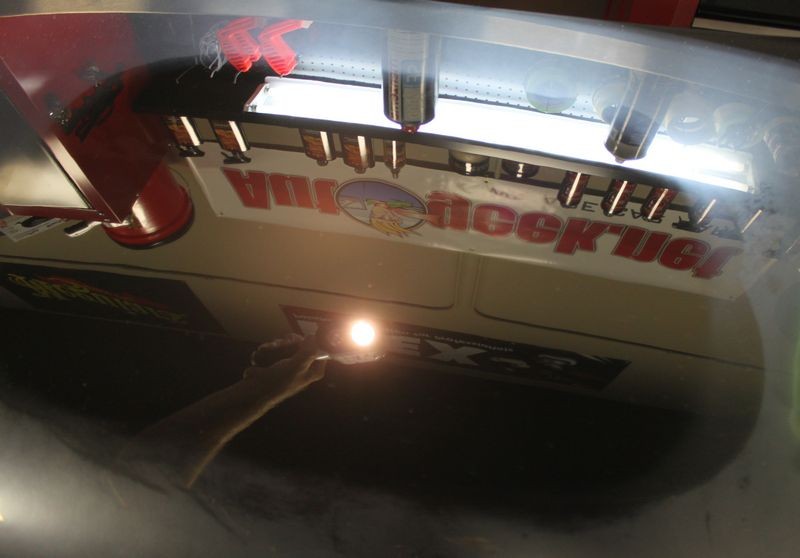
Brinkmann Swirl Finder Light
The Brinkmann Swirl Finder Light is like having the sun in your hand and the benefit to this is you can use it anytime, not true with the sun. Besides a great light for revealing the condition of your car's paint it also makes a great all-around-flashlight and with it's long battery charge life and the ability to recharge it using both a car charger and any household electrical plug-in it saves you from having to buy batteries over and over again...
Using the Brinkmann Swirl Finder Light to inspect for swirls after sanding and machine buffing
Examples
Here's an example of using 4 types of light to inspect the condition of the paint on this 1969 Camaro Pace Car
1969 Camaro Pace Car - Show Car Makeover - Modeled by Michelle
Sunlight
Steve just arrived with his Camaro and the sun is sitting low in the sky but I was able to get a few pictures to show the condition of the paint...
Here's how low the sun was in the sky...

Best Sun Swirl Shots I could get...


Camera Flash
Here I'm using the camera flash to light up the swirls and scratches...

Close-up: There's scratches and general surface imperfections throughout the finish...

Florescent Light
This shot is to frame-up the following shots so you can tell where the close-ups are being taken. Every body panel looked the same way...

Close-ups using overhead florescent lights


As you can see from the pictures above, the paint on this show car has swirls and scratches distracting from the true beauty of the car.
Brinkmann Swirl Finder Light
I personally use the Brinkmann Swirl Finder Light on every car project I work on and can't recommend it enough. If you don't have one of these cool lights then be sure to get one the next time you order detailing supplies...
Here's how the paint looks on the 1969 Camaro using the Brinkmann Swirl Finder Light

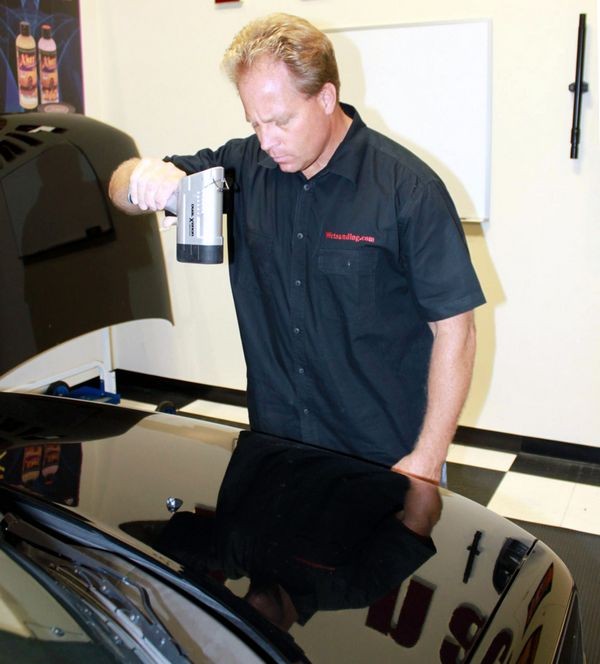
How to use the Brinkmann Swirl Finder Light
Using the Brinkmann Swirl Finder Light is pretty straightforward but here's a few tips to get the best results when exposing swirls.
You want to hold the Brinkmann Swirl Finder Light about 12" to 16" away from the surface you're inspecting and hold it at an angle so that the light bounces back to your eyes.
Correct distance to hold the light from the finish
Swirls in the clear coat finish surrounding the dual Xenon light bulbs

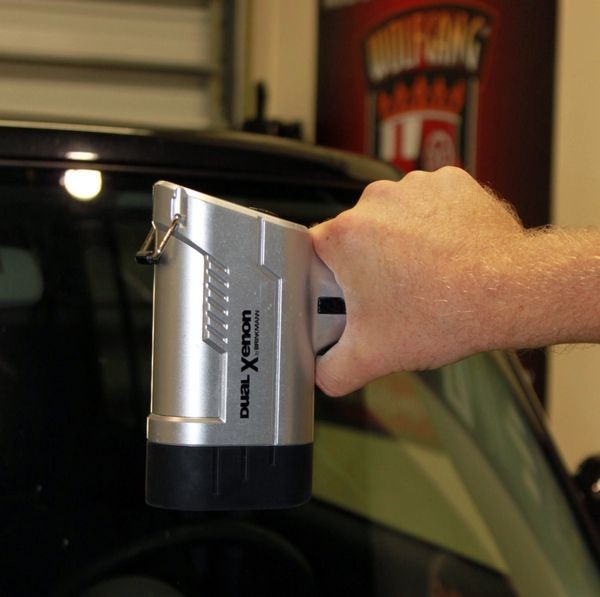
Correct hand position when inspecting for swirls - Comfortable, ergonomic grip
On Autogeek.net
Brinkmann Swirl Finder Light
Read my review here
:xyxthumbs:
(when inspecting the condition of your car's paint)
Before you can choose and use any paint care products you first need to visually inspect the paint to find out what types of paint defects are present. To do this you want and need to use multiple sources of light.
In the below example I use
- Sunlight
[*]Florescent lights
[*]Brinkmann Swirl Finder Light
[*]Camera Flash
Sunlight
The sun works best when it's high overhead but if it's not high overhead you can still use it by shifting the angle of your body. Here's what's called the "Sun Shot", that is I've put myself in front of the hood on a 1991 BMW with the sun directly overhead and shining down on the hood to reveal the swirls.
Cobweb or Spiderweb Swirls
(Photo courtesy of MeguiarsOnline although I actually took the photo)
Florescent Light
Florescent lights are good for showing swirls, scratches and water spots. Here's a picture where I use florescent lights to show holograms from the mis-use of a rotary buffer.
Holograms also called Rotary Buffer Swirls revealed using Florescent Lights
Brinkmann Swirl Finder Light
The Brinkmann Swirl Finder Light is like having the sun in your hand and the benefit to this is you can use it anytime, not true with the sun. Besides a great light for revealing the condition of your car's paint it also makes a great all-around-flashlight and with it's long battery charge life and the ability to recharge it using both a car charger and any household electrical plug-in it saves you from having to buy batteries over and over again...
Using the Brinkmann Swirl Finder Light to inspect for swirls after sanding and machine buffing
Examples
Here's an example of using 4 types of light to inspect the condition of the paint on this 1969 Camaro Pace Car
1969 Camaro Pace Car - Show Car Makeover - Modeled by Michelle
Sunlight
Steve just arrived with his Camaro and the sun is sitting low in the sky but I was able to get a few pictures to show the condition of the paint...
Here's how low the sun was in the sky...
Best Sun Swirl Shots I could get...
Camera Flash
Here I'm using the camera flash to light up the swirls and scratches...
Close-up: There's scratches and general surface imperfections throughout the finish...
Florescent Light
This shot is to frame-up the following shots so you can tell where the close-ups are being taken. Every body panel looked the same way...
Close-ups using overhead florescent lights
As you can see from the pictures above, the paint on this show car has swirls and scratches distracting from the true beauty of the car.
Brinkmann Swirl Finder Light
I personally use the Brinkmann Swirl Finder Light on every car project I work on and can't recommend it enough. If you don't have one of these cool lights then be sure to get one the next time you order detailing supplies...
Here's how the paint looks on the 1969 Camaro using the Brinkmann Swirl Finder Light
How to use the Brinkmann Swirl Finder Light
Using the Brinkmann Swirl Finder Light is pretty straightforward but here's a few tips to get the best results when exposing swirls.
You want to hold the Brinkmann Swirl Finder Light about 12" to 16" away from the surface you're inspecting and hold it at an angle so that the light bounces back to your eyes.
Correct distance to hold the light from the finish
Swirls in the clear coat finish surrounding the dual Xenon light bulbs
Correct hand position when inspecting for swirls - Comfortable, ergonomic grip
On Autogeek.net
Brinkmann Swirl Finder Light
Read my review here
:xyxthumbs:
")


