Continued...
How-To Damp-sand
Here are the basic techniques for damp-sanding using an air-powered DA Sander, these techniques can also be used with an electric D.A. Polisher but use an electric tool at your own risk.
Preparation
Wash the vehicle to remove loose surface dirt
Wash car to remove all loose surface dirt off the paint and out of any cracks, crevices, body seams and trim. It is vitally important that the vehicle is surgically clean before sanding because if any abrasive particulate enters the sanding process and is trapped between your sanding disc and the paint finish it will instill what are referred to as
pigtails.
Pigtails - Photo courtesy of Mister B
Pigtails are deeper circular scratches that look somewhat like a curled pig's tail thus the name. Typically what happens is an abrasive particle gets trapped between the paint and the face of your sanding disc and because the backing plate that holds the sandpaper is moving in an oscillating fashion, it grinds the abrasive particle into the paint in a curly pattern that looks somewhat like the tail on a pig, thus the name.
Pigtails
Use Detailing Clay to remove Above Surface Bonded Contaminants
After washing or wiping the car clean, use detailing clay to remove any Above Surface Bonded Contaminants. This is especially important if you're working on any car that's been put back into use as a daily driver because it can pick up air-borne contaminants from just about anywhere and you don't want any particulates bonded to the paint coming off while you're sanding so remove them first with detailing clay.
When I damp-sanded the 1969 El Camino of which some of the pictures from that project are used in this article, after wiping the El Camino clean I clayed all the painted body panels, (and the glass while I was at it), and even though this car is part of a collection of street rods and parked inside all the time it's not being driven, below is a picture of the detailing clay patty I used after ONLY claying the hood on this car.
Detailing Clay after claying ONLY the hood of the 1969 El Camino in this article
For a car parked inside, with a relatively new, custom paint job there was a lot of built-up contaminants on the finish that would have come off and onto the sanding discs reducing their working life and possibly causing pigtails.
Chemically Strip Paint
Chemically stripping the paint will remove waxes, paint sealants, silicones, polymers and any other substance off the finish that washing will not remove and was not removed by the claying process. Detailing clay will actually remove a lot of any substances bonded to the upper surface of the paint, including waxes and paint sealants, but under a microscope paint is not completely flat, it's made up of hills and valleys, pockets and pores, surface imperfections and interstices.
Interstices = Microscopic cracks and fissures.
Remember, a lot of modern car wax and paint sealant products are
detergent resistant so washing won't alway remove 100% of any previously applied wax or paint sealant coating.
Important: You don’t want any chemical substance bonded onto the surface to come off while sanding as it can interfere with the cutting process, load up on the face of our sanding disc and cause your disc to wear-out prematurely.
Common products for chemically stripping the finish include
Prep-All,
Orderless Mineral Spirits,
Automotive All Purpose Cleaners,
Isopropyl Alcohol.
You can dampen a microfiber towel and wipe the surface clean or use a spray bottle with a chemical resistant spray head to spray directly onto the surface and then wipe the paint dry using clean microfiber towels.
Prep-All
Safety Precautions with an air-powered DA Sander
Always wear eye protection and ear protection.
Safety Precautions with Electric DA Sander/Polishers
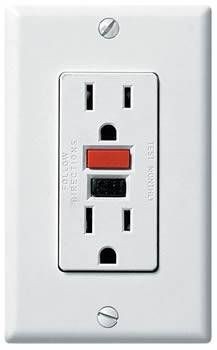
If using an electric DA Polisher make sure you have access to a GFI Outlet. A GFI or Ground Fault Interrupter will stop the flow of electricity if it detects a leakage or short in the normal circuit or flow of current.
GFI Outlet
And always wear eye protection and ear protection when using any power tool.
Work Area Size? - 2" x 2" or smaller
In the real world, you would slice up the car panel by panel and then slice up the panel to section usually no larger than about
20” squarish or so. This is not a hard and fast rule because not all panels are square and flat, in fact since the 1980’s most car bodies incorporate aerodynamics designs and are very rounded and curvy.
Why you don't want to tackle too large an area at one time...
Regardless of the shape of the panel, the reason you don't want to tackle too large of an area at one time is because you have better control over downward pressure when the sander is near your body. The further you reach out away from your body the more likely you'll change the downward pressure and possibly tilt the polisher potentially causing more pressure to and edge on the face of your sanding disc and this can cause gouging or deeper scratches in the paint.
The width of your shoulders is a pretty good measurement for as large of a dimension as you would ever want to tackle on a surface. My shoulders measure approximately 20" wide so I would only want to tackle a section 20" squarish or smaller, not larger.
Water Volume?
Damp-sanding is using only a
few mists of water. Meguiar’s new Unigrit Sanding and Finishing Discs MUST be used wet but not over-wet. All you need is a mist or two of clear water to the face of the pad and a few mists of water to the surface to be sanded. Damp-sanding should not be a wet-mess on the car, or on the ground surrounding the car.
- Too much water will hyper-lubricate the surface and reduce cutting action.
- Too little water will increase cutting, clog disc and wear disc out prematurely.
Unigrit Sanding and Finishing Discs are
always used wet. Use water only - no sanding lube (soap).
Use a clean water source - no soap or sanding lube
It's safer to error on the side of caution and use an extra mist or two of water until you get a feel for the right balance for your environmental conditions. Temperature, humidity, airflow, affect all machine sanding process including the Unigrit Sanding System so there can be no hard and fast recommendations. Practice makes perfect.
VITALLY IMPORTANT
It's vitally important that you stay focused on the amount of water you're using when damp-sanding because if you use too much water and your disc hydroplanes, you can mis-read this to mean the disc is spent of used-up and no longer cutting.
If the disc is in fact still good and you throw it away because you used too much water then you waste a good disc and these are not inexpensive.
Remember, it's not wet sanding it’s damp-sanding
I took the below picture after completely sanding down a 1969 El Camino. Note the water level in the clear spray bottle.
Only 16 ounces of water used to sand an entire 1969 El Camino
This is a 32 ounce spray bottle and I never refilled it during the sanding process, this means I used approximately 16 ounces of water to sand down a full size, domestic vehicle.
Downward Pressure?
Light Pressure. When machine sanding you only need to use the weight of the machine and whatever more pressure it takes to keep the pad flat to the surface with no hopping or skipping. It’s vitally important to maintain disc rotation so you don't want to use too low of a speed setting.
Tool Speed Setting?
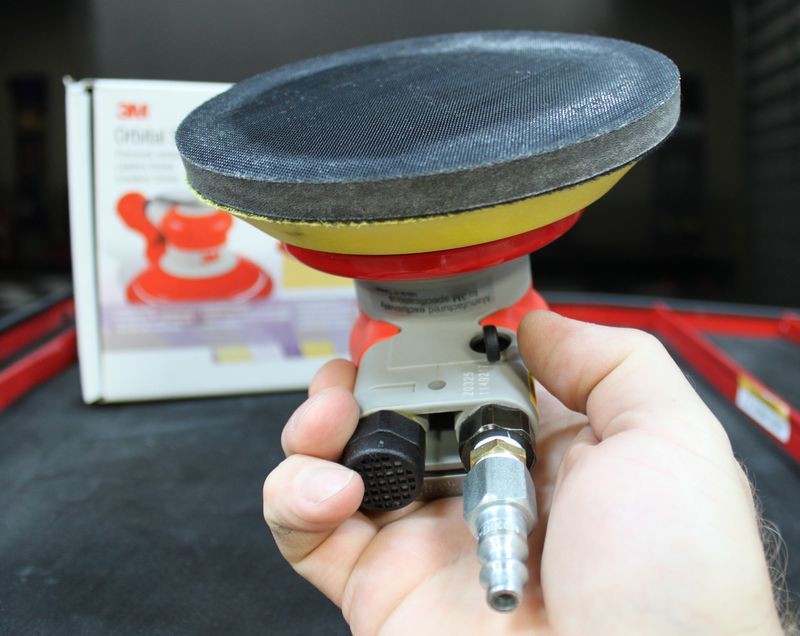
Fast. With an air powered D.A. Sander you're going to be on 3/4 to full throttle With a Meguiar's electric polisher you’re going to use the 3.0 to 6.0 speed setting depending upon whether you're sanding a flat surface or a curved surface. It's safer to turn the speed down anytime you're sanding small curved areas or hard to reach areas.
You can see the Throttle next to my thumb on the underside of this 3M Air-Powered DA Sander
Air Pressure or PSI
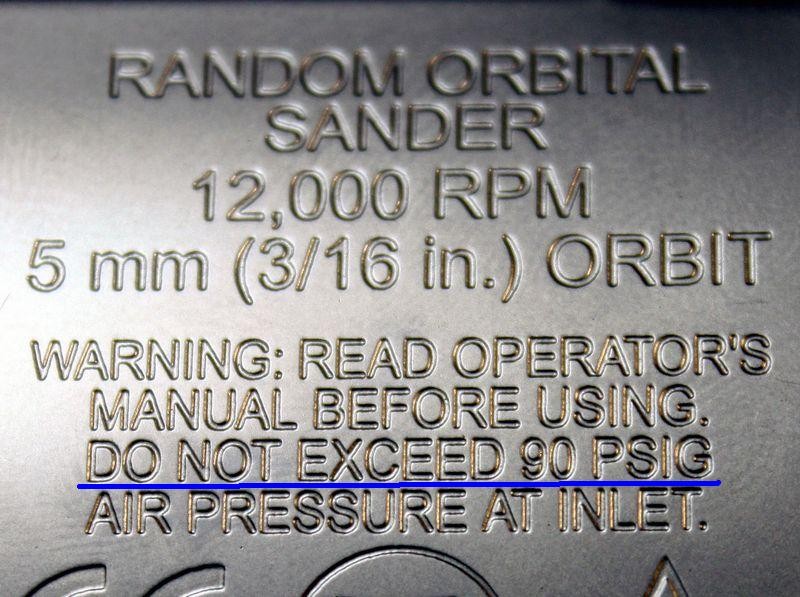
Before using an air powered DA Sander check to see what the tool manufacture recommends for Maximum PSI or PSIG.
PSI = Pounds per square inch
PSIG - Pounds per square inch at the gauge
I think the main difference between PSI and PSIG is that PSI is not specific to the point of connection for the tool and could mean compressed air pressure at the tank and not the actual gauge and thus the air line feeding your tool. That means there can be differences in PSI by the time it gets to your tool depending upon the shop you work in and how many lines are being fed by the air tank/compressor. The important point is to make sure you don't starve your air tool for compressed air and you don't over feed the tool with too much air pressure.
The 3M DA Sander shown in this article states to not exceed 90 PSI
The air regulator for use in our shop is usually set to around 110 PSI so when I want to use the air compressor I have to decrease the pressure coming out of the line by adjusting the regulator down to 90 PSI
Sanding Pattern?
Cross Hatch Pattern --> UMR = Uniform Material Removal.
The goal when sanding is to remove the defects while removing as little paint or topcoat material as possible. Of course the reason for this is to leave as much paint on the car to last over the service life of the car. So your specific goal is to only sand enough to remove the defects and then
STOP. The only way you will know how much sanding is required to remove the defects is by
testing each paint system you work on and getting a feel for how many passes it takes to remove the defects you're going after.
Because topcoat hardness is a variable you cannot control, you must do a Test Spot on each new car you work on to figure out how easily or difficult the paint is sanding to remove enough material to reach your goal.
Cross Hatch Pattern
Sanding back in forth in a straight line with a DA Sander creates the potential to remove material unevenly if you're not very careful. Adding a second direction will help insure the surface remains flat with no low/high troughs or valleys running a dedicated direction in the panel. A cross hatch pattern helps to ensure
uniform material removal over an entire panel.
Of course the shape of some panels will not lend themselves to sanding in a cross hatch pattern and you will be limited to only sanding in one direction. For panels such as these be sure to overlap your passes by 50%
Pre-determined pattern = Easy to duplicate and less thinking required
The benefit to using a cross hatch pattern is that it's easy to remember and thus easy to
duplicate over and over again for production sanding work. Feel free to come up with your own system that suits your goals best, these are just my recommendations as to what works best for me. If you have employees, you always want to make procedures they will do over and over again easy to learn and repeat for fewer mistakes.
Arm Speed?
Use a
rapid arm speed when machine sanding.
Unigrit discs are designed to cut fast and cut for a long time with light pressure and a fast arm speed. Moving the sander/polisher too slowly will cause the abrasives to cut too deeply and will wear the disc out prematurely. There’s a learning curve to every process and that includes machine sanding with these new Unigrit Sanding Discs and you’re better to error on the side of caution by using too fast of an arm speed versus too slow.
When first starting out, stop often and check your results.
B.I.T.E.
This is key remember…
BITE which stands for
Break-
In
Time
Efficiency
New discs
SKIM the surface until they break-in. A brand new disc requires anywhere from 2-4 passes to break-in before maximum cutting efficiency is reached. This has to do with physical process taking place on the surface of the paint and a physical process taking place on the surface of the paper.
Top coat hardness is a huge factor and
unknown variable between cars and effects how fast or how slow a disc will break-in. During the manufacturing process, the Unigrit abrasive particles are embodied in a slurry which hardens into a solid medium and this medium offers a controlled rate of break-down.
Efficient cutting is seen when the
water slurry on the surface is whitish in color. This is an indicator of clear paint particles suspended in the water film on the surface.
During break-in, the disc goes from
skimming to
biting or abrading... your job?
Pay attention to the task at hand.
This circles back to monitoring how much water you're using because a lack of whitish appearance to the water could mean the disc is either,
- Not broken in yet
- Too much water on the surface resulting in hydroplaning
- The disc is spent or used-up, that is the majority of abrasives have been worn off the face of the disc
The appearance for all three of the above is
clear water on the surface, so pay attention to the amount of water on the surface and how much area you've used each disc to sand and the concentration or lack thereof of the whitish appearance to the lubricating water.
Number of passes?
When sanding with the Meguiar's Unigrit Sanding Discs, after the initial break-in of the disc, sand for
2-4 Section Passes and then inspect.
The definition of a pass
There are two definitions of the word pass as it relates to machine polishing with any type of machine. We can apply this to machine sanding as well.
Single Pass
A single pass is just that. It's when you move the tool from one side of the section you're sanding to the other side of the section you're sanding. That's a single pass.
Section Pass
A section pass is when you move the tool back and forth, or front to back with enough single overlapping passes to cover the entire section one time. That's a section pass.
Taping-Off, Covering Up and Removing Trim
As a rule, it's a good idea to tape-off any raised hard body line for two reasons,
- So you don't sand over the high points
- Simply so you can see where they risky areas are at on a panel
1. So you don't sand over the high points
Paint will tend to be thinnest on any high point as the forces of gravity will cause the paint when it's sprayed and thus a liquid to flow downward. It only takes a few seconds of sanding on any high point, edge, corner or raised body line to either sand through the topcoat or remove enough material that when you later compound the area you go through the topcoat while compounding. So taping off high points will save you from having to repaint a panel.
2. So you can see where they risky areas are at on a panel
This one might sound kind of dumb if you've never sanded down an entire car before so let me share with you why it's important. As you're sanding, you'll create a white slurry on the panel that you can't see through. This slurry is made up of particles of paint you've removed off the topcoat, mixed with water. As it covers the panel it hides or camouflages everything under it including a high point or raised body line. By placing some tape over the area you want to avoid you create a visual indicator or reminder of where not to sand.
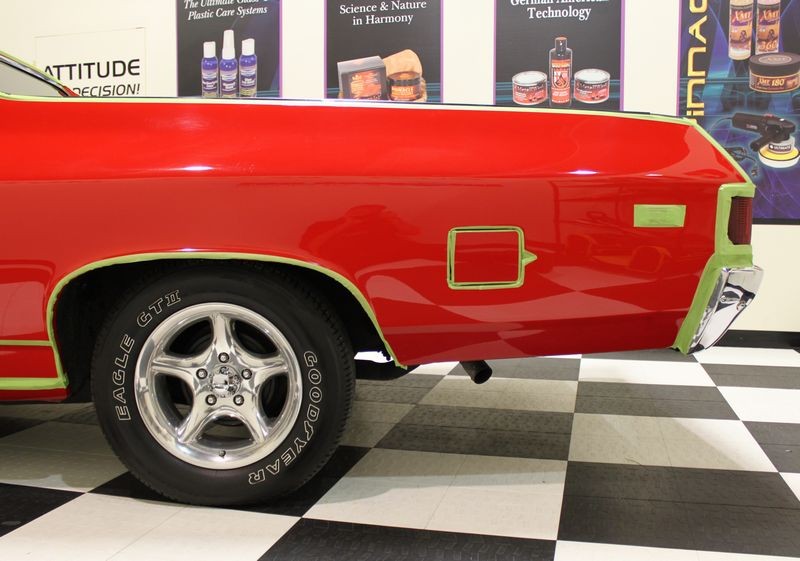
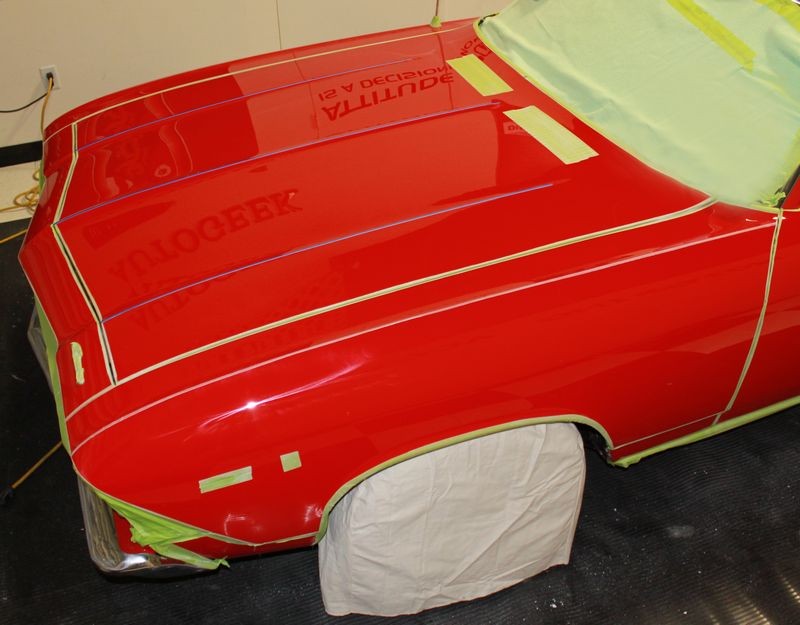
Here you can see where I've taped-off the edge of the gas tank door and the sheet metal surrounding the opening for the gas tank door. This will protect the edges while sanding and compounding.
Body lines taped-off
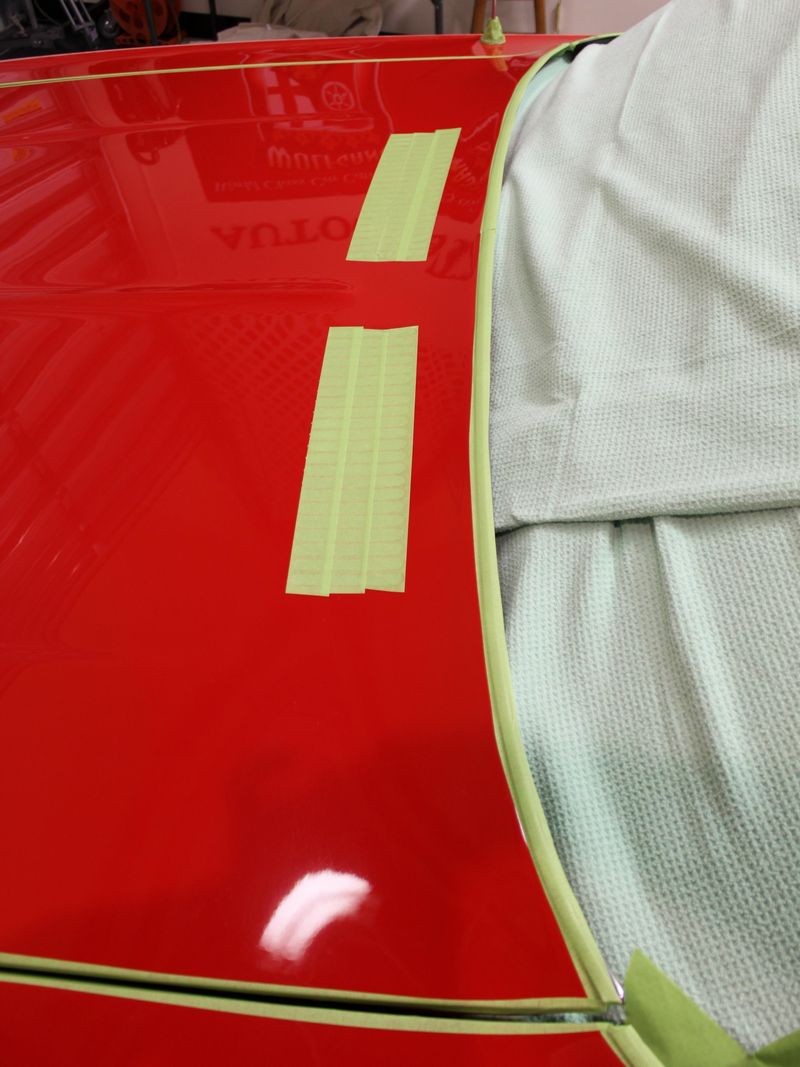
If you look carefully you can see some thin tape lines running down the center of the hood and the middle of each half-sections of the hood, these are
raised body lines as a part of the styling of the hood. They are not very high off the surface and when sanding,
the entire area will become white with water slurry. By taping them off I could see where they were at and if I accidentally run the sander too close to them, no worries...
Thin tape on top of raised body lines on the hood
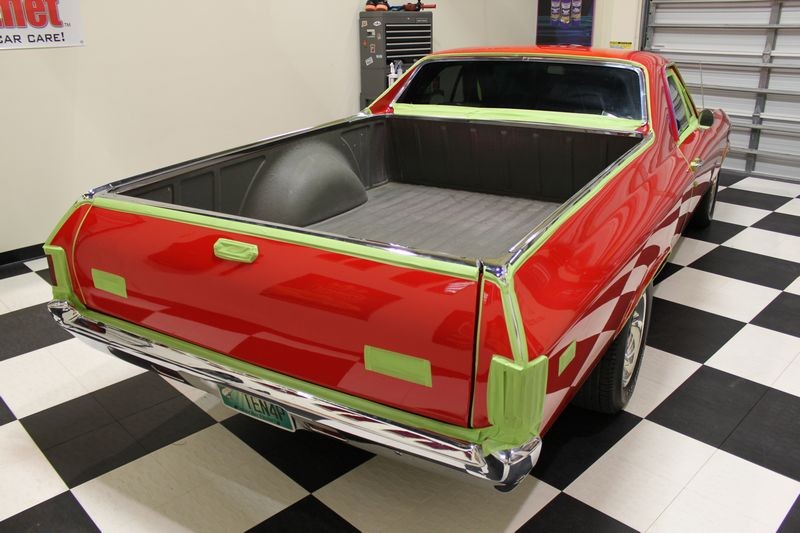
Grills and Vents
It's nearly impossible to get under the fresh air grill on late model cars to remove splatter residue so I always carefully tape them off. Sad to say but whoever sanded and buffed this car before me plastered the area under the tape you see here and there's no practical safe way to remove it so it will forever be an eyesore when the owner shows this El Camino
Fresh Air Grills Taped-off
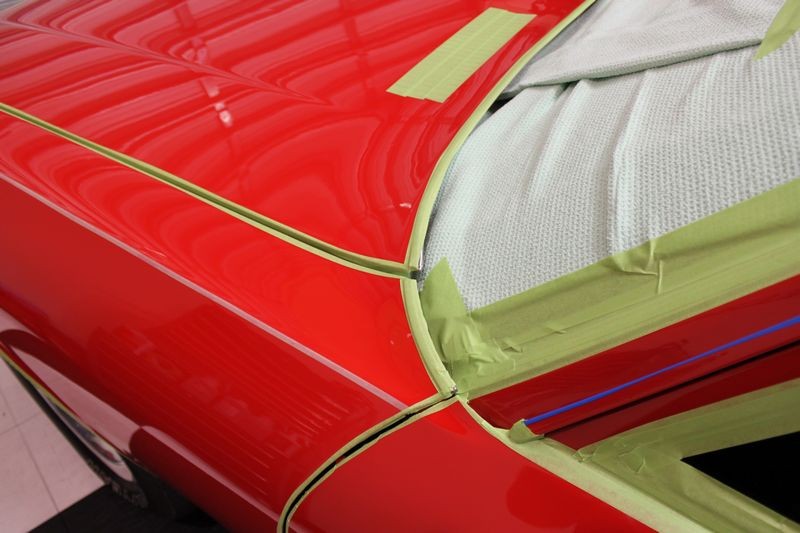
Here you can see where I've taped-off any edge I didn't want to risk sanding over... and it's not that I'm not good at what I do it's because the next paint job I buy is going to be for me.
Also tape off any trim you cannot or will not remove, especially plastic, rubber or felt trim and gaskets. This goes without saying but just to say it or type it, the reason you do this is so you don't damage the material while sanding and buffing and so you don't cream it over with compound or polish residue which later can be a nightmare to remover and cause the owner of the project vehicle to use your name as a curse word the rest of your life.
On classic cars, trim, script and emblems can be very fragile, especially the studs and nuts that hold them to a panel. What I personally like to do is point this out to the owner of the car and ask if they can and are willing to remove them so I can do a better job of sanding and buffing out their car. If they say "yes", this puts the responsibility on them for any damage caused by removal.
The good news is that often times owners of special interest and classic cars will already be very familiar with these items and understand the risk and in some cases be very proficient at their removal since they are more intimate with their car than you are.
If the owner cannot or will not remove trim, script or emblems then you can opt to remove them yourself as carefully as possible and/or tape or cover them up.
Covering up
I like to cover up the engine on special interest cars and especially show cars or restored cars where the engine and engine compartment are clean enough to eat off of. The reason for this is because it's all to easy for stray splatter from either wet-sanding or machine compounding and polishing to spray onto the engine and engine compartment and cleaning these areas can be difficult and very time consuming.
Here's a video I made a number of years ago that explains
why to cover an engine and shows my method of using a clean,
soft flannel bedsheet to carefully cover and protect the engine. You can also do this for trunks and interiors if you're working on a convertible with the top down or off the car.
Covering the motor on the Panic Parrot
[video=youtube_share;sE_0W-VXjR4]- Covering the motor on the Panic Parrot with a flannel bedsheet[/video]
To tape-off and cover areas and items on a car you'll need things like a good selection of Painter's Tape.
Also I like to have 2 mill Plastic Painter's drop cloths on hand, tin foil, and even a Beach Towel to cover up windshields and wiper assemblies in one fell swoop.
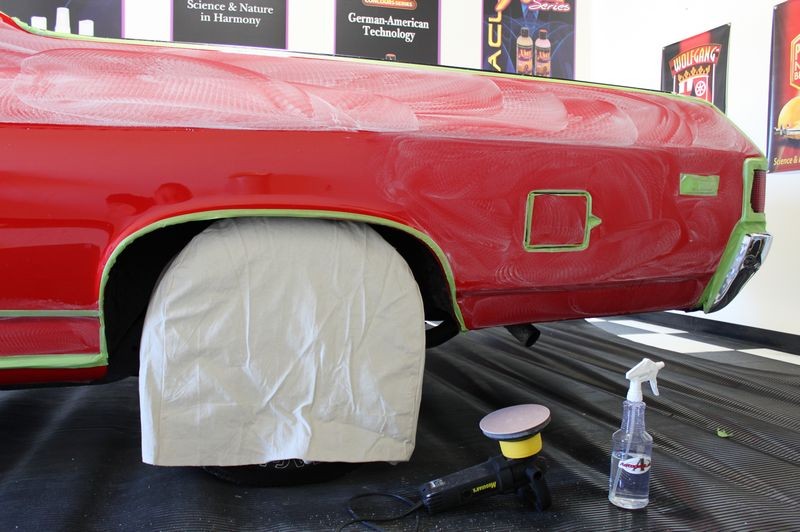
Canvas Wheel Covers
Wheel Covers make fast work of covering and protecting custom wheels and tires, don't kid yourself, wiping off any splatter from a well dressed tire or an intricate wheel design will be time consuming and not very much fun. Besides Canvas Wheel Covers like body shops use I've also used large Glad Garbage bags, like the kind you get for leafs and yard debris, you can slit them on one side and then slide them over the wheel and tire and tape back any loose plastic. I've also used newspaper to create a makeshift cover with tape as seen here,
Whatever it takes to keep the tire and wheel clean and keep me from having to wipe off any stray splatter is my personal goal.
I love polishing paint but I hate detailing cars. (See the link below to see what that means)
"Polishing paint is polishing paint, detailing is getting the wax out of the cracks"
")


 oke:
oke:

")