Oakes
New member
- Dec 21, 2010
- 225
- 0
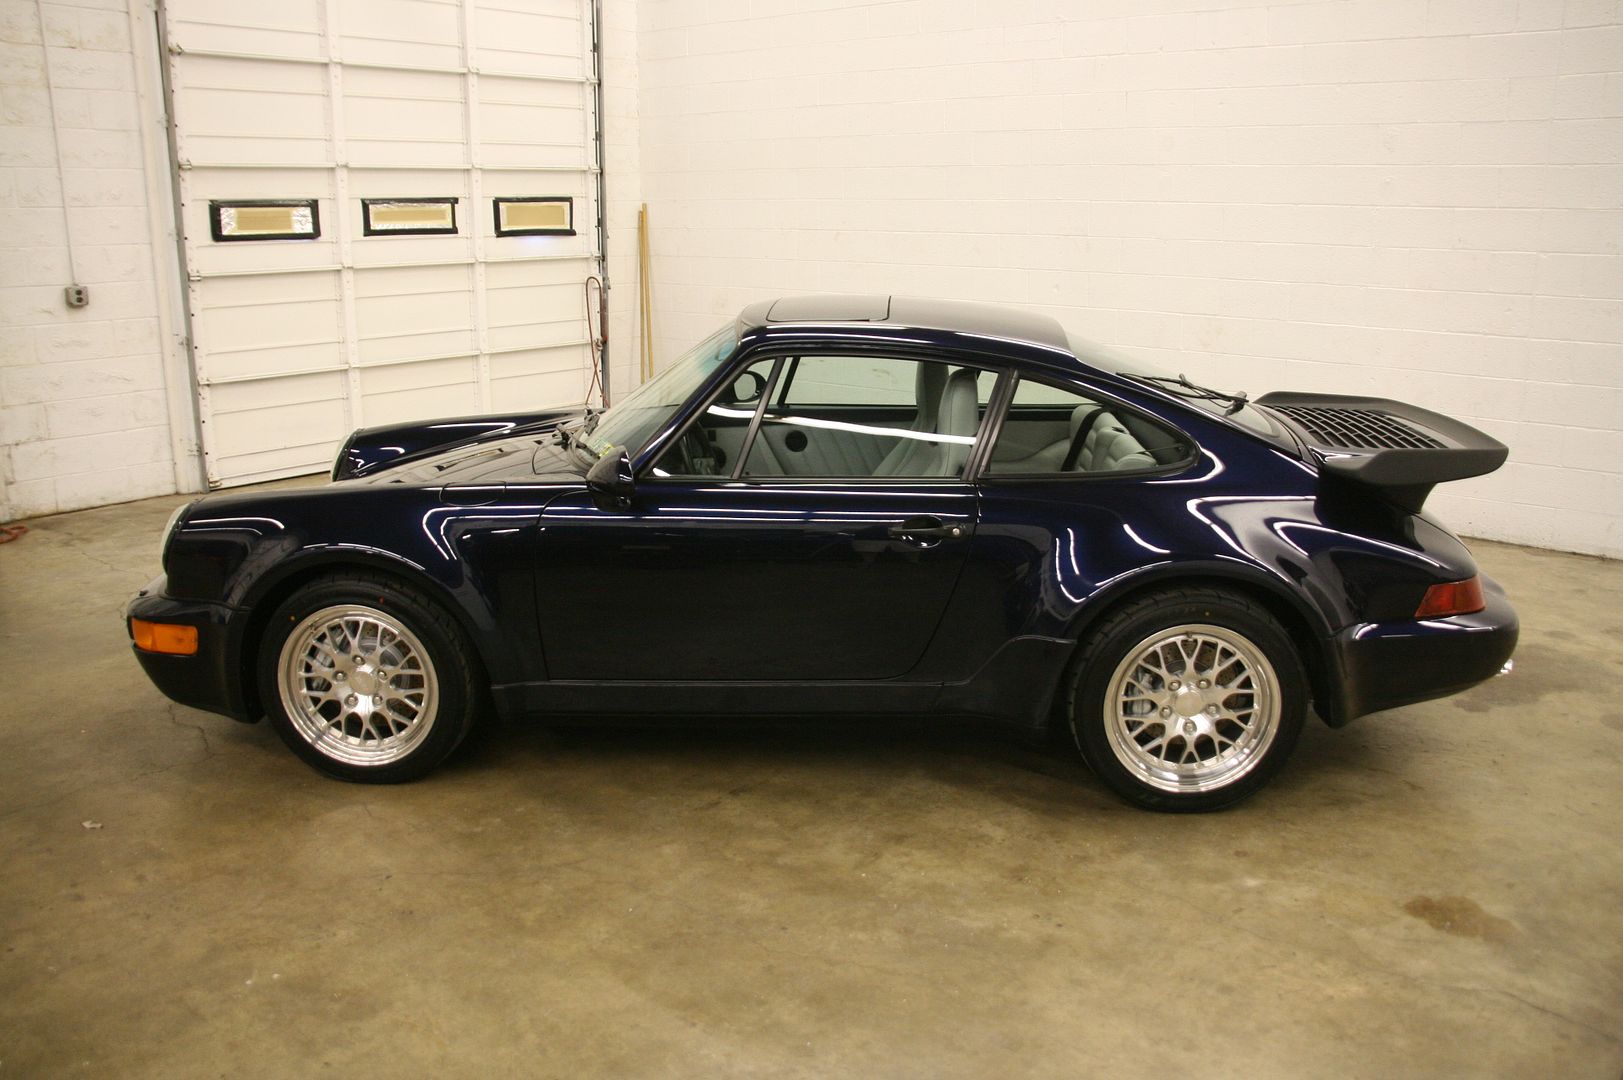
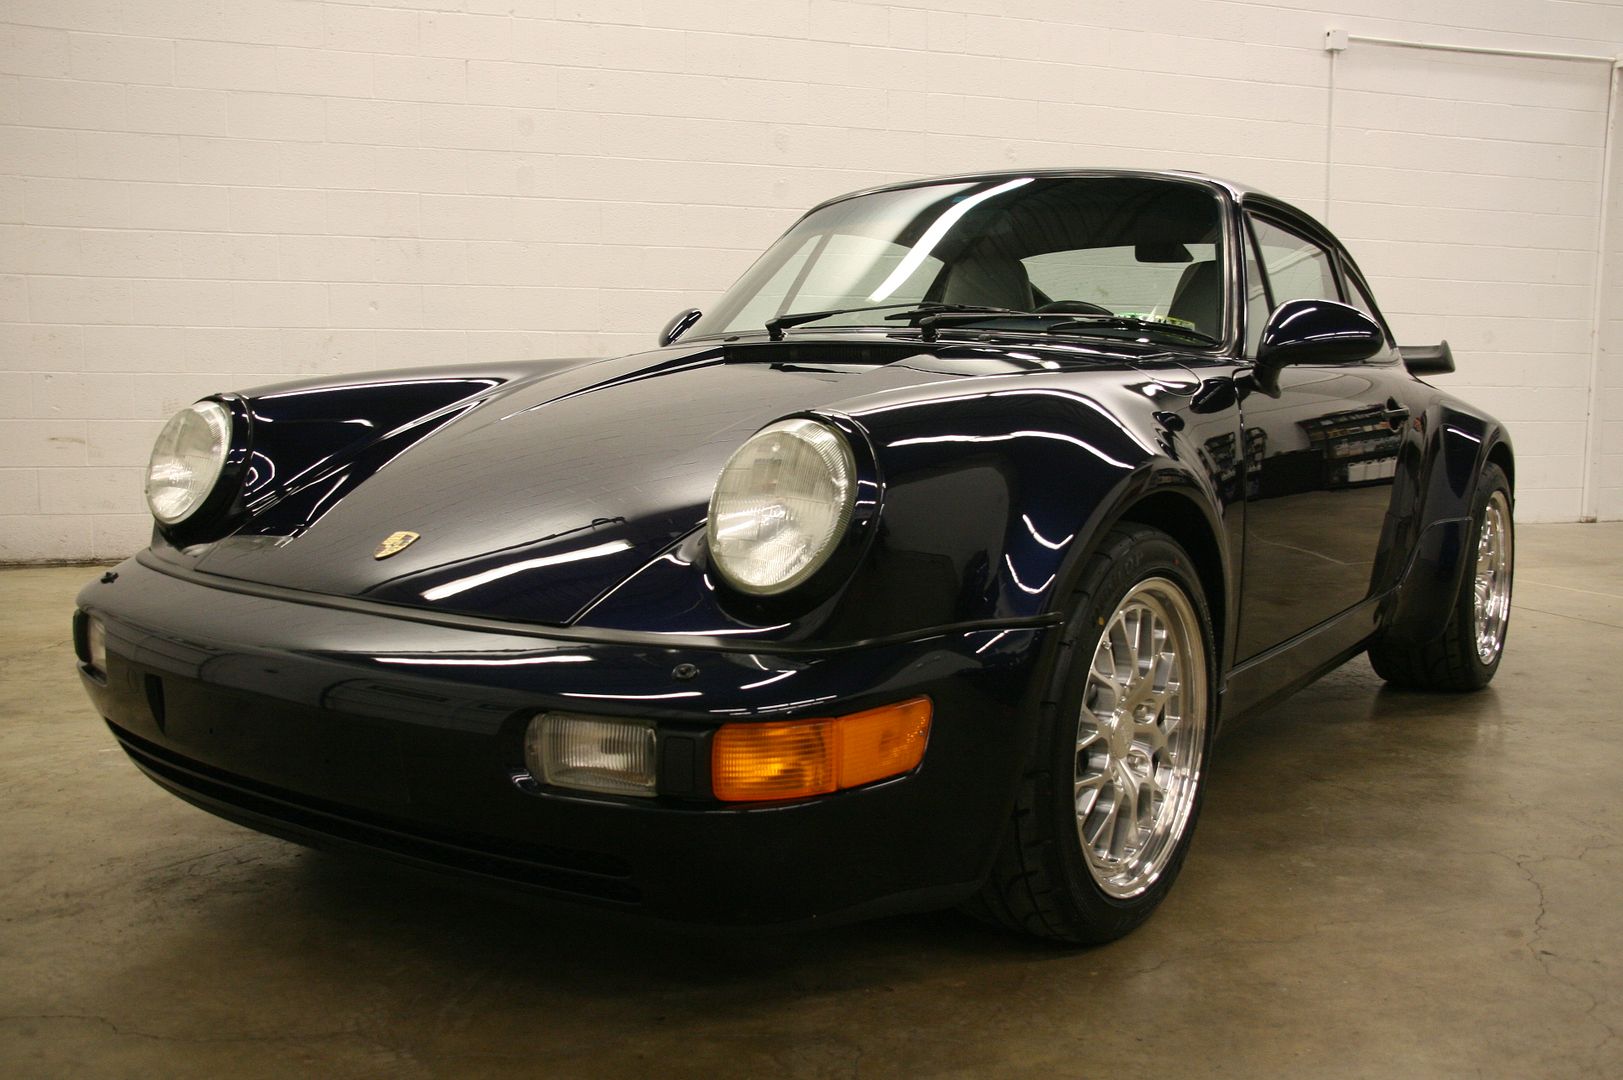
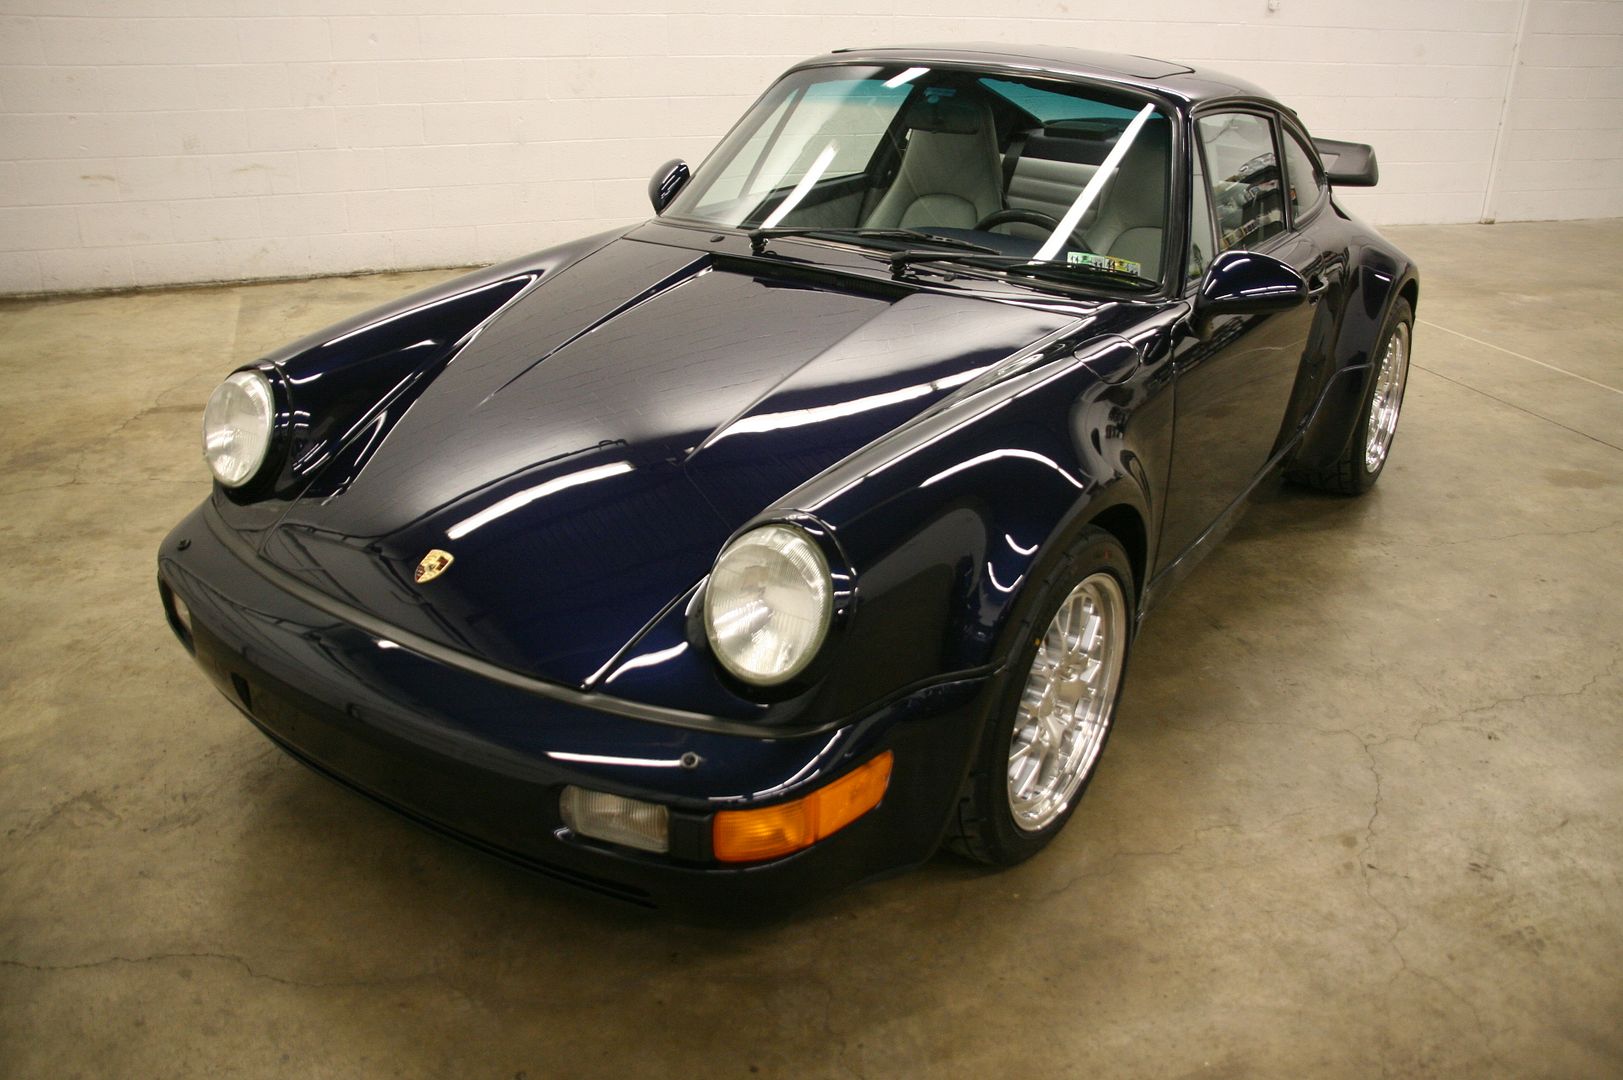
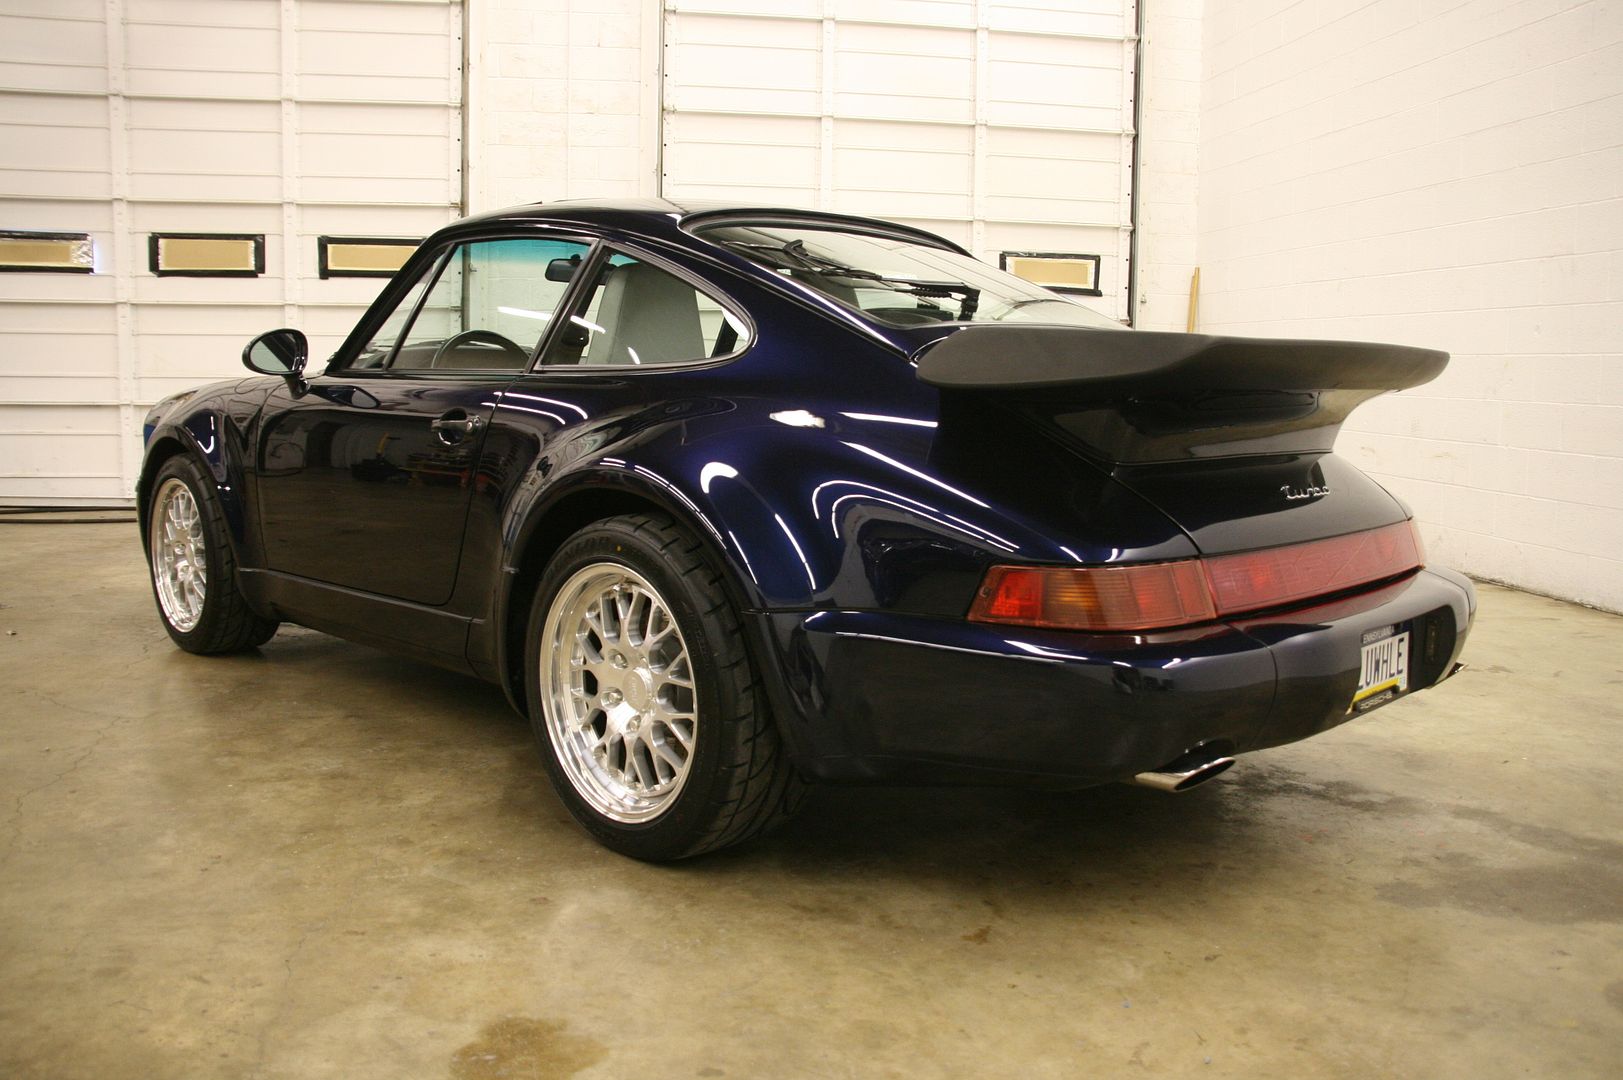
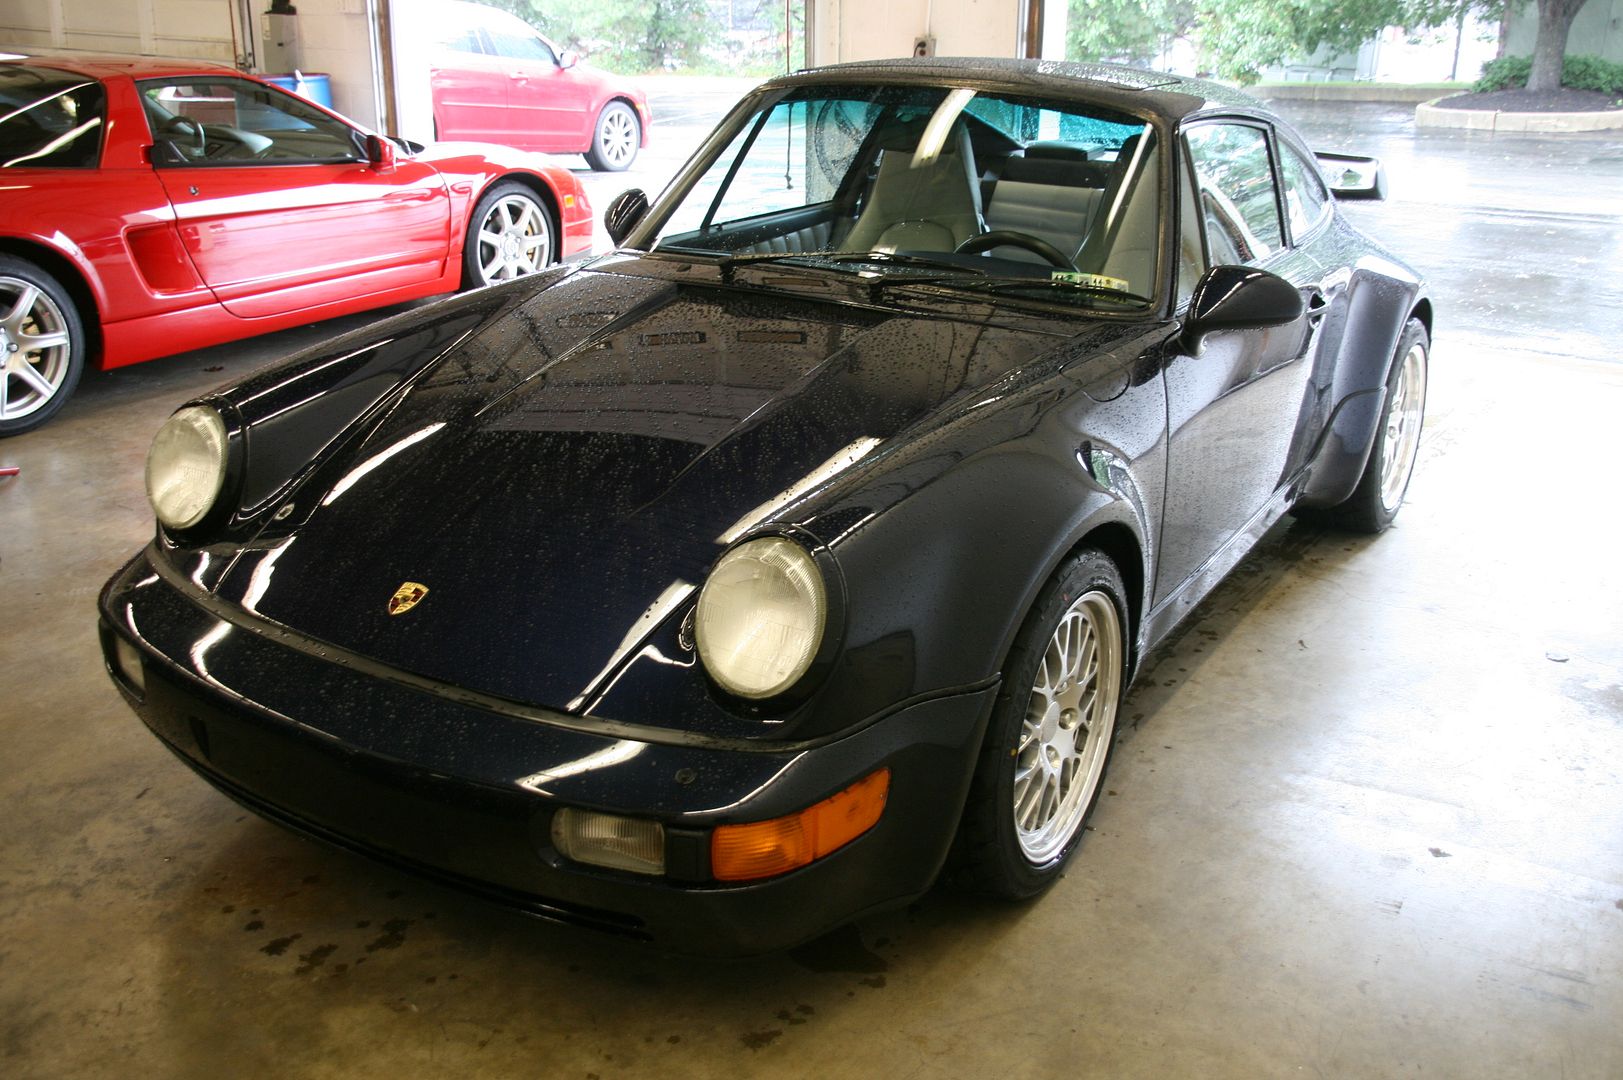
This project spanned quite some time and frankly its one of my personal prouder moments honestly. This 964 Porsche 911 Turbo in Royal Blue spent quite some time with me getting the brakes redone due to fading and a color change, some rusted parts refinished, new stainless steel brake lines installed, other metal components polished up, full paint correction/restoration and the vehicle was completely ceramic coated to wrap it all up.
I documented this detail a little differently than I normally do in the pictures I took to show, one new thing I'm trying out is labeling body panels and their paint depth readings which you will see below before the correction photos.
Definitely take the time to check out all the pictures and their descriptions! I'll start it off with the day she got here...
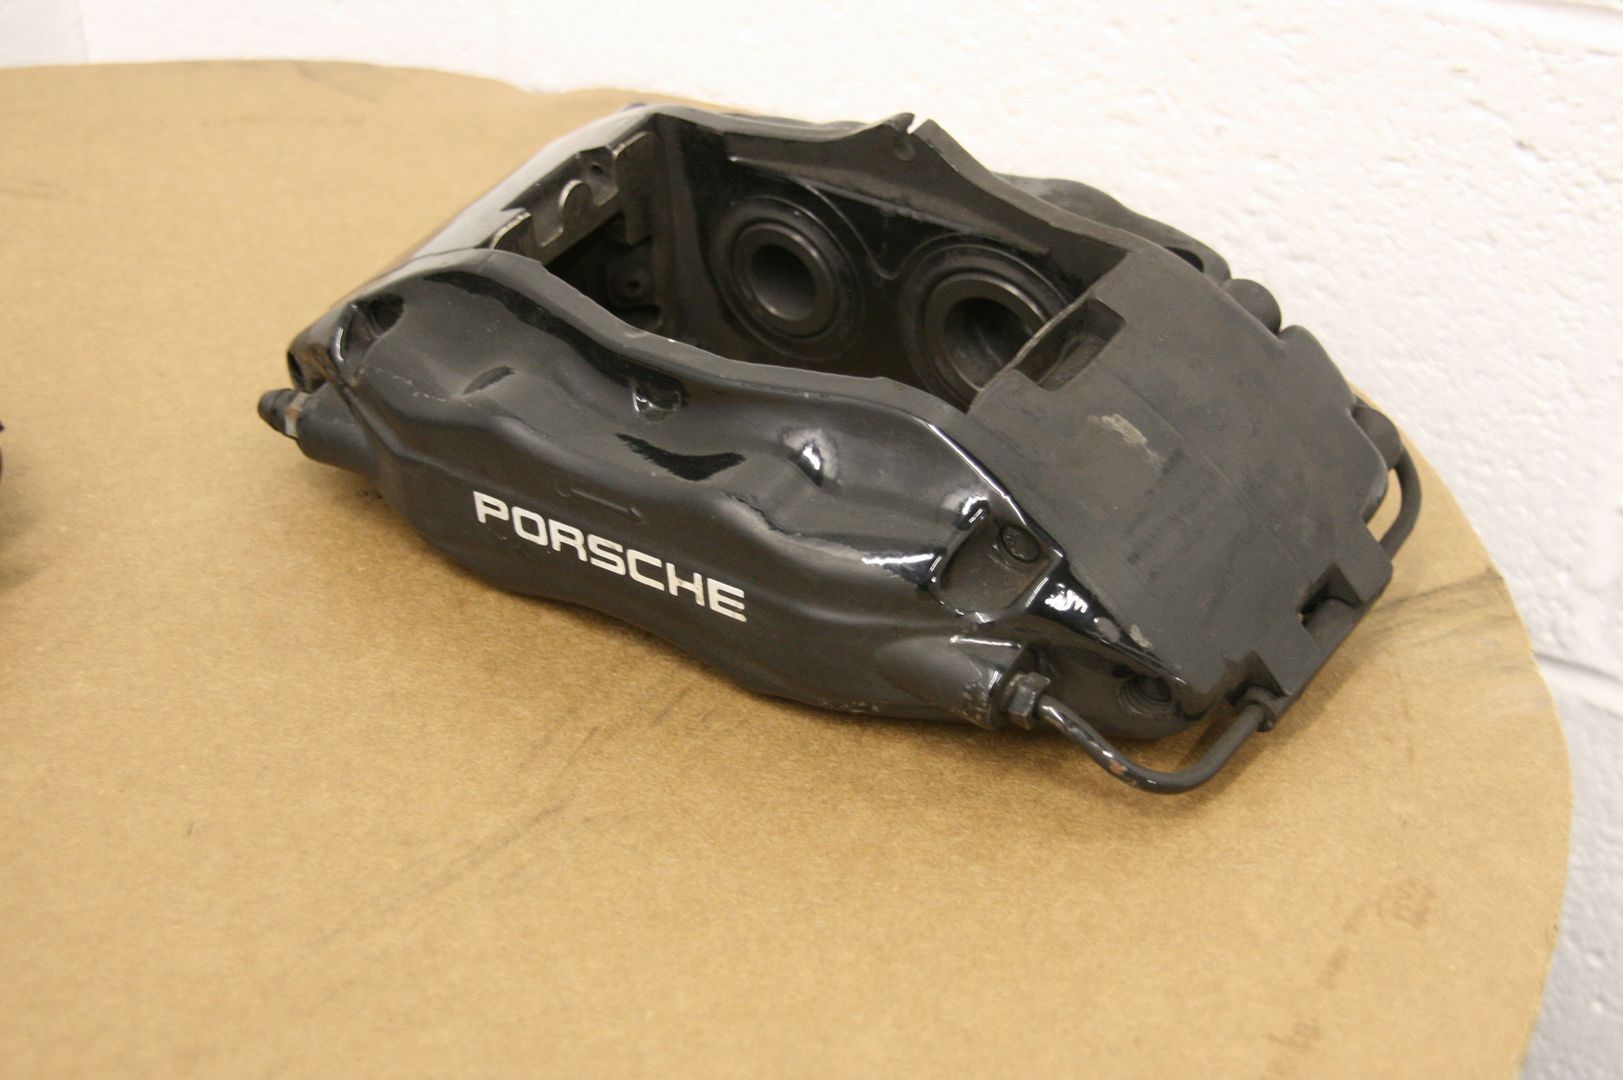
First order of business was removing the original brake calipers to have them stripped, torn down, powdercoated and restenciled and then rebuilt! Heres the original black finish fading and peeling away.
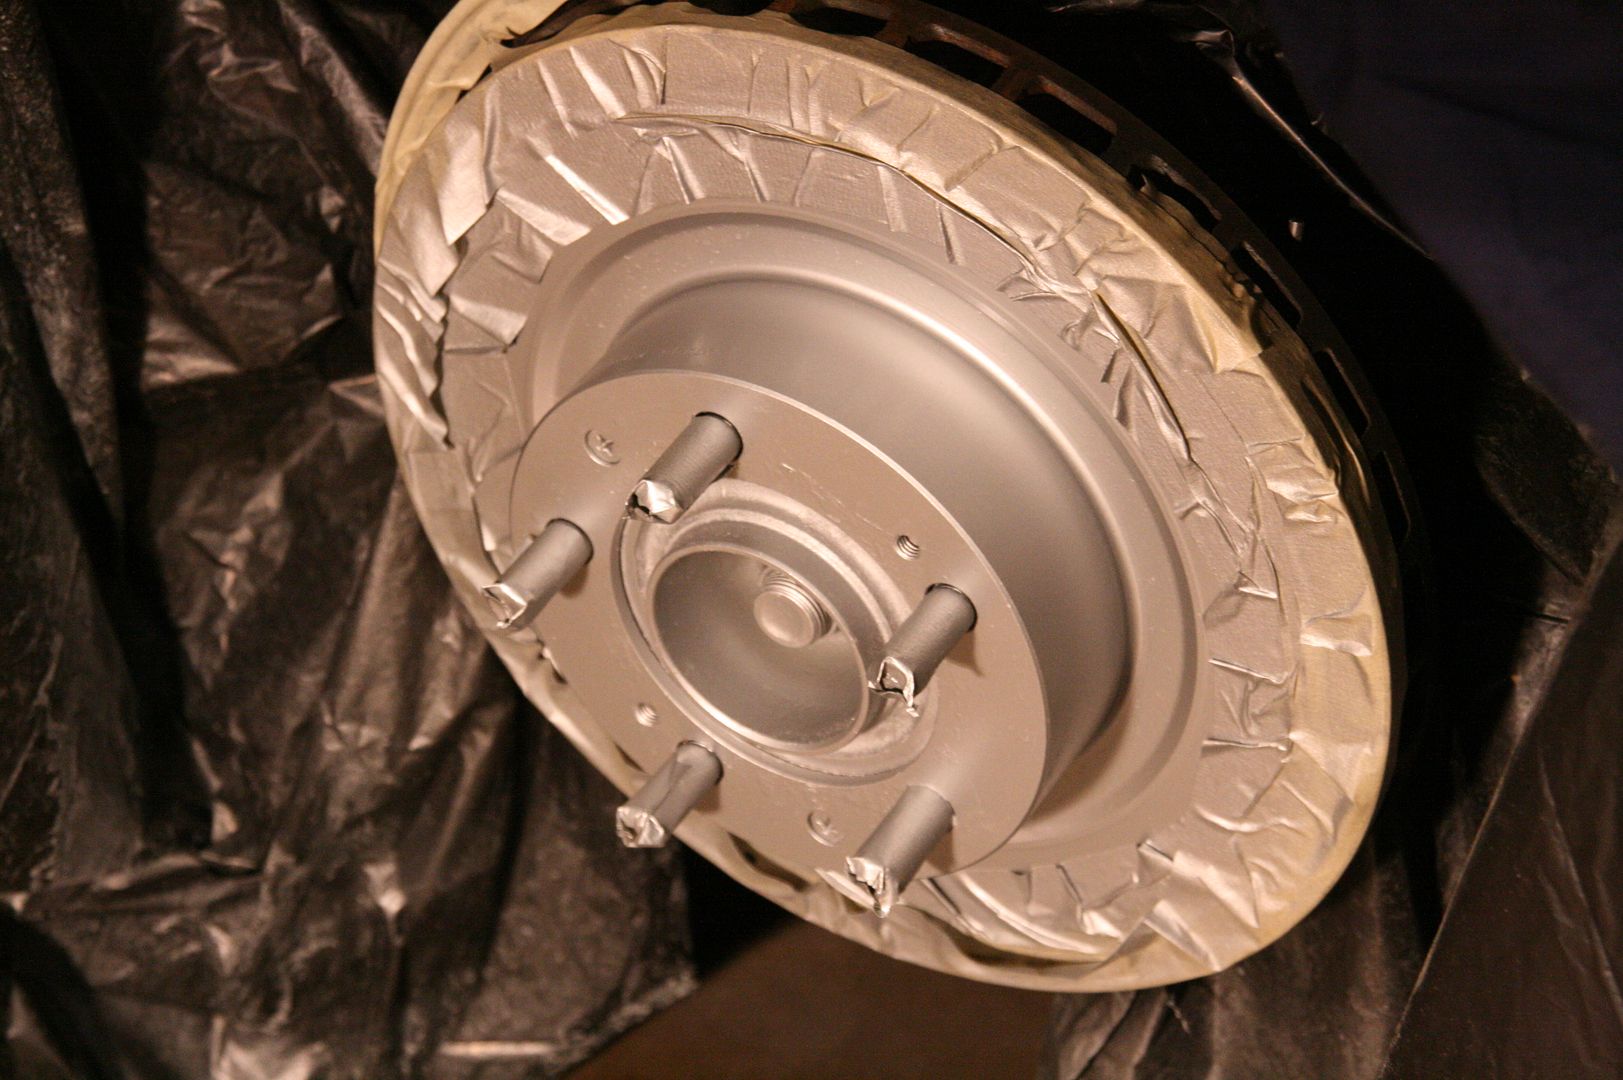
While the calipers were out getting refinished, the hubs were in need of some recoating, here is the passenger front before and after.

5.
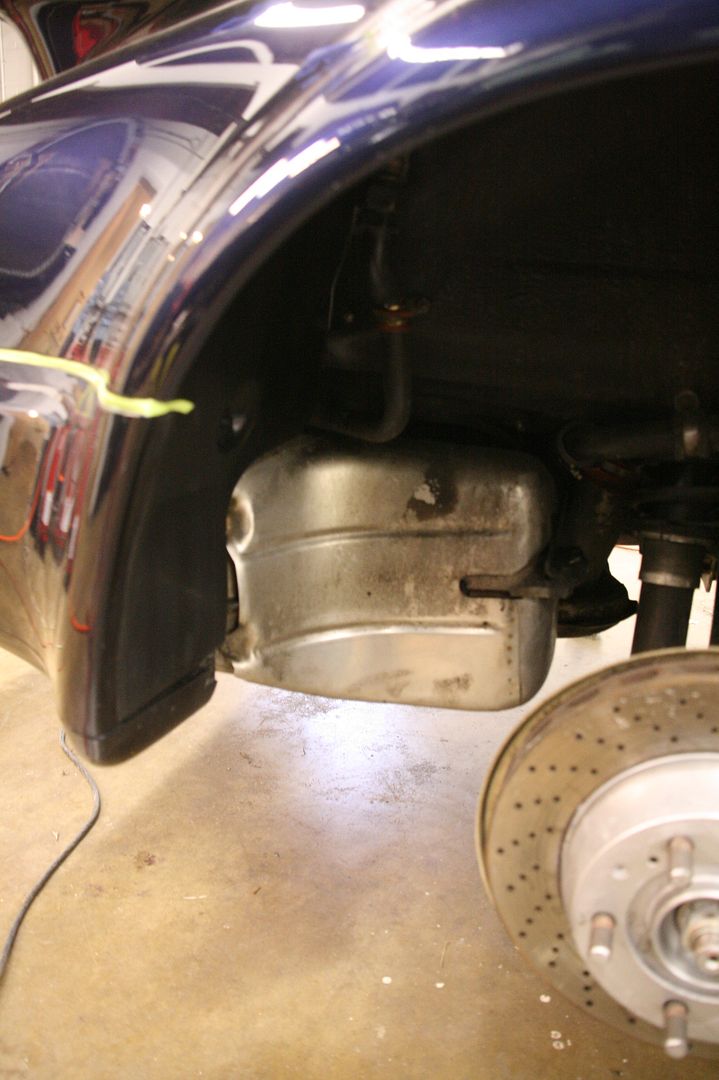
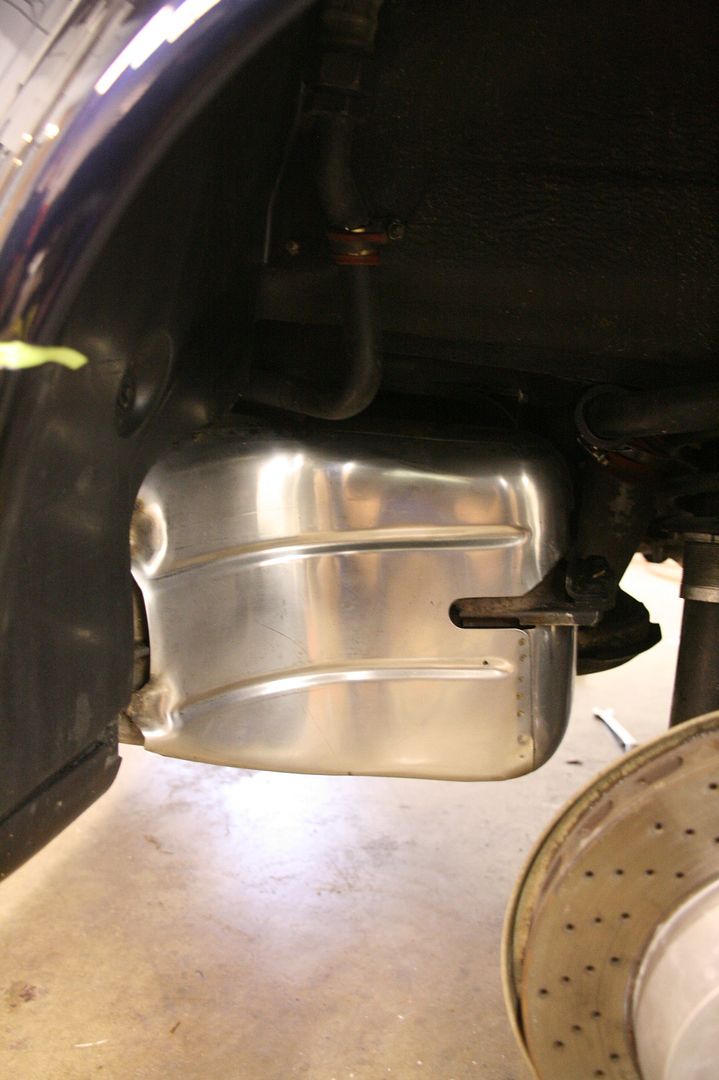
Also while the wheels were off, I did some metal polishing of the heat sheilds in the rear
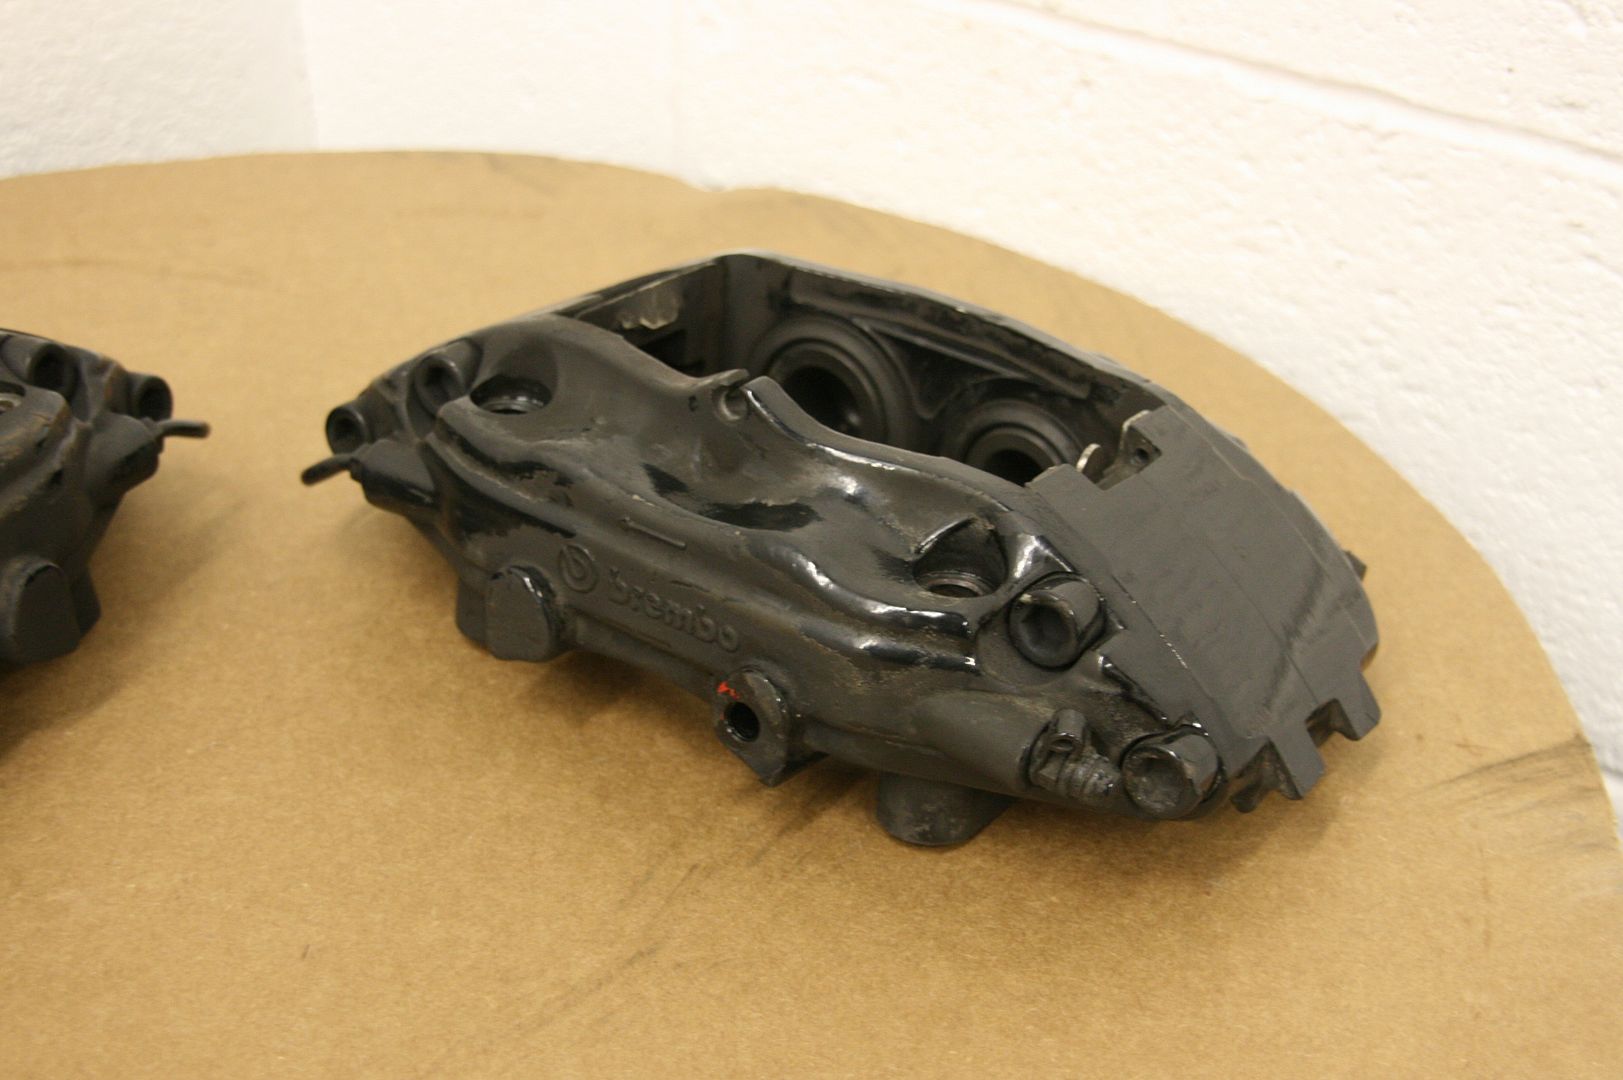
Then the calipers made their way back! Heres how they looked.
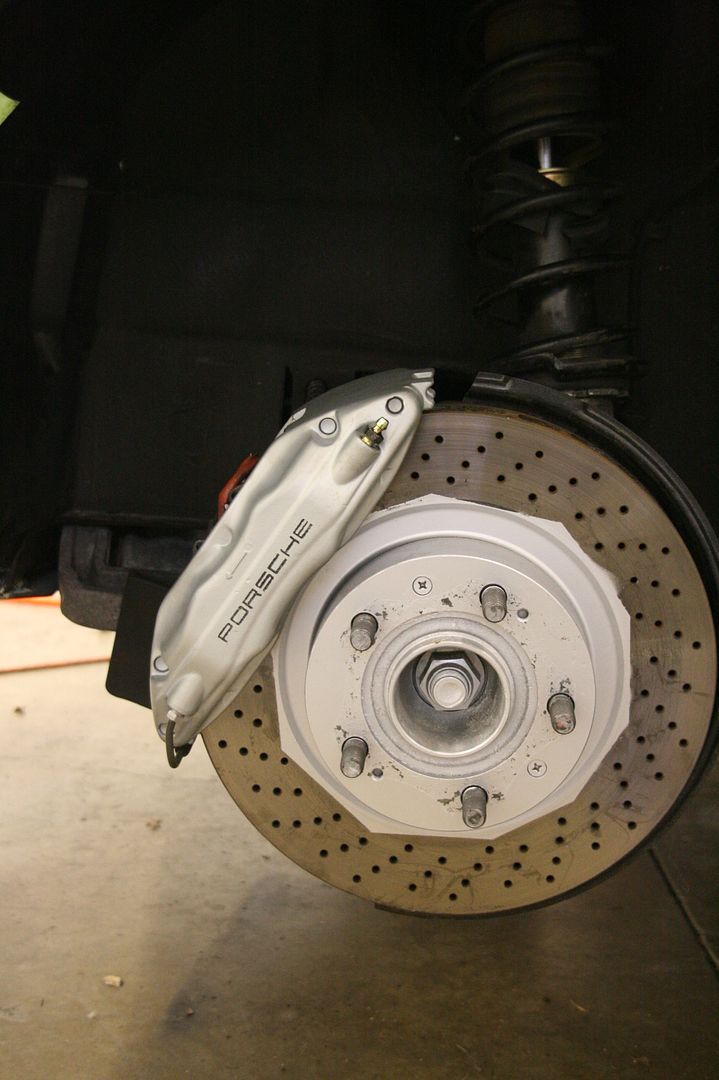
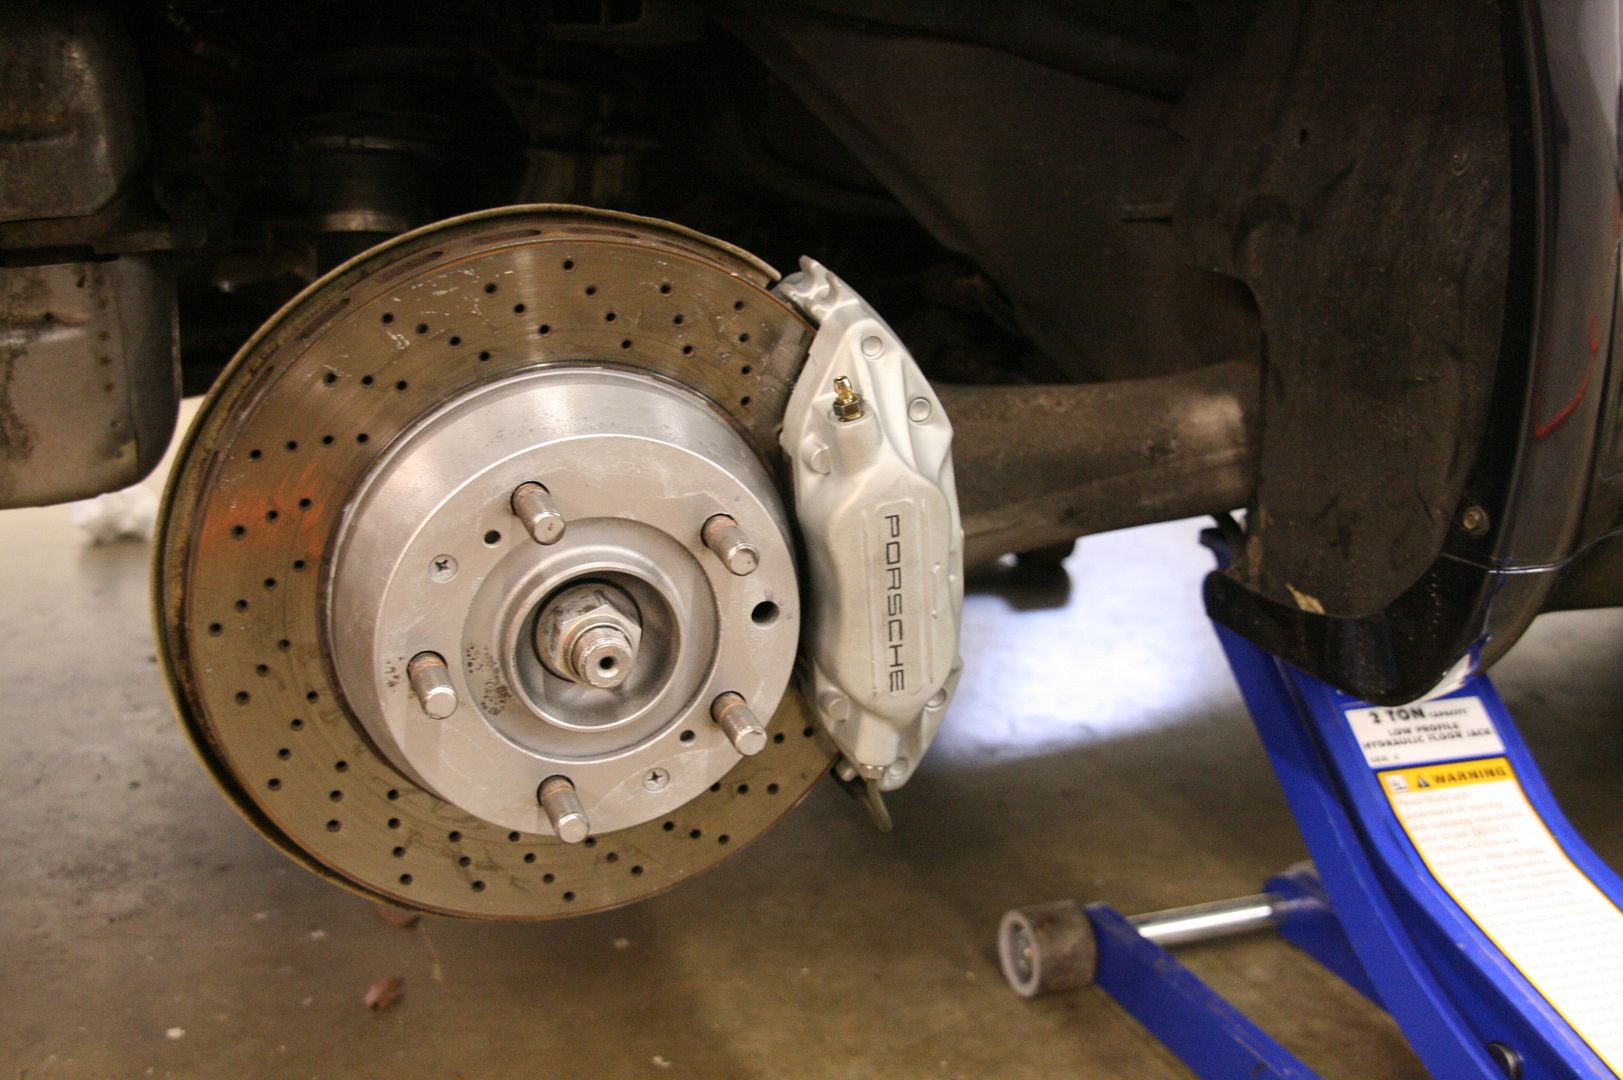
Simple yet elegant finish for this blue/silver/polished color scheme!
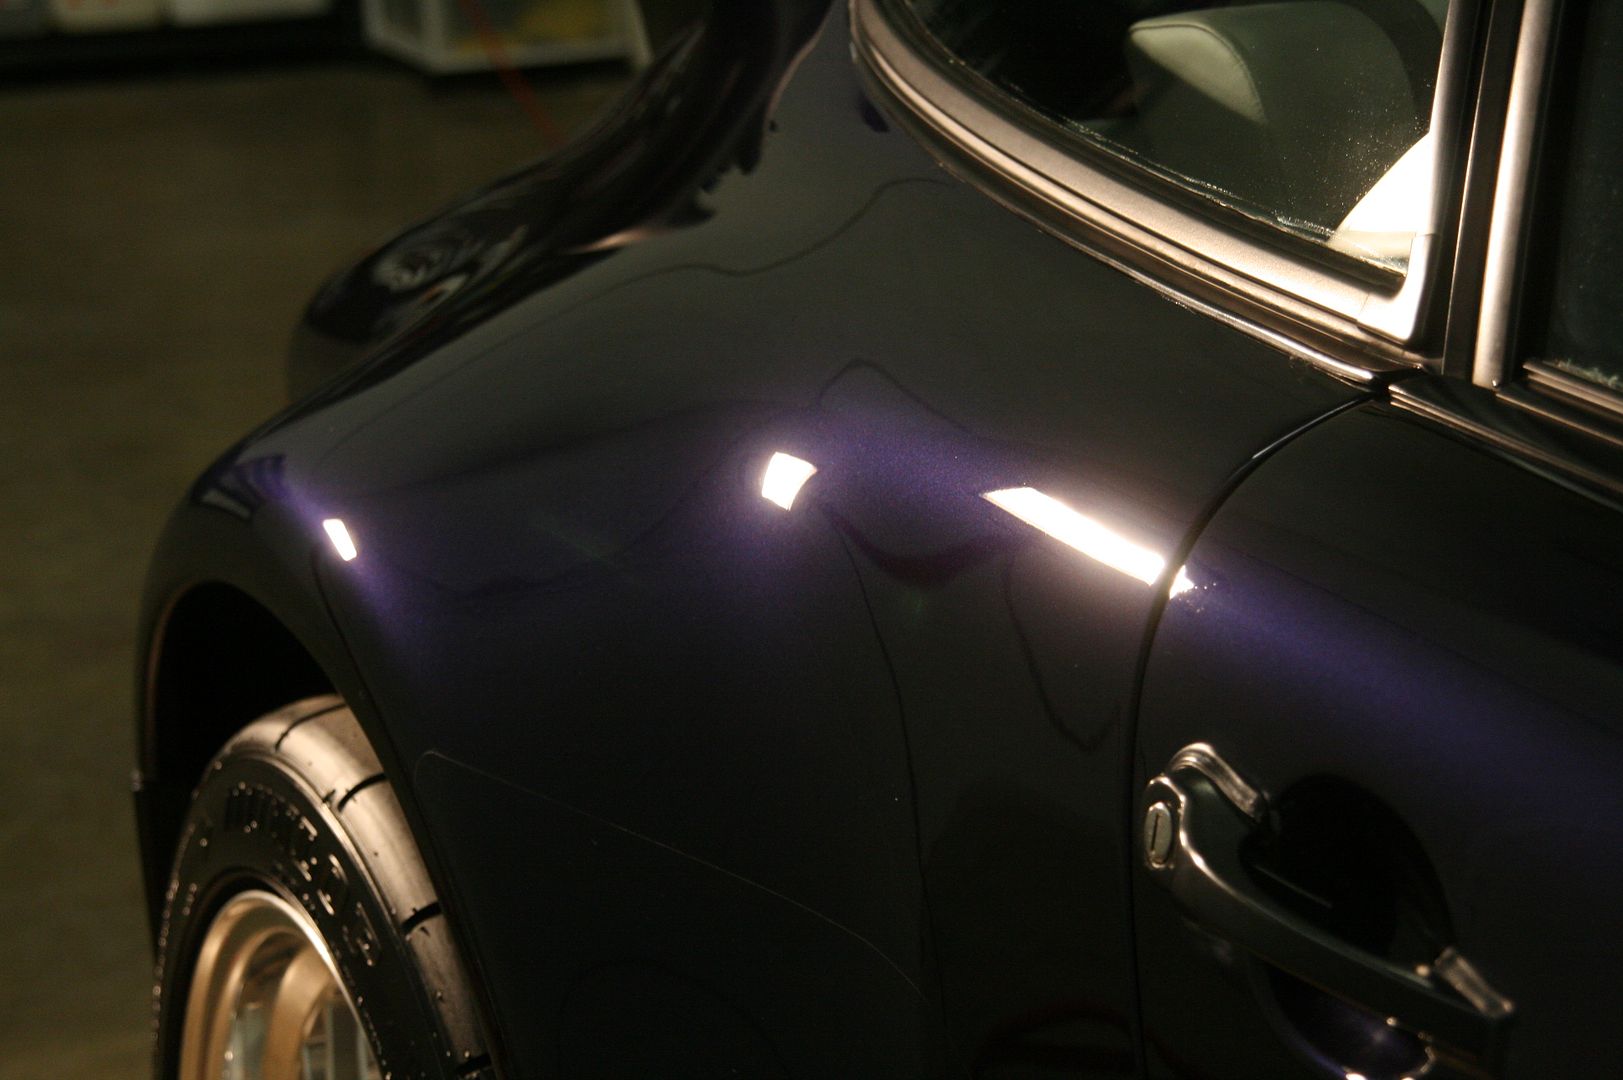
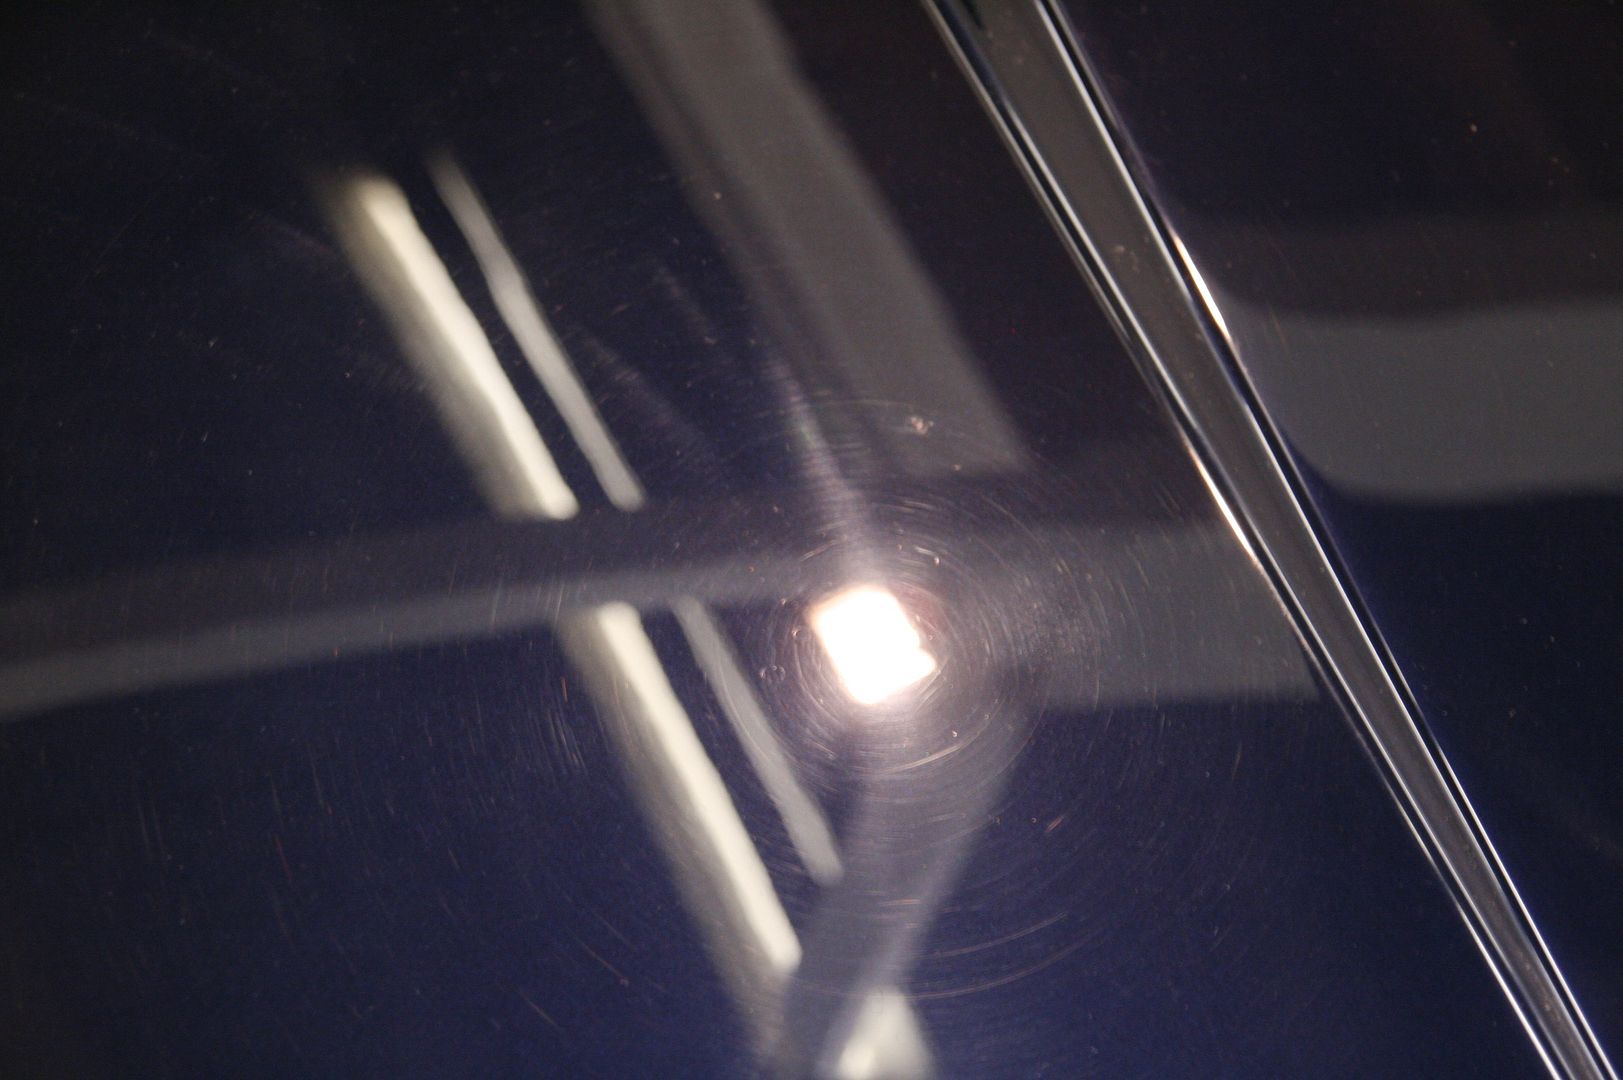
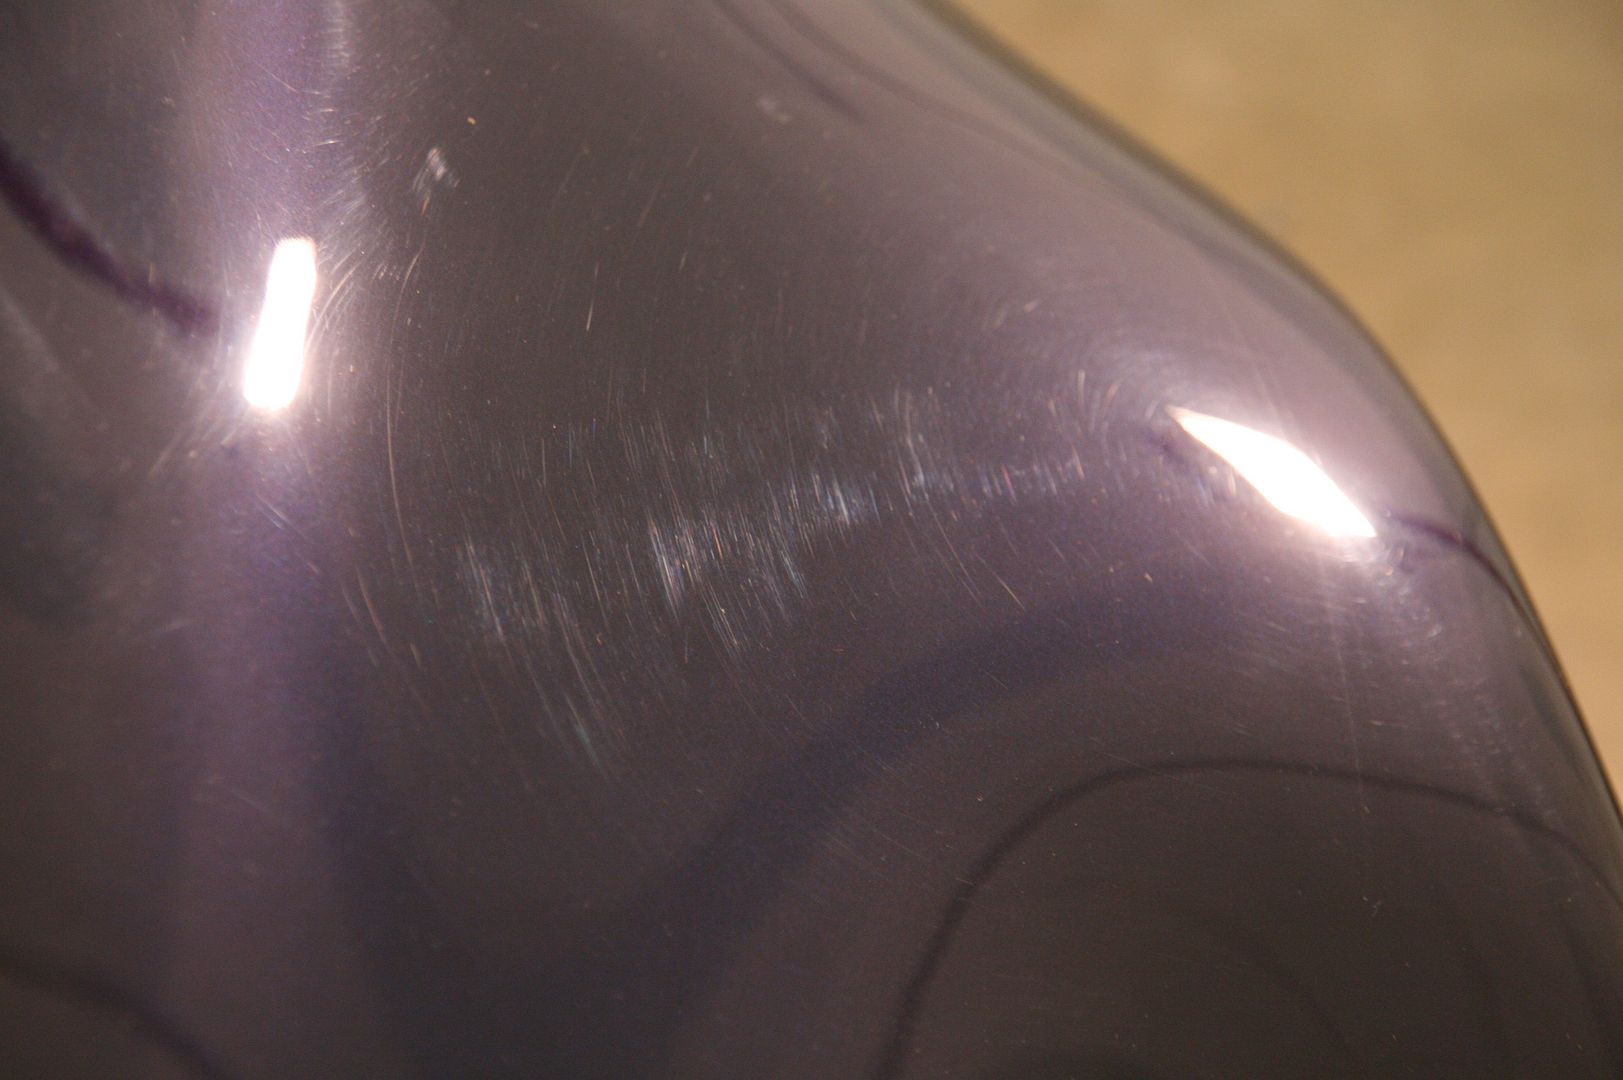
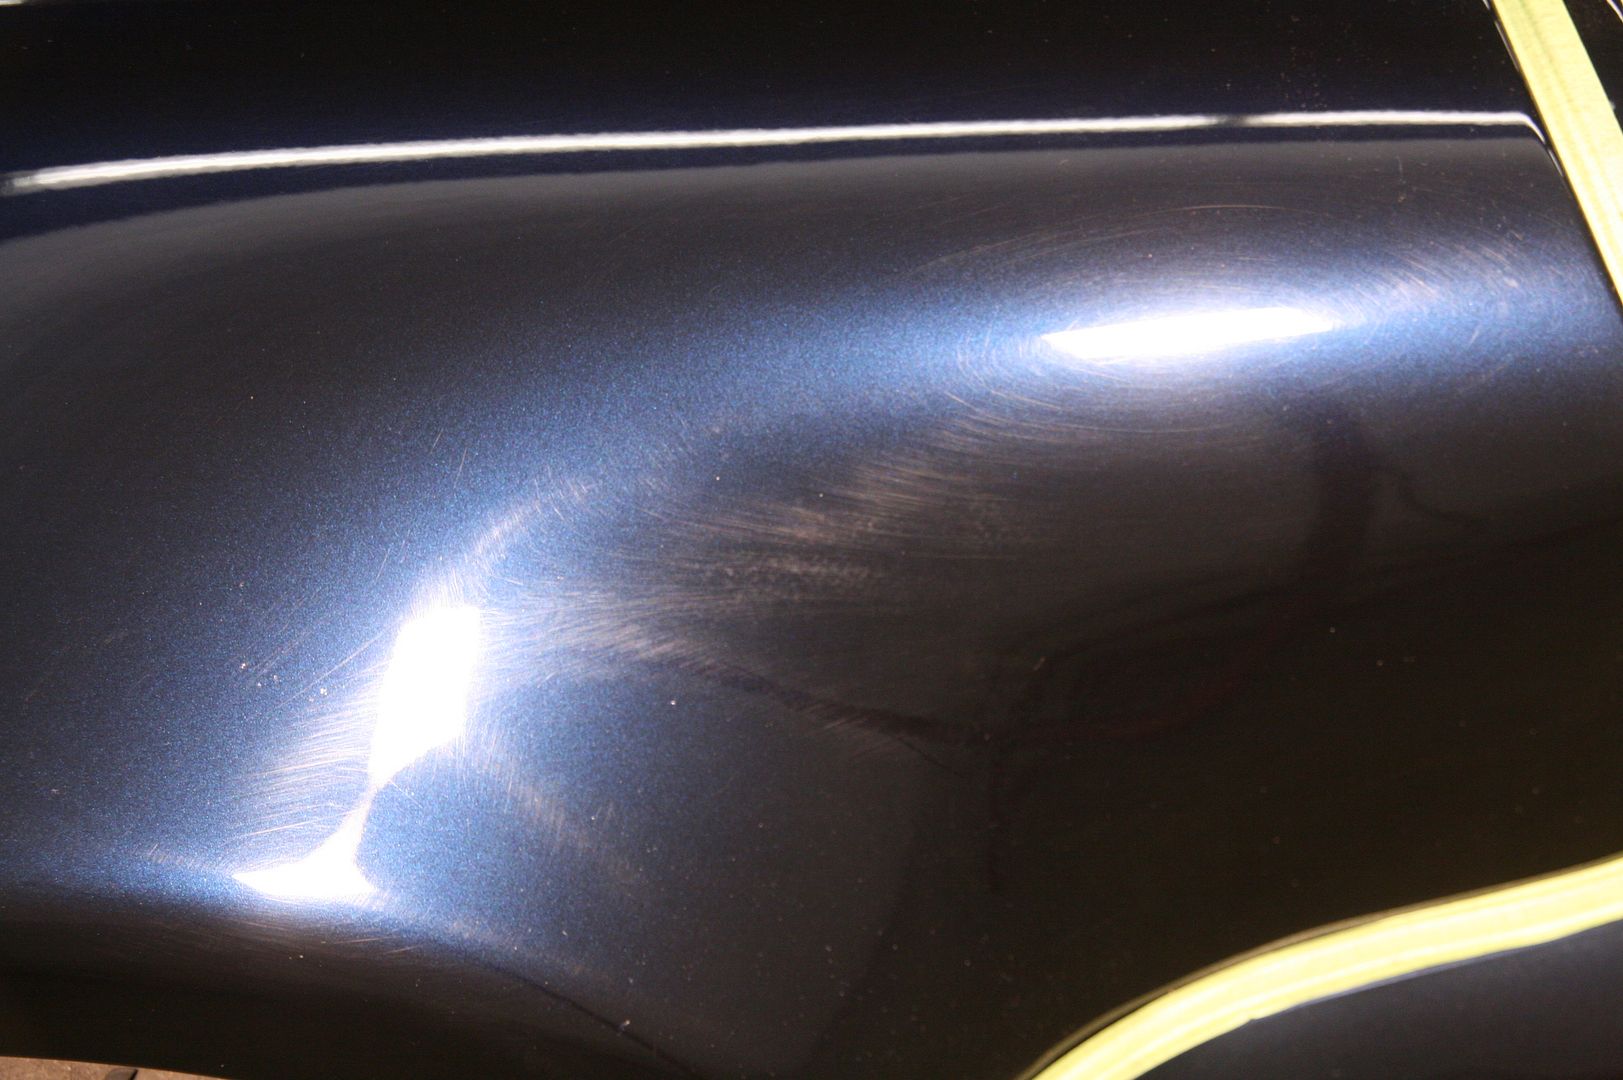
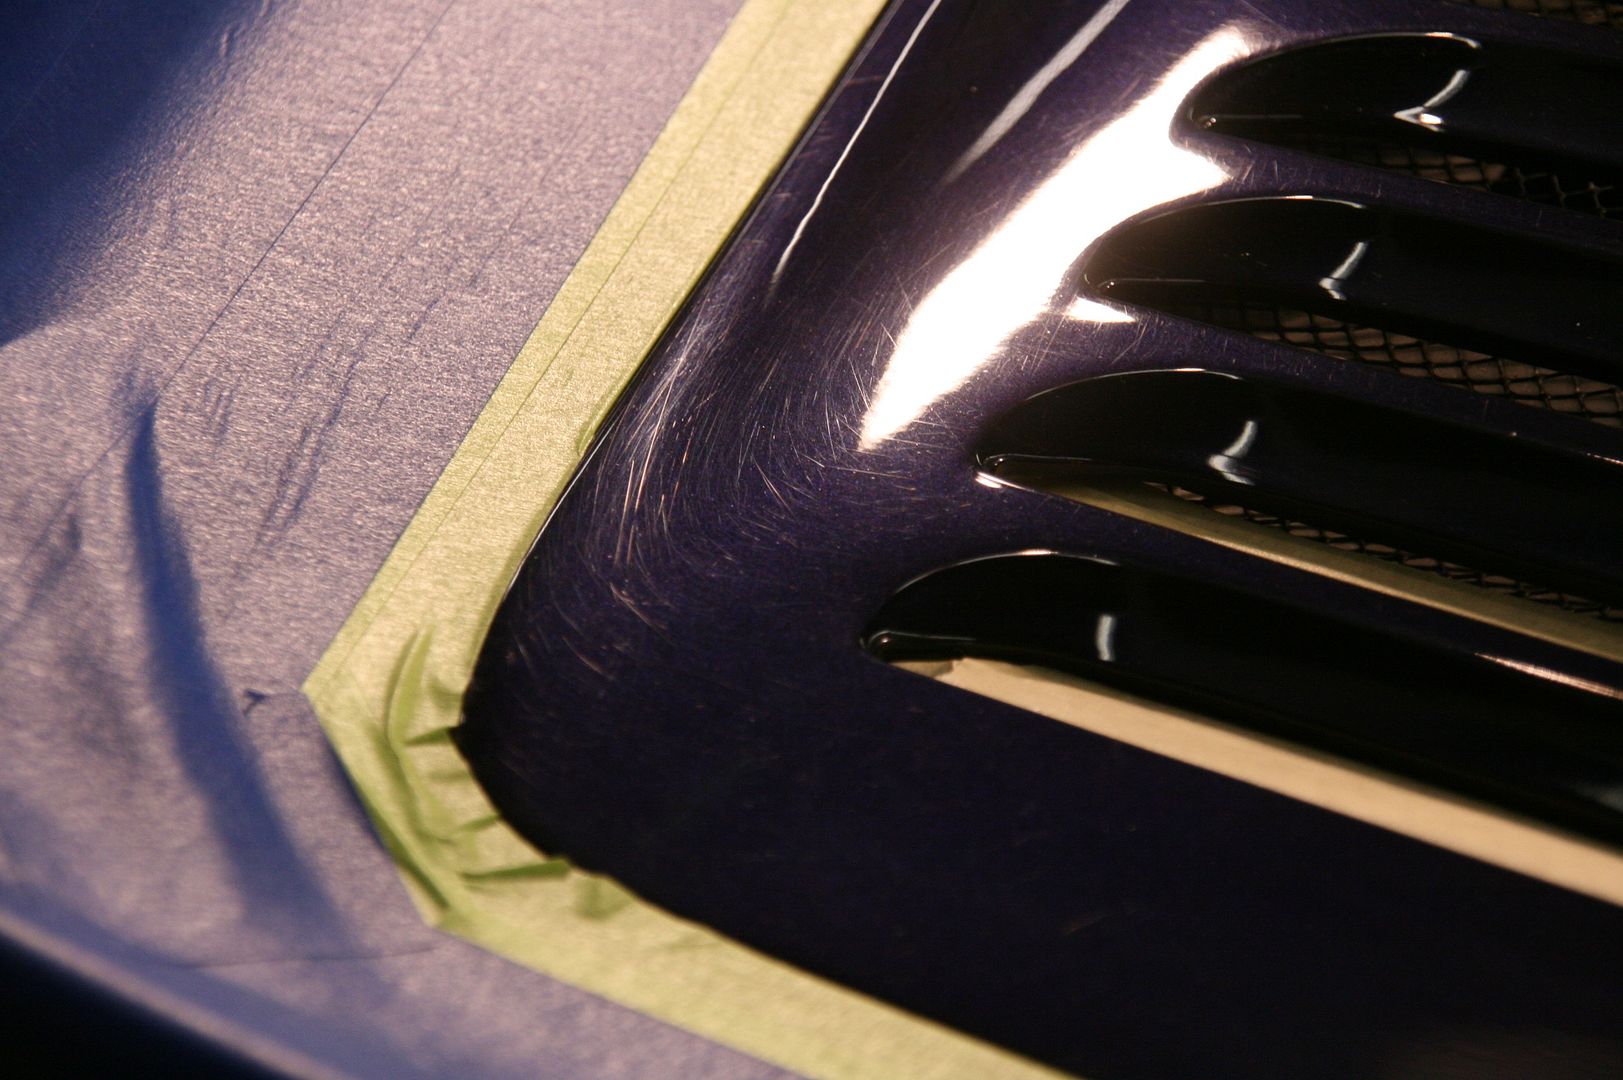
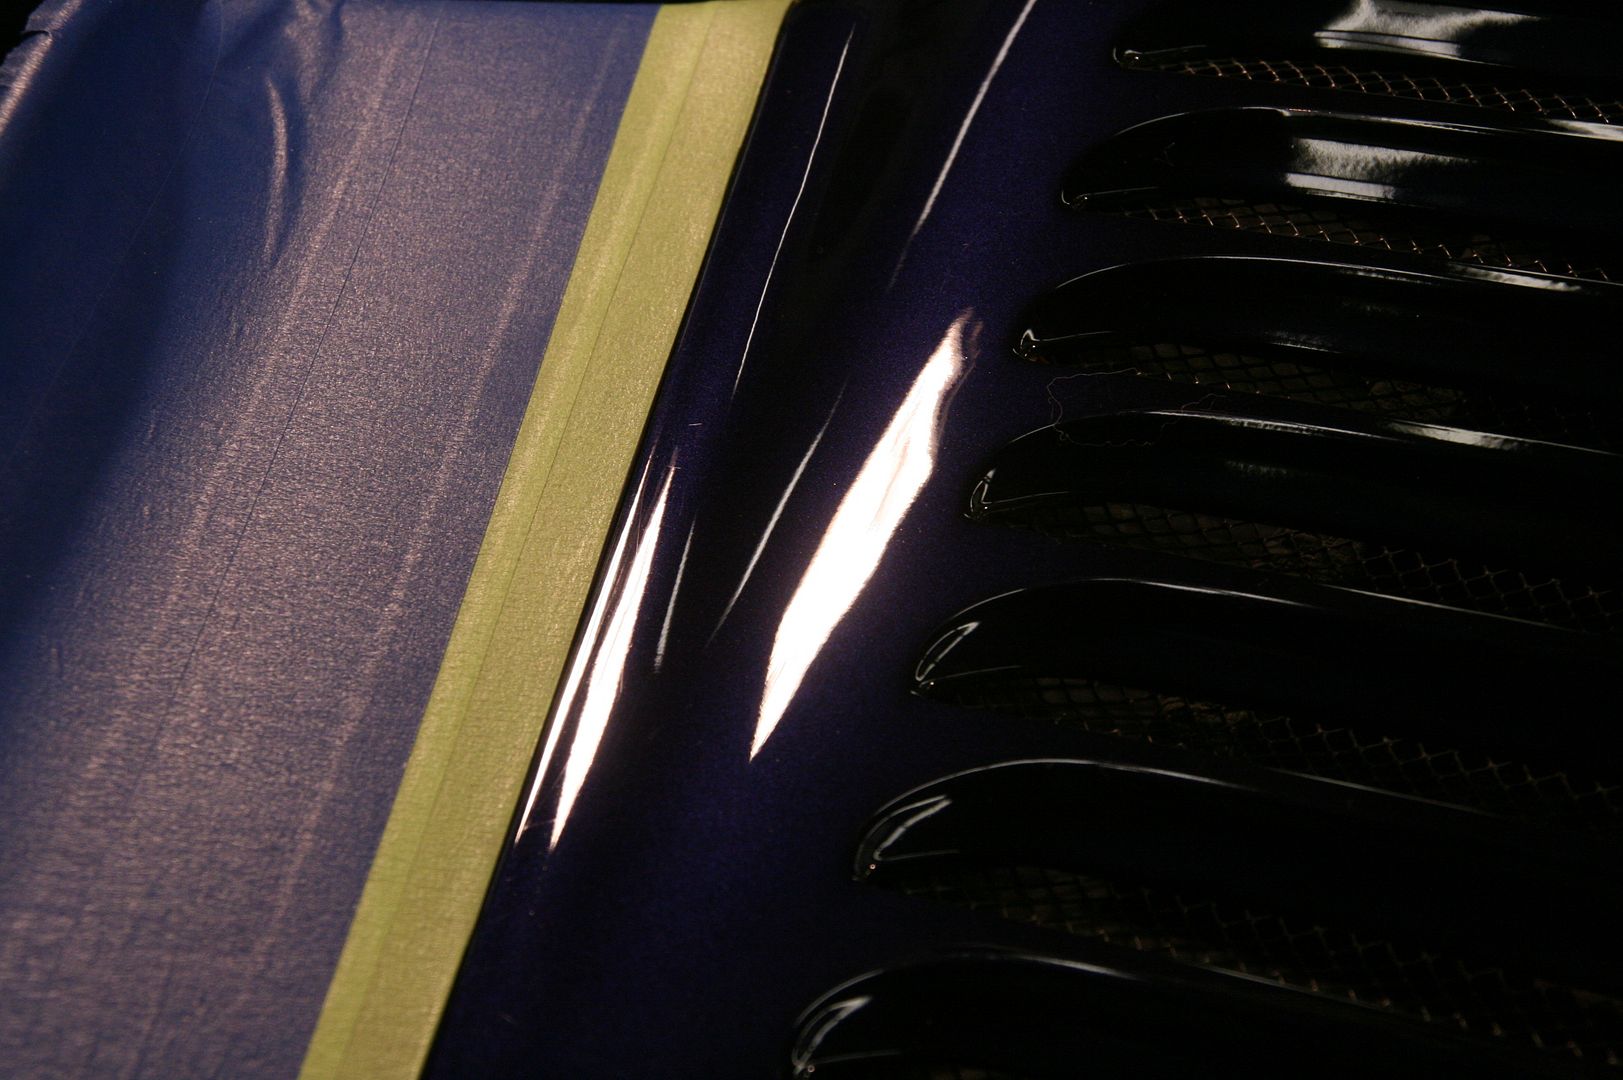
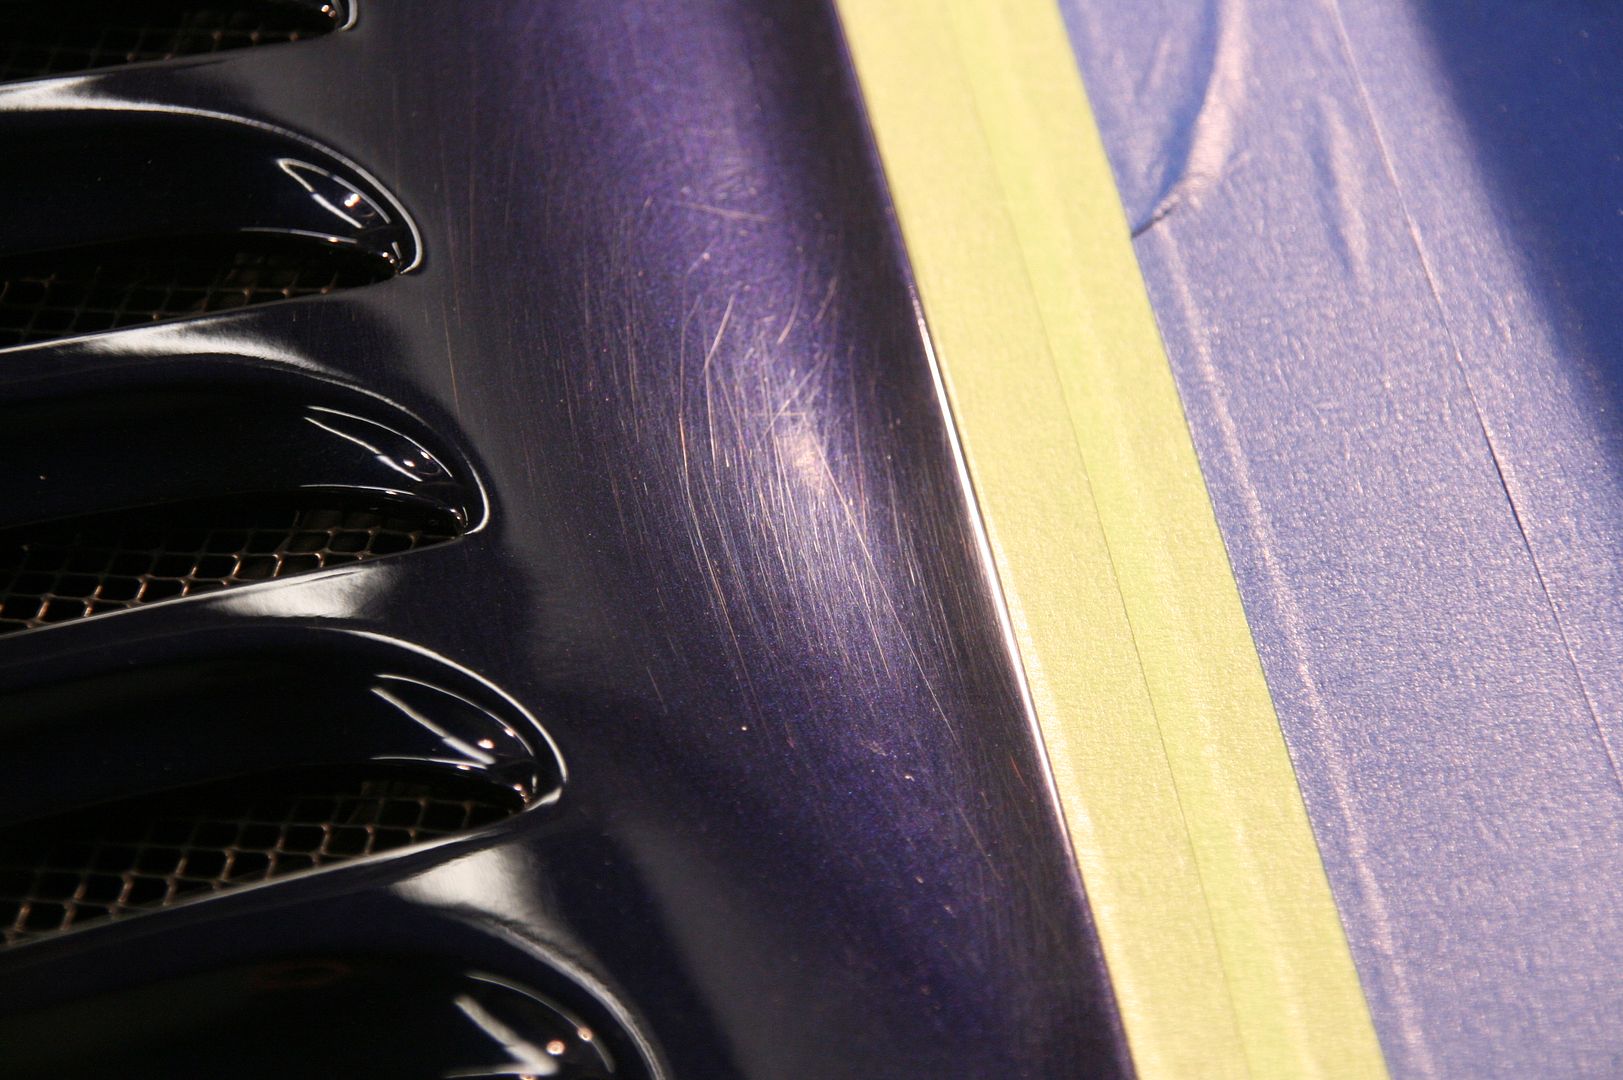
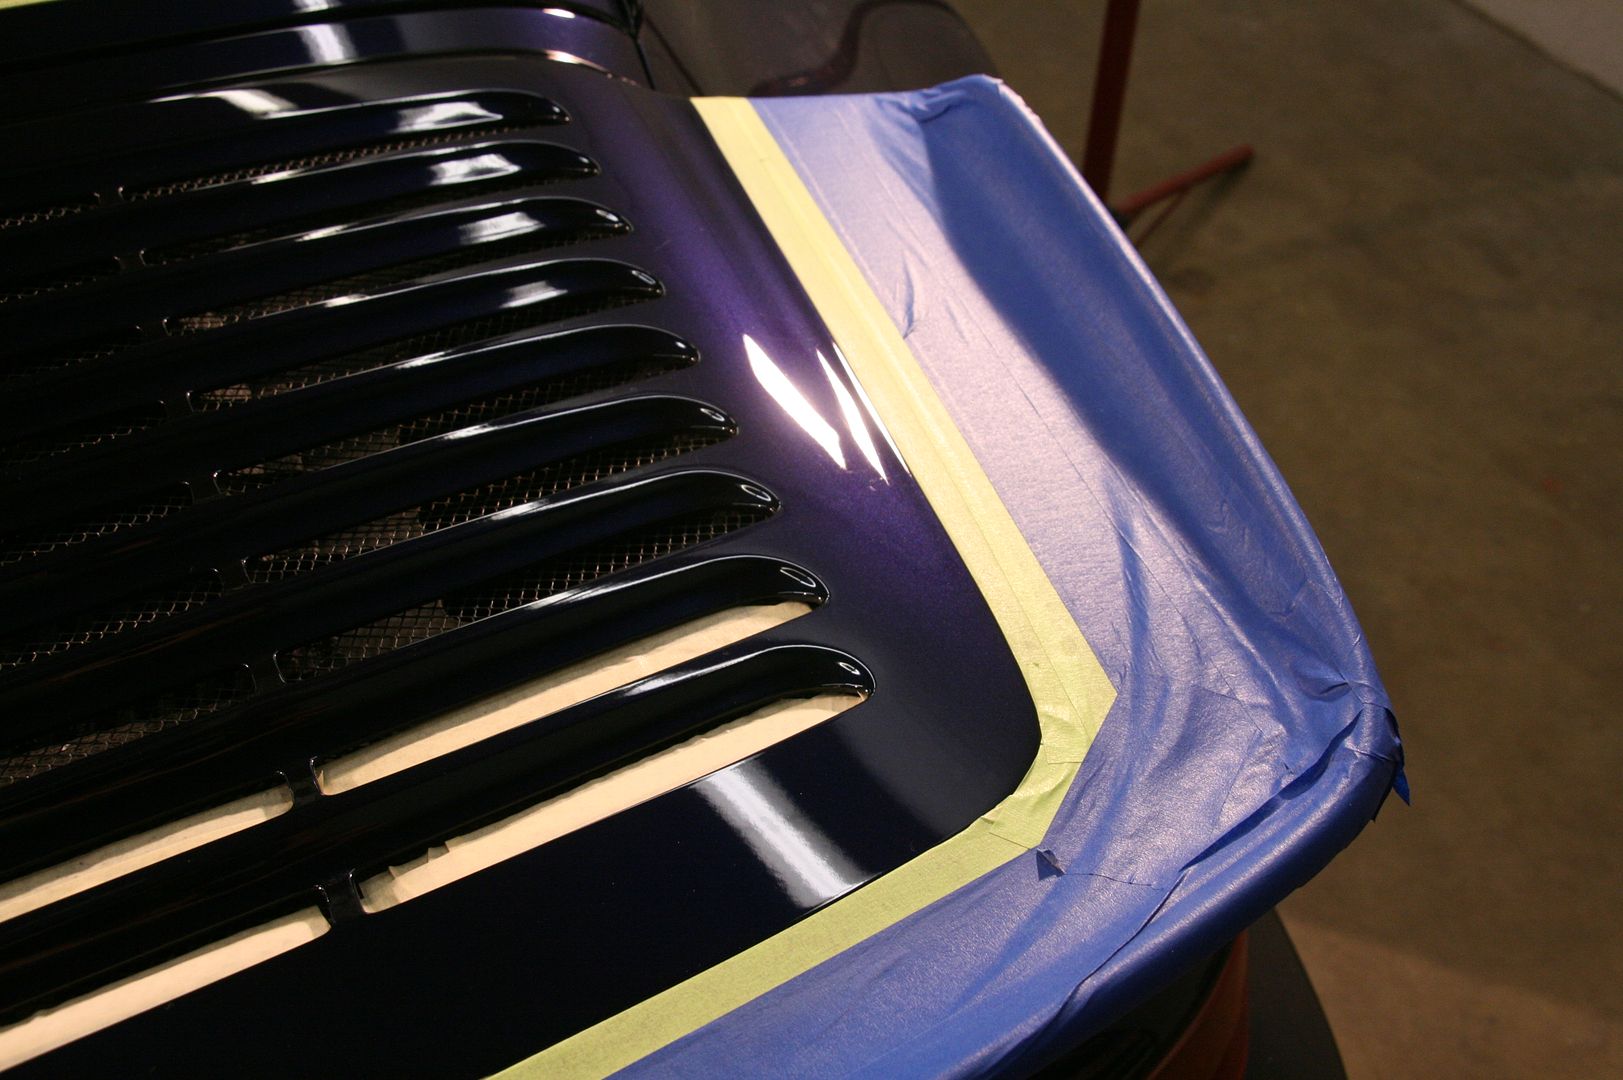
With all the mechanical work done and stainless steel brake lines installed, we moved on to the paint work, I first visually inspected it and here were my findings:
10.
15.
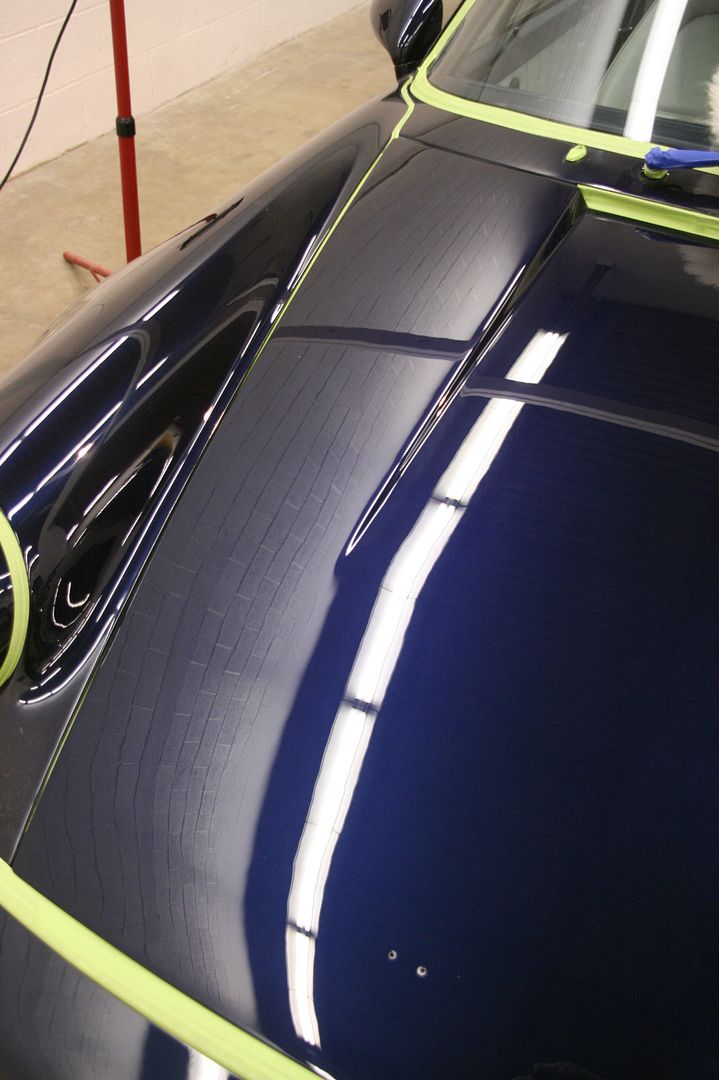
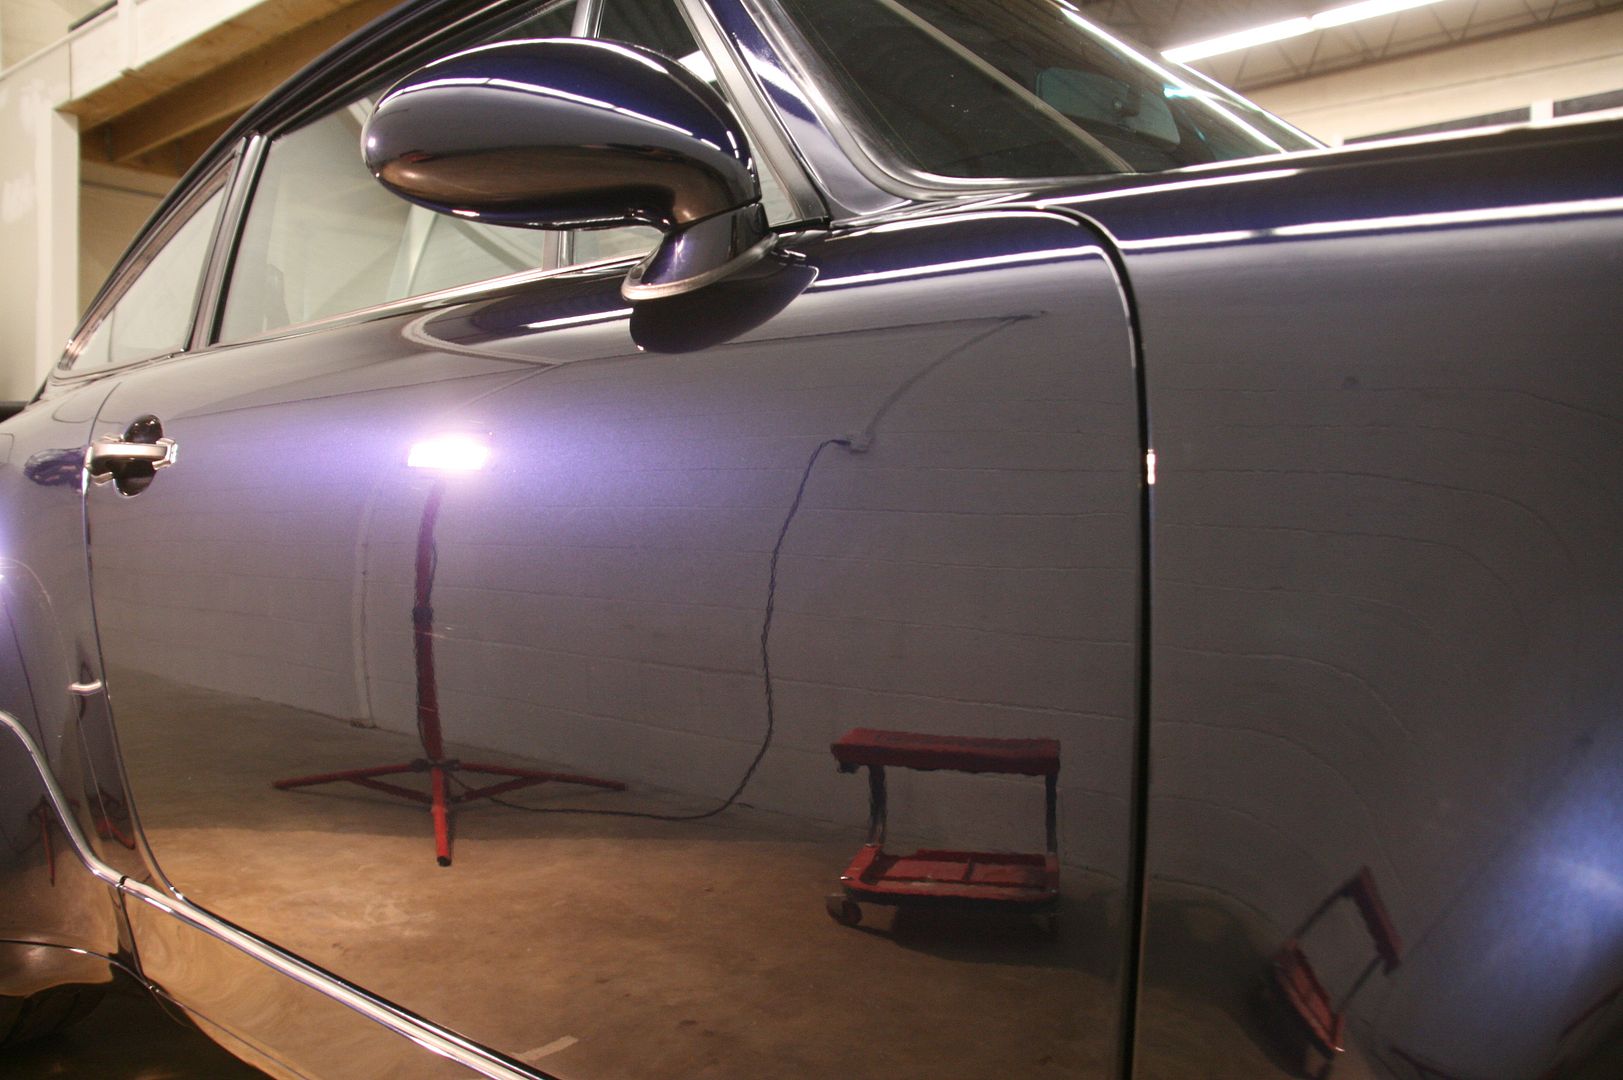
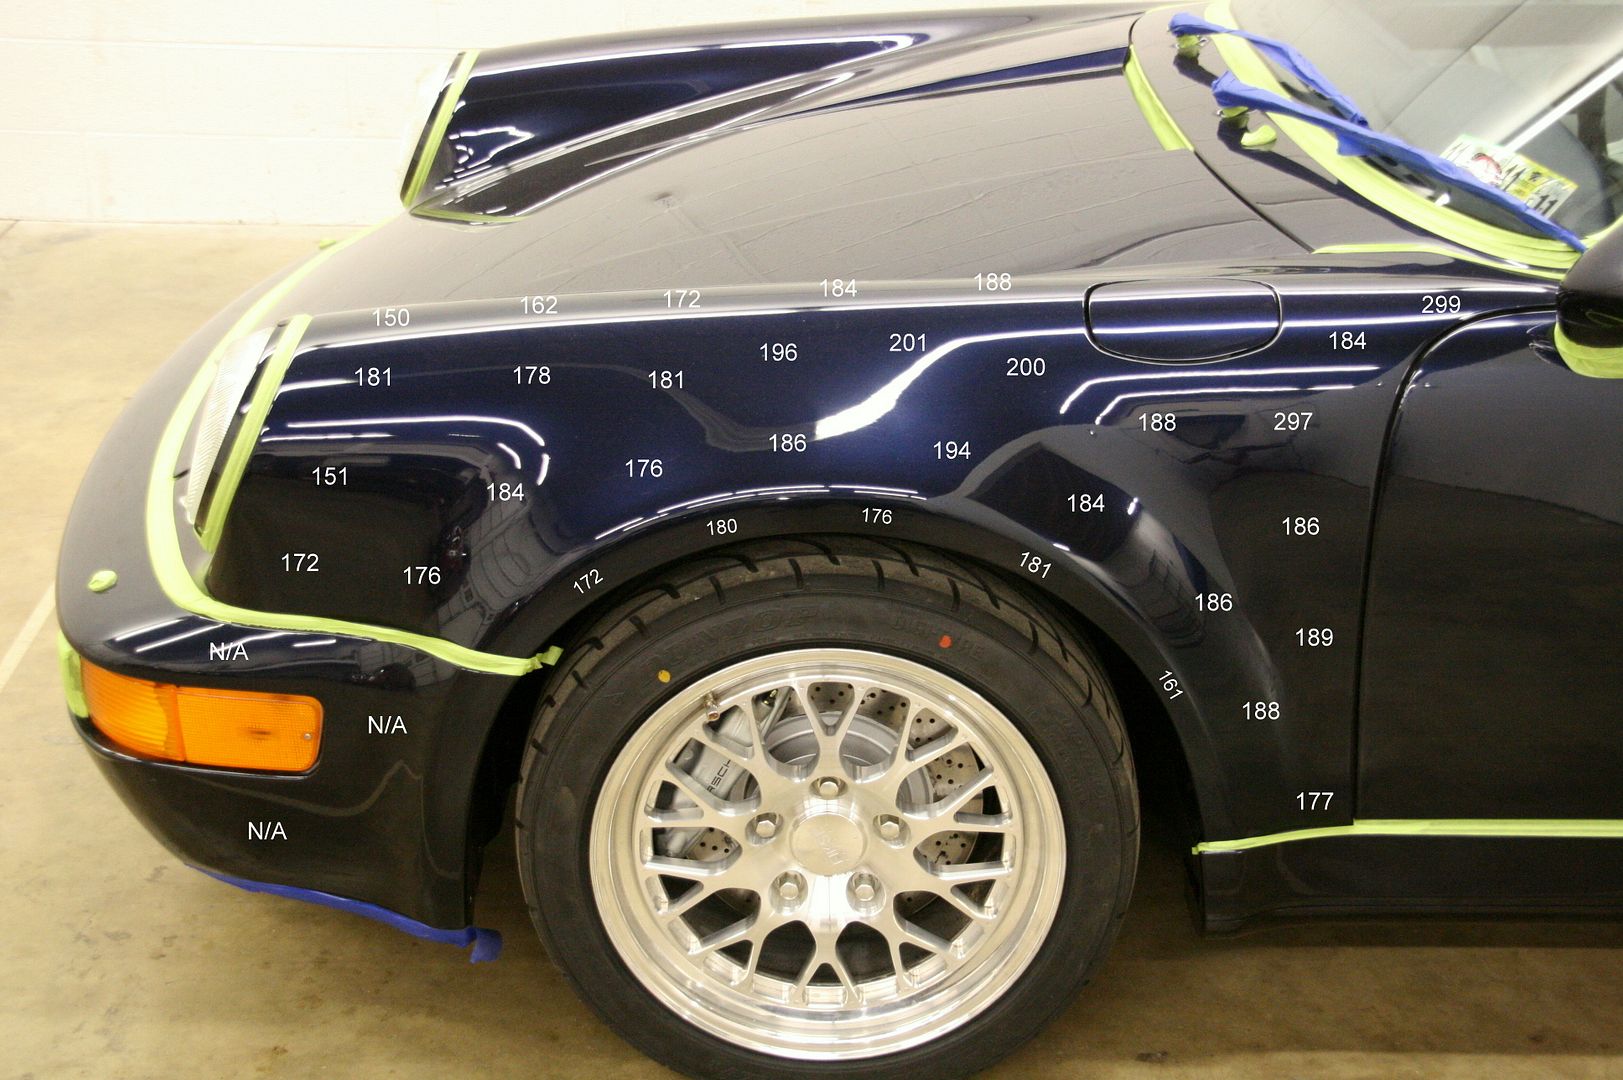
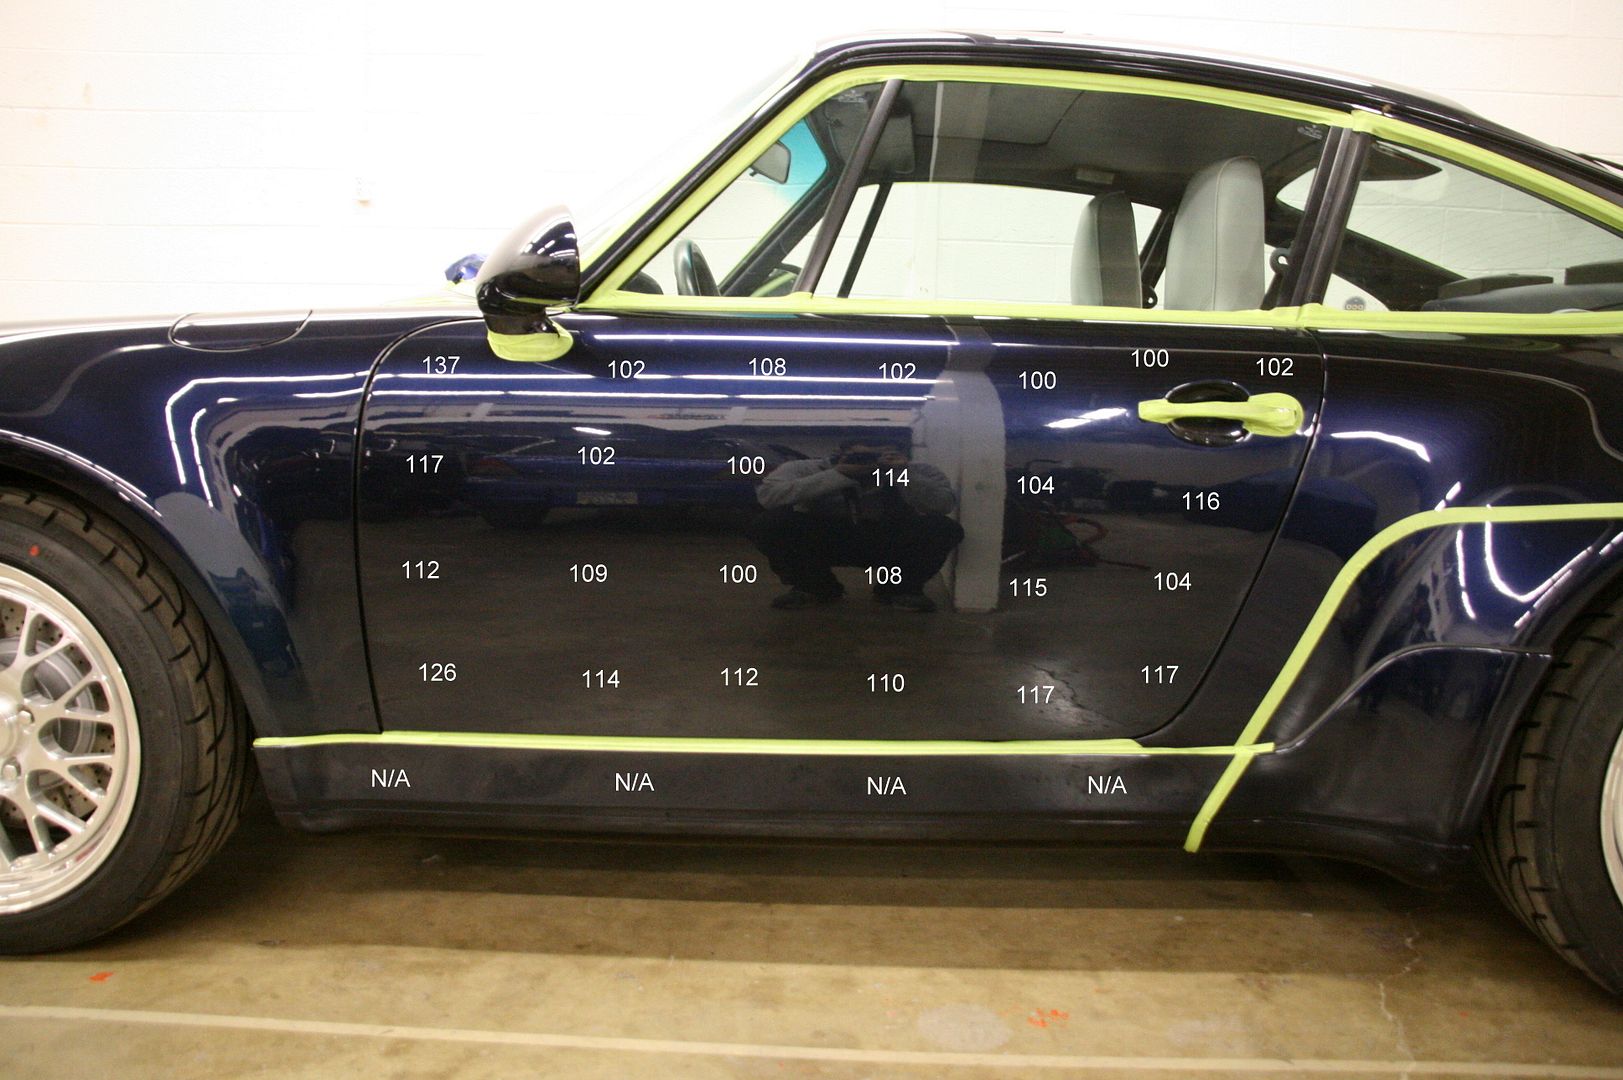
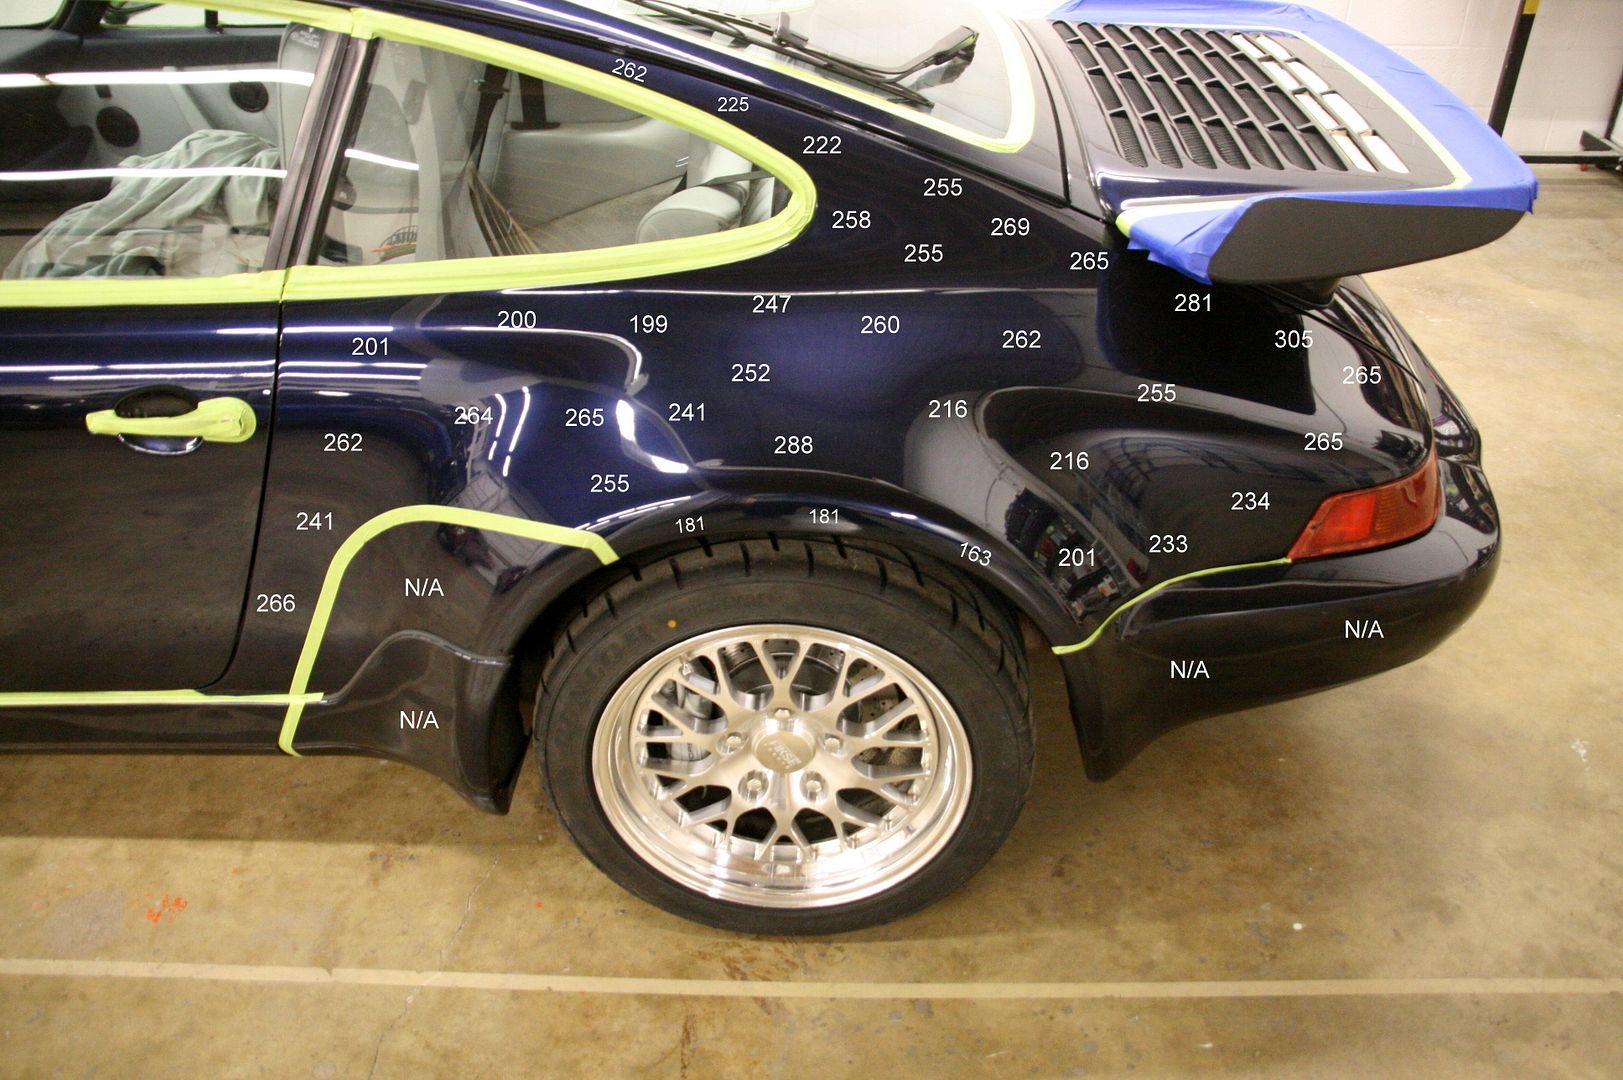
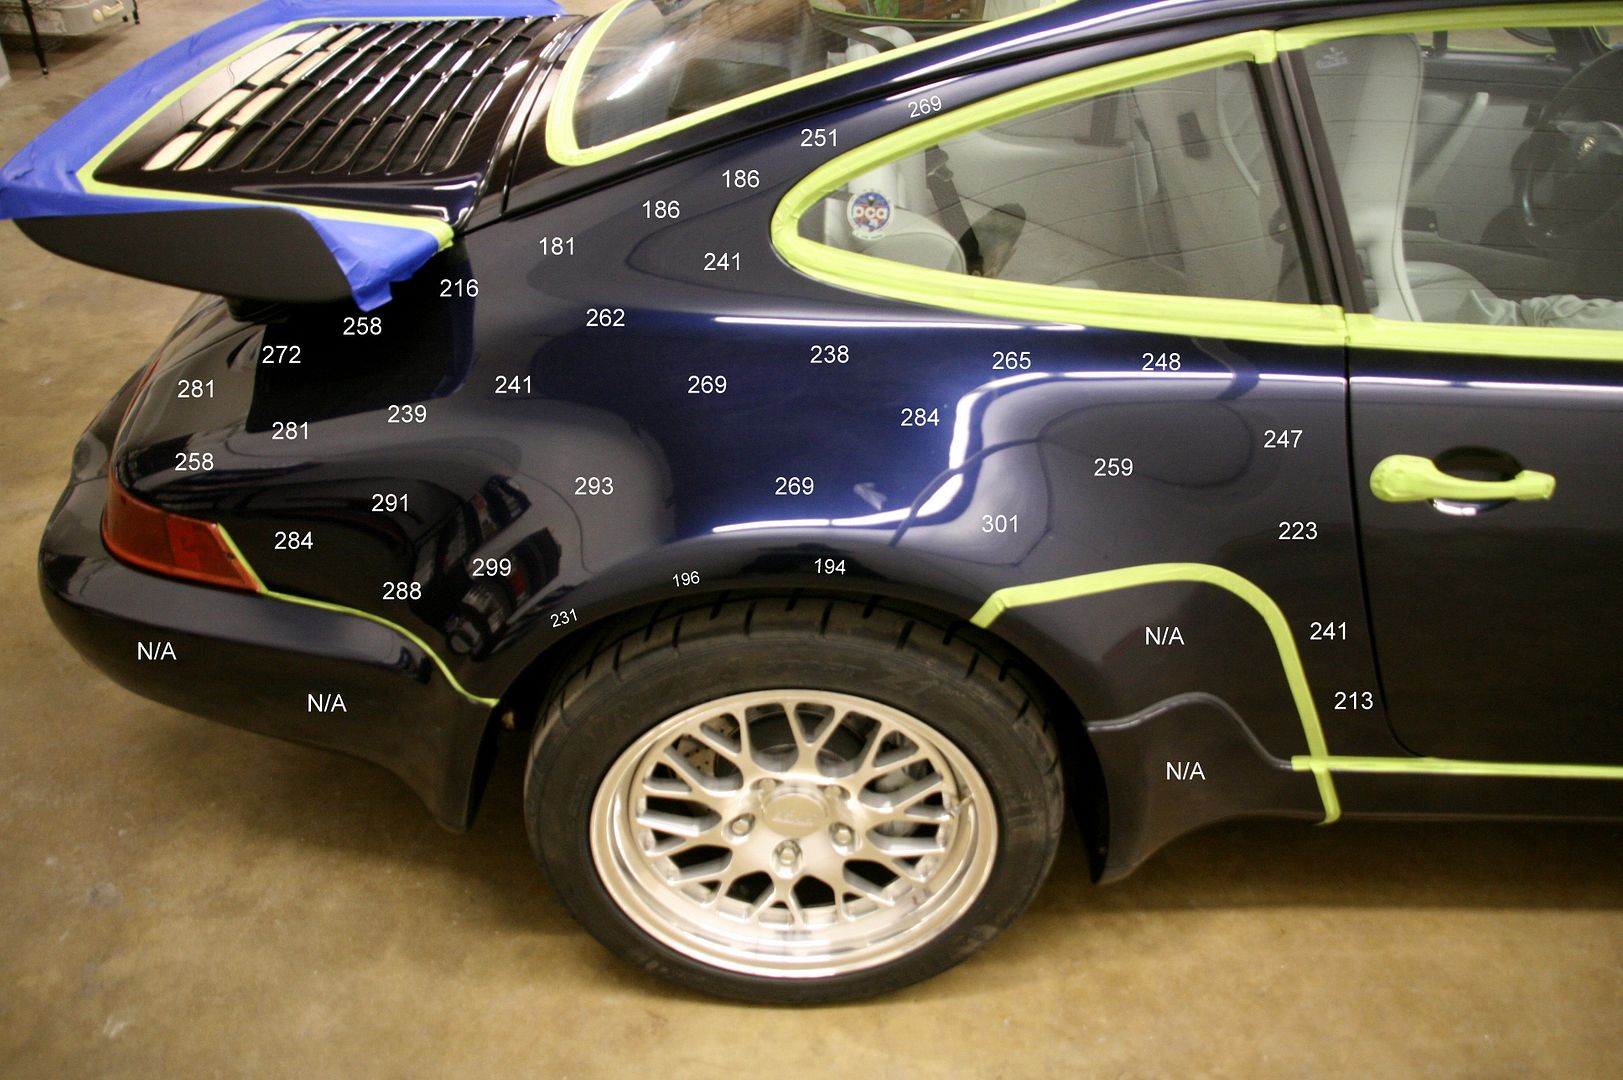
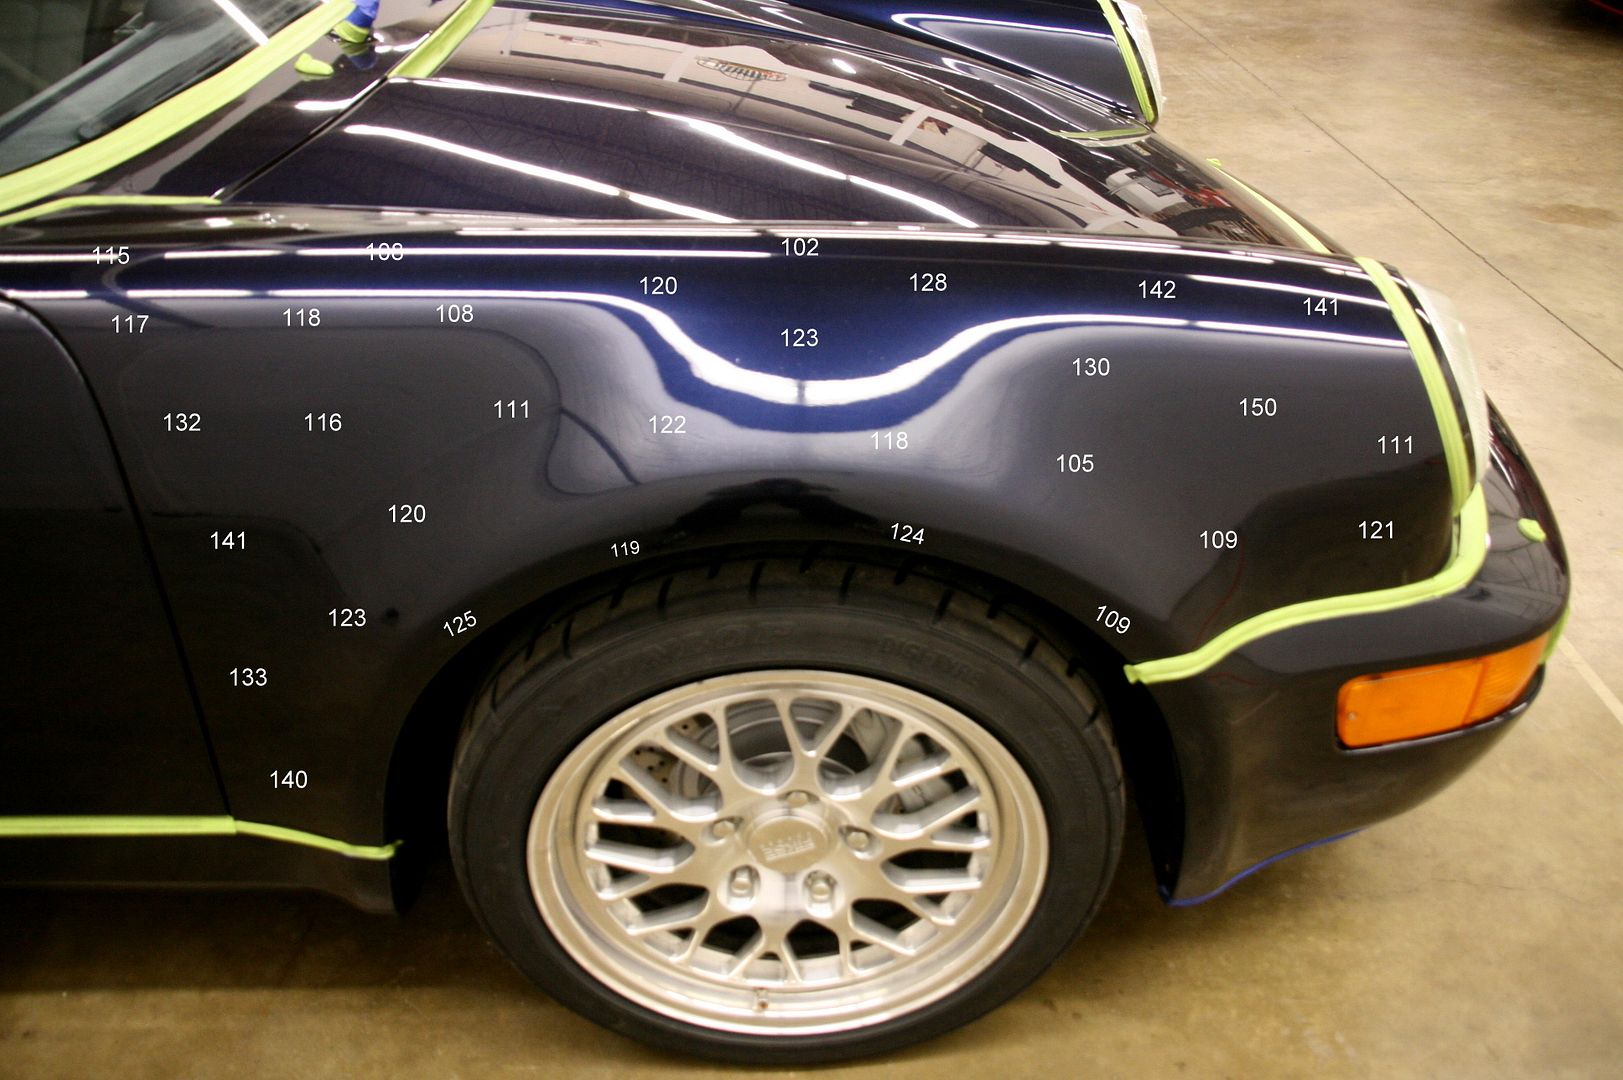
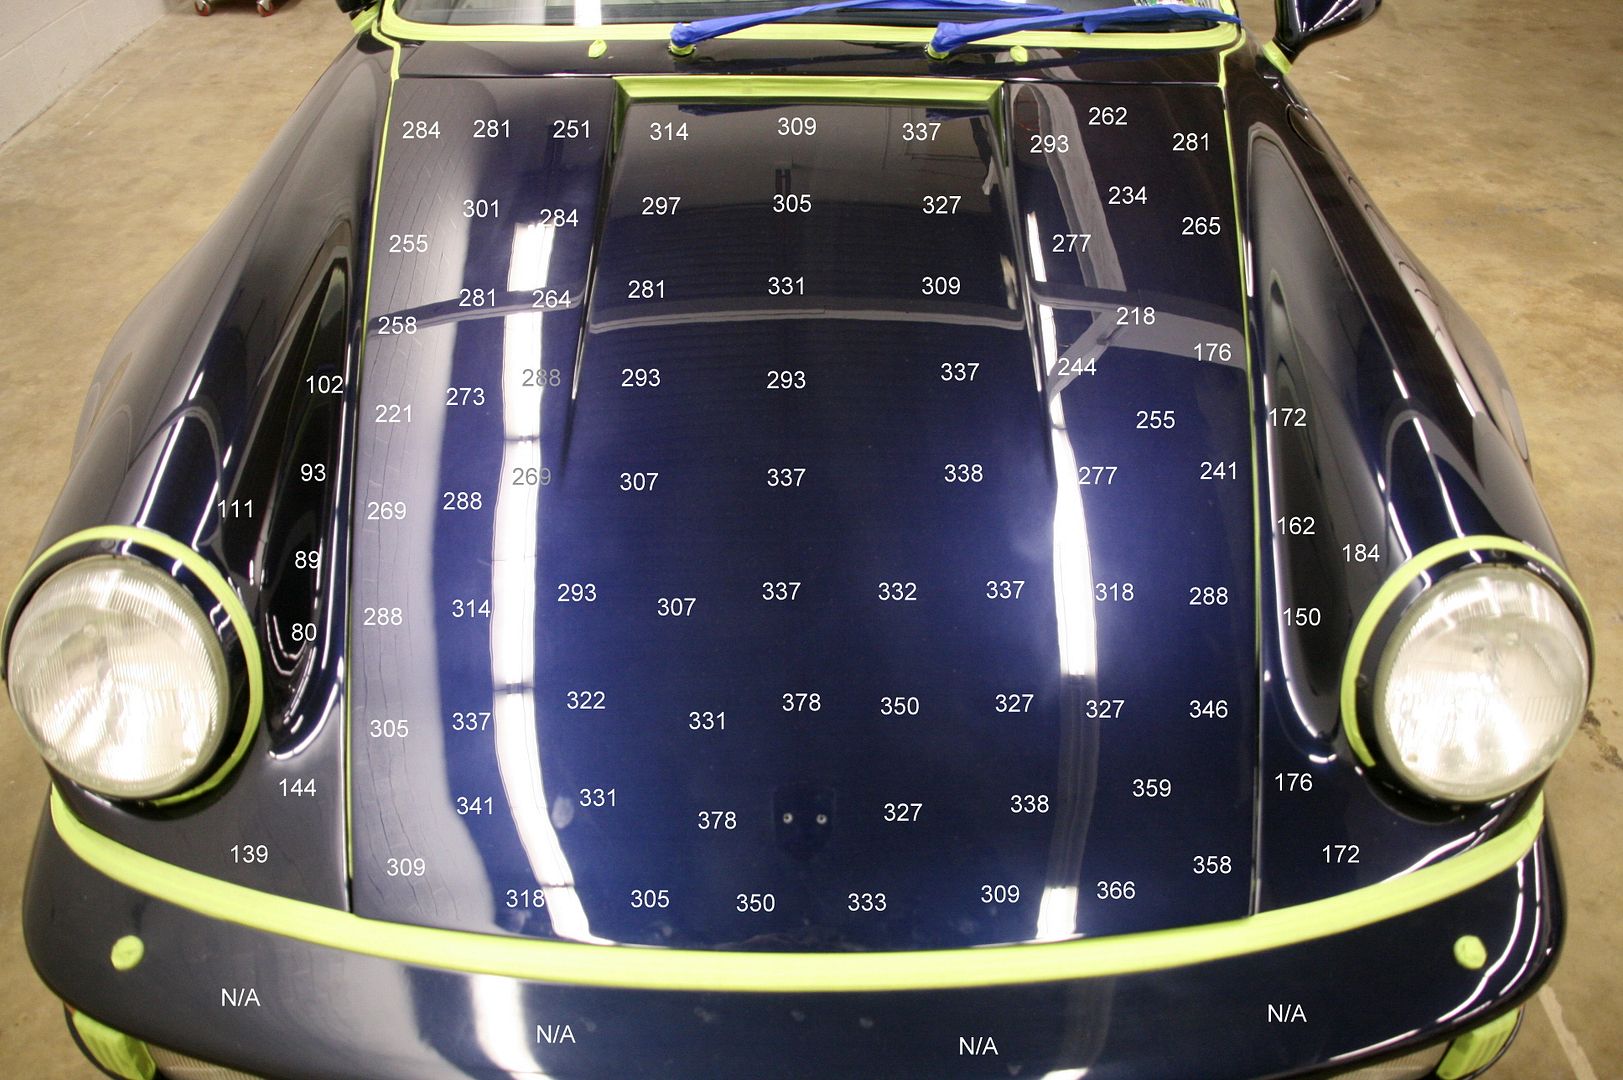
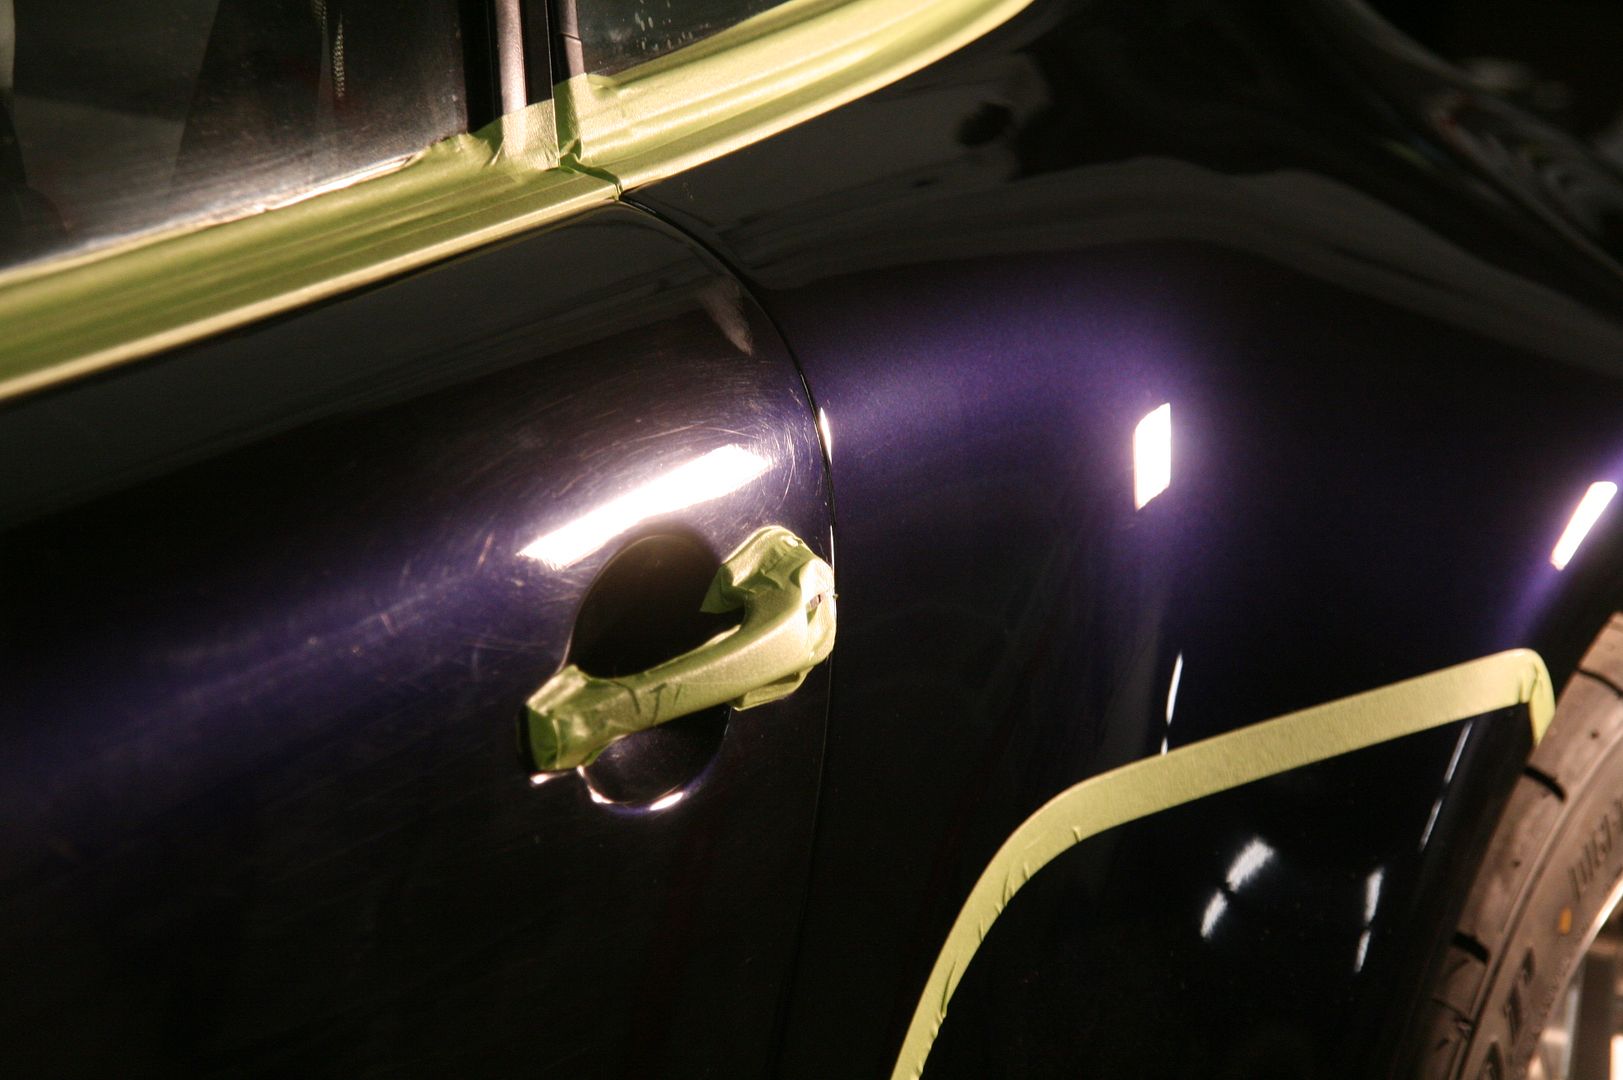
Seeing that it was in desperate need of proper correction, I took measurements throughout the vehicle after it was masked off. I took some photos of the major panels and took various paint depth readings. I then took those same images and labeled where the different depths were recorded so I could show an idea of the consistency in depth and where there were areas of concern.
20.

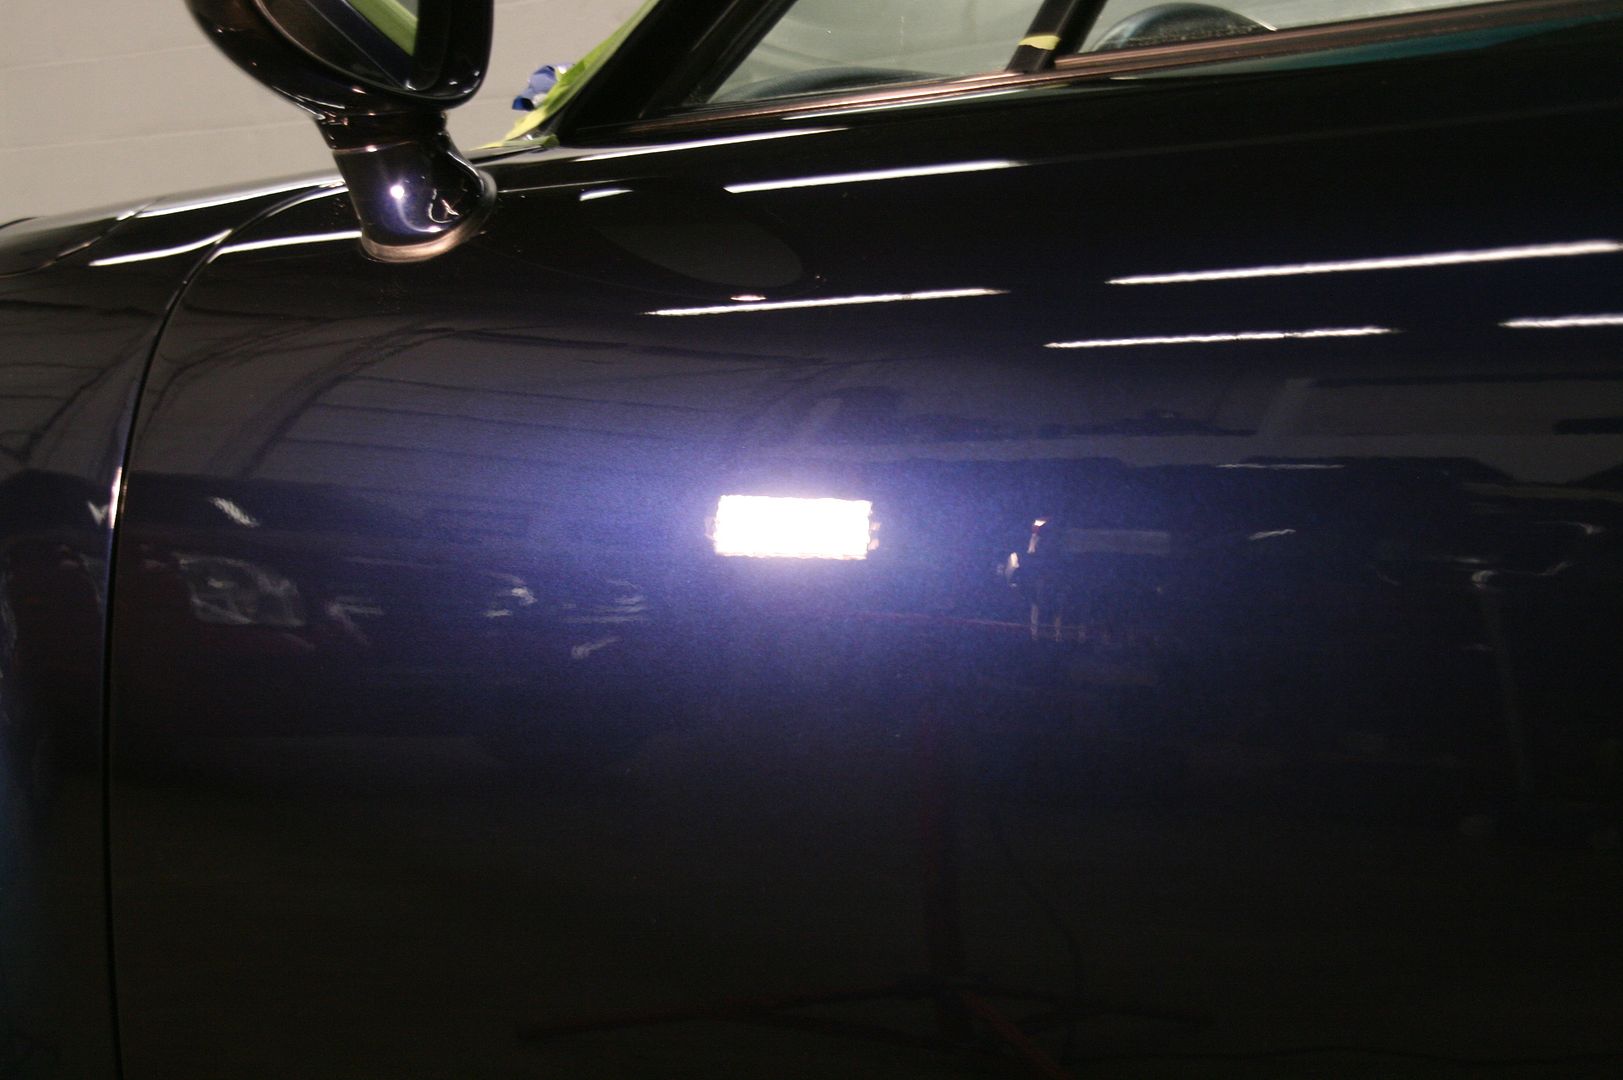
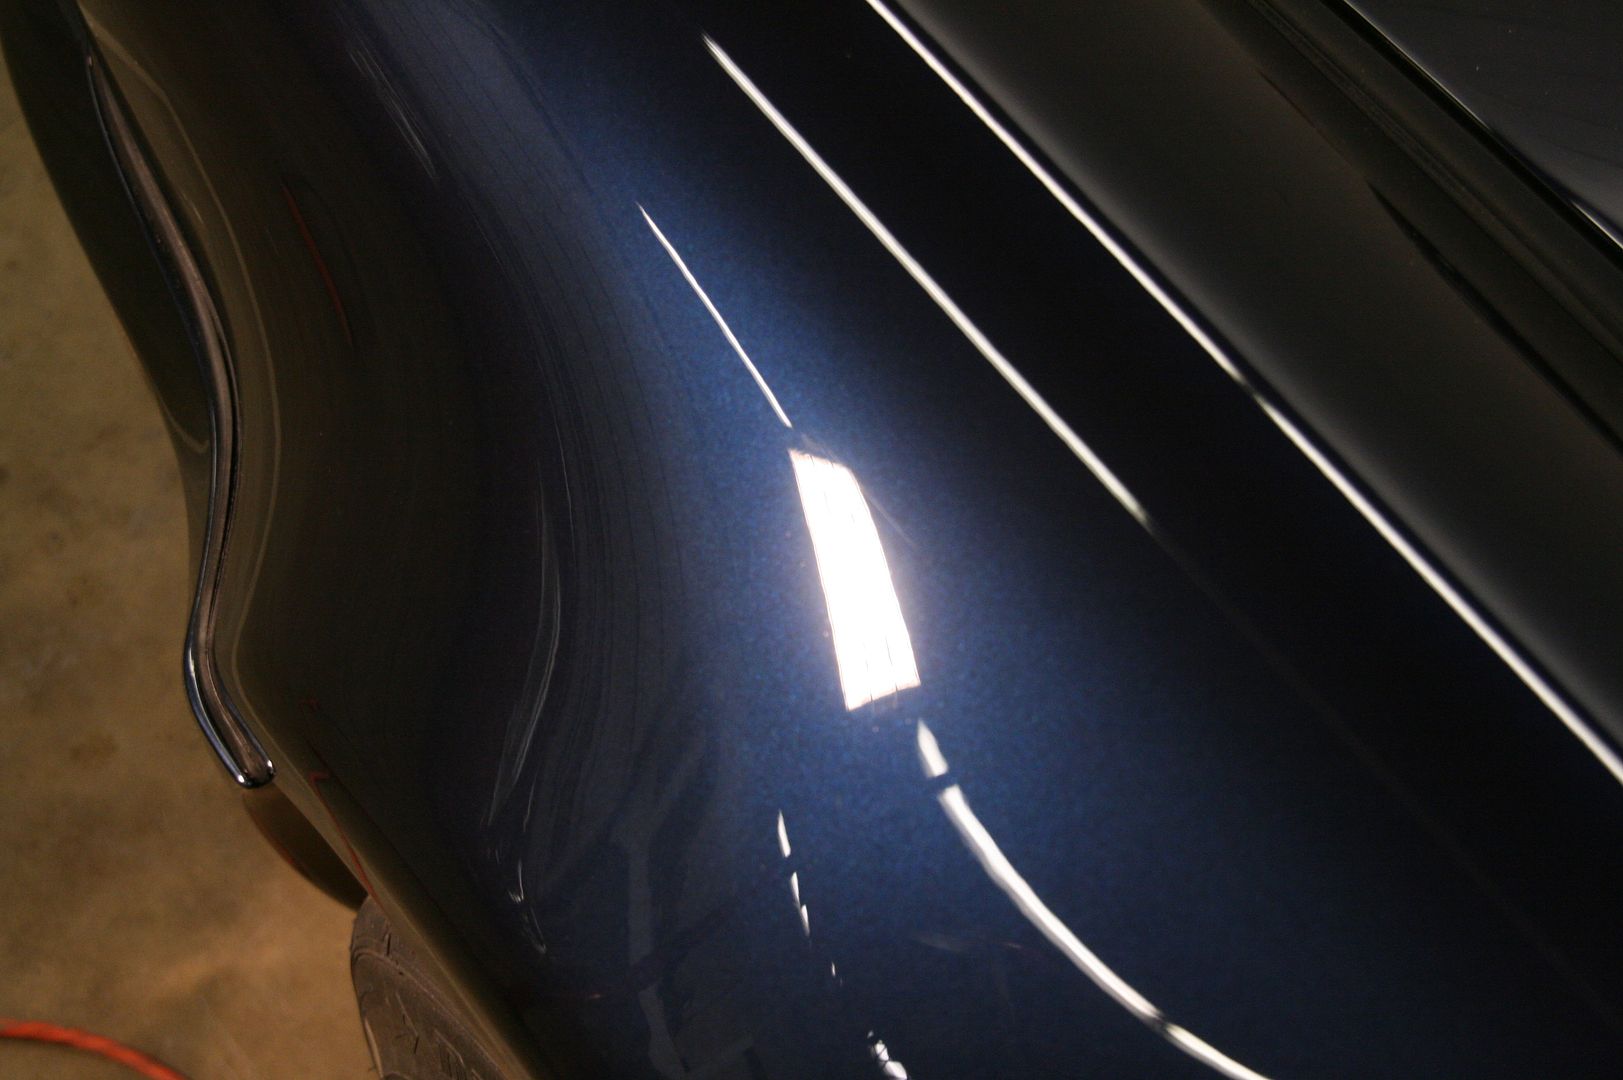
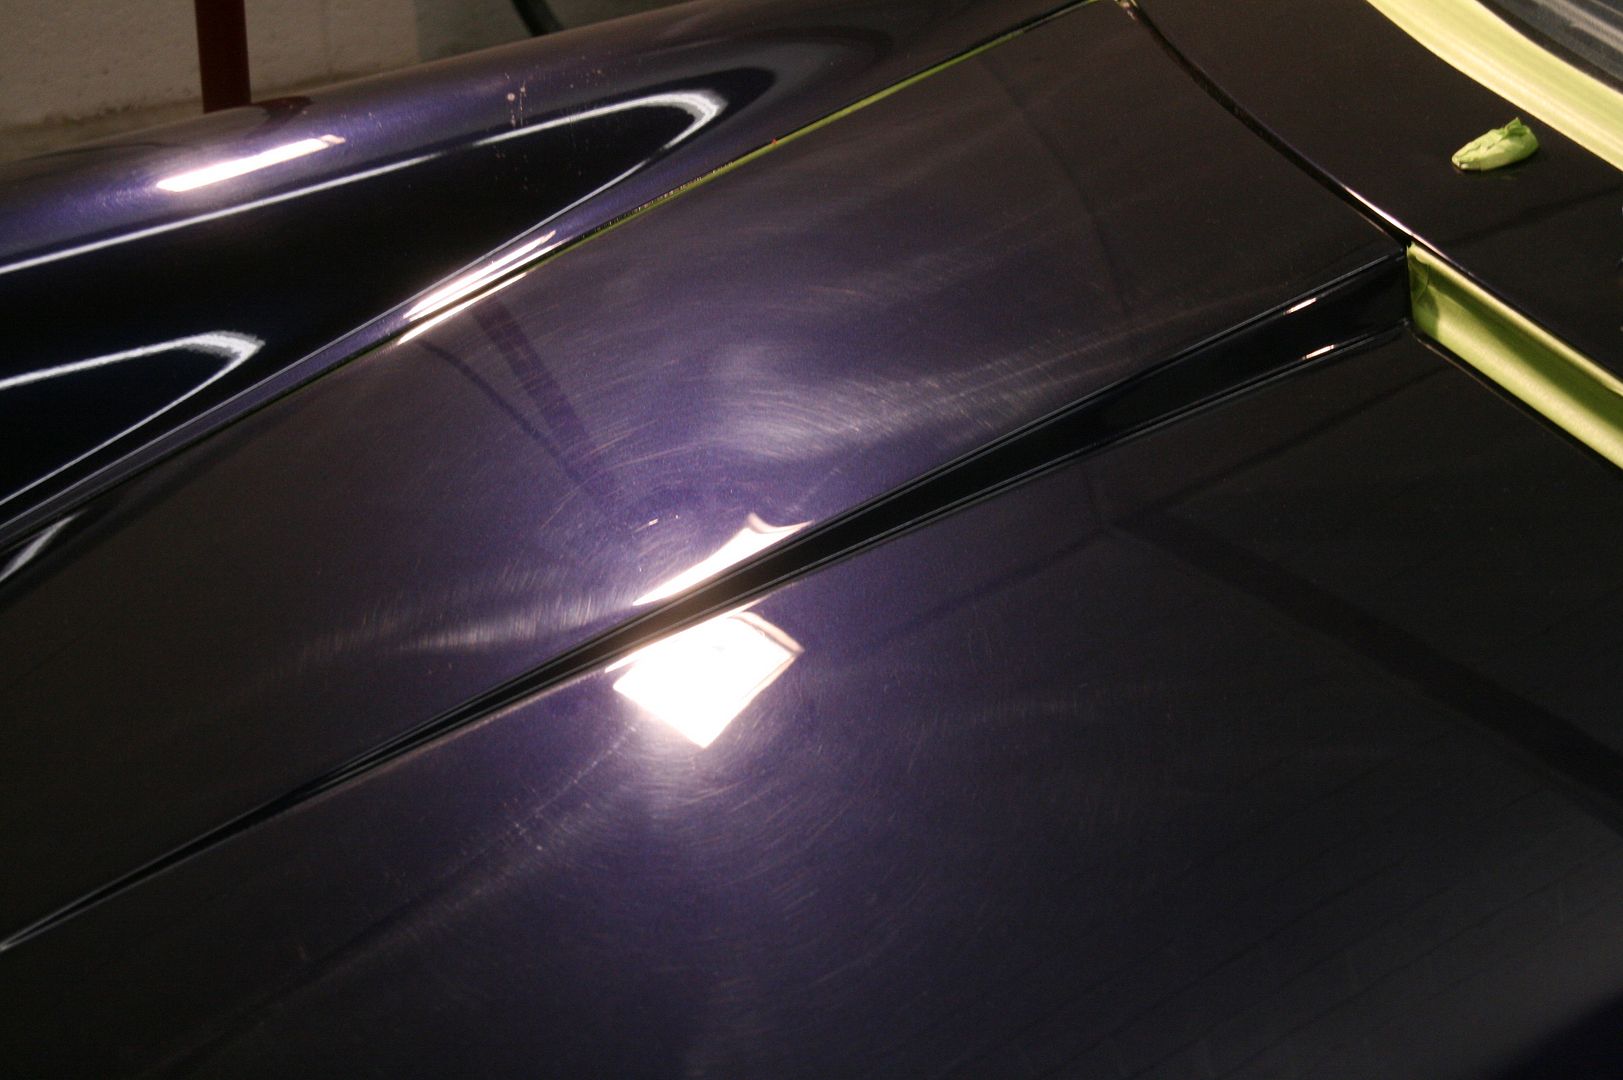
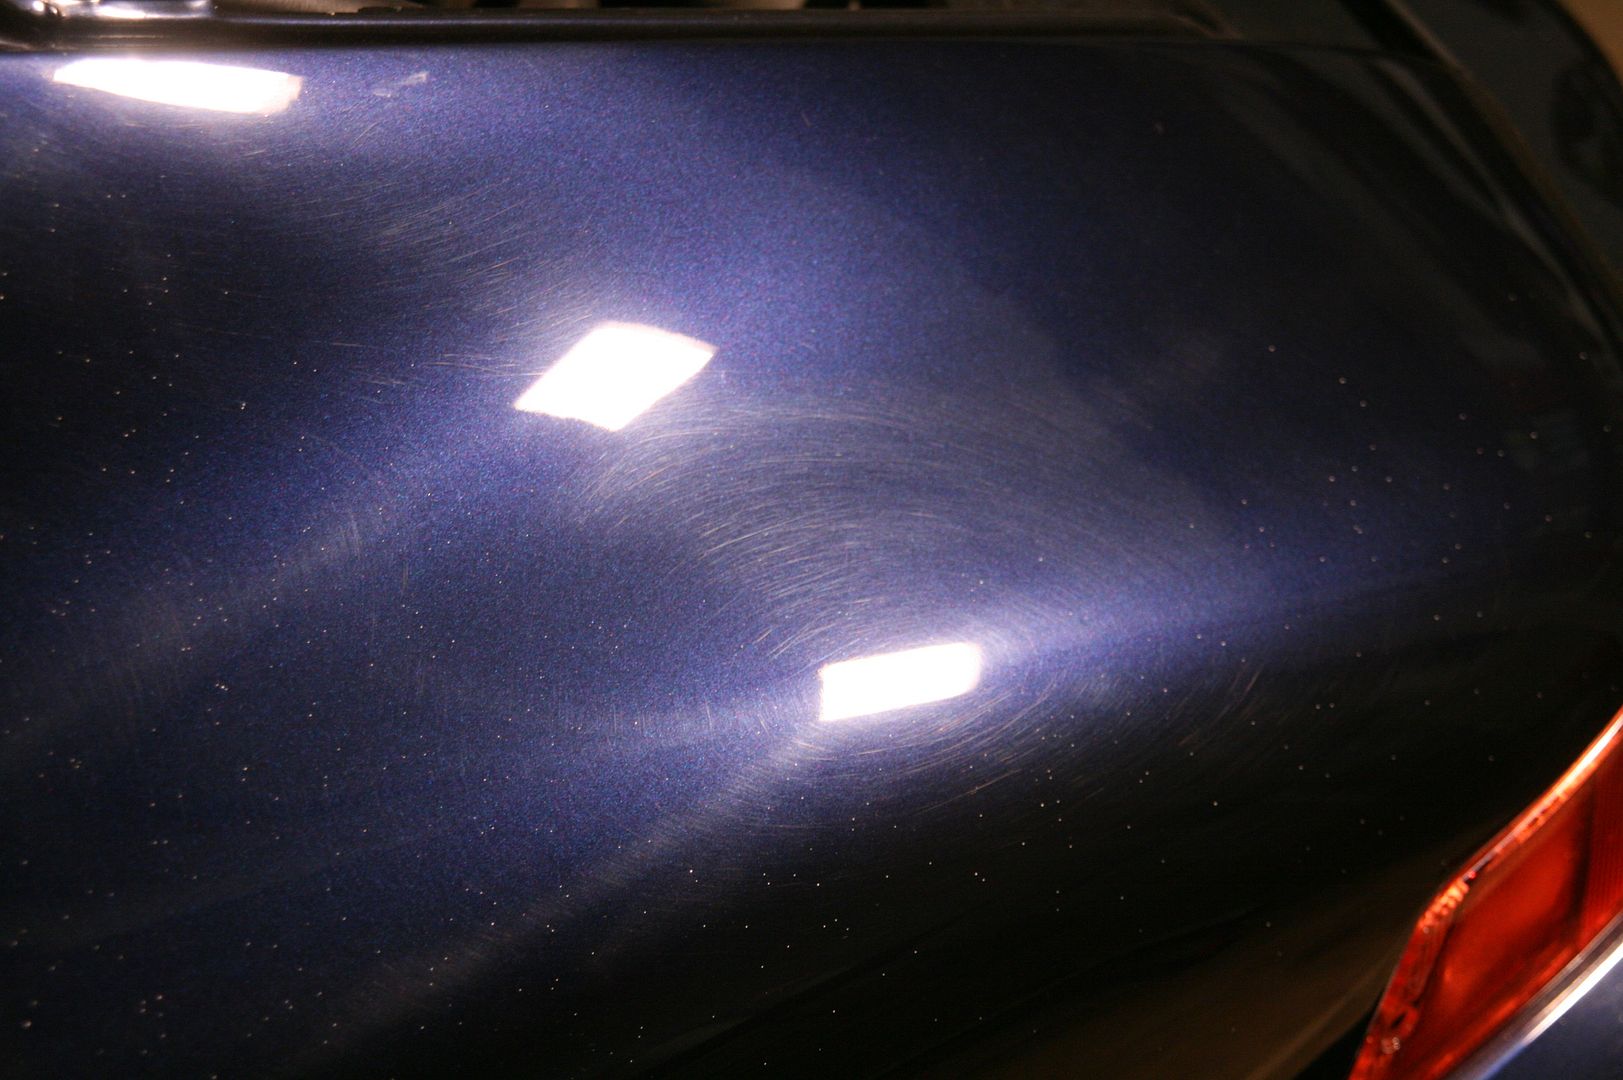
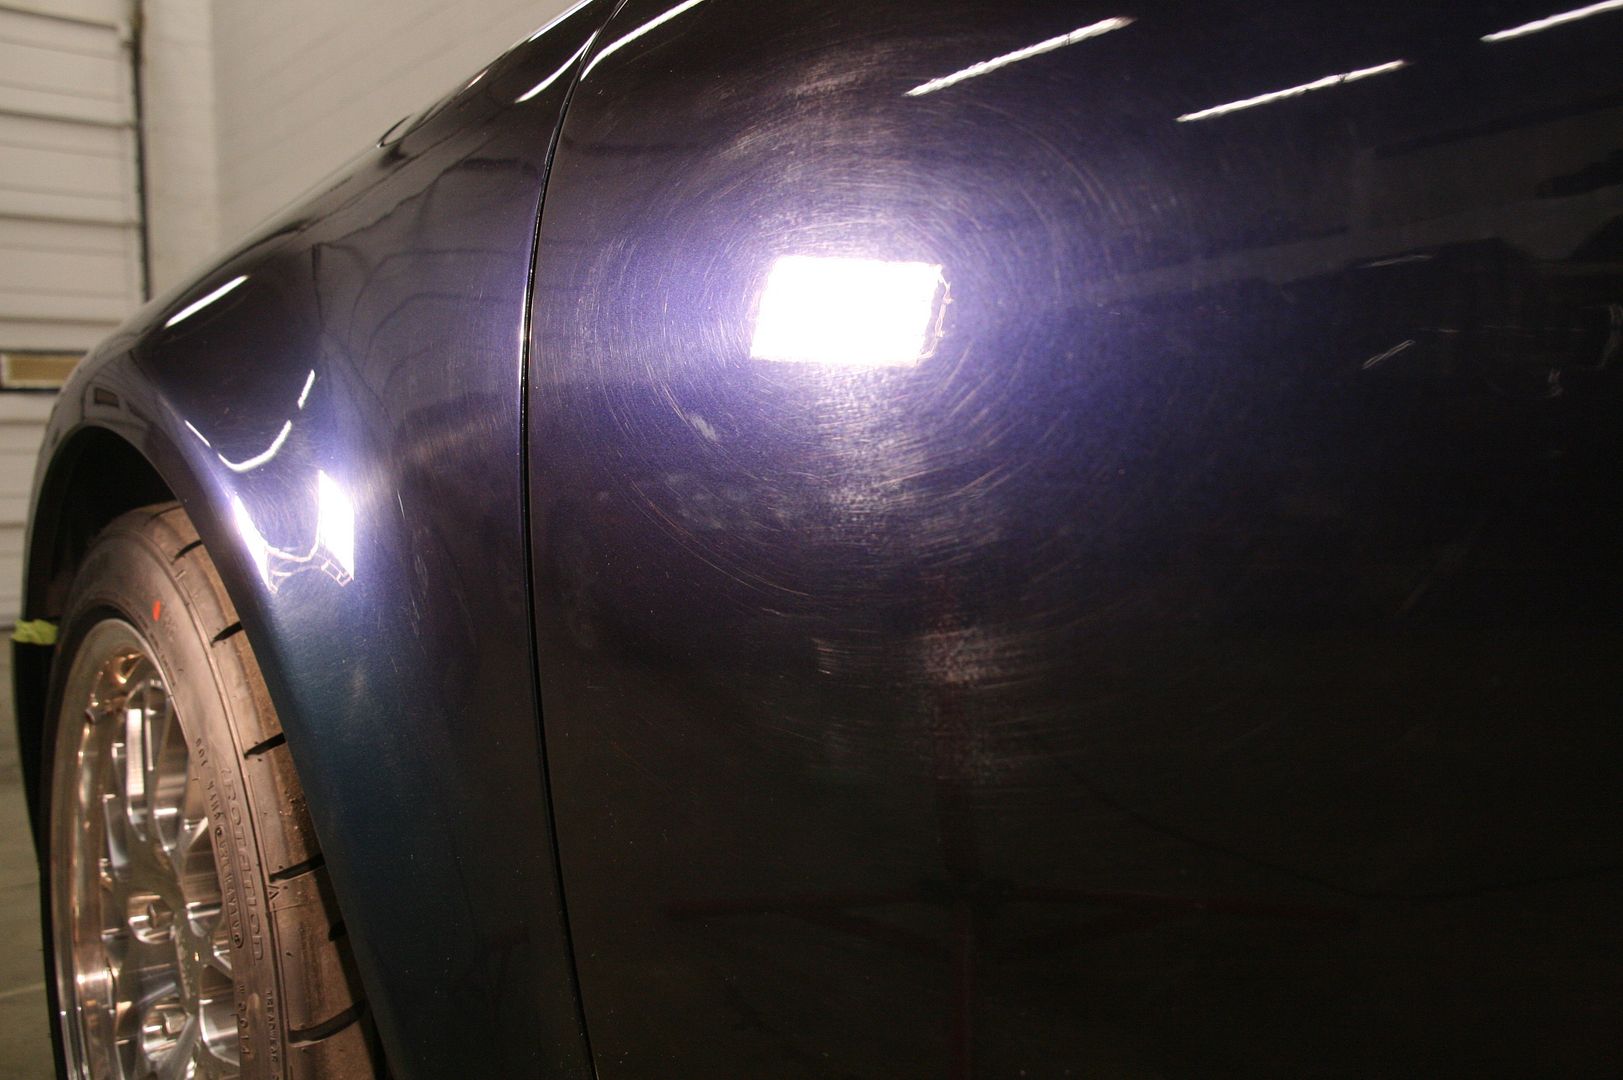
So with the readings known, trim masked off, paint received a full IPA wipedown twice to ensure it was as bare as possible. I got on to the correction work using various combinations throughout the vehicle. Here are some before and after photos as well as 50/50s
25.

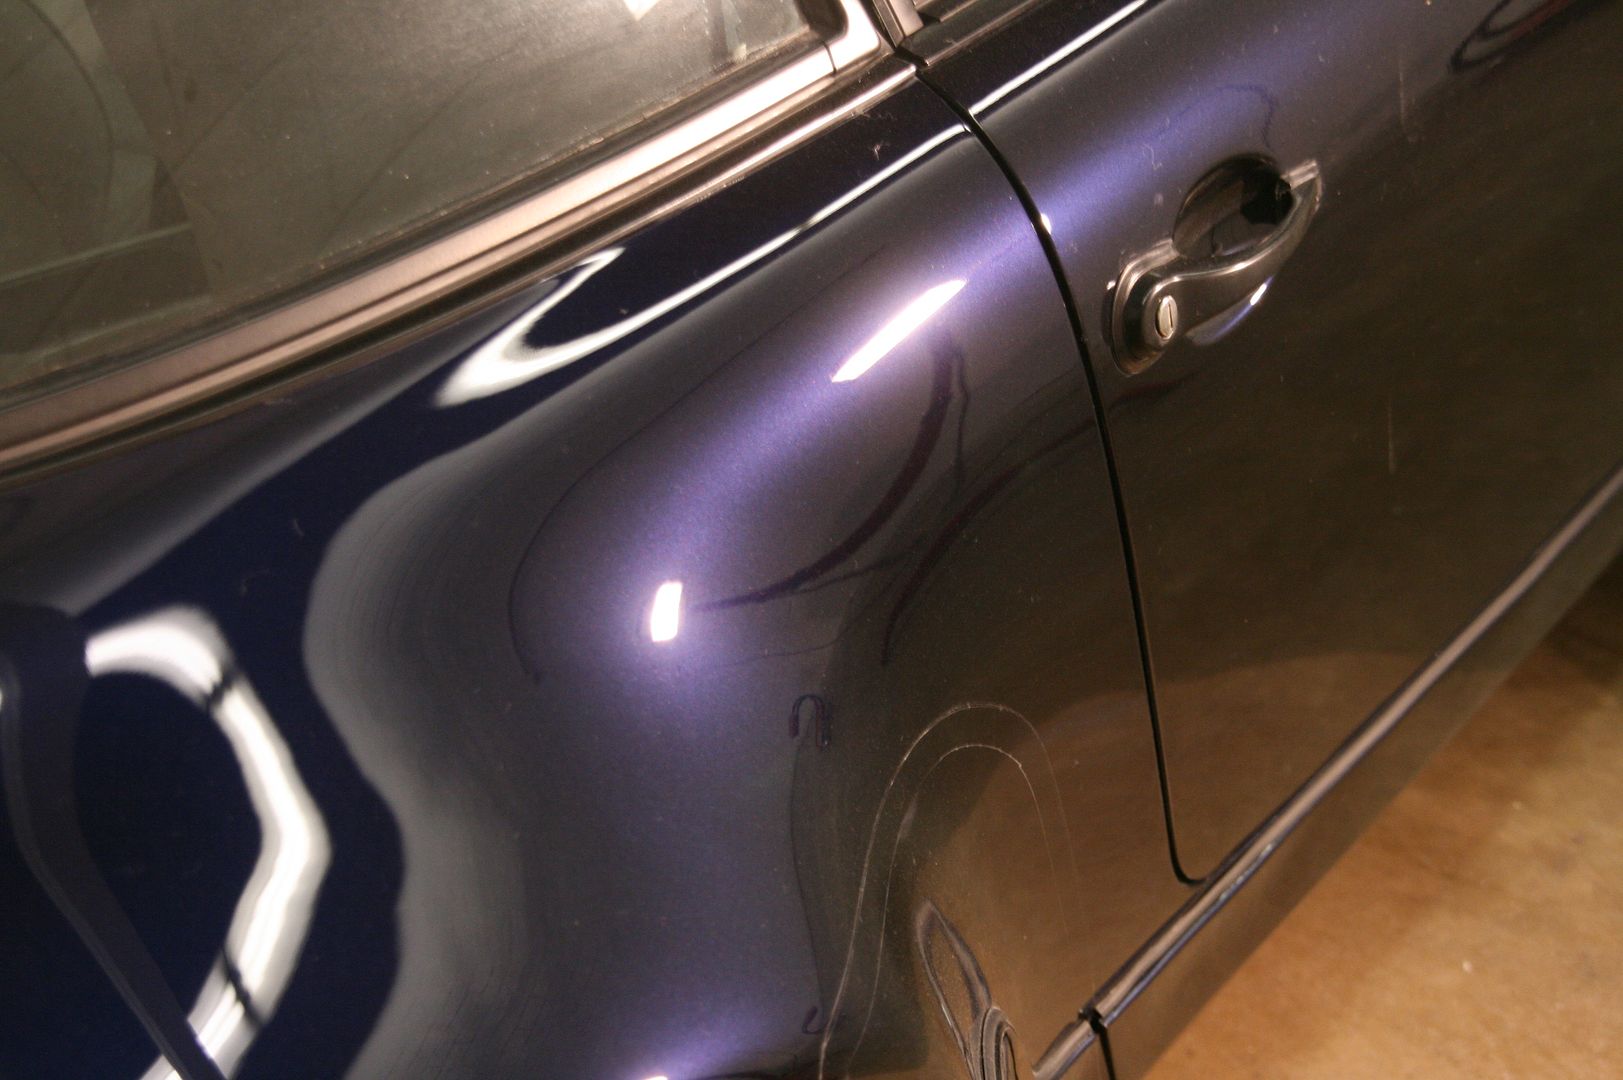
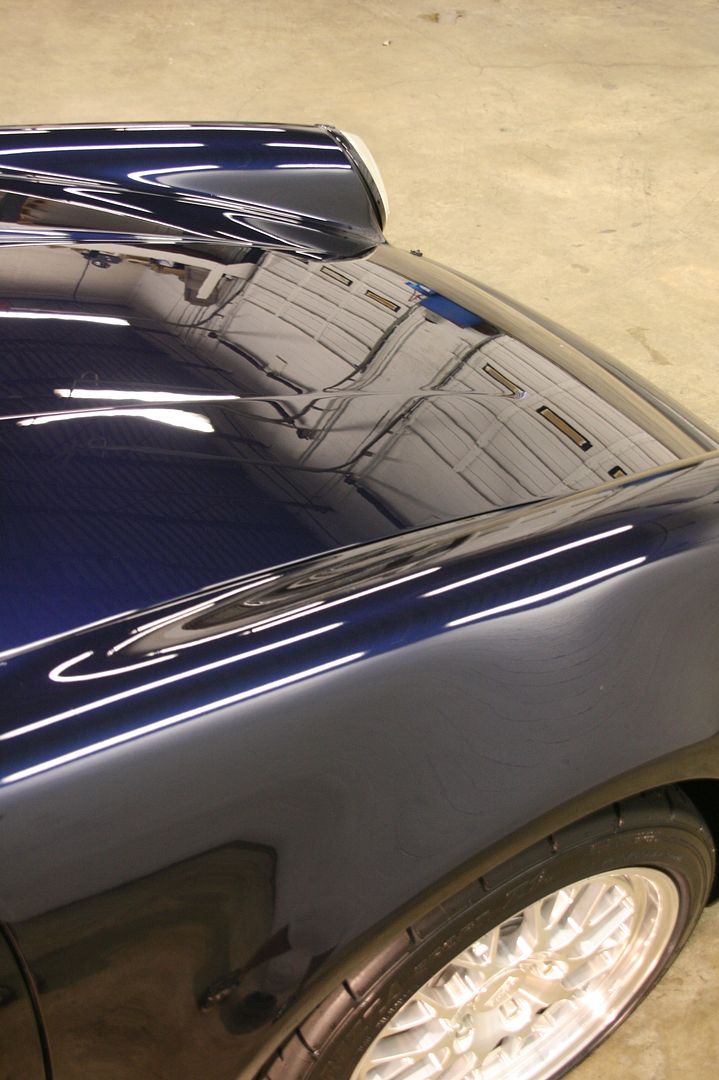
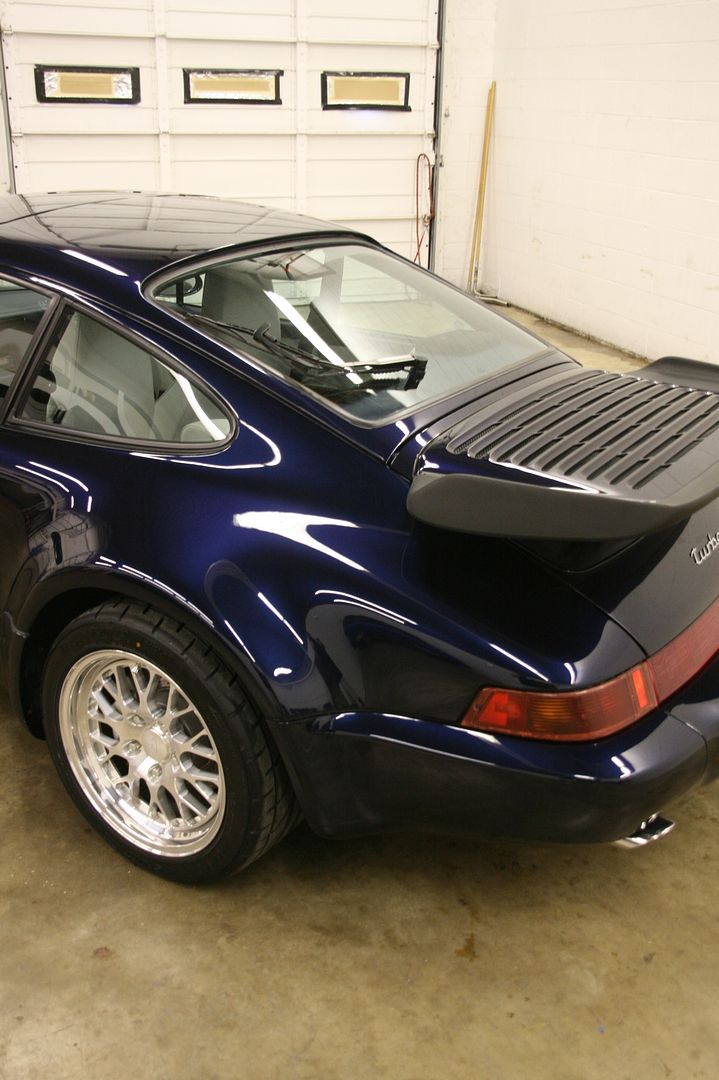
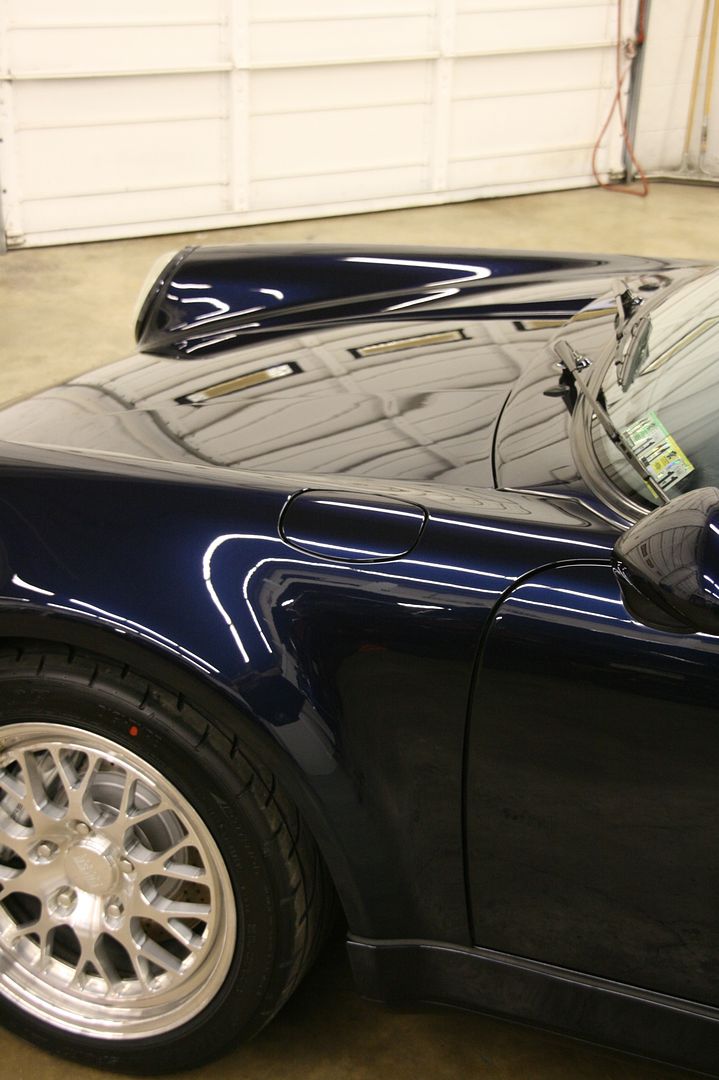
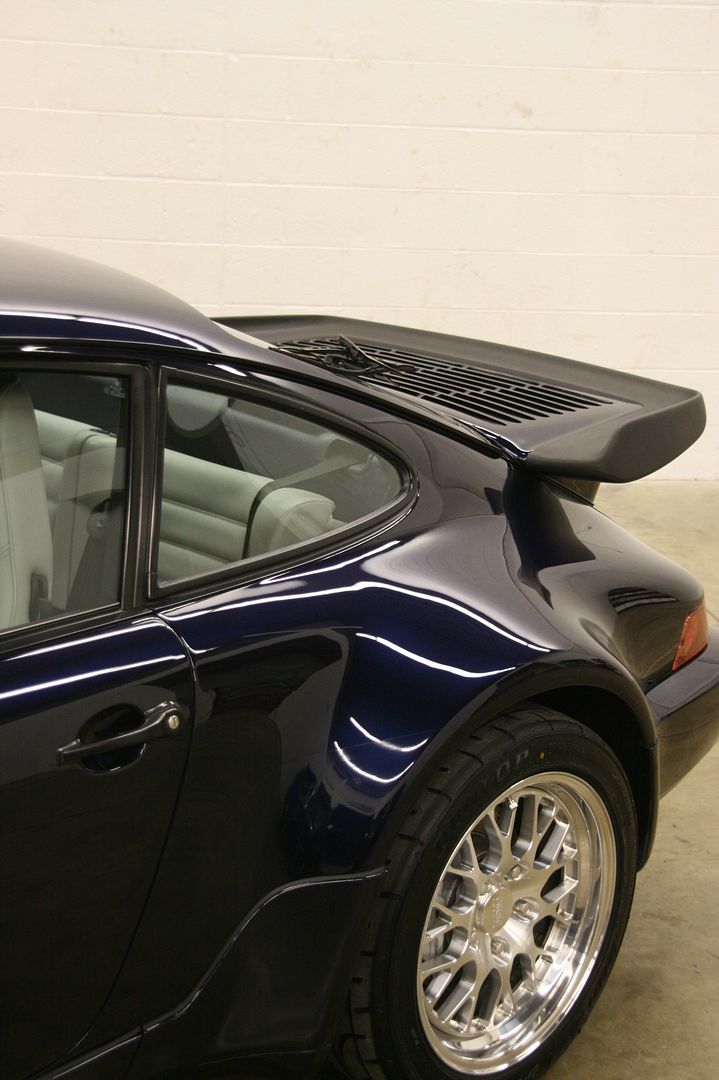
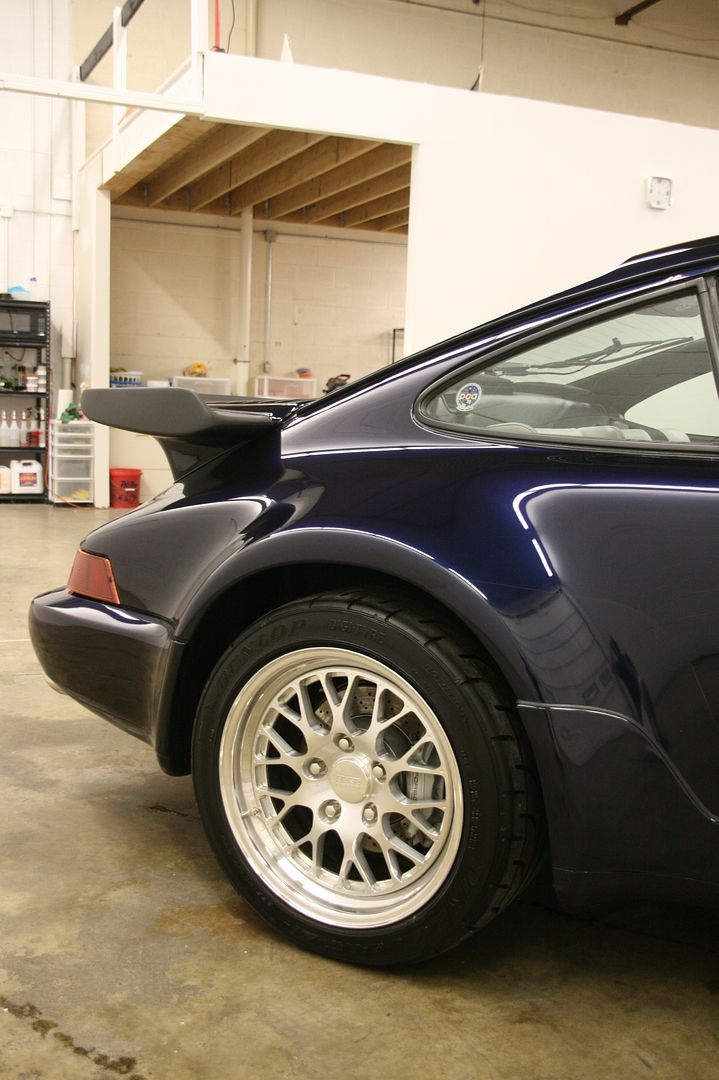
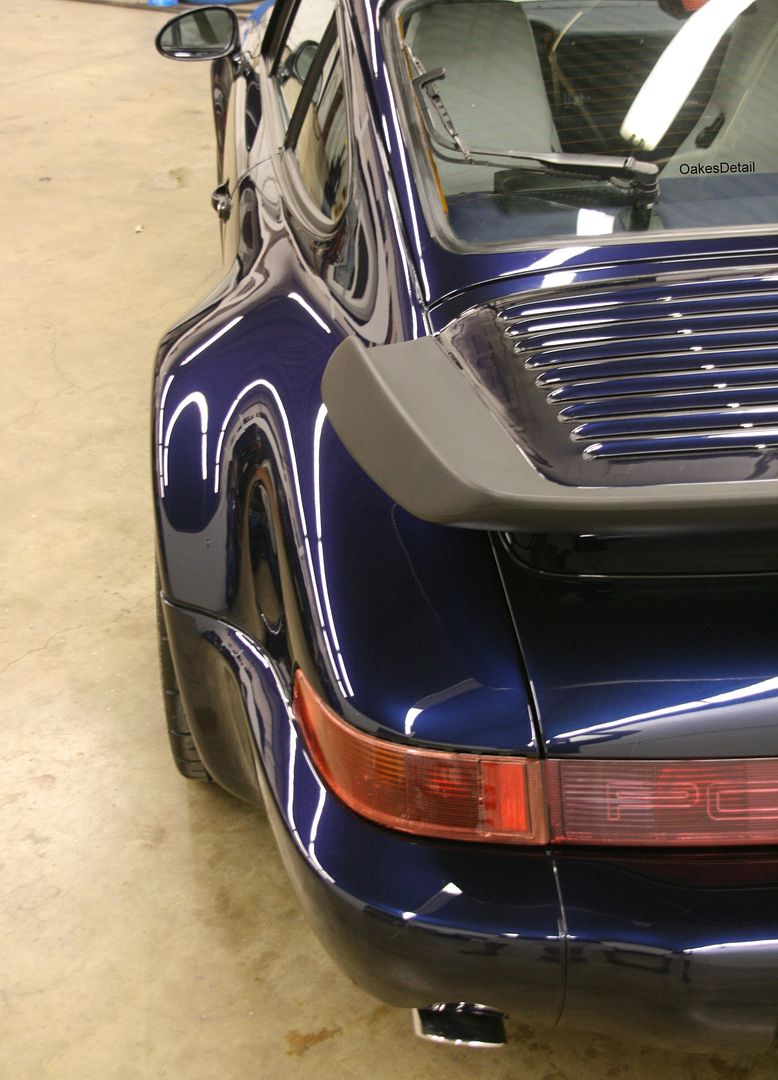
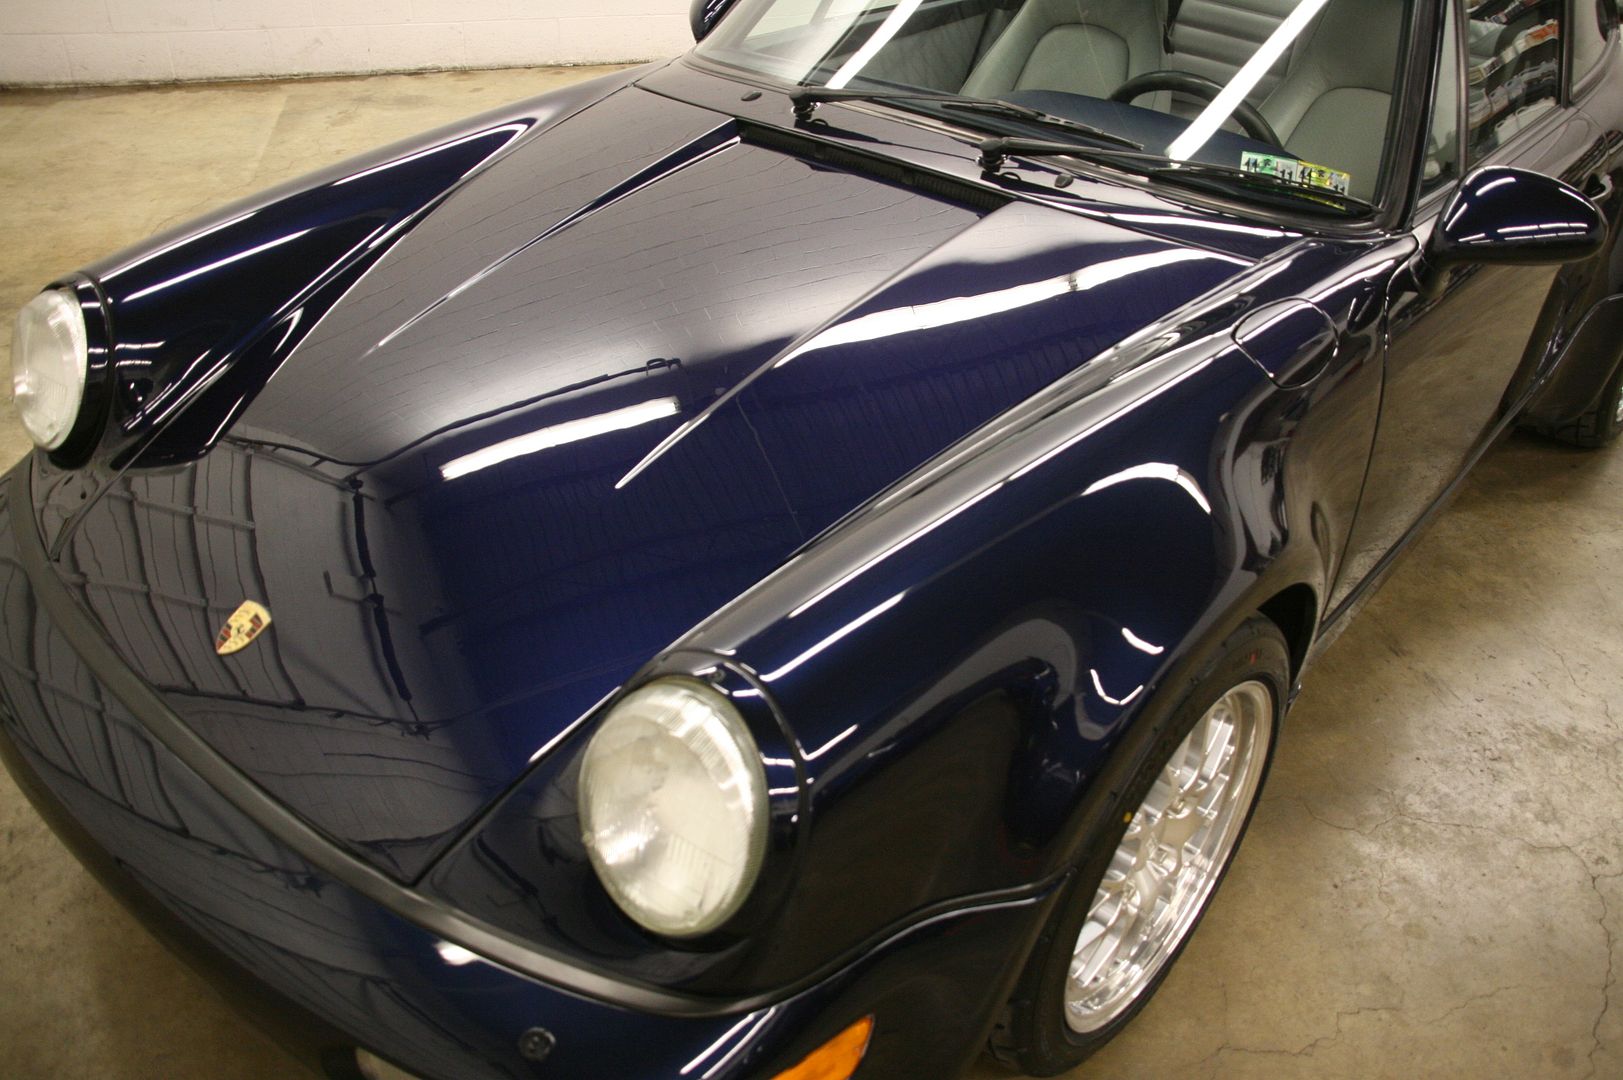
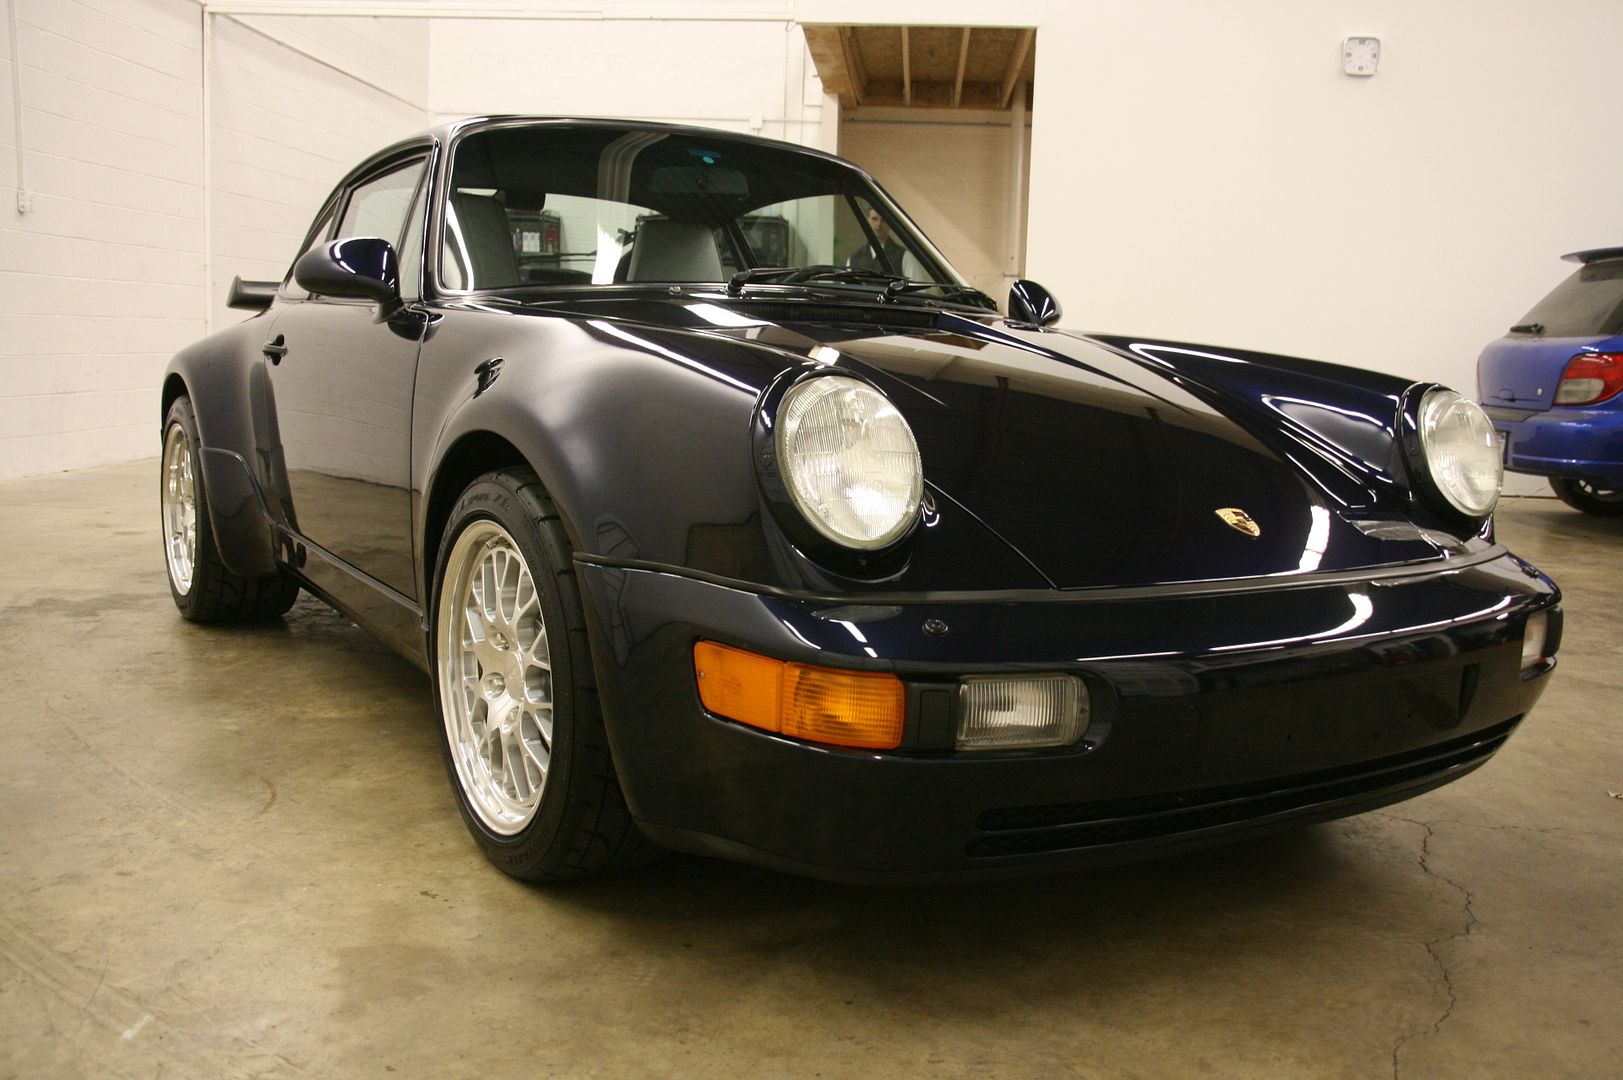
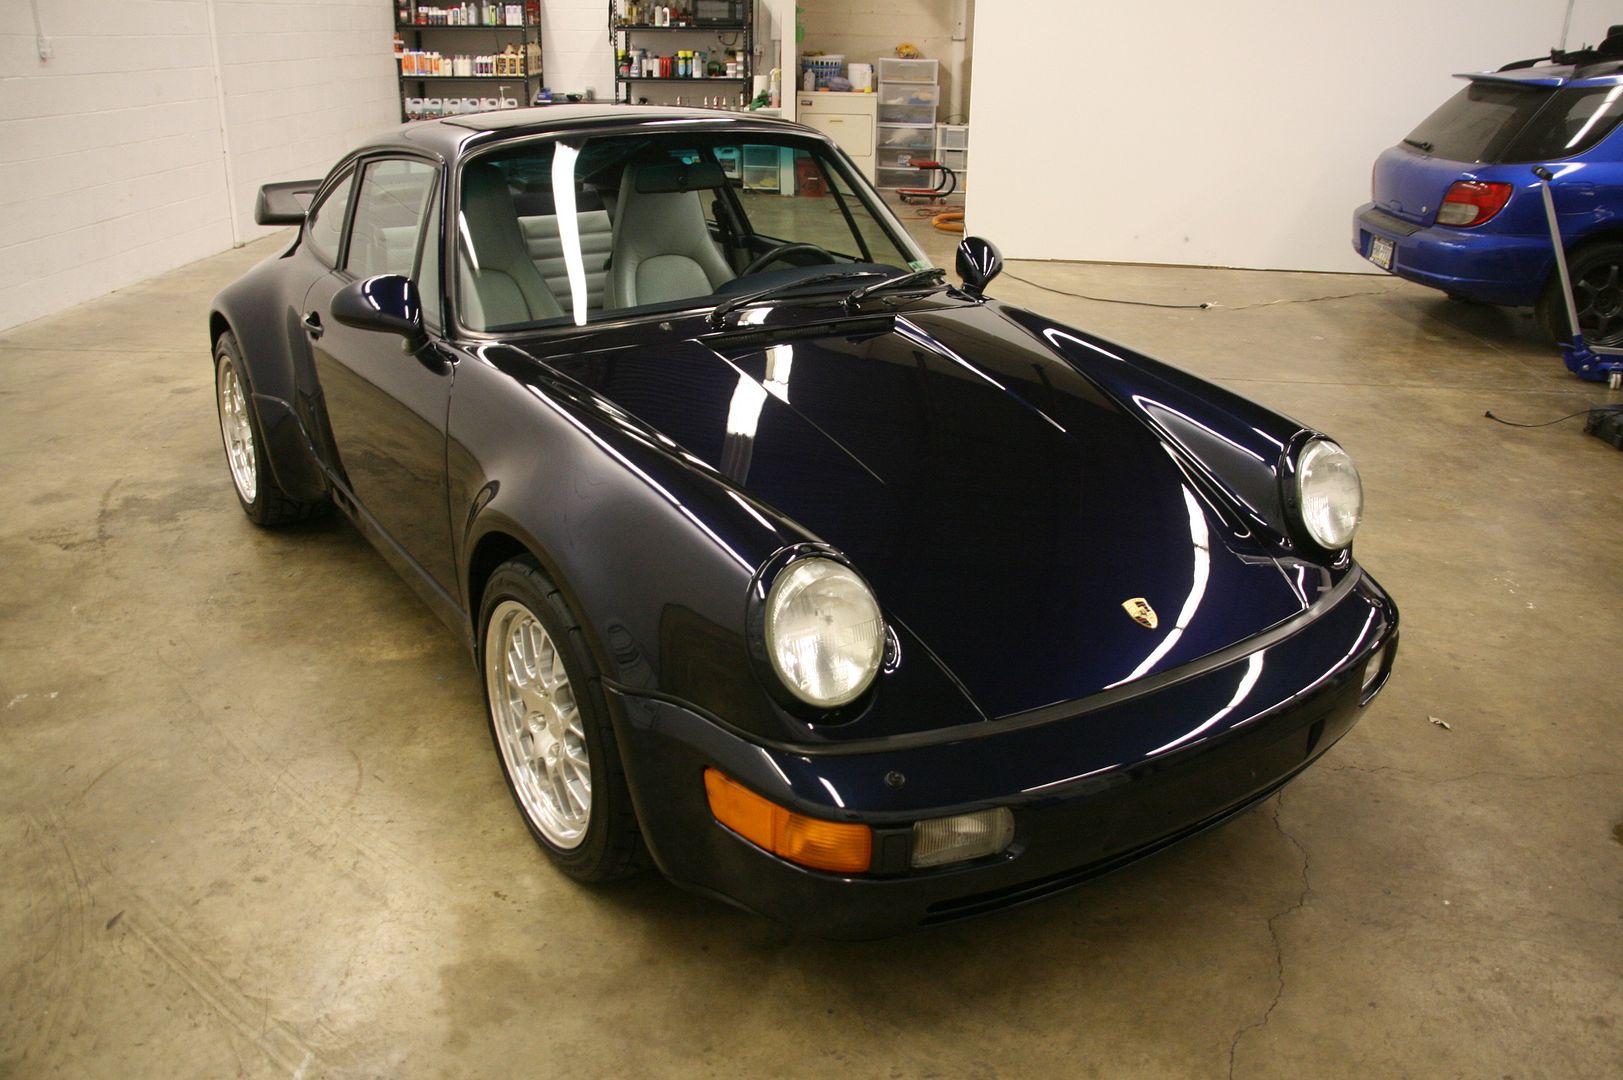
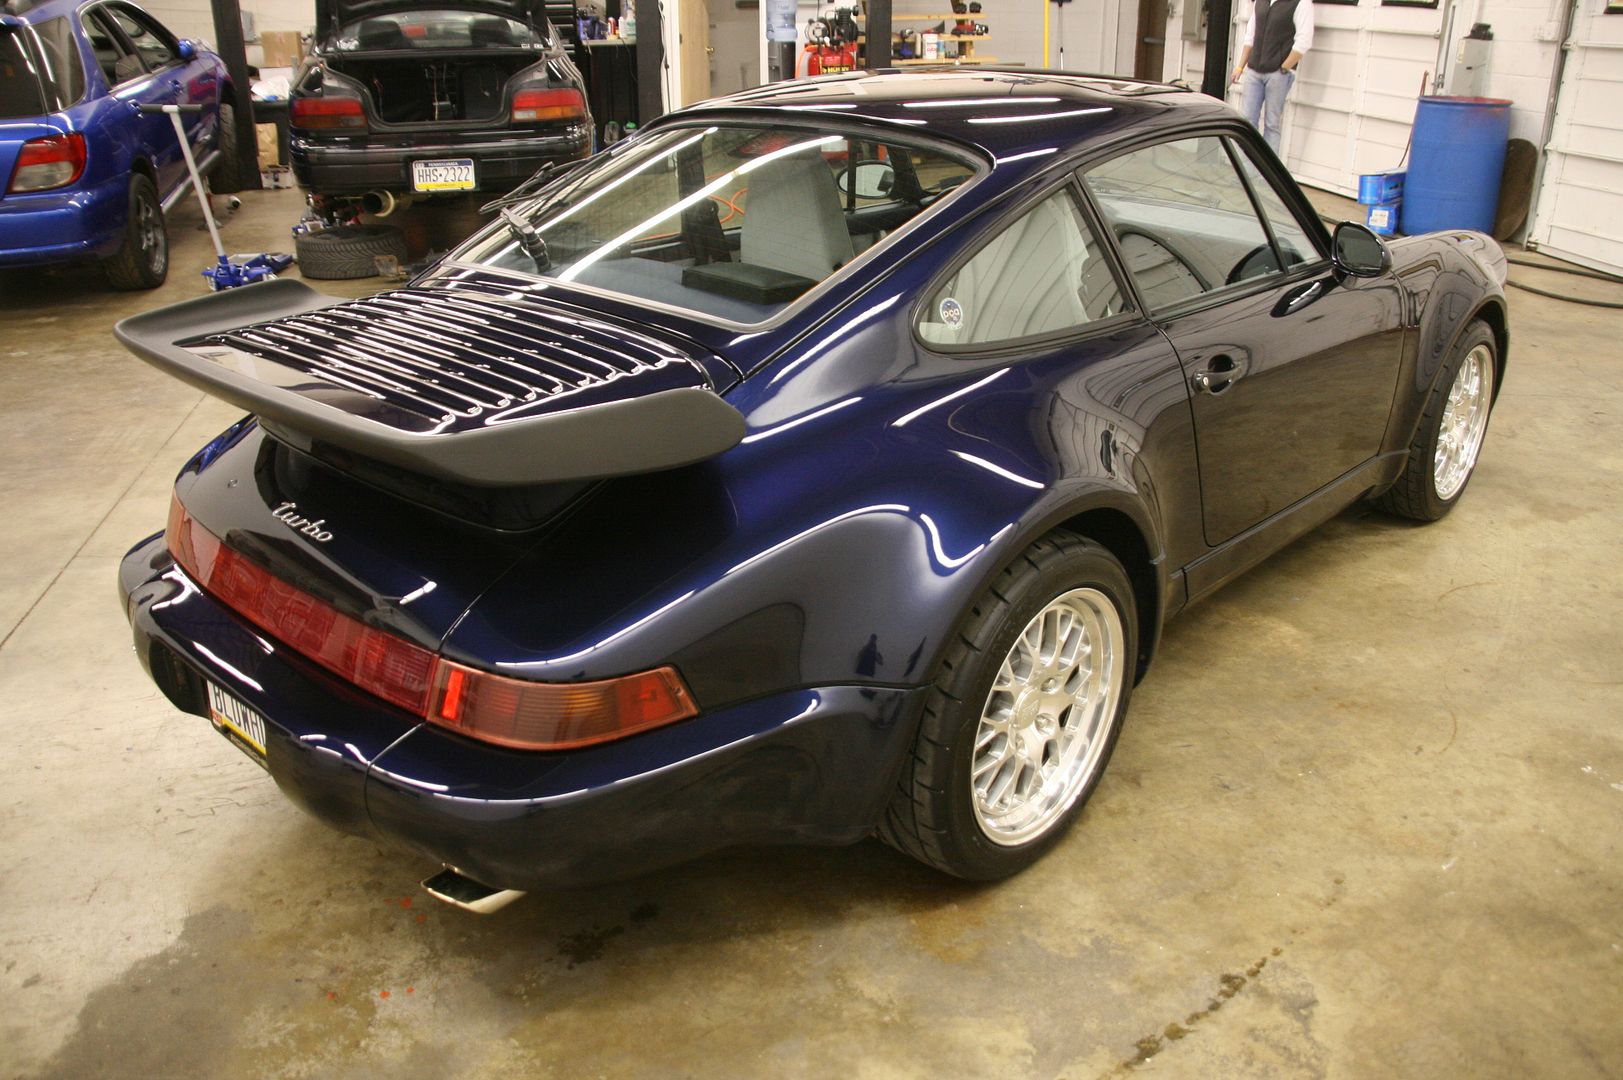
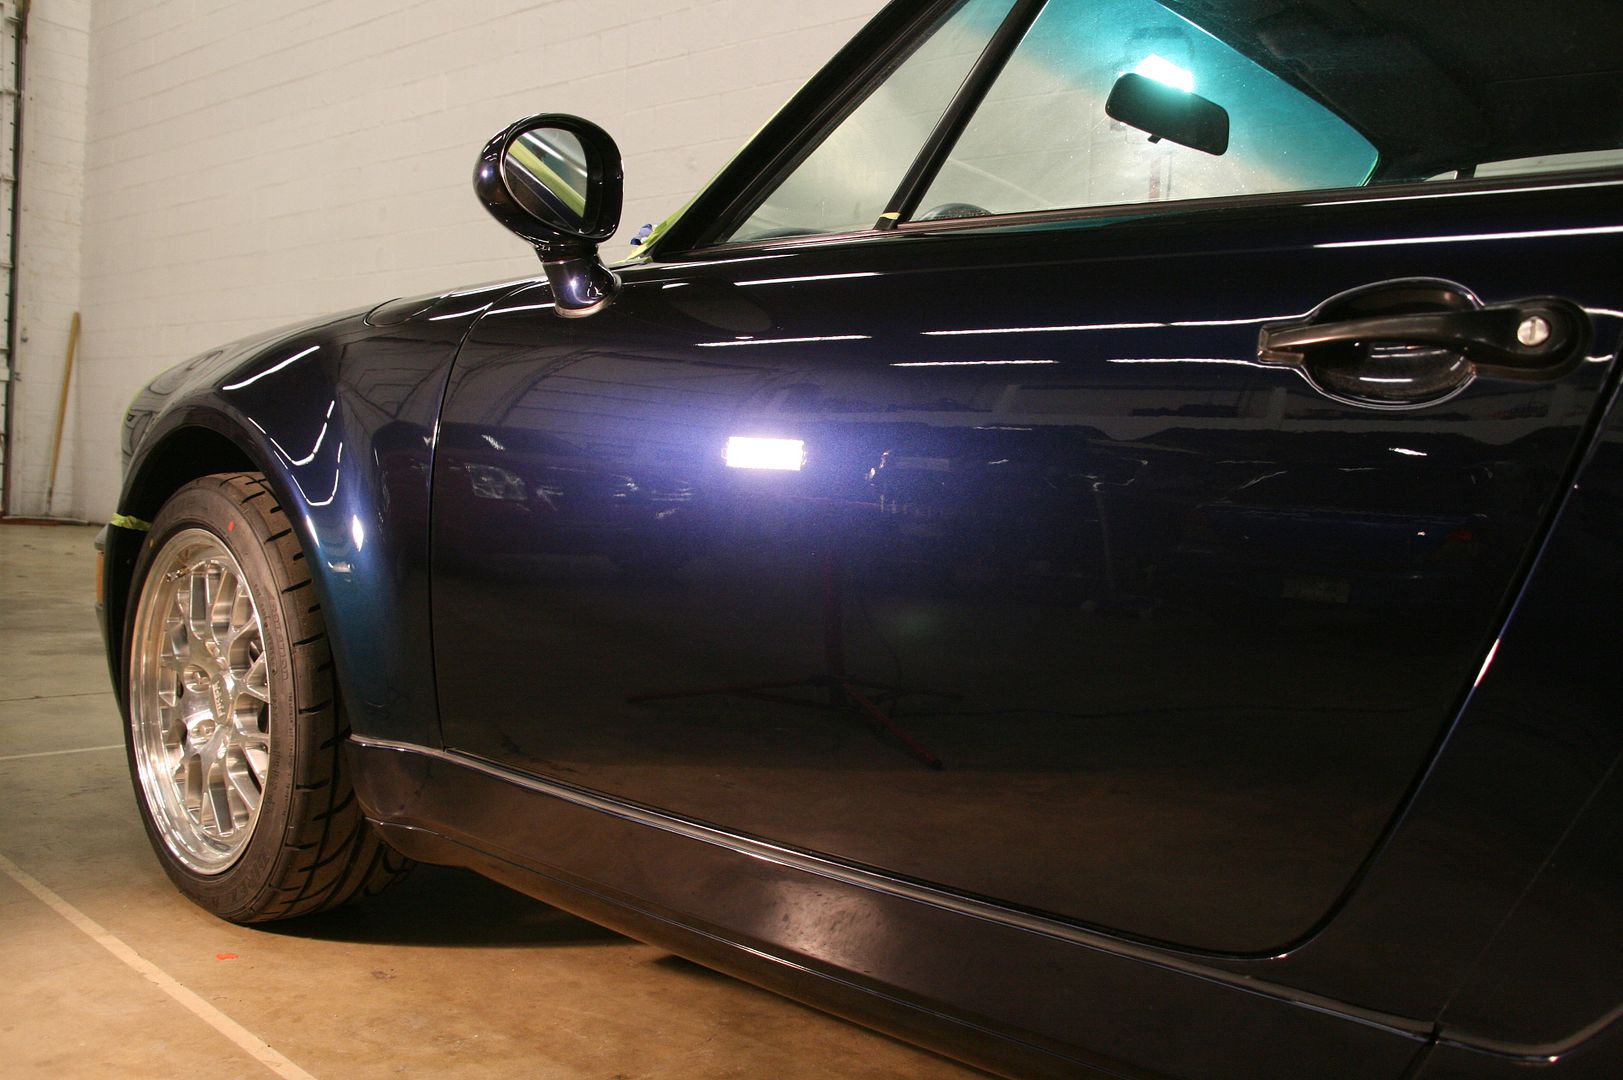
So approximately 9 hours of correction, polishing, paint cleansing and alcohol/IronX wash the paint was ready for ceramic application. Left to dry for 24 hours, here are some finished paint photos of the corrective work both before and after the ceramic was applied!
I documented this detail a little differently than I normally do in the pictures I took to show, one new thing I'm trying out is labeling body panels and their paint depth readings which you will see below before the correction photos.
Definitely take the time to check out all the pictures and their descriptions! I'll start it off with the day she got here...
First order of business was removing the original brake calipers to have them stripped, torn down, powdercoated and restenciled and then rebuilt! Heres the original black finish fading and peeling away.
While the calipers were out getting refinished, the hubs were in need of some recoating, here is the passenger front before and after.
5.
Also while the wheels were off, I did some metal polishing of the heat sheilds in the rear
Then the calipers made their way back! Heres how they looked.
Simple yet elegant finish for this blue/silver/polished color scheme!
With all the mechanical work done and stainless steel brake lines installed, we moved on to the paint work, I first visually inspected it and here were my findings:
10.
15.
Seeing that it was in desperate need of proper correction, I took measurements throughout the vehicle after it was masked off. I took some photos of the major panels and took various paint depth readings. I then took those same images and labeled where the different depths were recorded so I could show an idea of the consistency in depth and where there were areas of concern.
20.
So with the readings known, trim masked off, paint received a full IPA wipedown twice to ensure it was as bare as possible. I got on to the correction work using various combinations throughout the vehicle. Here are some before and after photos as well as 50/50s
25.
So approximately 9 hours of correction, polishing, paint cleansing and alcohol/IronX wash the paint was ready for ceramic application. Left to dry for 24 hours, here are some finished paint photos of the corrective work both before and after the ceramic was applied!