Mike Phillips
Active member
- Dec 5, 2022
- 51,004
- 6
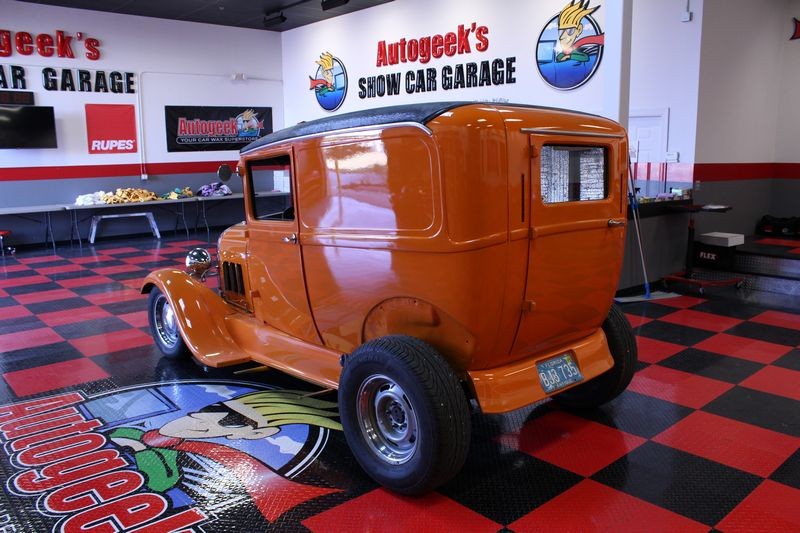
Orange Peel Before and After
I took before and after pictures to show the orange peel before we sanded and buffed and after we sanded and buffed.
Before
Orange Peel
I opened the garage bay door as it puts a strip of sunlight shining through the garage onto the large flat panel on the side and highlights the orange peel texture common to new/custom paint jobs.
Here you can see the garage bay door open...

Here you can see the orange peel...
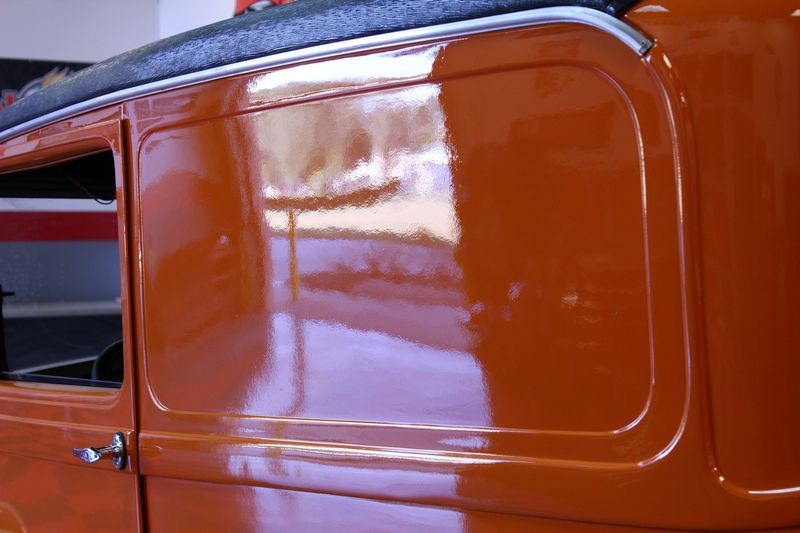

I adjusted a camera setting to darken the shot...

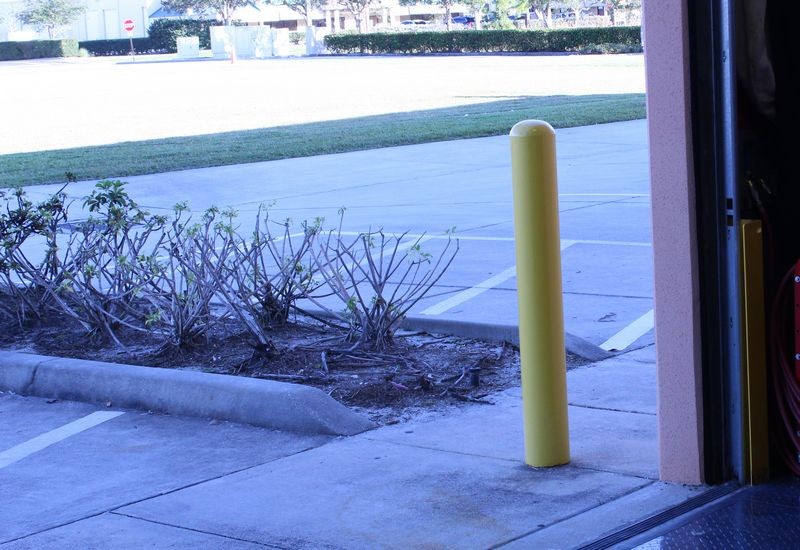
Looks like the texture on the peel of an orange - See the yellow pole in the reflection?

It's this pole - if we do the job right, when the Model A comes back we'll take after shots and we should see dramatically more clear and defined reflections.
After


")
I took before and after pictures to show the orange peel before we sanded and buffed and after we sanded and buffed.
Before
Orange Peel
I opened the garage bay door as it puts a strip of sunlight shining through the garage onto the large flat panel on the side and highlights the orange peel texture common to new/custom paint jobs.
Here you can see the garage bay door open...
Here you can see the orange peel...
I adjusted a camera setting to darken the shot...
Looks like the texture on the peel of an orange - See the yellow pole in the reflection?
It's this pole - if we do the job right, when the Model A comes back we'll take after shots and we should see dramatically more clear and defined reflections.
After