Thanks Mike - you know how building a car can be - over-budget & over time - but after 4 years 2,700 hours working on it, its really looking great - & fun to drive!
But the reward is worth it when it's all done and all you have to do is keep her shiny! That's the part I like the best and the part I gravitated towards when I was younger.
I didn't know I was gonna get so involved with the paint correction & detailing -
You had to do it though. Otherwise you would be at the mercy of someone else and as you've probably seen on this forum there are a lot of horror stories about how someone's pride and joy gets hacked up by someone claiming they're the best but in reality, they know not what they are doing.
You're going to become like Den and Tommy, both of these guys are experts in their own right at maintaining a flawless show car finish. I think one of the things they enjoy more than how nice the paint on their cars looks is how everyone asks them,
How did you get your car's paint to look so good?
(Click the question to find out who Tommy is) 
and that adds to the cost - but it is challenging & fun to shine it up myself - looking forward to it
I'm confident your hard work is going to pay off every time someone compliments your car and adds how nice the paint looks.
Thanks for uploading the pics to my gallery - QUESTION... where is my Gallery?
On the top of every forum page there are some text links, click on the word that says
Gallery and then to the left hand side of the page you'll see some text links that read,
My Photos My Albums My Favorites
Click on My Photos and you should see them.
I have a bunch of articles on how to work with photos on discussion forums. I'm all self-taught and probably post about 500 pictures a week to this forum. So if I can do it anyone can do it.
I own a copy of PhotoShop Elements 2.0, it came with my Canon Rebel Camera and I use this mostly for cropping out the fluff. Once I crop out the fluff I use Easy Thumbnails to resize all my pictures to 800 pixels wide as I find this to be the optimum picture width for the widest spectrum of electronic display devices. I also use a free picture viewer called Lview Pro, the freeware version from the early 1990's.
I can't help people to get a free copy of PhotoShop Elements but I've seen it at Costco for around $80.00 but the Easy Thumbnails and the Lview Pro are free.
How to resize your photos before uploading to a photo gallery -
Using Easy Thumbnails
Handiest little picture viewer tool I've been using for years now...
Here's an online website that will let you crop, resize and edit your images online for free. This link goes to my article on how to use the software on the website.
How to crop out the fluff and resize your pictures! - Using FREE online software!
Then here are my articles on how to get your pictures uploaded into the gallery and then inserted into a thread, not attached.
How to upload a photo into your Autogeek Photo Gallery
How to insert an image from your photo gallery into your message
If you're going to put a lot of pictures up on the forum then it helps to create a dedicated gallery for each car or project. Here's my article on how to do this...
How to create dedicated albums in your photo gallery...
This one just kind of explains how image tags work on the Internet, once you figure the tags deal out then it helps to make sense of it all.
[URL="http://www.autogeekonline.net/forum/tips-techniques-how-articles-interacting-discussion-forums/56732-how-use-image-tags-insert-photo.html"][COLOR=blue][B]How to use Image Tags to insert a photo[/B][/COLOR][/URL]
Photobucket is a waste of everyone's time because in most cases, over time the really cool pictures someone shares n a forum disappear and that pretty much ruins the really cool thread. Seen this happen for over 10 years now so don't really care to argue with any fanboy of Photobucket. (Usually if they're a fan boy I can find their missing pictures :D )
[URL="http://www.autogeekonline.net/forum/off-topic/23699-photobucket-missing-pictures.html"][COLOR=blue][B]Photobucket and Missing Pictures[/B][/COLOR][/URL]
And anyone having trouble figuring out how to get their pictures onto our forum can always contact me and I'm happy to helps walk you through the process over the phone. To be honest, my articles actually explain everything in detail and have screenshots SHOWING what to do and what things need to look like.
It's only hard the first few times you do it and then it's a cake walk.
[QUOTE="Demonizer, post: 1067189, member: 50126"]
Also, regarding posting - hoe do you post a reply with caption of previous posts like you do?
[/quote]
I also write articles on how to interact on discussion forums because I know we have people new to "discussion forums" joining all the time and instead of making them work at figuring this forum thing out I try to flatten out the learning curve a little.
Here's my article on how to use the edit option and the multi-quote feature of vBulletin. I use this a lot.
[URL="http://www.autogeekonline.net/forum/off-topic/20690-how-use-editor-mode-break-single-quoted-message-up-into-smaller-quoted-sections.html"][COLOR=blue][B]How to use the "Editor Mode" to break a single quoted message up into smaller quoted sections[/B][/COLOR][/URL]
Note I use [B]Internet Explorer[/B] for all my forum work because it's the ONLY browser that allows you to use ALL the features in vBulletin. I know there's a lot of fans for Chrome, or Firefox or fill-in-the-blank but with over 40,000 posts on this forum and tens of thousands of photos I know that which I speak of.
(If one of the other browsers worked as good or better for vBulletin don't you guys of other browsers think I would already be using it?)
Here's another good tip, again it works with IE but not all other browsers...
[URL="http://www.autogeekonline.net/forum/tricks-tips-techniques/23245-how-expand-message-box.html"][COLOR=blue][B]How to expand the message box[/B][/COLOR][/URL]
I'm using this one right now as I type this reply on a 24" monitor in [B]Portrait Mode[/B]. Look at the monitor on the left.
[IMG]http://www.autogeekonline.net/gallery/data/715/medium/ArmHolderUppers01.jpg
Your videos were very enlightening, and the book is really helpful to understand the tips & process - so I know all the stuff I will need before I start - I keep in near by with tabs where I marked important tips for quick reference.
Not bragging but if a person new to detailing, specifically polishing paint were to read my how-to book from front to back they will know more than most detailers and even guys that work in body shops. There's a TON of information in it.
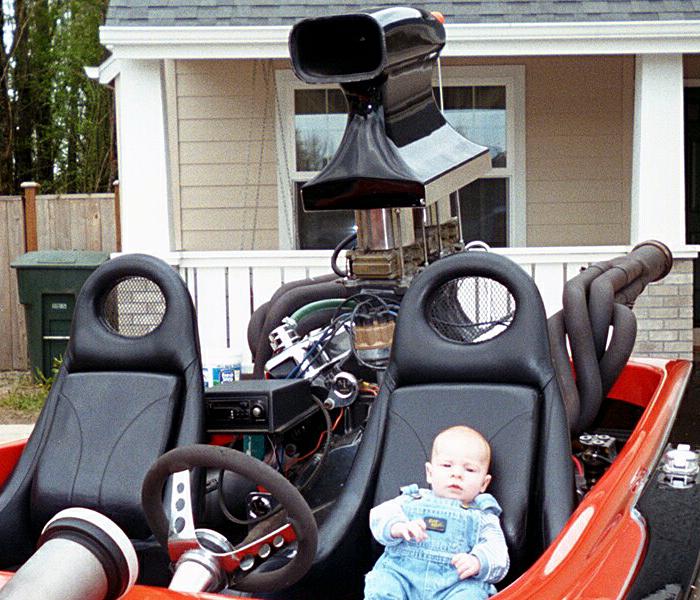
I put in a new Crate engine - Ford Performance GT-40 5.0 - I dressed it out with all the accessories & pumps, serpentine system & transmission. Ford had a sale few years back with free lift gate delivery - so it was longblock complete with GT40 Alum heads, full roller E-303 cam & fuel pump eccentric & Built by Ford - cheaper then to build one & came with a 2 year, 24k warranty - sounds great with @ 400hp. I also have electric cut outs which are a blast at car shows & stuff - ridiculously loud when they are open.
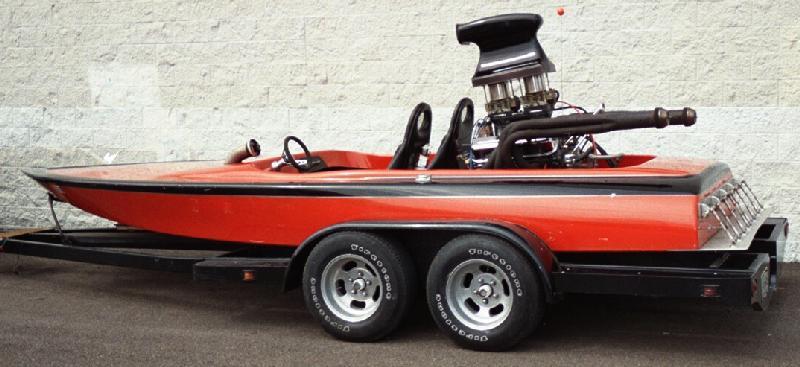
Sounds like my kind of fun. I owned this boat for 20 years, I know a little bit about fast and loud...
Here's a shot of the engine with my son in the driver's seat. If you look on the head of the engine behind the passenger seat you can see the stereo and behind the scoop is the antenna with a "76 Gas Station" ball on the top of it. Down below were a bunch of amps and speakers. I didn't put the stereo in till years later when I owned it and it was never in the boat when I raced it.
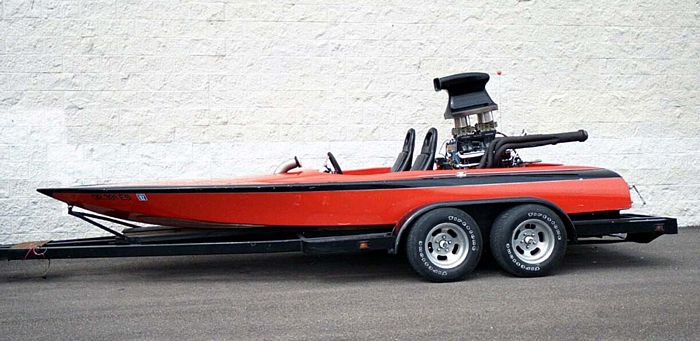
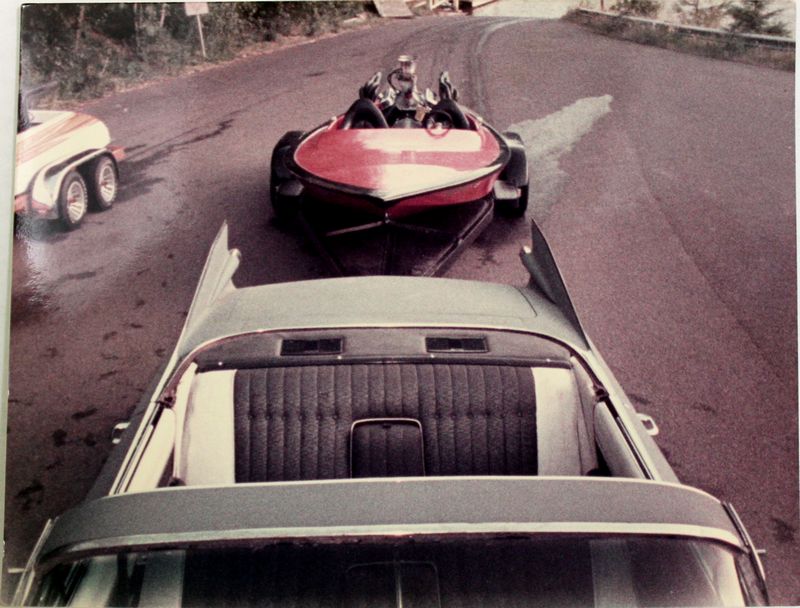
This is a shot of me racing the 1/4 mile I think in 1983 or 1984. I clocked my fastest time of 111 mph in 12 seconds. The boat was raced professionally by Rick Baker and he clocked 122 mph in 9 seconds in 1976. Back then that was really fast in the drag boat racing world.
If you look carefully, you can see I'm pulling the boat with the first 1959 Cadillac I ever bought. This too was a great boat puller and a blast to drive with the top off. Of the the left was my buddy Eric's 1976
Sanger Bubble Deck Runner Bottom, I loved his boat and if I could ever get another Drag boat I would want a
Sanger Runner Bottom V-Drive Bubble Deck...
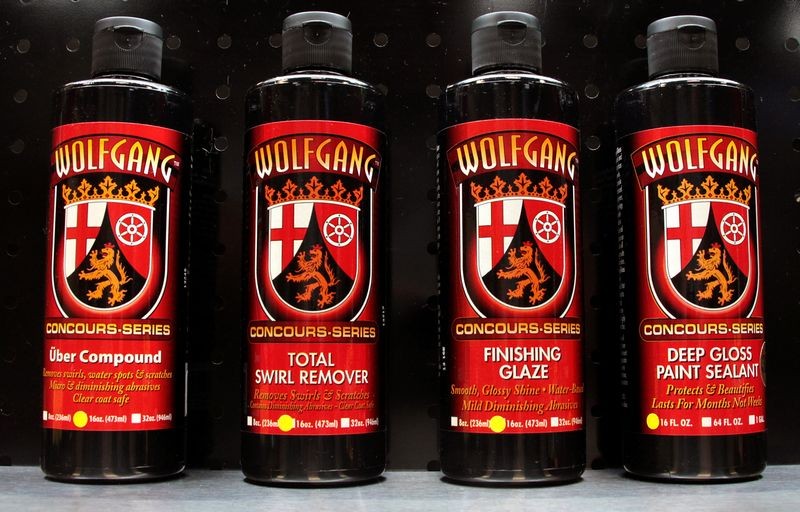
I did read the Back in Black post a while ago - and I was all set on getting the Pinnacle system of products. But After I say you demo the Wolfgang line with the Uber Polish, and saw that the Flex Kit came with the Wolfgang products, I went with it - I also heard good things about the Deep Gloss Sealant on Black paint.
So far I am very pleased with the results of the Wolfgang stuff - dont know how it could get much better.
Both use very good abrasive technology, that's the key factor.
Regarding Maintenance, after the big correction process, I would think (barring any major paint damage) I would just polish up with Final glaze & Seal it up couple times a year?
When it comes to maintenance, this is where you really need to
find a product you like and use it often.
Right now I'm a big fan of using the Black Label Diamond Paint Coating on my daily driver truck. But note, I don't purposefully try to maintain a 100% Flawless, Swirl-free finish as it's a
t-r-u-c-k.
I use Black Label Diamond Surface Coating on my wife's 2006 Mercedes-Benz SLK350 and it ALWAYS looks flawless but that's in part because of the coating, me keeping it up and it has PPG Ceramiclear paint.
Before we introduced the BL coatings, I used
Pinnacle Souveran Paste Wax for my LSP because it's
- Fast
- Easy
- Looks clear and wet
And I machine applied it. This is what Tommy uses on his Cuda and Den uses on his GTO.
A practice Tommy uses on his Cuda is
ANYTIME he sees a new defect, whatever it is, he makes a mental note of it when he's out and about. When he gets his Cuda home
he places a Post-it Note next to the defect and then as soon as he gets a chance he gets out his
Flex 3401, his Pinnacle Polishes and makes the defect go away. Then re-waxes that area.
That's how he keeps a show winning finish on his Cuda all the time...
Car is garage kept, and I cruise around about 100-150 miles a week/weekend.
Living the dream...
3M Compound - I understand the hazing - that compound is almost like liquid sandpaper - 4,000+ Grit or something - but more forgiving that using actual sand paper.
I follow it with Uber compound & it glosses right up. dont think I will use it on the DA - I think because I am polishing by hand that the extra cut of the 3M gave me the correction I needed - with pads & DA Performance, the Uber should really step up & kill the heavier swirls itself
Thanks again for the tips.
You're definitely getting the hang of all this...
:dblthumb2:
")