Navigation
Install the app
How to install the app on iOS
Follow along with the video below to see how to install our site as a web app on your home screen.
Note: This feature may not be available in some browsers.
More options
Style variation
Polish by hand? What pad?
- Thread starter Nira
- Start date
Mike Phillips
Active member
- Dec 5, 2022
- 51,004
- 6
What are you trying to do?
")
- Spread out a finishing wax?
- Restore a neglected finish with a cleaner/wax?
- Remove swirls by hand out of a clear coat?
Mike Phillips
Active member
- Dec 5, 2022
- 51,004
- 6
Wrote an article yesterday on removing water spots out of clear coats by hand, the techniques used to remove Type II Water Spots would be the same technique used for removing swirls, scratches and oxidation from a clear coat finish and at the end of the article I included links to different types of applicator pads.
How to remove water spots by hand
Further Resources
Applicator Pads (for applying paint cleaners)
CCS Red Wax/Sealant Applicator Pads 2 Pack
CCS Euro Foam Hand Polish Applicators
Pinnacle Polishin' Pal
Wolfgang Polishin’ Pal Combo
Wolfgang German Polish N’ Wax Applicator
At some level your choice is personal preference because the job can be done with just about any applicator pad with good technique...
The light orange CCS Euro Foam Hand Polish Applicators are large, healthy applicator pad and the aggressive nature of the foam helps to give your abrasive more bite.
I used this style of applicator pad to remove the swirls from this Lincoln in this thread,
Man versus Machine
Here's an excerpt...
My personal preference is I really like the CCS Red Wax/Sealant Applicator Pads 2 Pack because they offer good density or stiffness to spread out the pressure from your fingers to help you avoid Fingermarks.
Sometimes some good old fashioned terry cloth works great if you really need some abrading power by hand.
Just depends upon what you're trying to do but as the article "Man vs Machine" shows, removing swirls out of clear coat finishes is best done by machine, unless you're really wanting to build up your arms.
How to remove water spots by hand
Further Resources
Applicator Pads (for applying paint cleaners)
CCS Red Wax/Sealant Applicator Pads 2 Pack
CCS Euro Foam Hand Polish Applicators
Pinnacle Polishin' Pal
Wolfgang Polishin’ Pal Combo
Wolfgang German Polish N’ Wax Applicator
At some level your choice is personal preference because the job can be done with just about any applicator pad with good technique...
The light orange CCS Euro Foam Hand Polish Applicators are large, healthy applicator pad and the aggressive nature of the foam helps to give your abrasive more bite.
I used this style of applicator pad to remove the swirls from this Lincoln in this thread,
Man versus Machine
Here's an excerpt...
Mike Phillips said:Just to note, even though swirls can be removed by hand and the paint polished and waxed to a high gloss and it will look a zillion times better than when you started, it's still never going to look as good as the results you can achieve using a dual action polisher.
As Bill Murry said in the move Stripes,
"That's the facts Jack"
Let’s begin…
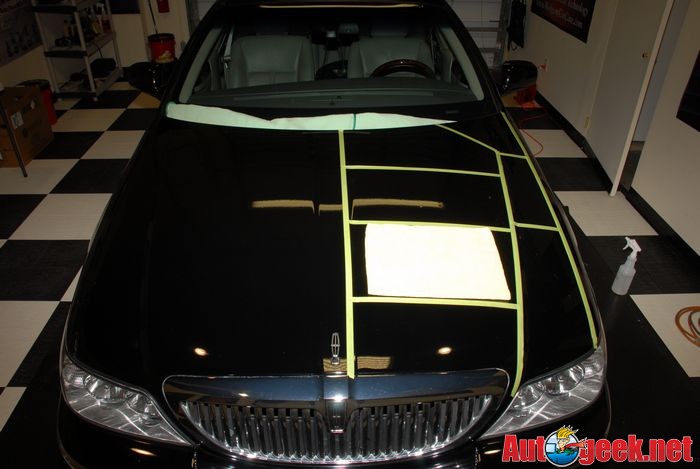
I'm going to rub-out the driver's side of the hood by hand and before starting, I’ve sliced up half of the hood by taking some painter's tape and taping off small sections to show you how to break-up a panel to be worked by hand when applying an aggressive product to remove swirls and scratches.
As you can see, you can’t tackle half a hood at one time, you have to work small sections at a time.
For reference, I also placed a Meguiar's Supreme Shine Microfiber polishing cloth folded in half to give you and idea as to the size of the major sections to be worked. Meguiar’s Supreme Shine Microfibers are 16" by 24" inches so the folded cloth you see on the hood is 16" by 12".
This is about as big a section you want to work at one time. You can tackle a 16” by 16” section or any size around these dimensions but you really don’t want to work a section any larger than this. The reason why is because you won’t be able to focus enough energy to do a thorough job of evenly removing the swirls. As a result the paint will still be all swirled out when you’re finished.
Now on this Lincoln, the hood has a raised thin panel down the middle with two hard body lines to be careful around. The sides of the hood also have thinner panels separated from the major section between the middle of the hood with a hard body line running most of the length of the hood..
As you can see the thinner panels are broken up into two thin sections. The thin panel of paint on the side is too long to work all at one time so I broke it into two sections.
Then there's a section in front of the driver's side A-Pillar that need to be it's own section as it’s joined to the major section in front of the windshield. (If that all makes sense)
Every hood, door, roof, trunk lid etc, is going to be different, so you have to do your best to figure out how to slice-up each panel. The important thing to understand is anytime you're removing swirls out of a modern clear coat you must only work a small section at a time. You cannot physically rub-out a huge section by hand and do a great job.
This is how I would slice-up the hood of this Lincoln
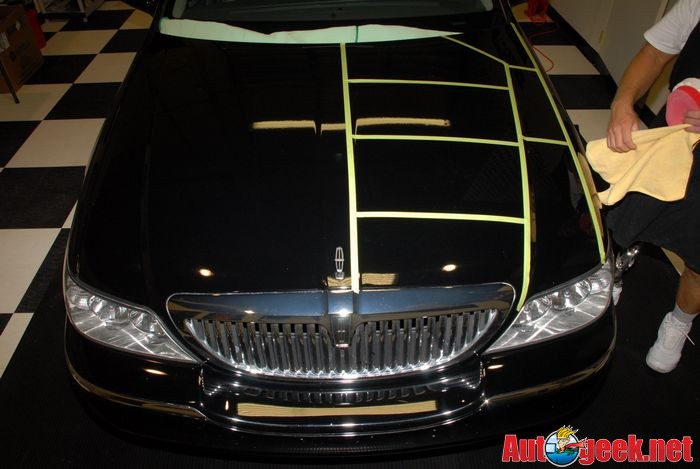
Now that I've shown you how I sliced-up this particular hood, it's time to remove the Supreme Shine Microfiber and the tape. Remember, I only placed the tape on the car as a visual tool to help show you how approach the defect removal step by hand.
Note: You actually slice-up each panel of a car in a similar fashion whether you're working by hand or with a dual action polisher for the same reasons. And the reason for this is because modern clear coats tend to be harder than old fashioned single stage paints like the paint that would have came on a 1965 Mustang.
Even if you’re using one of the popular dual action polishers like the Porter Cable polishers, the Meguiar’s polishers, and/or the Griot’s Garage polisher, because these tools have a clutch which stops the pad from rotating if you apply to much pressure, you can only work a small section at a time when doing any kind of defect removal step.
Here's a safety tip that's a best practice to develop anytime you're using Painter's tape on automotive paints. When you remove the tape, pull it back at and angle, not straight up, off the paint.

First we're going to use Meguiar's Ultimate Compound for our first step process with both the orange and the white CCS Euro Foam Hand Polish Applicators. That's right, we're going to rub-out the paint using two different levels of aggressiveness in our foam applicators because we want the driver's side of the hood to look as good as the machine buffed side.
We'll start with the aggressive orange pad and put quite a bit of passion behind the pad and then follow this with the white foam applicator pad and lessen our pressure. After the compounding step we’ll do the polishing step, so this half of the hood is going to get 6 cleaning steps before applying the wax.

With a new, dry pad it's important to add an ample amount of product to start with, as your pad becomes wet with product you can cut down a little on the amount of product you apply. Because you're going to be applying firm pressure with a quick hand movement, you need enough product to provide good lubrication.

My personal preference is I really like the CCS Red Wax/Sealant Applicator Pads 2 Pack because they offer good density or stiffness to spread out the pressure from your fingers to help you avoid Fingermarks.
Sometimes some good old fashioned terry cloth works great if you really need some abrading power by hand.
Just depends upon what you're trying to do but as the article "Man vs Machine" shows, removing swirls out of clear coat finishes is best done by machine, unless you're really wanting to build up your arms.
- Thread starter
- #4
What are you trying to do?
- Spread out a finishing wax?
- Restore a neglected finish with a cleaner/wax?
- Remove swirls by hand out of a clear coat?
I'm trying to remove swirls

S2K
New member
- Jul 8, 2010
- 990
- 0
Would you suggest paying $5 for a complete polish (by hand) from a very experienced detailer or paying $20 for a complete polish (by machine) from a novice detail?
I don't think any experienced detailer is going to hand polish a car for $5.
I totally agree with Mike on the LC CCS Euro Pads. I used the orange with M105 and the white with M205 this past weekend and got great results removing scratches and swirls and they were very comfortable to use. Here is a thread with pics, I used the Euro pads around the spoiler, A pillars and front bumper. The area under the spoiler was just covered with scratches and was a small area to work and the Euro pads fit in nicely and got rid of all the scratches.
http://www.autogeekonline.net/forum/auto-detailing-101/29121-first-attempt-paint-correction.html
- Thread starter
- #7
I don't think any experienced detailer is going to hand polish a car for $5.
In Cambodia, labor is extremely cheap. These detailers (about 15 people) detail 100-200 cars a day on average. They've been doing for over 20 years here. $3 for smaller cars and $5 for larger ones
Dubbin1
New member
- May 28, 2009
- 3,845
- 0
In Cambodia, labor is extremely cheap. These detailers (about 15 people) detail 100-200 cars a day on average. They've been doing for over 20 years here. $3 for smaller cars and $5 for larger ones
Those guys are NOT detailers if they are doing 100-200 cars a day.
Mike Phillips
Active member
- Dec 5, 2022
- 51,004
- 6
Would you suggest paying $5 for a complete polish (by hand) from a very experienced detailer or paying $20 for a complete polish (by machine) from a novice detail?
You'll have to make those decisions... here's what I'll add though...
Clear coat finishes are scratch-sensitive, they are easily scratched and dulled and removing the swirls and scratches and restoring a show car finish is an art form.
Using quality products, application materials and procedures is all important.
Paint is thin. Anytime someone buffs out a car the wrong way, this remove a little paint and leaves defects in the paint. Removing these defects will remove a little more paint, so it's important to do things right the first time.
- Thread starter
- #11
Those guys are NOT detailers if they are doing 100-200 cars a day.
They are quite good at what they do
If I was to detail my car with them, they would send 2-3 people to come to my house and detail it from washing, clay, polish, seal in 6 hours. All for 5 dollars.
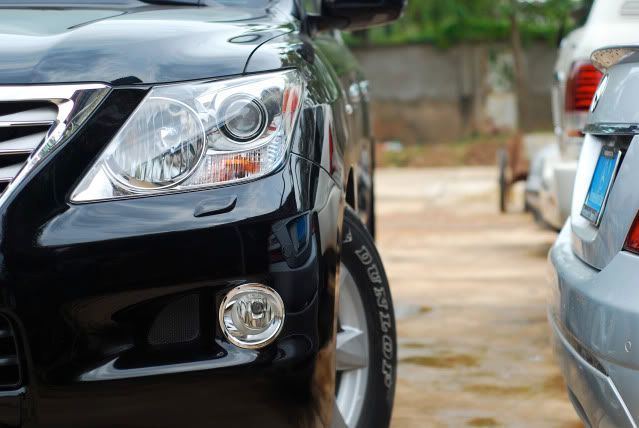
I had them detail my Black LX570 a few months ago, they were amazing. I had HORRIBLE SWIRLS but after they detailed my car there was none left.
I didn't get any before pictures, but here's a sample of their work. So tell me what you think.