I have read Mike's article
The Secret to Removing Oxidation and Restoring a Show Car Finish to Antique Single Stage Paints, and was wondering how this process compares to polishing a modern single stage paint job.
Since this is not an antique single stage paint, should I use the #7 Show Car Glaze before polishing or polish with 105/205 and perhaps the glaze afterwards?
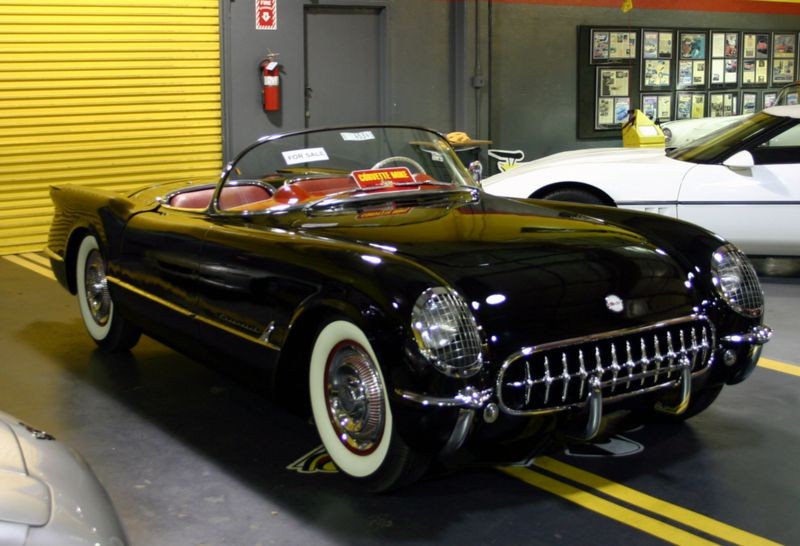
A forum member, Merlin just PM'd me about restoring antique paint on a
1954 Corvette and while that's what the above article is directly targeted at, I've found #7 to work well on single stage urethane paint too...
I wasn't sure if his car was clear coated, so I tested a spot with a white microfiber and Meguiar's Ultimate Compound. From my test spot it appeared that the paint color transferred to the microfiber, meaning that this is a single stage paint job.
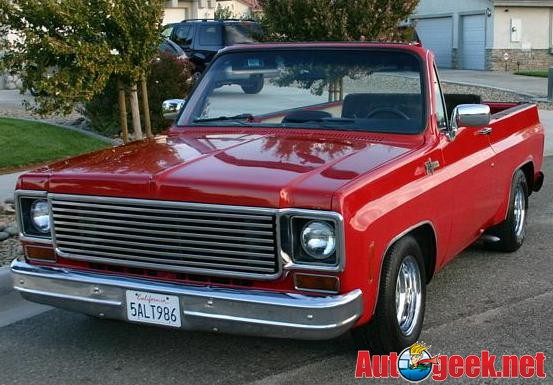
A neighbor of mine has a car that he told me was repainted by Maaco a few years ago. The paint is a metallic light blue and is dull, oxidized and fish-eyed.
The portion I made bold above is key... dull and oxidized is normal for a single stage, if the metallic flake is aluminum that could be a problem but you'll see a black residue coming off on your buffing pad and wiping towels if it is aluminum. I think that modern metallics use something else, I want to say a type of mylar but I could be wrong, but if whatever is being used to create the "metallic look" is anything but something made of aluminum, then you shouldn't see any blackness coming off and the paint should restore real easy.
Single stage "metallic" paints are the hardest type of old paint to restore because the aluminum metallic flake in the paint oxidizes and you can't polish off the oxidation from each individual flake as it's inside the paint matrix. Remove the aluminum factor and you remove the worst component of the oxidation problem.
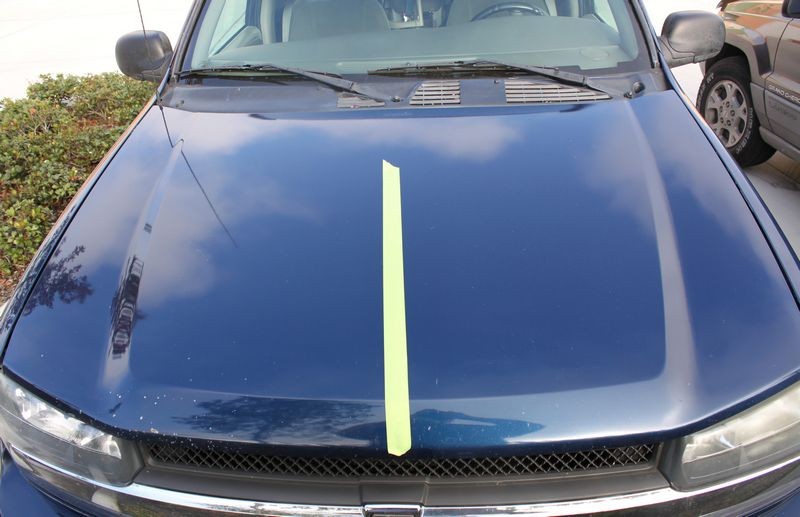
Do a
TEST SPOT to one area, work all the way through the process even up to wax as this will show the the true end result. Also lay down a tape line so you can easily visibly see the before and after difference.
And of course, single stage paint cars make the best before and after pictures...
My guess is that even though the resin used to make modern paints is a lot different than the seed oil resins used in the old days, the paint itself is still more open or permeable than a layer of clear paint with no pigment or colorant at all. Thus the oils in the #7 will act to bring out the full richness of color...
Here's a portion of the above article...
This is key...
Saturation Application --> The First Application
This is a mostly unknown technique and that is to let the first application penetrate and soak into the paint for up to 24 hours before wiping the product off. The idea being to really apply the product wet and work it in really well and the walk away.
The idea is to allow the heavy concentration of oils to penetrate and seep into the paint for maximum saturation before removing the product and continuing with the process. In this case I finished applying the first application of #7 around 9:00 pm and then left the #7 to soak in until the next day. I started wiping the product off then next morning right about 10:00am.
Some will argue if this works or not buy my experience is that with a porous single stage paint it does in fact help. One thing for sure it can't hurt.
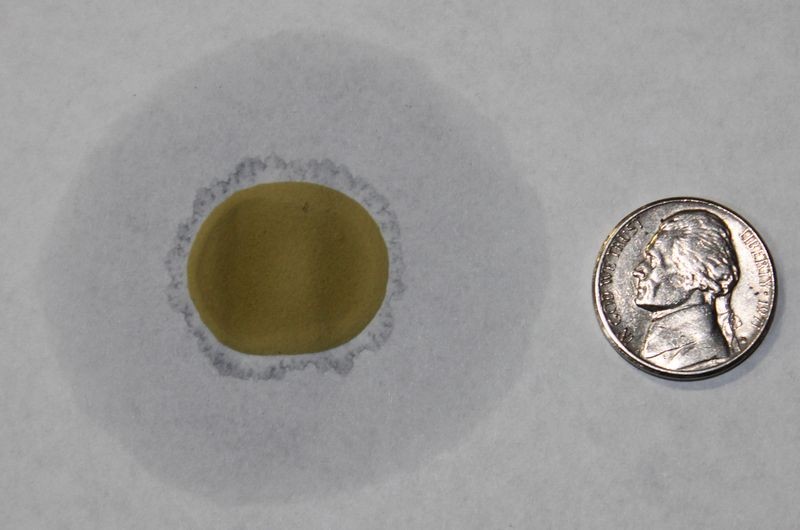
Paper Test for Capillary Action
If you place a few drops of #7 onto a piece of paper and then monitor it over a few days you will see the oils in the #7 migrate or seep away from the actual drop of product. It does this through capillary action and the same thing can work to your car's paints' advantage if it's a single stage lacquer or enamel paint.
I placed a few drops about the size of a nickel on a piece of standard printer paper around 3:00pm.
The next day I took these pictures at approximately 10:00am, (19 hours later), note how the oils in the drops of #7 have migrated outward via
capillary action.
Feeder Oils penetrate or feed the paint
This same effect can take place in a single stage paint but not only will the oils travel horizontally, they will also travel vertically, that they will penetrate downward "into" your car's paint and this is where the term
feeder oils comes from as the oils penetrate into or feed the paint. The result is they will condition the paint restoring some level of workability as compared to just working on old dry paint, and they will also bring out the full richness of color, something that will showcase the beauty of your car's paint.
If the paint is in good shape except for swirls, the do the M105, M205 steps first, get the paint to where you like it then DA apply a thin coating of #7 (or hand apply, your choice), then wipe off and then apply you're favorite LSP
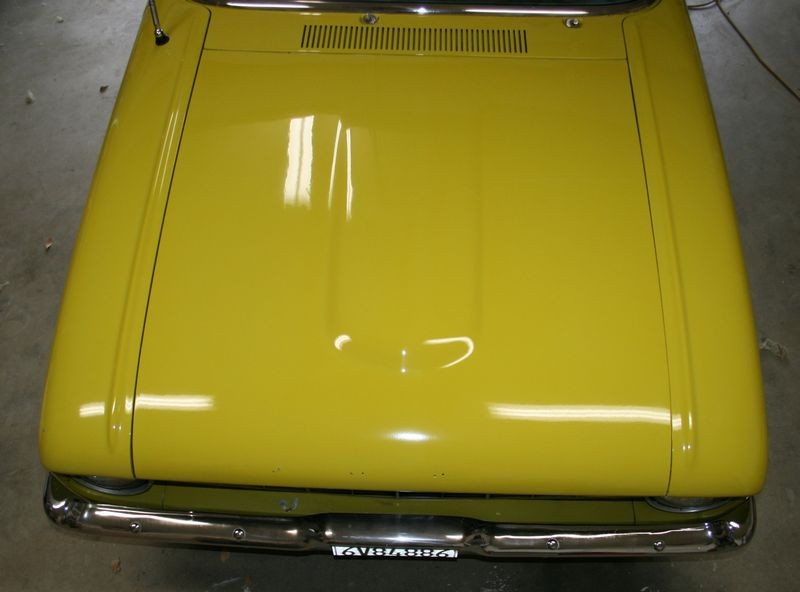
The power in the after shots is created in the before shots
Before
After
Here's what I used for the above...
Products Used
M105/
W5500/RB - 1500 RPM
M205/
W-8000/RB - 1500 RPM
M07/
W-8006/DA - 5.0 Speed Setting
NXT/
W9207/DA - 4.0 Speed Setting
Friendly suggestion...
Anytime you find yourself in a position to buff out something interesting or unique, do your best to get the before pictures. While the after pictures make the car look its best, it's the before pictures that show how you took a diamond in the rough and turned it into a glistening gemstone.
:xyxthumbs:


")