Nick McKees37
McKee's 37 Product Support
- Jan 6, 2011
- 7,265
- 0
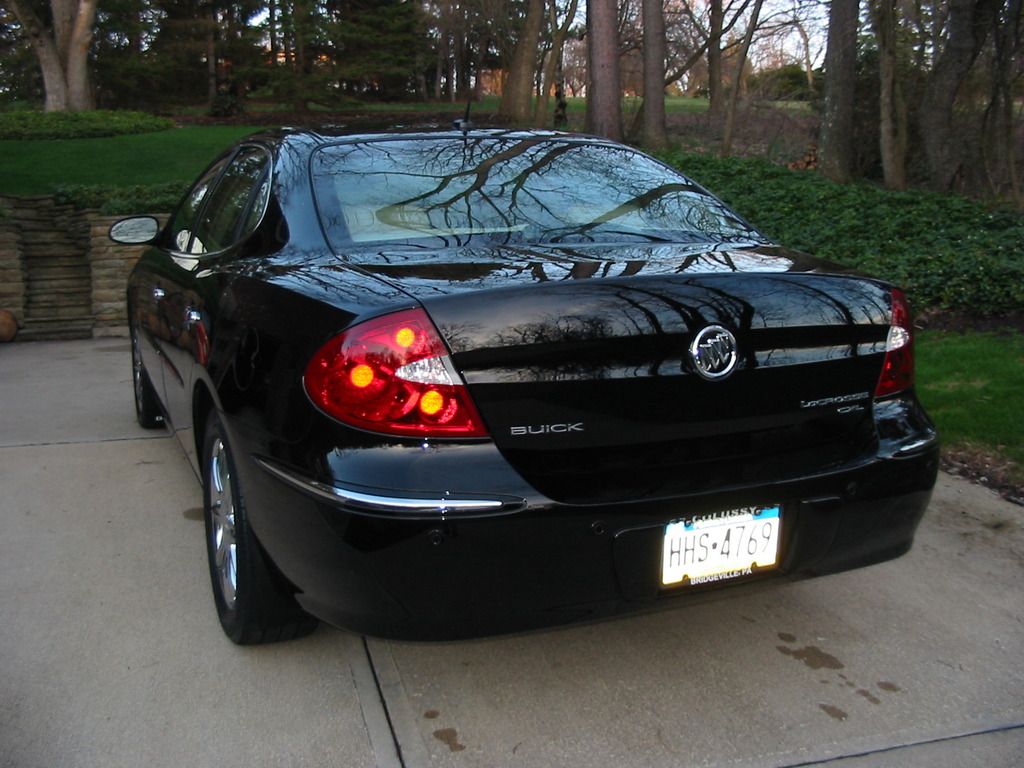
Ever since I purchased my Honda Civic Si a year and a half ago it has repeatedly been referred to as the "Honda Si" from friends, techs at the Honda dealership, and so on. Since it is currently the only model Honda makes with the "Si" designation, it makes sense. For that reason - and because I dislike taping the emblem off anyway - I decided it was time to remove the Civic emblem altogether. This makes for a much cleaner appearance.
Most emblems on vehicles manufactured in the last 25 or 30 years are attached with an adhesive backing. If you have an older car, the emblem more than likely bolts onto the panel. This guide is for removing the former.
It's real simple, so don't click away just yet. Here's a couple basic tools you will need:

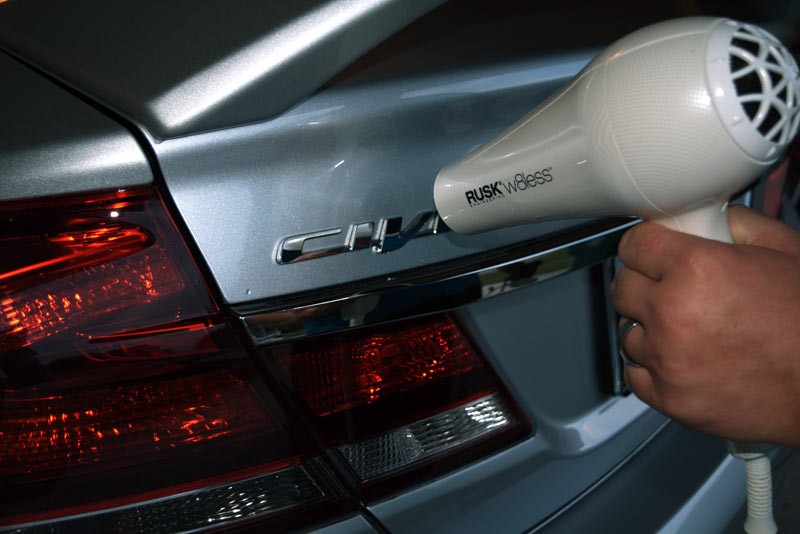
First you'll want to heat up the emblem using a heat gun or hair dryer. I used a hair dryer for two reasons: 1. I don't have a heat gun. 2. Less chance of damaging the panel.
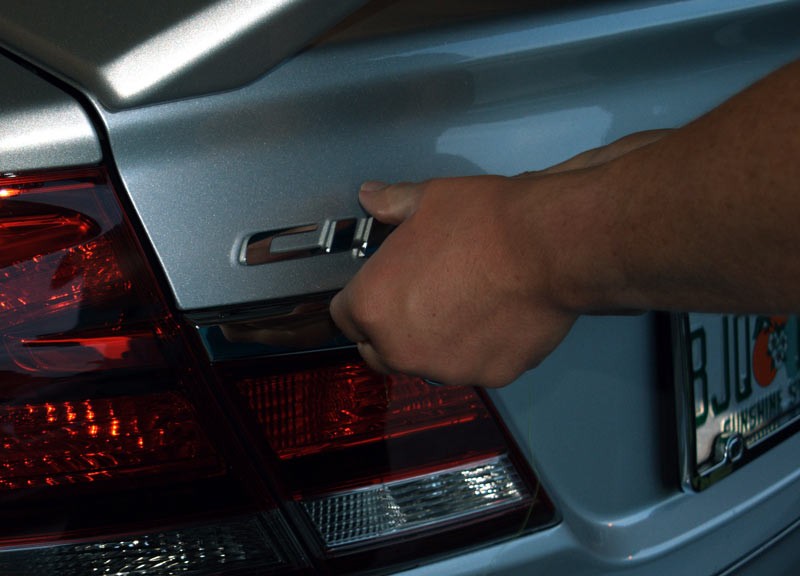
You only need to heat the emblem for 15-30 seconds or so, and pay close attention to the surrounding finishes. Use the "fight or flight" method to determine if the surrounding panels are too hot. If you can't touch them without yanking your hand away in pain, then it's too hot. Take your time - better safe than sorry.
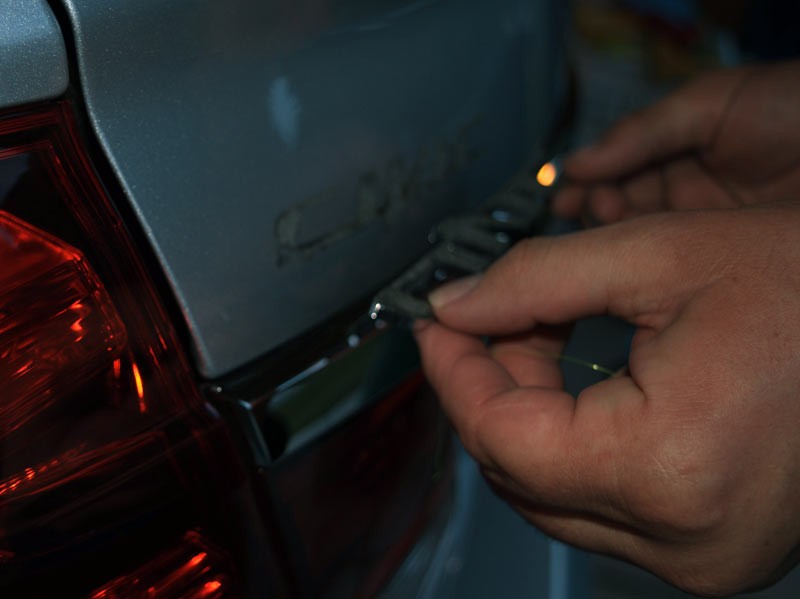
Once the emblem has been heated up, take your fishing line and wrap it around your index finger on both hands. It's kind of like flossing a tooth, but much bigger. Perform a "sawing" motion as your work your way behind the emblem.


Normally the emblem will pop right off, but mine wasn't as easy so I simply had to pry it off with my fingers. Be careful, the emblem might still be hot from the hair dryer.

What you see is leftover adhesive. You can remove this with a plastic razor blade, or simply use your fingernail. A plastic razor blade works much better.

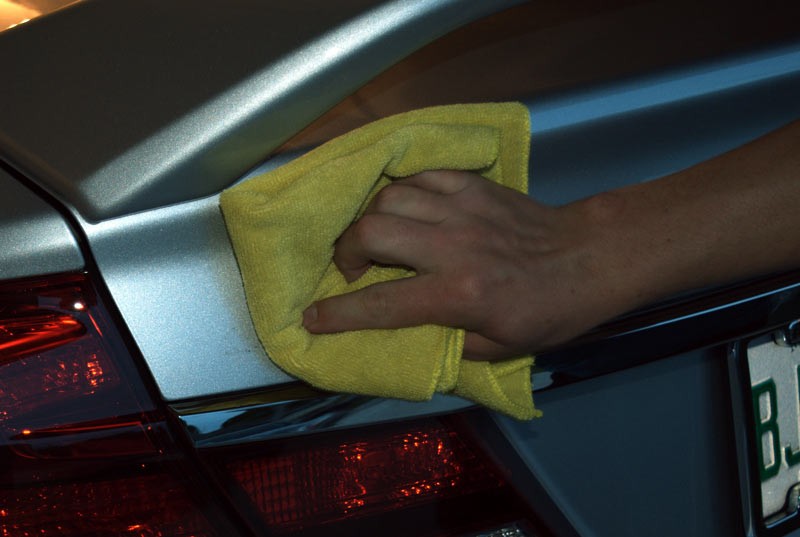
Once you remove the majority of the remaining adhesive, spray 3M Adhesive Remover directly onto a DAMPENED (with water) microfiber towel.

GENTLY wipe the panel until all the remaining adhesive from the emblem has been removed.
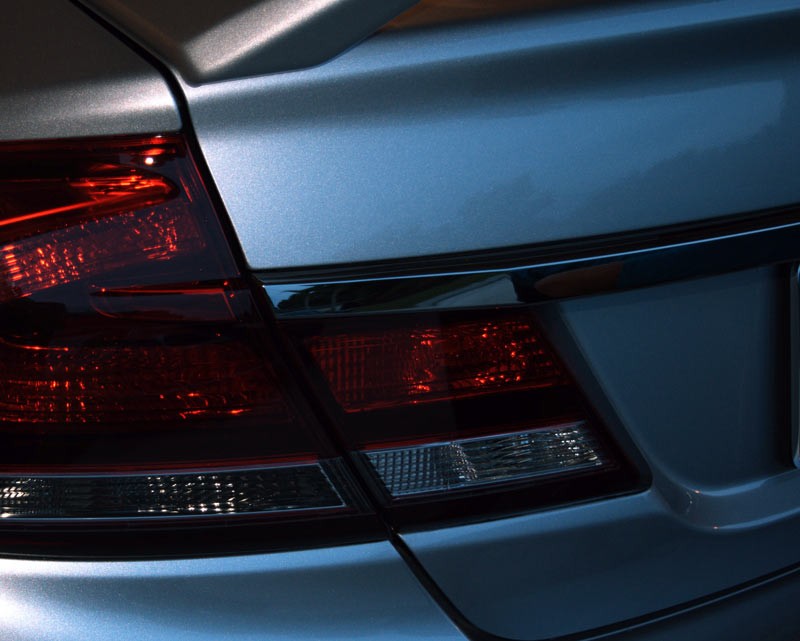
Tada!
Just to be on the safe side, I quickly washed the panel using a rinseless wash. This is to ensure any residue from the adhesive remover is completely gone.


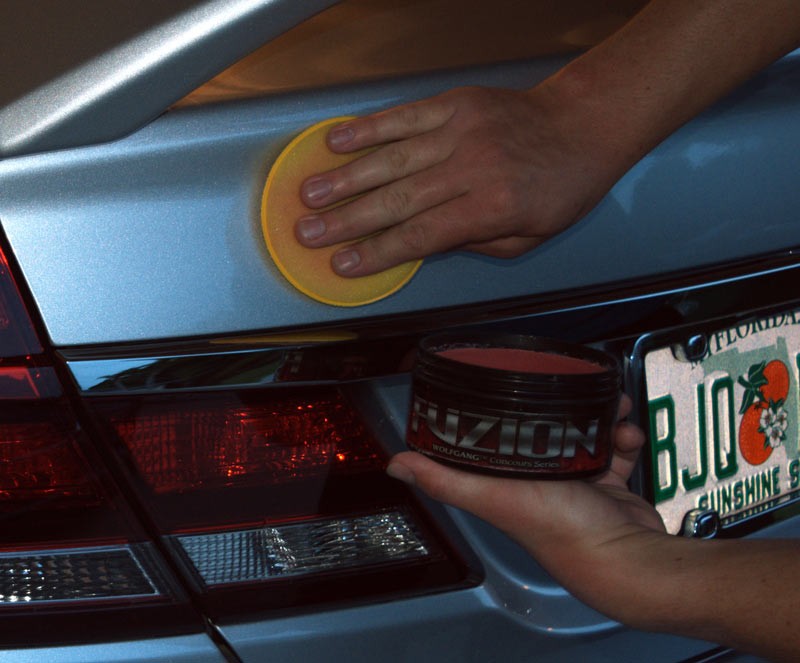
3M Adhesive Remover is pretty potent stuff, so it will remove your wax or sealant. I quickly applied a coat of Wolfgang Fuzion to protect the area.
That's it!
:dblthumb2:
Most emblems on vehicles manufactured in the last 25 or 30 years are attached with an adhesive backing. If you have an older car, the emblem more than likely bolts onto the panel. This guide is for removing the former.
It's real simple, so don't click away just yet. Here's a couple basic tools you will need:
- About 5 minutes to spare
- 3M Adhesive Remover
- Fishing line (I don't get too technical on this one - I just used what I had lying around the house)
- Plastic razor blade (fingernail works too)
- Microfiber towel
- Wax to protect the finish afterwards
First you'll want to heat up the emblem using a heat gun or hair dryer. I used a hair dryer for two reasons: 1. I don't have a heat gun. 2. Less chance of damaging the panel.
You only need to heat the emblem for 15-30 seconds or so, and pay close attention to the surrounding finishes. Use the "fight or flight" method to determine if the surrounding panels are too hot. If you can't touch them without yanking your hand away in pain, then it's too hot. Take your time - better safe than sorry.
Once the emblem has been heated up, take your fishing line and wrap it around your index finger on both hands. It's kind of like flossing a tooth, but much bigger. Perform a "sawing" motion as your work your way behind the emblem.
Normally the emblem will pop right off, but mine wasn't as easy so I simply had to pry it off with my fingers. Be careful, the emblem might still be hot from the hair dryer.
What you see is leftover adhesive. You can remove this with a plastic razor blade, or simply use your fingernail. A plastic razor blade works much better.
Once you remove the majority of the remaining adhesive, spray 3M Adhesive Remover directly onto a DAMPENED (with water) microfiber towel.
GENTLY wipe the panel until all the remaining adhesive from the emblem has been removed.
Tada!
Just to be on the safe side, I quickly washed the panel using a rinseless wash. This is to ensure any residue from the adhesive remover is completely gone.
3M Adhesive Remover is pretty potent stuff, so it will remove your wax or sealant. I quickly applied a coat of Wolfgang Fuzion to protect the area.
That's it!
:dblthumb2:
")